1. 서론
Thank you for choosing the COUGAR MX360 RGB Mid Tower Case. This manual provides essential information for the proper installation, operation, and maintenance of your new PC case. The MX360 RGB combines a sleek design with ARGB LED strips on the front panel, offering excellent cooling performance and support for a wide range of components, including up to a 360mm radiator, 315mm graphics cards, and 170mm CPU coolers. Its compact layout and full-length PSU shroud contribute to a clean and organized build.
2. 안전 정보
- 구성 요소를 설치하거나 제거하기 전에 항상 벽면 콘센트에서 전원 공급 장치를 분리하세요.
- 정전기로 인한 손상을 방지하기 위해 부품을 조심스럽게 다루십시오. 정전기 방지 손목 스트랩 사용을 고려해 보세요.
- 작은 부품과 나사는 어린이의 손이 닿지 않는 곳에 보관하십시오.
- 과열을 방지하려면 케이스 주변의 적절한 환기를 확보하세요.
- 케이스 또는 구성품을 개조하지 마십시오. 개조 시 보증이 무효화될 수 있으며 안전상의 위험이 발생할 수 있습니다.
3. 패키지 내용
다음 품목이 모두 패키지에 포함되어 있는지 확인하세요.
- COUGAR MX360 RGB 미드타워 케이스
- 액세서리 상자(나사, 스탠드오프, 케이블 타이 등이 들어 있음)
- 사용 설명서 (본 문서)
4. 제품 오버view
The COUGAR MX360 RGB case features a minimalist design with integrated ARGB lighting and a tempered glass side panel for showcasin빌드를 구성하세요.

그림 4.1: 전면 view of the COUGAR MX360 RGB case, showing the interior and active RGB lighting.
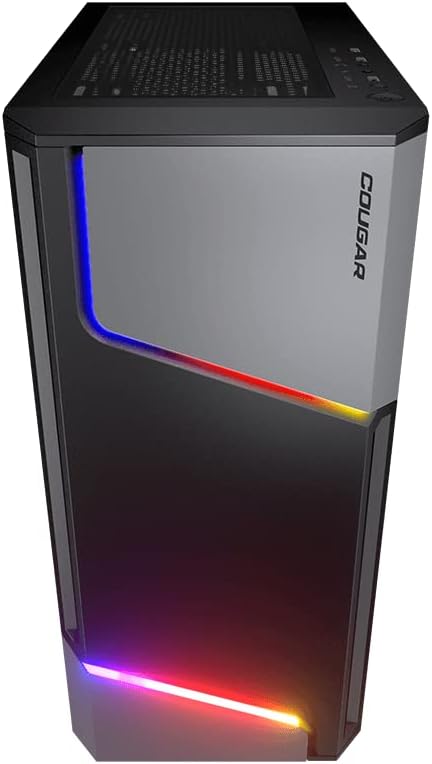
그림 4.2: 전면 view of the COUGAR MX360 RGB case, highlighting the integrated ARGB LED strips.
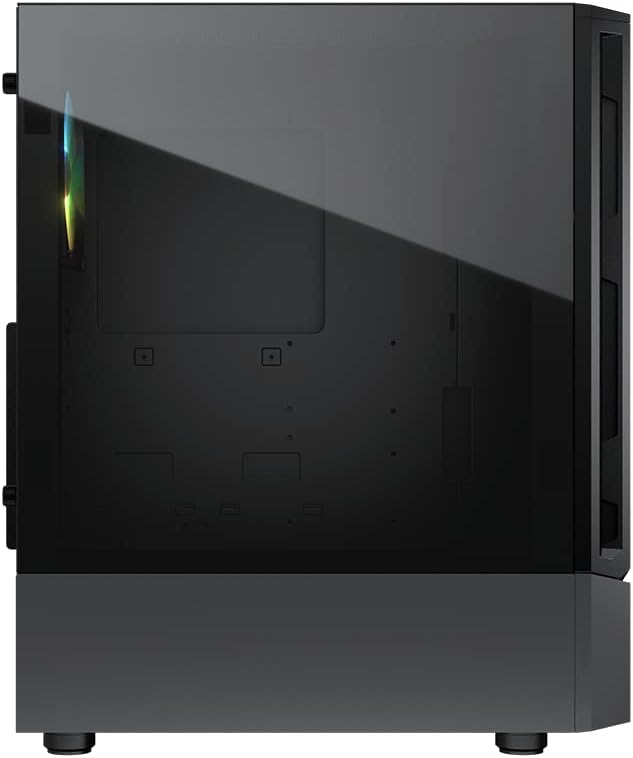
그림 4.3: 측면 view of the COUGAR MX360 RGB case, featuring the tempered glass panel.

그림 4.4: 각진 앞면 view of the COUGAR MX360 RGB case, showcasing its design and ARGB elements.
5. 설정 및 설치
Follow these steps to install your components into the COUGAR MX360 RGB case.
5.1 사건 준비
- 케이스를 평평하고 안정적인 표면에 놓으십시오.
- Remove the tempered glass side panel by unscrewing the thumb screws at the rear of the case and carefully sliding the panel off.
- Remove the opposite metal side panel by unscrewing the thumb screws and sliding it off.
5.2 마더 보드 설치
- (메인보드에 미리 설치되어 있지 않은 경우) I/O 쉴드를 케이스 후면 개구부에 설치하십시오.
- Ensure the correct standoffs are installed for your motherboard form factor (ATX, Micro-ATX, Mini-ITX). Adjust or add standoffs as needed.
- 나사 구멍을 맞춰서 마더보드를 스탠드오프에 조심스럽게 올려놓습니다.
- 제공된 나사로 마더보드를 고정합니다.
5.3 전원 공급 장치(PSU) 설치
- Locate the PSU shroud at the bottom of the case.
- 파워서플라이를 케이스 뒷면의 지정된 칸에 밀어 넣으세요.
- 케이스 뒷면에서 나사로 PSU를 고정합니다.
- Route necessary cables through the cutouts in the PSU shroud for cable management.
5.4 저장 드라이브 설치
The MX360 RGB supports various storage configurations.
- 3.5인치 HDD: 파워서플라이 덮개 아래에 있는 드라이브 케이지에 설치하십시오.
- 2.5" SSDs/HDDs: Mount onto the dedicated trays or mounting points behind the motherboard tray.
5.5 그래픽 카드(GPU) 설치
- 케이스 뒷면에서 필요한 PCIe 슬롯 커버를 제거합니다.
- 그래픽 카드를 마더보드의 적절한 PCIe 슬롯에 삽입하세요.
- Secure the graphics card with screws. The case supports graphics cards up to 315mm in length.
5.6 냉각 시스템 설치 (팬/라디에이터)
The case supports up to six fans and a 360mm water cooling radiator.
- 앞쪽: Supports up to 3 x 120mm or 2 x 140mm fans, or a 240/280/360mm radiator.
- 맨 위: Supports up to 2 x 120mm or 2 x 140mm fans, or a 240/280mm radiator.
- 뒤쪽: 120mm 팬 1개를 지원합니다.
Install fans or radiators using the provided screws, ensuring proper airflow direction.
5.7 전면 패널 연결
Connect the front panel cables (USB, Audio, Power, Reset, LED) to their corresponding headers on your motherboard. Refer to your motherboard manual for exact header locations.
5.8 ARGB Lighting Connection
The integrated ARGB LED strips on the front panel connect via a 5V/3Pin ARGB connector. Connect this cable to a compatible 5V/3Pin ARGB header on your motherboard to synchronize lighting effects with your system.
6. 케이스 작동
Once all components are installed and connected, replace the side panels. Power on your system using the power button on the top I/O panel. The ARGB lighting will illuminate, controlled by your motherboard's software or a dedicated ARGB controller if you have one installed.
7. 유지관리
정기적인 유지관리는 PC 구성 요소의 최적의 성능과 수명을 보장하는 데 도움이 됩니다.
- 먼지 필터: The MX360 RGB includes removable dust filters (e.g., top, bottom). Periodically remove and clean these filters with compressed air or water (ensure they are completely dry before reinstallation).
- 내부 청소 : Use compressed air to remove dust from internal components like fans, heatsinks, and the motherboard.
- 외부 청소: 부드러운 d로 외부 표면을 닦으십시오.amp 옷감. 연마성 세제를 피하십시오.
8. 문제 해결
문제가 발생하면 다음의 일반적인 문제 해결 단계를 참조하세요.
- 전원 없음: Ensure all power cables (24-pin ATX, 8-pin CPU, GPU power) are securely connected. Check the PSU switch is in the 'ON' position. Verify front panel power button connection to the motherboard.
- ARGB 조명이 작동하지 않습니다: Confirm the 5V/3Pin ARGB connector is correctly plugged into a compatible motherboard header. Check your motherboard's RGB software for control settings.
- 과열: Ensure all case fans are spinning and oriented correctly for optimal airflow. Check for dust buildup on filters and components. Verify CPU cooler and GPU cooler are properly installed.
- 느슨한 연결: Re-seat all components (RAM, GPU, storage drives) and check all power and data cables.
9. 사양
| 특징 | 사양 |
|---|---|
| 상표 | 쿠거 |
| 모델명 | MX360 RGB |
| 품목 모델 번호 | CGR-5CC6G-RGB |
| 케이스 유형 | 미드 타워 |
| 치수(길이x너비x높이) | 14.88 x 8.27 x 18.11인치(378 x 210 x 460mm) |
| 품목 무게 | 10.56파운드(4.8킬로그램) |
| 재료 | Tempered Glass, Fine Metal |
| 색상 | 검은색 |
| 마더보드 지원 | 미니 ITX / 마이크로 ATX / ATX |
| 최대 그래픽 카드 길이 | 315mm (XNUMXmm) |
| 최대 CPU 쿨러 높이 | 170mm (XNUMXmm) |
| PSU 지원 | 표준 ATX PS2 |
| 냉각 방식 | 공기 / 물 |
| 라디에이터 지원 | Front: 360mm / 280mm / 240mm / 140mm / 120mm Top: 280mm / 240mm / 140mm / 120mm 후면 : 120mm |
| 팬 지원 | 전면: 3 x 120mm / 2 x 140mm 상단: 2 x 120mm / 2 x 140mm 후면 : 1 x 120mm |
| 드라이브 베이 | 3.5" HDD: 2 2.5" SSD: 2+2 (converted from 3.5" drive bays) |
| I/O 패널 | USB 3.0 x 2, USB 2.0 x 1, Mic x 1, Audio x 1, RGB Button |
| 특징 | ARGB LED Strips, Full-length PSU Cover for Cable Hiding and Improved Airflow |
10. 보증 및 지원
COUGAR products are designed and manufactured to the highest quality standards. For warranty information, please refer to the warranty card included with your product or visit the official COUGAR web사이트. 보증 청구를 위해 구매 증빙 자료를 보관하세요.
For technical support or further assistance, please visit the official COUGAR web해당 웹사이트를 방문하거나 고객 서비스 부서에 문의하십시오. 더 많은 정보와 자료는 다음에서 찾을 수 있습니다. COUGAR Store on Amazon.