소개
Welcome to your new Reloop Turn 7 Premium HiFi Turntable. This manual provides essential information for setup, operation, and maintenance to ensure optimal performance and longevity of your device. Please read these instructions carefully before using your turntable.
상자 안에 무엇이 들어있나요?
- Turn 7 Turntable Unit
- 더스트 커버
- 2x 힌지
- 펠트 매트
- International Power Supply (UK/EU/US)
- RCA 케이블
- Ortofon 2M Red가 있는 헤드쉘(사전 설치된)
- 7" Aluminium Adapter
- Acrylic Turntable Platter
- 앨런 키
- USB 케이블
- 사용 설명서
- 균형추
설치 지침
1. 풀기 및 배치
Carefully remove all components from the packaging. Place the turntable on a stable, level surface away from direct sunlight, heat sources, and strong vibrations. Ensure adequate ventilation around the unit.
2. Platter Installation
Place the acrylic platter onto the spindle. The precision-manufactured 20 mm thick acrylic platter is designed for excellent evenness and antistatic characteristics, eliminating the need for a platter mat.

Image: The solid acrylic platter, a key component for stable record playback.
3. Belt Installation
Locate the external drive belt. Carefully loop the belt around the platter and the motor pulley. The decentralized, low-vibration DC motor drives the platter via this external flat belt.

Image: Close-up of the external motor and drive belt mechanism.
4. 톤암 및 카트리지 설치
The Ortofon 2M Red cartridge system comes pre-installed on the headshell. Ensure it is securely attached to the high-quality carbon tonearm. Adjust the counterweight for proper tracking force. Refer to the Ortofon 2M Red cartridge manual for specific tracking force recommendations. The tonearm features height adjustment (Vertical Tracking Angle - VTA) and anti-skating adjustment for maximum precision. Adjust these settings for optimal sound reproduction.
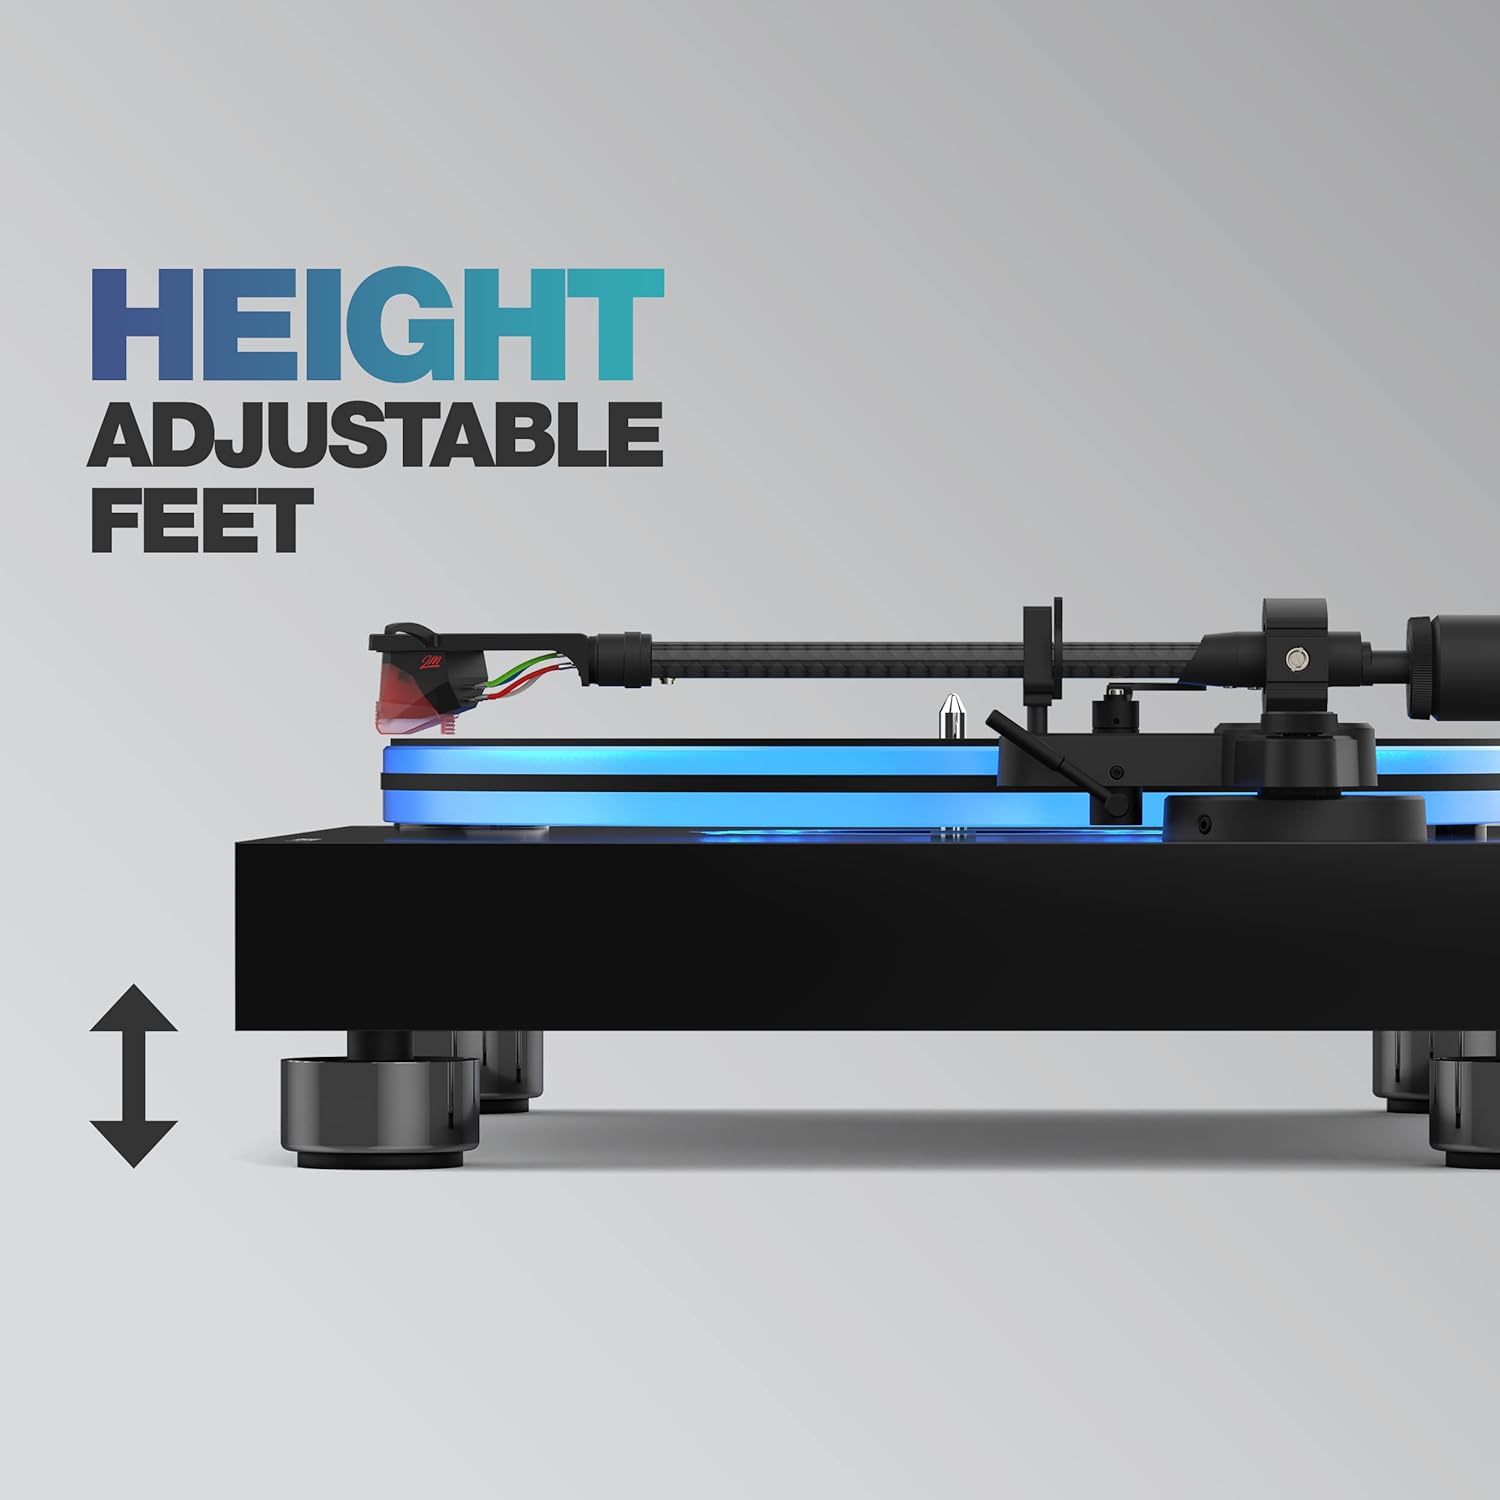
Image: The carbon tonearm with the pre-installed Ortofon 2M Red cartridge.

이미지: 상세 view of the Ortofon 2M Red cartridge.
5. 오디오 시스템 연결
Connect the RCA cables from the turntable's audio output to your amplifier or receiver. The Turn 7 features a high-quality preamplifier, allowing switching between line and phono signals. If your amplifier has a dedicated phono input, set the turntable's pre-amp switch to OFF. If connecting to a line-level input (AUX, CD), set the pre-amp switch to ON. Connect the ground wire (if applicable) to your amplifier's ground terminal to minimize hum. For digitizing vinyl records, connect the USB output to your computer.

Image: Rear panel showing RCA and USB outputs, and pre-amp 스위치.
6. 전원 연결
Connect the international power supply to the turntable and a suitable power outlet.
7. 먼지 덮개 설치
Attach the dust cover using the provided hinges to protect the turntable from dust when not in use.

Image: The Reloop Turn 7 turntable with its protective dust cover.
작동 지침
1. 전원 켜기 / 끄기
Use the power switch to turn the turntable on or off.
2. 속도 선택
The start/stop rotary switch allows selection between 33 and 45 RPM. For 78 RPM records, an appropriate stylus and cartridge may be required, and the speed can be selected via the rotary switch.

Image: Close-up of the speed selection dial (33, 45 RPM).
3. 레코드 재생
Place a record on the platter. Select the appropriate speed. Carefully lift the tonearm using the cueing lever and position it over the desired track. Lower the tonearm gently onto the record using the cueing lever.
4. Platter Illumination
The Turn 7 features optional blue platter illumination. This can be activated or deactivated via a switch, creating a warm and inviting ambiance.

Image: The Reloop Turn 7 turntable showcasing its blue LED platter illumination.
5. Digitizing Records (USB)
Connect the USB cable to your computer. Use appropriate recording software to capture the audio from your vinyl records.
주요 특징
- Belt-driven HiFi turntable with pre-installed Ortofon 2M Red cartridge.
- 20 mm thick acrylic platter with optional blue LED illumination.
- Decentralized, low-vibration DC motor with external flat belt drive.
- High-quality carbon tonearm with adjustable height (VTA) and anti-skating.
- 통합 포노 프리amplifier with switchable line/phono output.
- USB output for digitizing vinyl records.
- Sturdy MDF wooden plinth with high-gloss piano lacquer finish.
- Height-adjustable isolator feet for effective decoupling.
- Universal headshell connection (SME) for cartridge versatility.

Image: Height-adjustable insulator feet for optimal stability and vibration damp주고받음.
기술 사양
| 특징 | 사양 |
|---|---|
| 상표 | 리루프 |
| 특징 | Blue Platter Illumination |
| 재료 | 엔지니어링 목재, 플라스틱 |
| 품목 무게 | 8.2 킬로그램 |
| 스타일 | 현대의 |
| 색상 | 검은색 |
| 모델명 | 7턴차 |
| 호환 장치 | 스피커 |
| 모터 유형 | 직류 모터 |
| 신호 형식 | 아날로그, 디지털 |
| 권tage | 12볼트(DC) |
| 전원 | 코드식 전기 |
| 신호 대 잡음 비율 | 60데시벨 |
| 연결 기술 | USB |
| 제조업체 | 리루프 |
| 모델 번호 | 245435 |
유지
1. 턴테이블 청소
Use a soft, dry cloth to clean the plinth and dust cover. Avoid abrasive cleaners. For the acrylic platter, use a specialized acrylic cleaner and a microfiber cloth to prevent scratches.
2. 스타일러스 관리
Regularly clean the stylus using a soft brush designed for stylus cleaning, brushing from back to front. Inspect the stylus for wear or damage periodically. A worn stylus can damage records and degrade sound quality.
3. Belt Care
Check the drive belt for signs of wear or stretching. Replace if necessary to maintain consistent playback speed.
문제 해결
소리가 들리지 않거나 낮은 볼륨
- Check all cable connections (RCA, power).
- Ensure the pre-amp switch is set correctly (ON for line input, OFF for phono input).
- 확인하다 amplifier input selection.
- Check stylus condition and ensure it is properly seated.
윙윙거리는 소음
- Ensure the ground wire is properly connected.
- Check for interference from other electronic devices. Move the turntable if necessary.
- Verify RCA cable shielding.
속도 불일치
- Check the drive belt for proper placement and tension. Replace if worn.
- Ensure the platter is clean and free of debris.
- Verify the speed selection switch is set correctly.
건너뛰기 또는 왜곡
- 레코드판과 바늘을 닦으세요.
- Adjust tracking force and anti-skating settings.
- Ensure the turntable is on a level and stable surface.
보증 및 지원
The Reloop Turn 7 Premium HiFi Turntable comes with a 2-year manufacturer's warranty. For warranty claims or technical support, please contact Reloop customer service or visit the official Reloop web대지.
공식 리루프 Web대지: www.reloop-hifi.com