
1. 서론
Thank you for choosing the Haier 190 L Direct Cool Single Door Refrigerator. This manual provides essential information for the safe and efficient operation, installation, and maintenance of your appliance. Please read these instructions carefully before use and retain them for future reference.
2. 안전 정보
안전한 작동을 위해 항상 다음 기본 예방 조치를 따르세요.
- Ensure the refrigerator is placed on a stable, level surface away from direct sunlight and heat sources.
- 제품 외함이나 내장 구조물의 통풍구를 막지 마십시오.
- 제조업체에서 권장하는 것 외에는 해동 과정을 가속화하기 위해 기계적 장치나 기타 수단을 사용하지 마십시오.
- 냉매 회로를 손상시키지 마십시오.
- 제조업체에서 권장하는 유형이 아닌 한, 식품 보관 칸 안에서 전기 제품을 사용하지 마십시오.
- 냉장고를 청소하거나 유지 보수를 하기 전에는 항상 전원 플러그를 뽑으십시오.
- 어린이들이 포장재에 접근하지 못하도록 하여 질식 사고를 예방하십시오.
3. 제품 오버view
The Haier HED-203RFB-P is a 190 L Direct Cool Single Door Refrigerator designed for efficient and convenient food storage. It features a 3-star energy rating for energy efficiency and a stylish Red Opal finish.
주요 특징:
- 1 Hour Icing Technology (HIT): Rapid ice formation within an hour.
- 안정기 없는 작동: Designed to operate stably without an external stabilizer.
- 항균 개스킷: Helps prevent the entry and build-up of fungi and bacteria inside the refrigerator.
- 강화 유리 선반: 내구성이 뛰어나고 무거운 물건을 담을 수 있습니다.
- 대형 야채 상자: 제공합니다 amp신선한 농산물을 위한 공간.
- Base Stand with Drawer: Offers additional storage for non-refrigerated items.
- Connect Home Inverter: Compatible with home inverters for uninterrupted cooling during power outag에스.
- External Bar Handle: For easy access and a sleek look.
제품 구성 :

그림 3.1: 앞쪽 view of the Haier 190 L Direct Cool Single Door Refrigerator (HED-203RFB-P).
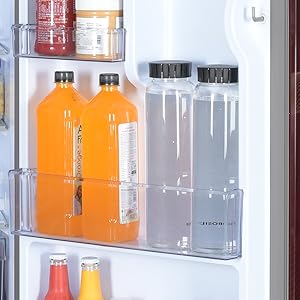
그림 3.2: Internal layout with Toughened Glass Shelves, Large Vegetable Box, and Utility Box.
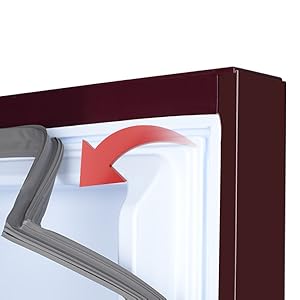
그림 3.3: Freezer compartment demonstrating 1 Hour Icing Technology (HIT).
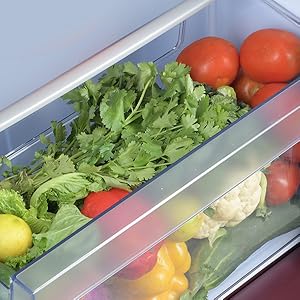
그림 3.4: Anti-Bacterial Gasket for hygiene.
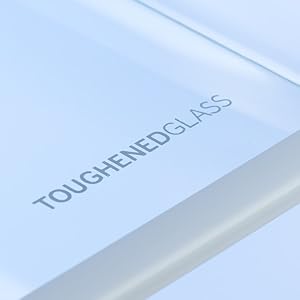
그림 3.5: Spacious Large Vegetable Box.

그림 3.6: External Bar Handle and Clean Back design.
4. 설정 및 설치
4.1 풀기
Carefully remove all packaging materials. Check the contents against the 'Included in the Box' list. Retain packaging for future transport if needed.
- 1 냉장고 유닛
- 계란 트레이
- 아이스 트레이
- 사용자 설명서
- 보증 카드
- 키
4.2 배치
다음과 같은 위치를 선택하십시오.
- Level and stable to prevent vibrations.
- Away from direct sunlight, heat sources (e.g., oven, radiator), and moisture.
- Well-ventilated, allowing sufficient space around the appliance for heat dissipation. Maintain at least 10 cm clearance from walls.
4.3 전기 연결
Connect the refrigerator to a dedicated power outlet. The appliance is designed for 230 Volts. Thanks to its stabilizer-free operation, an external voltage stabilizer is not typically required under normal voltag전자 변동.
4.4 초기 사용
After placement and connection, wait for at least 2-4 hours before plugging in the refrigerator. This allows the refrigerant to settle. Once plugged in, allow the refrigerator to run for several hours (e.g., 4-6 hours) empty to reach its optimal operating temperature before storing food.
5. 사용 설명서
5.1 온도 조절
The refrigerator features a manual temperature control dial, typically located inside the fresh food compartment or freezer. Adjust the dial to your desired cooling level. Higher numbers usually indicate colder settings.
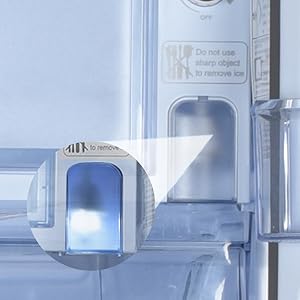
그림 5.1: Interior door storage for bottles and other items.
5.2 1 Hour Icing Technology (HIT)
To utilize the 1 Hour Icing Technology, ensure the freezer compartment is set to its coldest setting. Place water in the ice tray and position it in the designated area within the freezer. Ice should form within approximately one hour under optimal conditions.
5.3 Using Storage Compartments
- 강화 유리 선반: Arrange food items on the shelves. These shelves are designed to withstand significant weight.
- 대형 야채 상자: Store fruits and vegetables in the dedicated vegetable box to maintain their freshness.
- Base Stand with Drawer: Use the integrated drawer in the base stand for storing non-refrigerated items like onions or potatoes.
6. 유지관리 및 관리
6.1 청소
정기적인 청소는 위생과 효율성을 유지하는 데 도움이 됩니다.
- 내부: 냉장고 플러그를 뽑으세요. 부드러운 천으로 내부를 닦으세요.amp순한 세제 용액으로 닦으십시오. 깨끗한 물로 헹구고 완전히 말리십시오.
- 항균 개스킷: Wipe the door gasket regularly with a damp cloth to keep it clean and flexible, ensuring a proper seal.
- 외부: 부드러운 천으로 외부 표면을 청소하세요.amp 옷감. 연마성 세제를 피하십시오.
- 후면 패널 : Periodically clean the back panel to remove dust and ensure proper heat dissipation.
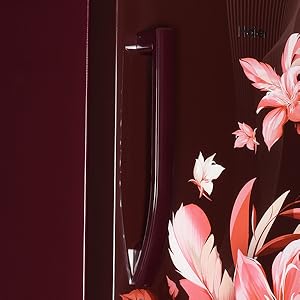
그림 6.1: Clean Back design for easy maintenance.
6.2 해동
This is a direct-cool refrigerator with a manual defrost system. Frost will accumulate in the freezer compartment over time. When the frost layer becomes approximately 5mm thick, defrost the appliance:
- 냉장고의 플러그를 뽑으세요.
- Remove all food items from the freezer and fresh food compartments. Store frozen items in an insulated container.
- 냉동실 문을 열어 성에가 자연스럽게 녹도록 하세요. 바닥에 수건을 깔아 물기를 흡수하도록 하세요.
- 해동 후 내부를 깨끗이 청소하고 완전히 말리세요.
- Plug the refrigerator back in and allow it to cool down before returning food.
7. 문제 해결
서비스에 문의하기 전에 다음과 같은 일반적인 문제를 확인하세요.
| 문제 | 가능한 원인 | 해결책 |
|---|---|---|
| 냉장고가 작동하지 않습니다 | 전원 공급이 안 됨; 플러그가 제대로 꽂히지 않음; 퓨즈가 끊어졌거나 회로 차단기가 작동함. | Check power supply; Ensure plug is firmly in socket; Check fuse/reset circuit breaker. |
| 온도가 충분히 낮지 않습니다 | Door not closed properly; Too much food stored; Door opened too frequently; Temperature setting too high; Appliance near heat source. | Ensure door is sealed; Do not overload; Reduce door openings; Adjust temperature setting lower; Relocate appliance. |
| 특이한 소음 | 기기가 수평이 아님; 물체가 뒷벽에 닿음; 압축기 소음(정상). | Adjust leveling feet; Move objects away from the back; Compressor noise is normal during operation. |
| 냉동실에 과도한 서리가 내렸습니다 | Door not sealed properly; Humid environment; Frequent door opening. | Check door gasket; Ensure proper ventilation; Reduce door openings; Defrost manually. |
8. 사양
| 특징 | 세부 사항 |
|---|---|
| 모델명 | HED-203RFB-P |
| 상표 | 하이얼 |
| 용량 | 190리터 |
| 신선 식품 용량 | 176리터 |
| 냉동고 용량 | 14리터 |
| 에너지 평가 | 별 3개 (BEE 별점 평가) |
| 제상 시스템 유형 | 수동 |
| 제품 크기(D x W x H) | 62.8D x 54.1W x 131.3H 센티미터 |
| 품목 무게 | 38 킬로그램 |
| 권tage | 230 볼트 |
| 선반 유형 | 강화 유리 (선반 3개) |
| 냉각제 | R-600A |
| 색상 | Red Opal |
| 도어 재질 유형 | 스테인리스 스틸 |
| 전원 | 코드식 전기 |
| 잠금 유형 | 열쇠 |
9. 보증 및 지원
9.1 보증 정보
Your Haier refrigerator comes with a comprehensive warranty:
- 제품 보증: 구입일로부터 1년.
- 압축기 보증: 구입일로부터 10년.
자세한 약관은 제품에 동봉된 보증서를 참조하십시오.
9.2 제조업체 연락처 정보
서비스, 지원 또는 보증 청구 관련 문의는 다음 연락처로 문의해 주십시오.
하이얼 가전 인도 유한회사B3 - MIDC Ranjangaon, Near Taluka Shirur,
마하라슈트라 412220, 인도
더 자세한 도움을 받으시려면 하이얼 공식 웹사이트를 방문하세요. web사이트를 방문하거나 고객 서비스 헬프라인에 문의하세요.


