
1. 서론
This instruction manual provides essential information for the safe and effective installation, operation, and maintenance of the ALLIANCE LAUNDRY SYSTEMS Contactor C16 220V Pkg (F330177P). Please read this manual thoroughly before proceeding with any procedures to ensure proper functionality and to prevent potential hazards.
2. 제품 오버view
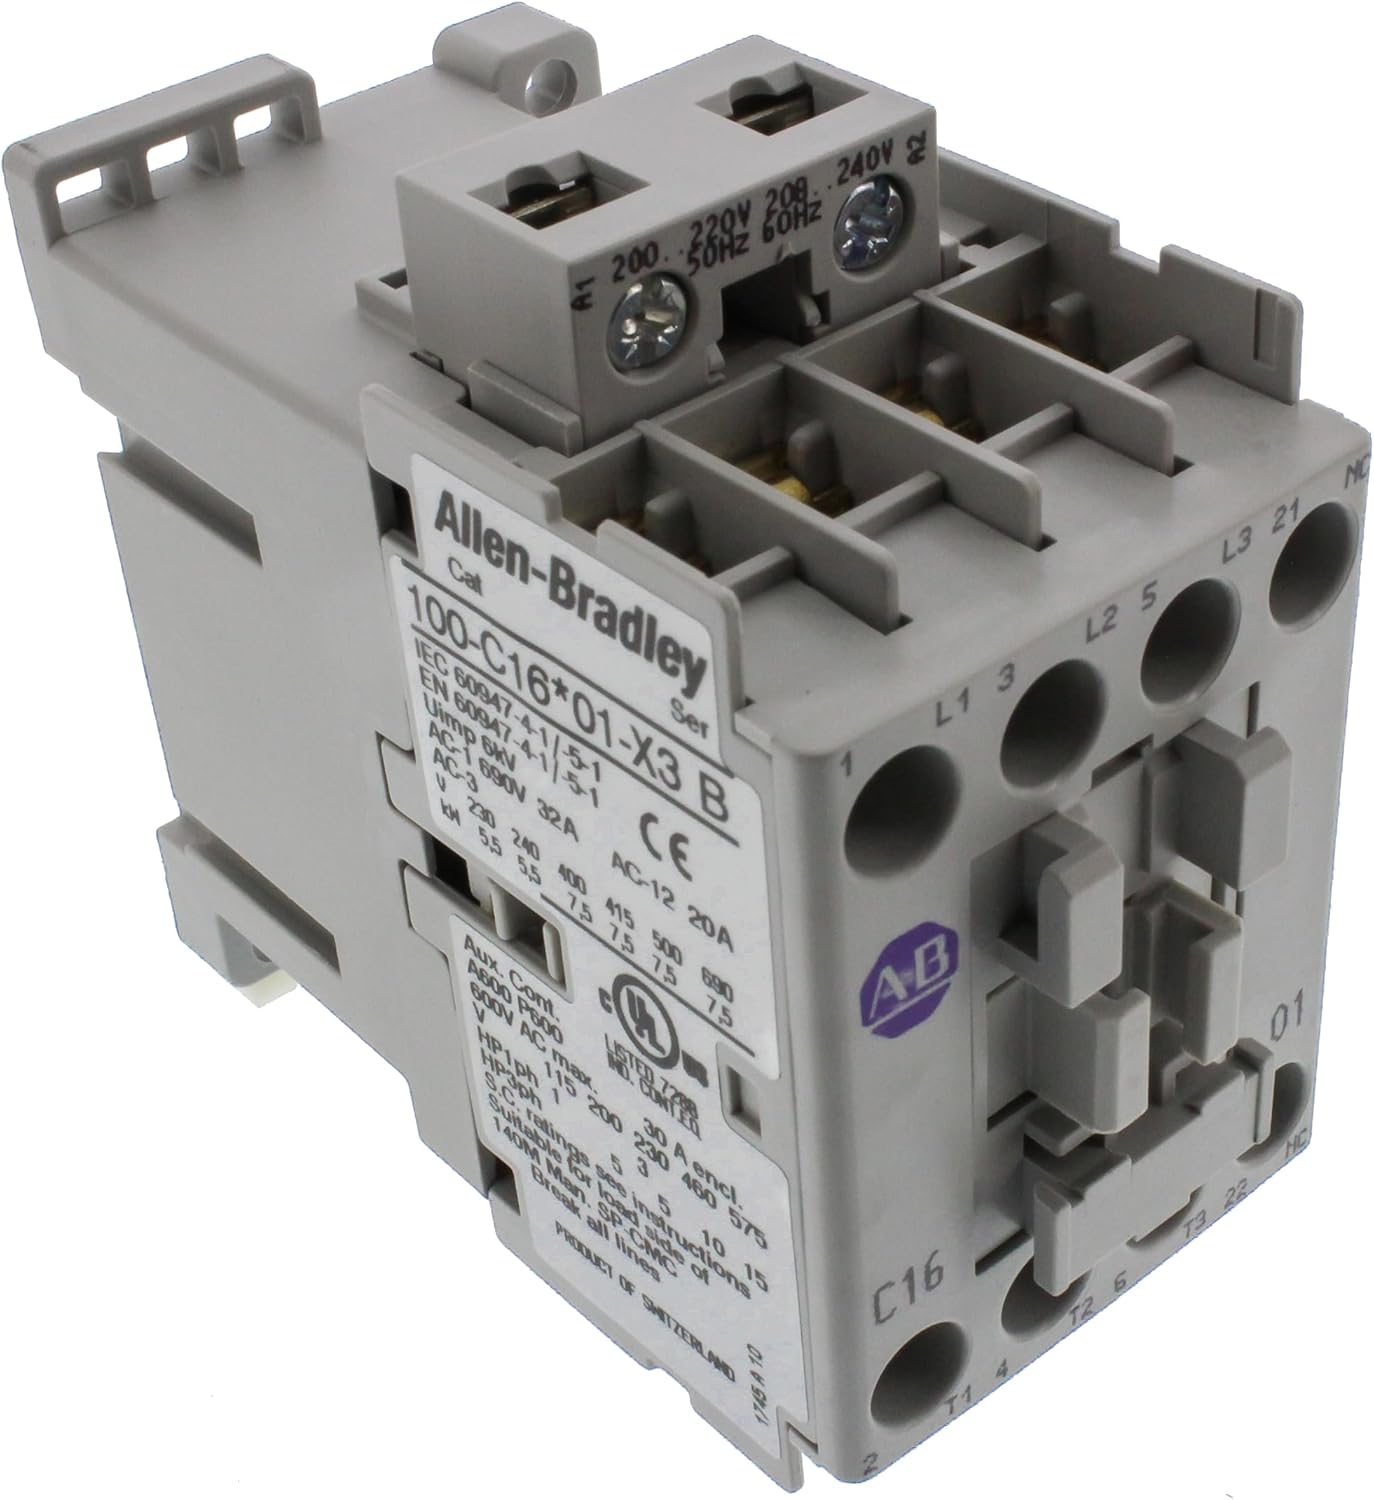
이미지 2.1: 앞면 view of the ALLIANCE LAUNDRY SYSTEMS C16 220V Contactor. This image displays the main body of the contactor, including the Allen-Bradley branding, model number 100-C16*01-X3 B, electrical ratings (200-240V, 50/60Hz), and terminal markings (L1, L2, L3, T1, T2, T3).
The ALLIANCE LAUNDRY SYSTEMS Contactor C16 220V Pkg is a critical electrical component designed for controlling electrical circuits, particularly in industrial and commercial laundry equipment. It functions as an electrically operated switch, providing a safe and efficient means to switch a power circuit. This genuine OEM part ensures compatibility and reliable performance with various laundry systems.
주요 특징:
- 호환성: Fits Ipso, Huebsch, Speed Queen, Unimac, Econo-Wash, Primus, and Alliance Laundry Systems Washer/Dryer units.
- 정품 OEM 부품: Ensures high quality and perfect fit, replacing original part numbers 801423, F330177, TU21462, and TU21192.
- 권tage 등급: Designed for 220V applications, suitable for various power requirements.
- 견고한 구조: Built for durability and long-term performance in demanding environments.
3. 사양
| 사양 | 세부 사항 |
|---|---|
| 브랜드 이름 | ALLIANCE LAUNDRY SYSTEMS |
| 모델명 | C16 |
| 부품 번호 | 무료 |
| 권tage Rating (from label) | 200-240V, 50/60Hz |
| AC-1 Rating (from label) | 690V 32A |
| AC-12 Rating (from label) | 20A |
| 품목 무게 | 14.6 온스 |
| 패키지 크기 | 8.25 x 6.85 x 3.2 인치 |
| 제조업체 | 얼라이언스 세탁 시스템 |
Note: Specifications are based on product information and label details. Always refer to the product label for precise ratings.
4. 설치 및 설정
경고: Electrical installation should only be performed by qualified personnel. Ensure all power is disconnected at the main circuit breaker before beginning any installation or maintenance work. Failure to do so can result in serious injury or death.
- 전원 차단: Locate the main power supply to the equipment where the contactor will be installed. Turn off and lock out the power source to prevent accidental re-energization. Verify zero voltage 멀티미터로.
- 배선 식별: Carefully identify the existing wiring connected to the old contactor (if replacing) or the designated wiring points for the new installation. Pay close attention to line (L1, L2, L3) and load (T1, T2, T3) connections, as well as control circuit wiring (A1, A2 for coil). Refer to the equipment's wiring diagram.
- 설치: Mount the new contactor securely in the designated electrical enclosure. Ensure it is firmly attached to a DIN rail or mounting plate, if applicable, to prevent vibration and movement.
- 배선 연결: Connect the power and control wires to the appropriate terminals on the contactor.
- Line Side (Input): Connect incoming power lines to terminals L1, L2, L3.
- Load Side (Output): Connect the load (e.g., motor, heating element) to terminals T1, T2, T3.
- Control Coil: Connect the control circuit wires to the coil terminals (typically A1 and A2). The label indicates 200-240V for the coil.
- 보조 연락처: If auxiliary contacts are used (e.g., for interlocking or signaling), connect them according to the wiring diagram. The label shows "Aux. Cont." and "A600 P600".
- 설치 확인: Double-check all wiring connections against the equipment's schematic. Ensure no bare wires are exposed and that the contactor is properly seated.
- 복원력 : 설치가 완료되고 검증되면 장비에 전원을 공급하세요.
5. 운영
The C16 contactor operates by receiving an electrical signal to its control coil, which then closes the main power contacts, allowing current to flow to the connected load. When the signal to the coil is removed, the contacts open, interrupting the power flow.
- 코일에 전원을 공급합니다. When the control circuit supplies the rated voltage (200-240V AC) to the A1 and A2 terminals, the electromagnetic coil inside the contactor becomes energized.
- 접점 폐쇄: The energized coil pulls the movable contacts into connection with the stationary contacts, completing the circuit between the L1, L2, L3 (line) terminals and the T1, T2, T3 (load) terminals.
- Power to Load: Electrical power is then supplied to the connected appliance or motor.
- 코일의 전원을 끄기: 제어 볼륨이tage is removed from A1 and A2, the coil de-energizes, and springs return the contacts to their open (normally open) position, interrupting power to the load.
The operation of the contactor is typically automated by the laundry equipment's control system, responding to cycles and user inputs.
6. 유지관리
정기적인 점검 및 유지관리는 접촉기의 수명을 연장하고 안전한 작동을 보장합니다. 유지관리 작업을 수행하기 전에는 항상 전원을 차단하십시오.
- Visual Inspection (Monthly/Quarterly):
- Check for signs of overheating, such as discoloration or melted plastic on the contactor body or terminals.
- Inspect wiring for fraying, damage, or loose connections.
- Look for excessive dust or debris accumulation, especially around moving parts and contacts.
- Terminal Tightness (Annually): With power disconnected, use an insulated screwdriver to gently check the tightness of all terminal screws. Loose connections can cause resistance, heat, and potential failure.
- Contact Wear (As needed): If the contactor is frequently cycling or operating under heavy loads, inspect the main contacts for pitting or excessive wear. Severely worn contacts may require replacement of the contactor.
- 청소: Use a dry, non-conductive brush or compressed air to remove dust and debris from the contactor. Do not use liquids or solvents.
If any damage or excessive wear is observed, the contactor should be replaced immediately by a qualified technician.
7. 문제 해결
This section provides guidance for common issues. For complex problems, consult a qualified electrician or service technician.
| 문제 | 가능한 원인 | 해결책 |
|---|---|---|
| 접촉기가 활성화되지 않음(클릭 없음) |
|
|
| 접촉기는 전원이 공급되지만 부하에는 전원이 공급되지 않습니다. |
|
|
| 접촉기가 큰 소리로 윙윙거리거나 덜컹거립니다. |
|
|
| Contactor trips circuit breaker/fuse |
|
|
8. 보증 및 지원
This ALLIANCE LAUNDRY SYSTEMS product is manufactured to high standards and is designed for reliable performance. For specific warranty information, please refer to the documentation provided with your original equipment or contact ALLIANCE LAUNDRY SYSTEMS directly.
For technical support, replacement parts, or service inquiries, please contact your authorized ALLIANCE LAUNDRY SYSTEMS dealer or visit their official website. When contacting support, please have your product model (C16) and part number (F330177P) readily available.
중요 참고 사항: The product is an OEM part. Using non-genuine parts may void the warranty of your laundry equipment and could lead to performance issues or safety hazards.