
1. 서론
This manual provides detailed instructions for the setup, operation, and maintenance of your XTUGA U-260 Dual Channel UHF Wireless Microphone System. Please read this manual thoroughly before using the product to ensure proper functionality and to maximize its lifespan. Retain this manual for future reference.
2. 제품 오버view
The XTUGA U-260 is a professional-grade dual UHF wireless microphone system designed for various applications including church events, karaoke, weddings, and other live events. It features a robust design, adjustable frequencies, and convenient auto-scan and IR pairing functions.
2.1. 포함된 구성 요소
- U-260 UHF Wireless Receiver (1 unit)
- UHF Wireless Handheld Microphones (2 units)
- Antennas (2 units)
- 전원 어댑터(1개)
- 사용 설명서(1개)
- 오디오 케이블 (1개)
- Anti-skid Rings (2 units)
- Power Plugs (2 units)
- Power Cables (2 units)

Figure 2.1: All components included with the XTUGA U-260 Wireless Microphone System, including the receiver, two microphones, antennas, power adapter, cables, and anti-skid rings.
2.2. 주요 특징
- Dual UHF Channels: Two independent channels with 100 selectable frequencies each (Channel 1: 540.1 - 564.85 MHz; Channel 2: 568.1 - 592.85 MHz).
- Auto Scan Function: Automatically searches for the least interference channel.
- IR 동기화: Seamlessly pairs the receiver and microphones.
- 주파수 잠금: Prevents accidental frequency changes.
- 장거리 작전: Up to 492ft (150 meters) operating distance.
- 내구성 있는 구조: Microphones feature sturdy metal construction.
- 뛰어난 음질: High-quality dynamic cartridge designed to limit feedback and interference.
- Rechargeable Microphones: Built-in lithium batteries provide up to 8 hours of use on a 3-hour charge via USB-C.
- Dashboard-Inspired Display: Receiver features a unique display for AF and RF signal indication.

Figure 2.2: The receiver's display screen, featuring a dashboard-inspired design for clear signal indication.
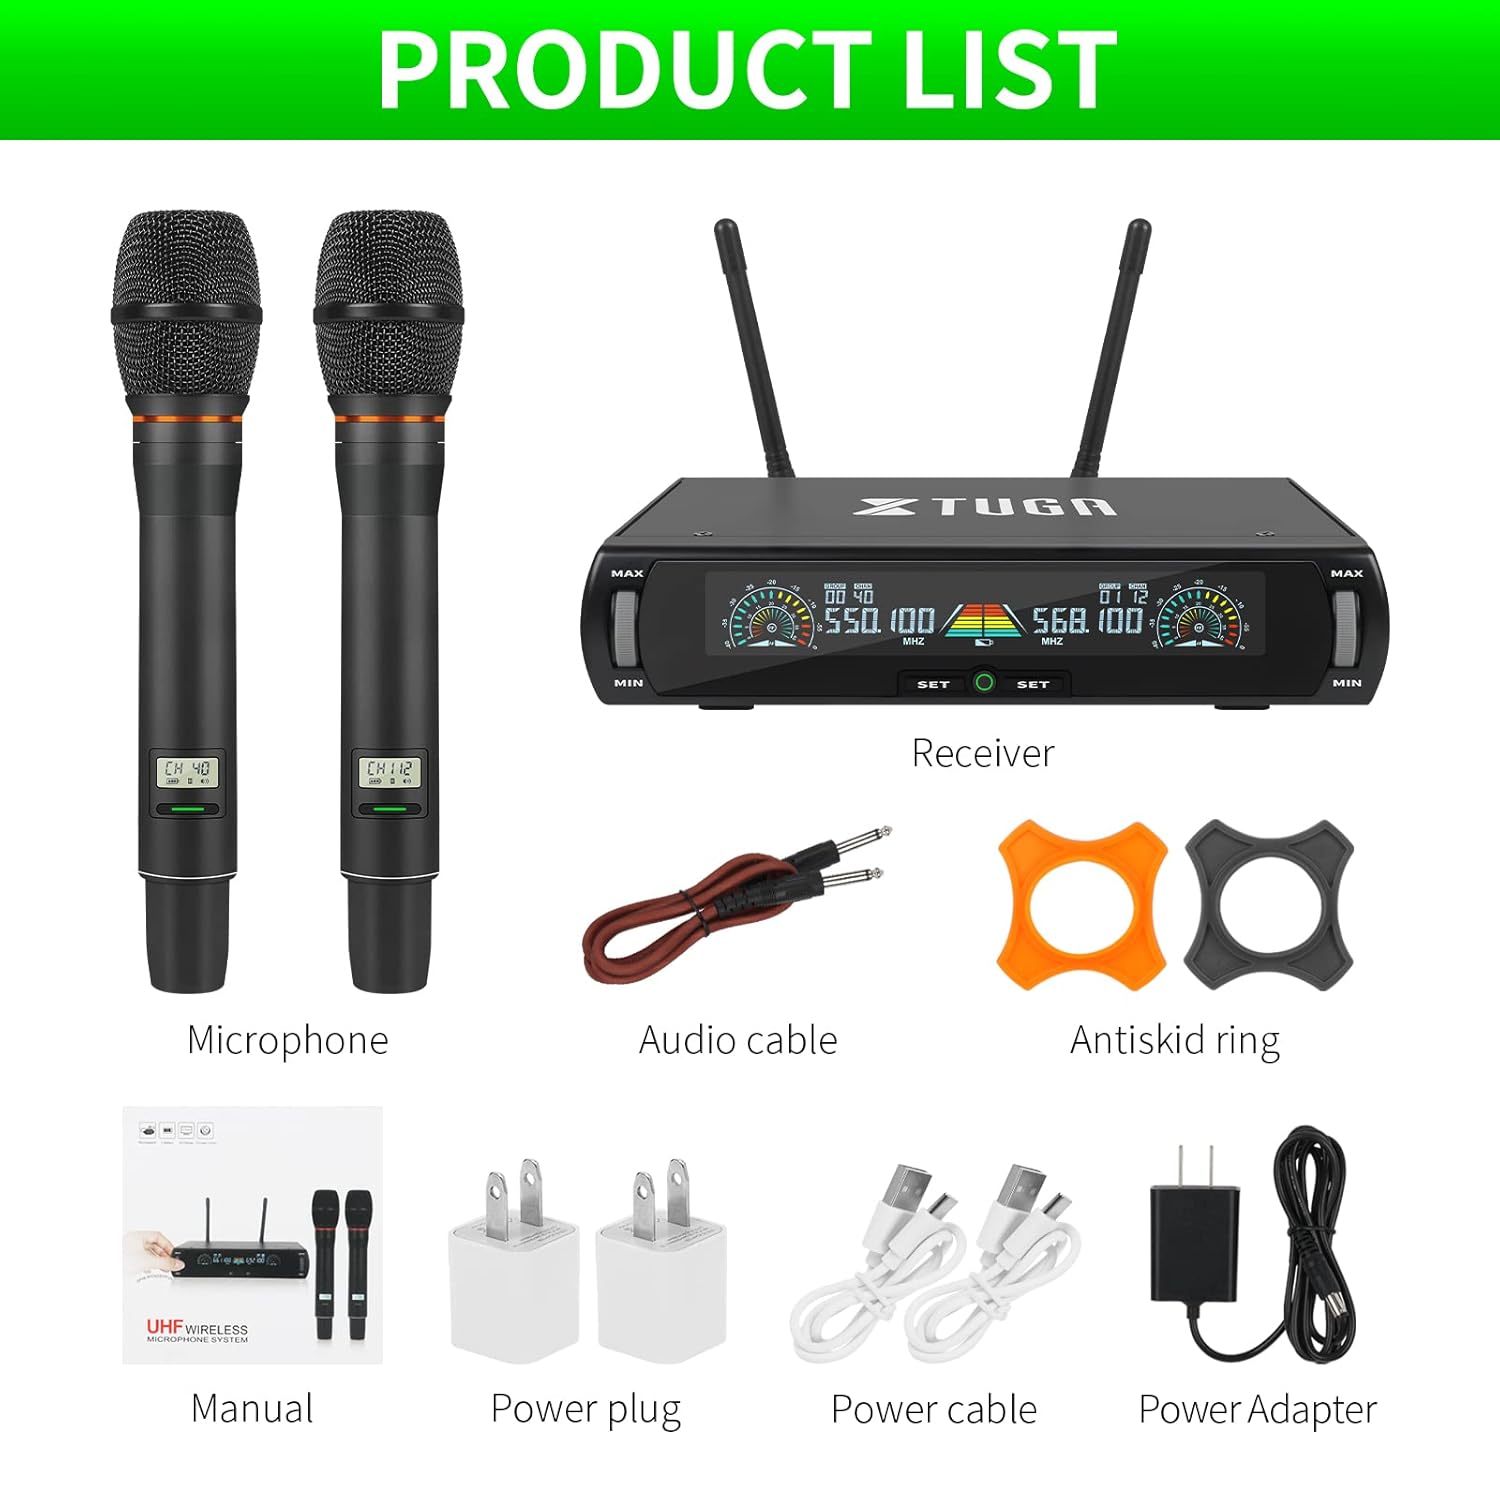
Figure 2.3: Illustration of the microphone's cardioid pickup pattern, designed to reduce noise and capture sound realistically.
2.3. 구성 요소 식별

그림 2.4: 상세 view of the receiver and microphone components.
- 볼륨 조절
- Function settings button
- Switch (Power/Mode)
- 디스플레이 화면
- Power socket (DC 12V)
- 안테나 잭
- XLR 출력
- Audio output (6.35mm/1/4 inch)
- Steel meshed head (Microphone)
- Display screen (Microphone)
- Switch (Microphone Power)
- Type-C charging port (Microphone)
3. 설정 지침
- 구성 요소 풀기: 모든 품목을 포장에서 조심스럽게 꺼내세요.
- 안테나 연결: Screw the two antennas into the antenna jacks on the rear of the receiver. Ensure they are securely tightened.
- 전원 연결: Connect the power adapter to the receiver's power socket (DC 12V) and plug it into a suitable power outlet.
- 오디오 출력:
- For balanced output, connect XLR cables from the receiver's XLR outputs to your mixer or amp리퍼.
- For unbalanced output, use the provided 6.35mm (1/4 inch) audio cable to connect the receiver's audio output to your mixer or amp리퍼.
- 수신기 전원 켜기: Press the power switch on the receiver. The display screen should illuminate.
- 충전 마이크: Before first use, ensure both microphones are fully charged using the provided USB-C cables and power plugs. The microphone display will show charging status.
- 마이크 전원 켜기: Press and hold the power switch on each microphone until its display illuminates.

Figure 3.1: The XTUGA U-260 system ready for operation, showing the receiver with antennas and two handheld microphones.
4. 사용 설명서
4.1. Frequency Selection and IR Pairing
The system features an auto-scan function to find clear frequencies and IR synchronization for easy pairing.

Figure 4.1: Diagram illustrating the IR pairing process between the microphone and receiver.
- 자동 스캔 시작: On the receiver, press the "SET" button three times quickly for the desired microphone channel (left or right). The receiver will scan for the clearest available frequency.
- Select Frequency (Optional): If you wish to manually select a frequency after the scan, rotate the volume knob corresponding to the microphone channel you are adjusting.
- IR Pairing: Once a frequency is displayed on the receiver, hold the front of the microphone (where its display is located) close to the IR sensor on the receiver. The IR sensor is located on the bottom left side of the receiver's screen.
- 페어링 확인: While holding the microphone near the IR sensor, press the "SET" button on the receiver once for the corresponding microphone channel. A small indicator light on the receiver should flash, and the microphone's display will update to show the new frequency, confirming successful pairing. This process may require a couple of attempts to ensure proper alignment and timing.
4.2. Frequency Lock Function
To prevent accidental changes to the selected frequency, use the frequency lock function.

Figure 4.2: Visual representation of the frequency lock function, showing a padlock icon.
- 잠그려면: Press and hold the "SET" button on the receiver for the desired microphone channel until a lock icon appears on the display.
- 잠금 해제하려면: Press and hold the "SET" button again until the lock icon disappears.
4.3. 볼륨 조절
Each microphone channel has an independent volume control knob on the receiver. Rotate the "MIN/MAX" knobs to adjust the output volume for each microphone.
4.4. Microphone Charging
The handheld microphones are equipped with built-in rechargeable lithium batteries.

Figure 4.3: Illustration of microphone battery life (8 hours work) and charging time (3 hours) via USB-C.
- Connect a USB-C cable to the charging port at the bottom of the microphone.
- Connect the other end of the USB-C cable to a power adapter or a USB power source.
- A dim red light on the microphone's display bar indicates charging. The light will turn off or change color when fully charged.
- 완전 충전에는 일반적으로 약 3시간이 소요되며, 최대 8시간 동안 연속 사용이 가능합니다.
5. 유지관리
- 청소: 수신기 및 마이크를 닦을 때는 부드럽고 마른 천을 사용하십시오. 액체 세척제나 용제를 사용하지 마십시오.
- 저장: 사용하지 않을 때는 직사광선과 극한의 온도를 피해 서늘하고 건조한 곳에 보관하세요.
- 배터리 관리 : For optimal battery life, avoid fully discharging the microphones frequently. Recharge them regularly, especially if storing for extended periods.
- 케이블 관리 : Ensure all cables are connected securely and are not strained or kinked.
6. 문제 해결
| 문제 | 가능한 원인 | 해결책 |
|---|---|---|
| 소리가 출력되지 않습니다. |
|
|
| 간섭 또는 정적 노이즈. |
|
|
| 마이크가 페어링되지 않습니다. |
|
|
| Microphone battery drains quickly. |
|
|
7. 사양
| 특징 | 세부 사항 |
|---|---|
| 모델 | 유-260 |
| 상표 | 엑스투가 |
| 마이크 폼 팩터 | 마이크 시스템 (핸드헬드형) |
| 연결 기술 | UHF Wireless, XLR |
| 채널 수 | 2 (2x100 selectable frequencies) |
| Frequency Range (Channel 1) | 540.1~564.85MHz |
| Frequency Range (Channel 2) | 568.1~592.85MHz |
| 작동 범위 | 최대 492미터(150피트) |
| 극성 패턴 | Unidirectional (Cardioid Pickup) |
| 임피던스 | 600옴 |
| 신호 대 잡음 비율 | 120데시벨 |
| 마이크 전원 | 내장 충전식 리튬 배터리 |
| 마이크 배터리 수명 | 최대 8시간 |
| 마이크 충전 시간 | 약 3시간 (USB-C 연결 시) |
| 수신기 전원 | DC 12V 전원 어댑터 |
| 재료 | 금속(마이크) |
| 포함된 구성 요소 | Receiver, 2 Handheld Microphones, 2 Antennas, Power Adapter, User Manual, Audio Cable, Anti-skid Rings, Power Plugs, Power Cables |
| 품목 무게 | 2kg |
8. 보증 및 지원
XTUGA provides a one-year free warranty period for products with authentic brand logos. For any questions, technical assistance, or warranty claims, please contact XTUGA customer support through your purchase platform or the official XTUGA web대지.
보증 확인을 위해 구매 증빙서류를 보관하세요.