
1. 서론
This manual provides detailed instructions for the safe and effective use of the JBM 54013 Tire Puncture Repair Kit. This kit is designed for temporary emergency repair of small punctures in vehicle tires, allowing you to reach a service station for a permanent repair. It includes a liquid sealant and an air compressor.
2. 제품 오버view
The JBM 54013 kit consists of the following main components:
- Liquid Tire Sealant: A bottle containing a specialized liquid designed to seal small punctures.
- 공기 압축기: An electric air compressor used to inflate the tire and force the sealant into the puncture.
- Connecting Hoses/Cables: Hoses for connecting to the tire valve and power cables for the compressor.
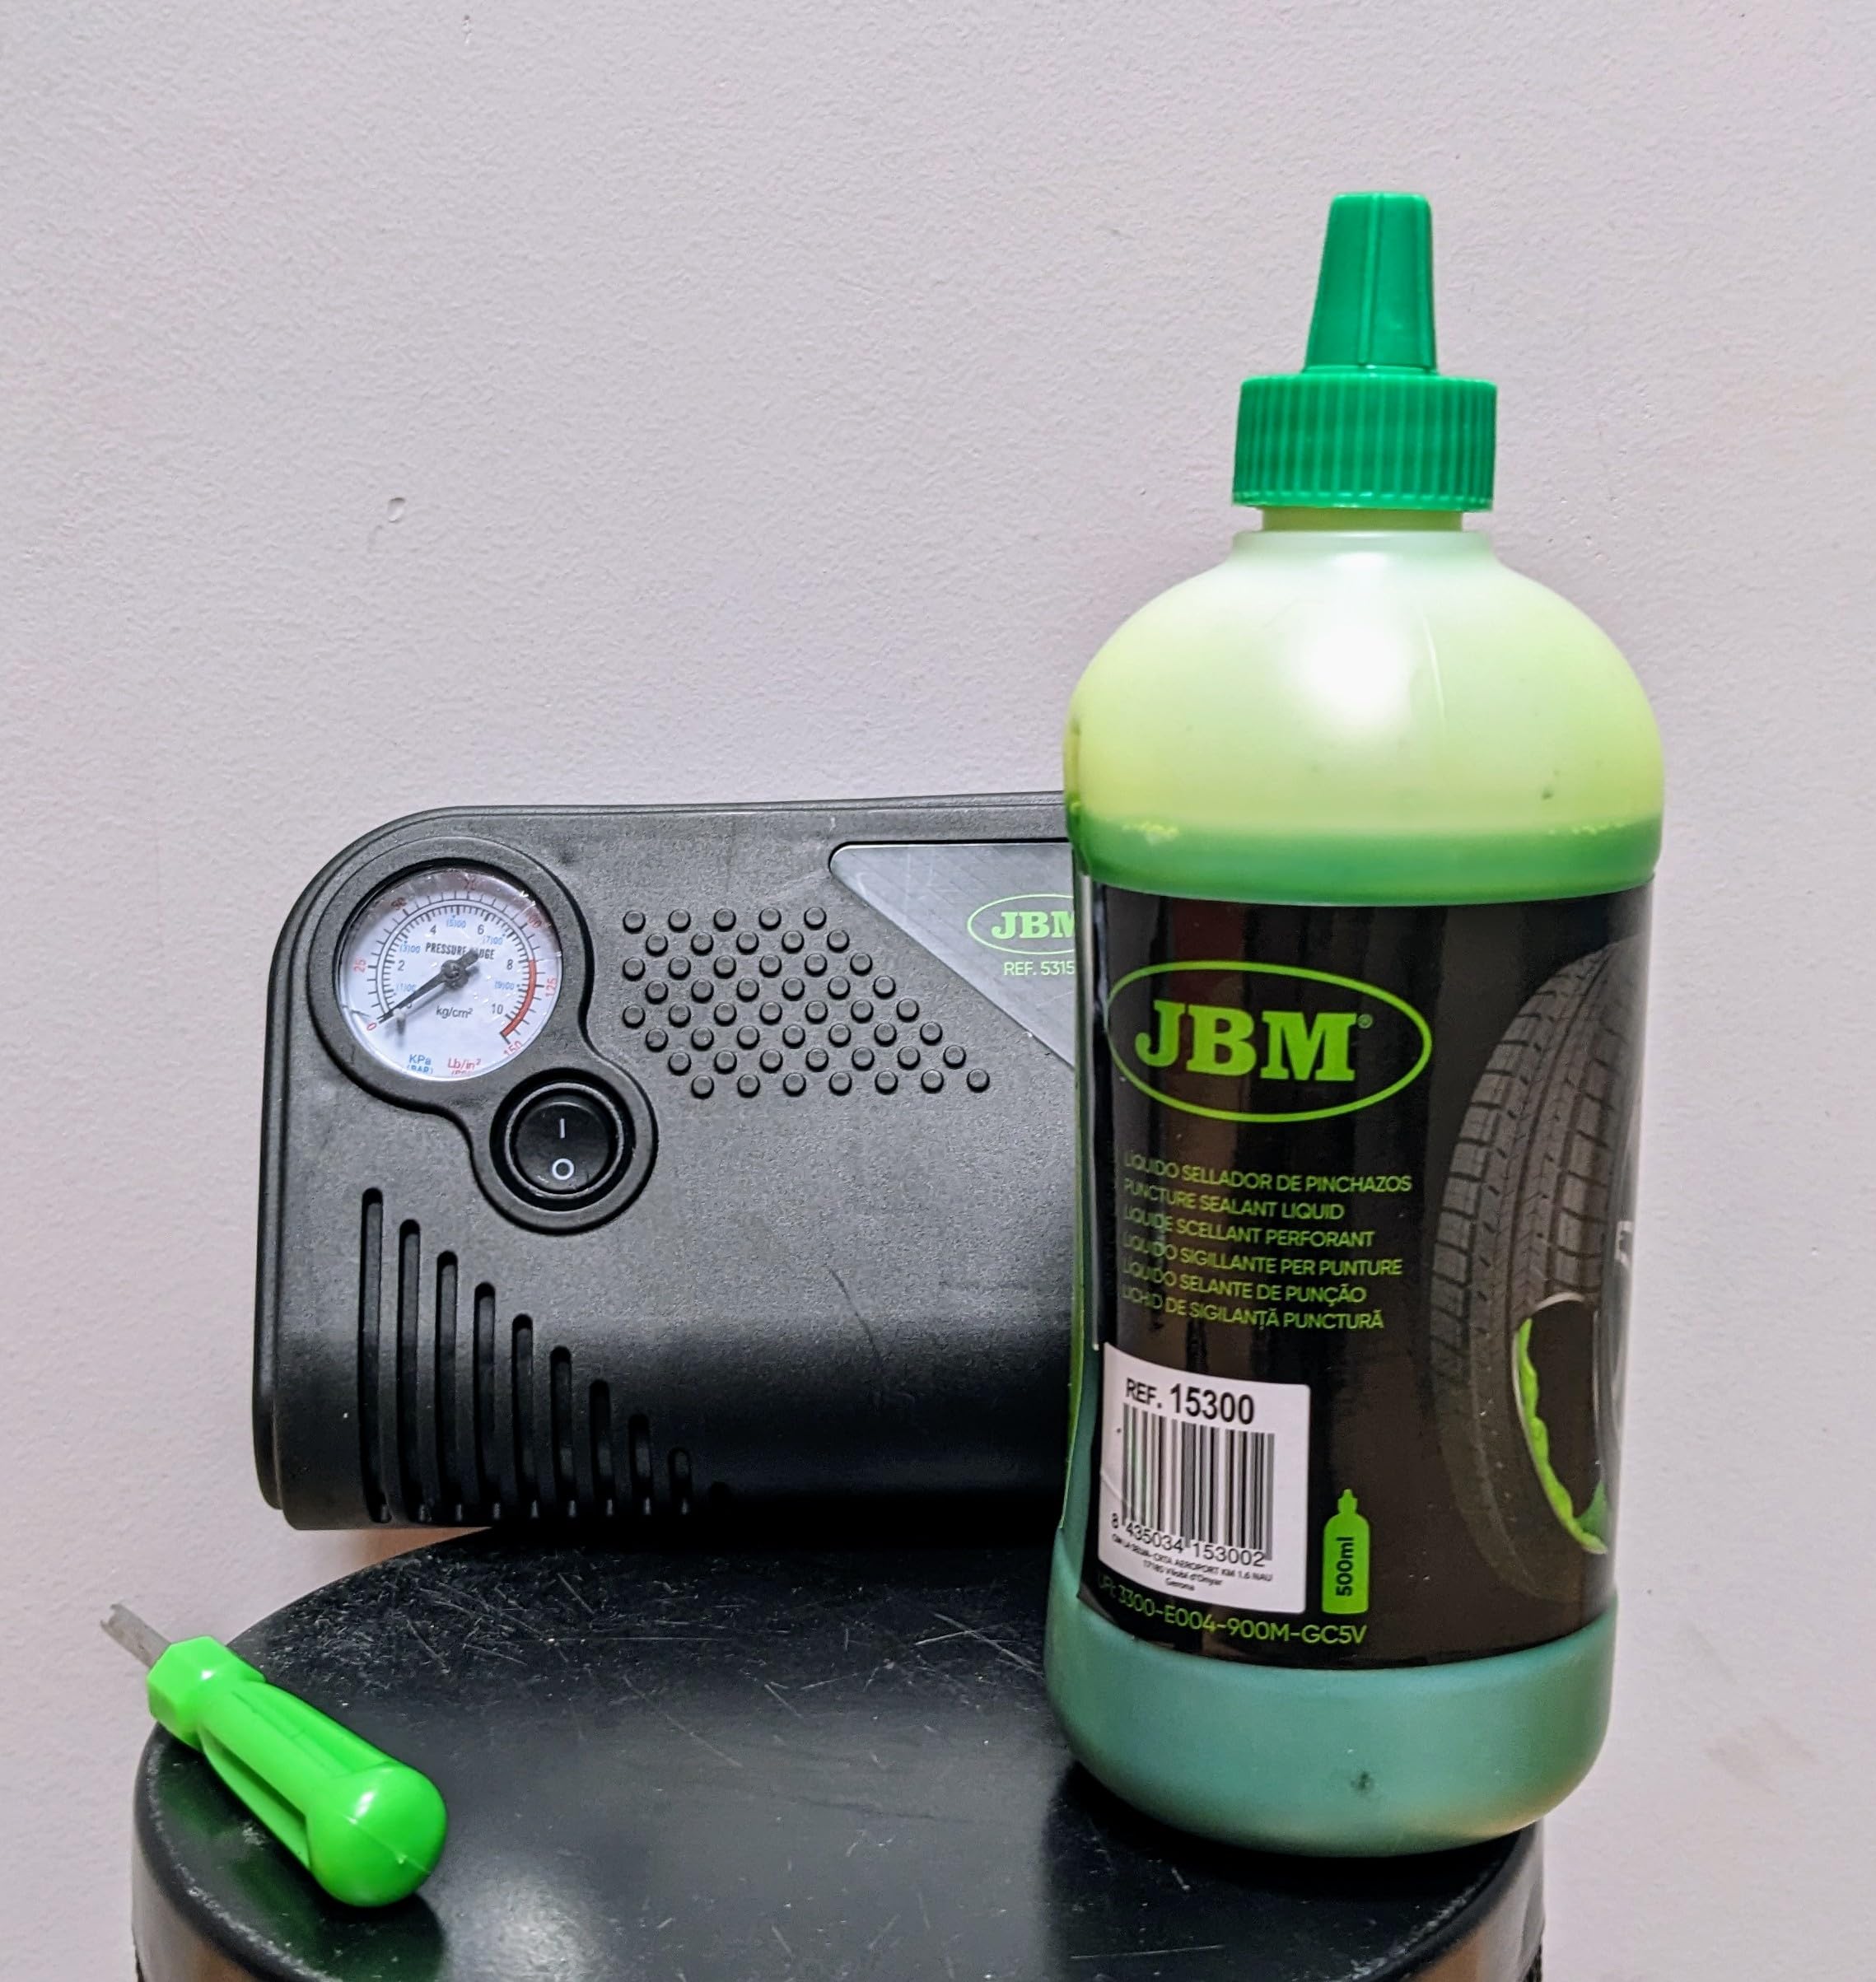
Image 1: JBM 54013 Tire Puncture Repair Kit components. This image displays the liquid sealant bottle and the compact air compressor, along with their connecting hoses.
3. 안전 지침
Read all safety warnings and instructions before using this product. Failure to follow these instructions may result in electric shock, fire, or serious injury.
- Always wear appropriate personal protective equipment, such as gloves and eye protection, when handling the sealant.
- Ensure the vehicle is parked on a level surface, the engine is off, and the parking brake is engaged before attempting any repair.
- Do not use the kit if the tire has a large cut, sidewall damage, or if the tire is completely off the rim. This kit is for small tread punctures only.
- 어린이와 주변 사람들이 작업장에서 멀리 떨어지게 하십시오.
- Do not overinflate the tire. Refer to your vehicle's recommended tire pressure.
- The sealant is for temporary repair only. Drive cautiously to the nearest service station for a professional, permanent repair.
- Avoid contact of the sealant with skin and eyes. In case of contact, rinse thoroughly with water.
- 습기가 많은 환경이나 인화성 액체 또는 가스 근처에서 압축기를 작동하지 마십시오.
- Disconnect the compressor from the power source when not in use.
4. 설정
- Locate the Puncture: Carefully inspect the tire tread for the puncture. If an object (nail, screw) is still embedded, leave it in place.
- Prepare the Sealant: Shake the sealant bottle well before use.
- Connect Sealant to Tire: Remove the valve cap from the tire. Connect the sealant bottle's hose directly to the tire valve stem. Ensure a tight connection.
- Connect Compressor: Connect the air compressor's hose to the sealant bottle's inlet or directly to the tire valve if the sealant bottle has a pass-through. Connect the compressor's power cable to your vehicle's 12V accessory outlet (cigarette lighter).
5. 사용 설명서
- Start the Vehicle Engine: For optimal compressor performance and to avoid draining the vehicle battery, start the vehicle engine.
- 압축기 작동: Turn on the air compressor. The sealant will be forced into the tire, followed by air to inflate it.
- 모니터 압력: Continuously monitor the tire pressure gauge on the compressor. Inflate the tire to the pressure recommended by your vehicle manufacturer (usually found on a sticker inside the driver's door jamb or in the owner's manual).
- 연결 해제: Once the desired pressure is reached, turn off the compressor and disconnect it from the power source and the tire valve. Replace the valve cap.
- Drive Immediately: Drive the vehicle immediately for a short distance (approx. 5-10 km or 3-6 miles) at a moderate speed (not exceeding 80 km/h or 50 mph). This helps distribute the sealant evenly inside the tire.
- Recheck Pressure: After driving, recheck the tire pressure. If the pressure has dropped significantly, the puncture may be too large for the kit to seal, and professional assistance is required. If the pressure is stable, proceed to a service station for a permanent repair.
6. 유지관리
- 컴프레서 청소: Keep the air compressor clean and free from dirt and debris. Wipe with a dry cloth.
- Sealant Expiration: Check the expiration date on the sealant bottle. Replace expired sealant to ensure effectiveness.
- 저장: 키트는 직사광선과 극한 온도 변화를 피해 서늘하고 건조한 곳에 보관하십시오.
- 호스 검사: Periodically inspect hoses and connections for cracks or damage.
7. 문제 해결
| 문제 | 가능한 원인 | 해결책 |
|---|---|---|
| 압축기가 켜지지 않습니다. | 12V 콘센트에 전원이 공급되지 않음; 차량 또는 컴프레서의 퓨즈가 끊어졌습니다. | Check vehicle's 12V outlet and fuse. Check compressor's inline fuse if applicable. Ensure vehicle engine is running. |
| Tire does not inflate or inflates slowly. | Loose connection; Large puncture; Sealant blockage. | Ensure all connections are tight. The puncture may be too large for the kit. Check for sealant blockage in hoses. |
| Sealant leaks from tire valve. | Loose connection to valve stem. | Tighten the connection of the sealant hose to the tire valve stem. |
| Tire pressure drops after driving. | Puncture too large or sealant did not fully seal. | The kit is for temporary repair only. Seek immediate professional tire service. Do not continue driving on a deflating tire. |
8. 사양
- 모델 번호: JBM 54013
- 제조업체: JBM CAMP롱, 슬루
- 제품 무게: 150g(0.33파운드)
- 패키지 크기: 12 x 10 x 10cm(4.7 x 3.9 x 3.9인치)
- 전원: 12V DC (typically via vehicle accessory outlet)
- 필요한 배터리: 아니요
- Units in Package: 1개 키트
Note: Specifications are approximate and subject to change without notice.
9. 보증 및 지원
Information regarding specific warranty terms and customer support for the JBM 54013 Tire Puncture Repair Kit is not provided in the available product data. Please refer to the product packaging or contact JBM CAMPLLONG, S.L.U. directly for warranty details and technical assistance.