
Pro-Ject PJ292792
Pro-Ject Debut PRO S 턴테이블 사용 설명서
모델: PJ292792
소개
This manual provides essential information for the proper setup, operation, and maintenance of your Pro-Ject Debut PRO S Turntable. Please read these instructions carefully before using your turntable to ensure optimal performance and longevity of the product.
패키지 내용
Before proceeding with setup, verify that all components are present in the packaging:
- Pro-Ject Debut PRO S Turntable Unit
- Pick it S2 C integrated cartridge/headshell
- 10" Aluminum S-Shaped Tonearm (pre-installed)
- Precision aluminum platter with TPE damp잉
- TPE-Damped Die-Cast Aluminum Record Platter
- 먼지 덮개
- 프리미엄 반대칭 포노 케이블
- 전원 공급
- 균형추
- 안티 스케이트 웨이트
- Setup tools (e.g., alignment protractor, stylus force gauge)
설정
Proper setup is crucial for the performance of your turntable. Follow these steps carefully.
1. 풀기 및 배치
Carefully remove all components from the packaging. Place the turntable on a stable, level surface, away from direct sunlight, heat sources, and vibrations. Ensure adequate ventilation around the unit.

Image: The Pro-Ject Debut PRO S Turntable, showcasing its sleek satin black finish and the S-shaped tonearm. This view highlights the overall design and footprint of the unit, important for placement considerations.
The turntable features height-adjustable TPE-damped metal feet. Adjust these feet to ensure the turntable chassis is perfectly level. This minimizes resonance and improves playback stability.

이미지: 각도가 있는 view from below the turntable, illustrating the motor suspension system and the adjustable TPE-damped metal feet. Proper adjustment of these feet is essential for leveling the turntable and isolating it from vibrations.
2. 플래터 및 벨트 설치
Carefully place the TPE-damped die-cast aluminum record platter onto the spindle. Locate the drive belt and loop it around the motor pulley and the sub-platter rim. Ensure the belt is not twisted.

Image: A schematic diagram illustrating the turntable's platter and belt drive mechanism. This visual aid helps in correctly installing the drive belt around the motor pulley and the sub-platter.
3. 톤암 및 카트리지 설치
The Debut PRO S comes with a 10" S-shaped aluminum tonearm and a Pick it S2 C integrated cartridge/headshell pre-installed. You will need to balance the tonearm and set the tracking force.
- 톤암의 균형을 맞추세요: 톤암 클램프를 부드럽게 놓으십시오.amp. While supporting the tonearm, rotate the counterweight until the tonearm floats freely and horizontally.
- 추적력 설정: Once balanced, rotate the tracking force scale ring on the counterweight to '0' without moving the counterweight itself. Then, rotate the entire counterweight counter-clockwise until the desired tracking force (typically specified by the cartridge manufacturer, usually around 1.8g for the Pick it S2 C) is indicated on the scale.
- 안티스케이트 설정: Attach the anti-skate weight to the small fishing line and loop it over the anti-skate post. The recommended setting for the Pick it S2 C cartridge is typically the second groove from the tonearm pivot.
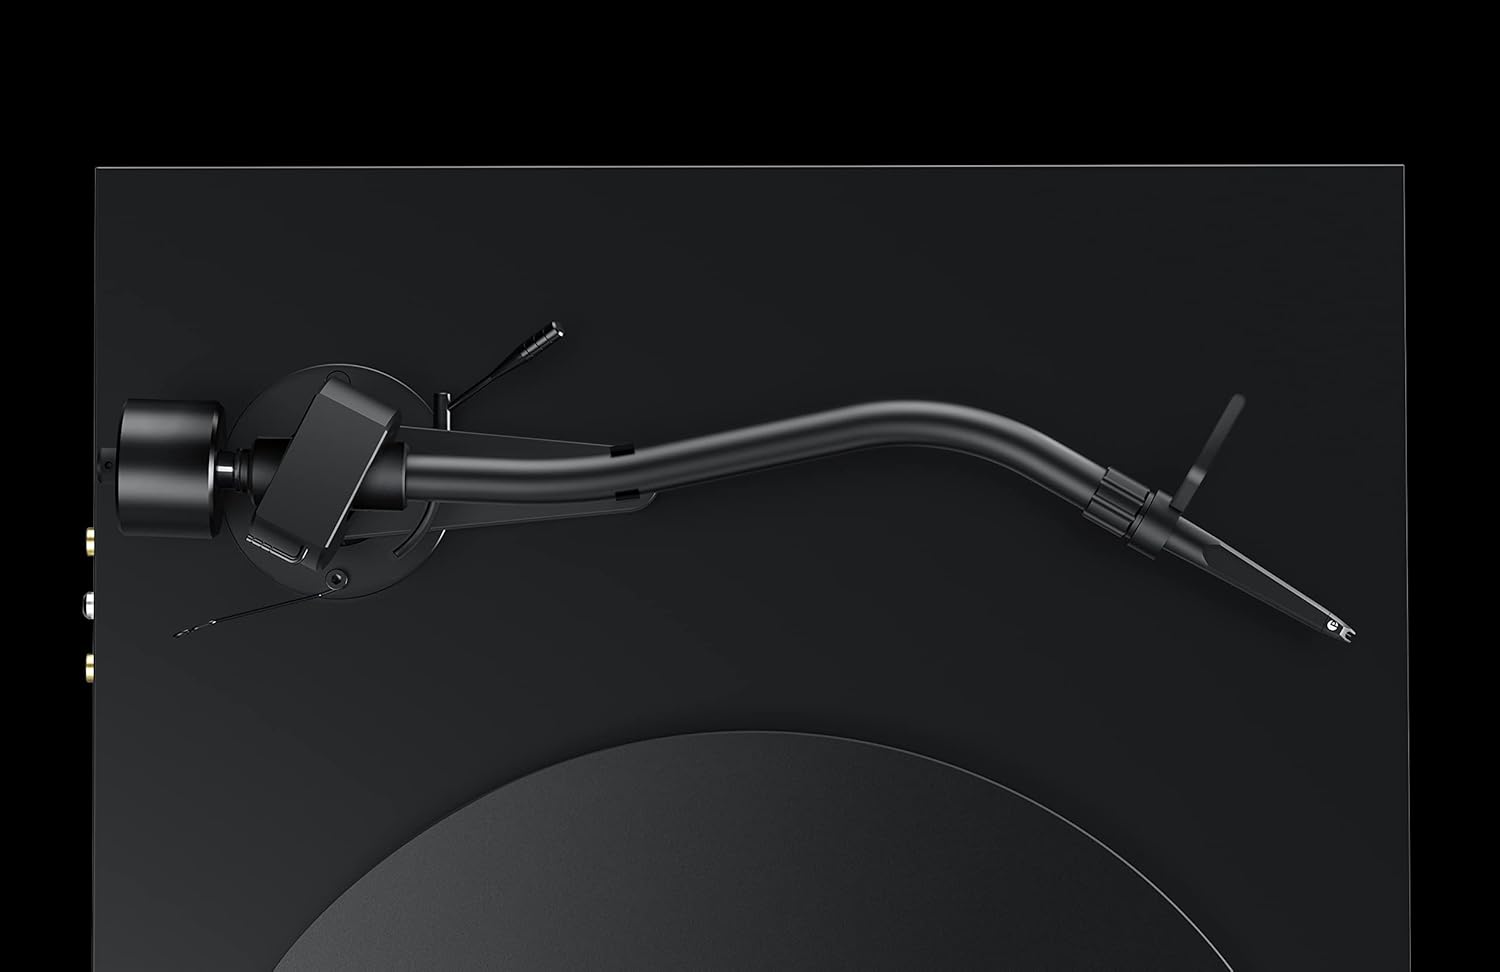
이미지: 자세한 view of the S-shaped tonearm, highlighting the counterweight and anti-skate mechanism. This image is crucial for understanding the physical components involved in balancing the tonearm and setting the tracking force.
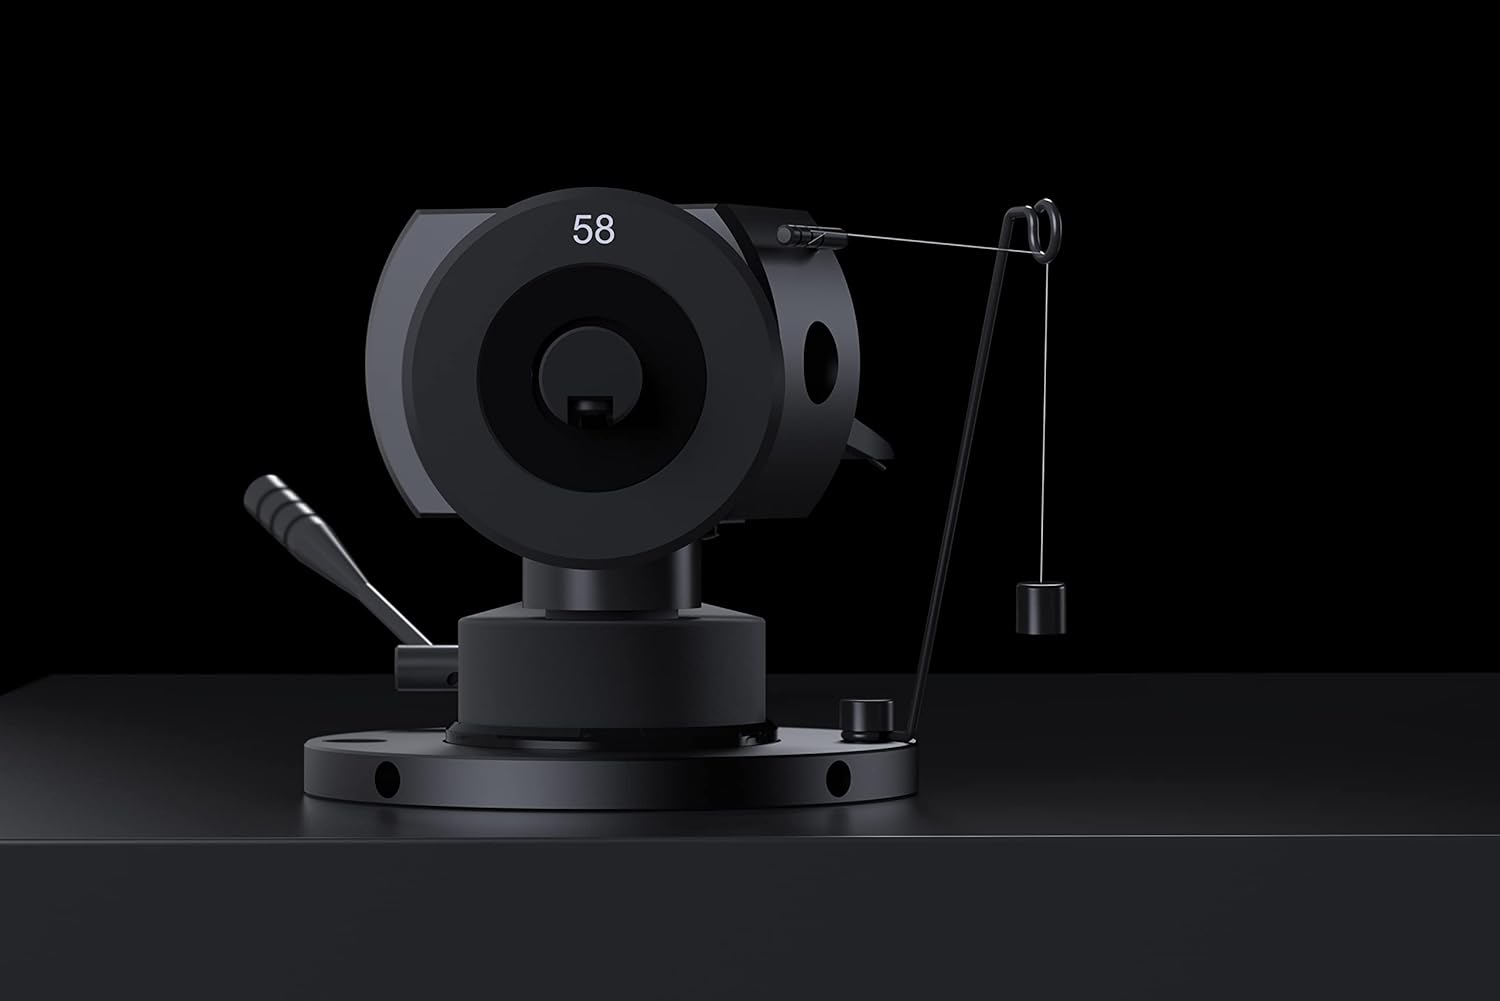
Image: A close-up of the tonearm's pivot area, clearly showing the anti-skate weight and its attachment point. This detail assists users in correctly setting the anti-skate force.
The tonearm also supports VTA (Vertical Tracking Angle) and Azimuth adjustment for fine-tuning cartridge performance. Refer to advanced setup guides if you wish to adjust these parameters.
4. 연결
Connect the premium semi-symmetrical phono cable from the turntable's RCA outputs to the phono input of your amp리파이어 또는 포노 프리amplifier. Ensure the ground wire is connected to the ground terminal on your amp험 노이즈 방지용 증폭기.
Connect the power supply to the turntable's power input and then to a suitable wall outlet.
작동 지침
Once set up, operating your Pro-Ject Debut PRO S Turntable is straightforward.
1. Powering On and Speed Selection
Locate the power switch, typically on the underside or side of the plinth. Turn the turntable on. The Debut PRO S supports multiple speeds, including 33 1/3, 45, and 78 RPM. Adjust the speed according to the record you are playing. For 78 RPM records, a special stylus may be required.

이미지: 오버헤드 view of the Pro-Ject Debut PRO S Turntable, providing a clear perspective of the platter, tonearm, and the overall layout. This angle is useful for understanding the operational components.
2. 레코드 재생
- 플래터에 레코드를 놓습니다.
- Ensure the correct playback speed is selected.
- 큐잉 레버를 사용하여 톤암을 부드럽게 들어 올리십시오.
- Position the stylus over the lead-in groove of the record.
- 큐잉 레버를 천천히 내려 스타일러스가 레코드판 위로 내려가도록 하십시오.
- At the end of the record, lift the tonearm using the cueing lever and return it to the tonearm rest. Secure it with the tonearm clamp.
유지
Regular maintenance will help preserve the performance and appearance of your turntable.
- 섀시 청소: The turntable features an 8-coat hand-painted satin black MDF chassis. Use a soft, dry, lint-free cloth to gently wipe the surface. Avoid abrasive cleaners or solvents.
- 스타일러스 청소하기: Use a dedicated stylus cleaning brush or fluid to carefully clean the stylus before or after each play. Always brush from back to front.
- Dustcover Care: The included dustcover protects the turntable from dust. Clean it with a soft, damp 천. 독한 화학 물질을 사용하지 마십시오.
- 벨트 검사: Periodically inspect the drive belt for wear or stretching. Replace if necessary to maintain accurate playback speed.
문제 해결
If you encounter issues with your turntable, refer to the following common problems and solutions.
| 문제 | 가능한 원인 | 해결책 |
|---|---|---|
| 소리가 안 나거나 아주 작게 들린다. |
|
|
| 윙윙거리는 소리 |
|
|
| 소리가 끊기거나 왜곡됨 |
|
|
| 재생 속도가 잘못되었습니다 |
|
|
명세서
| 특징 | 세부 사항 |
|---|---|
| 모델명 | 데뷔 프로 S |
| 품목 모델 번호 | 피제이292792 |
| 상표 | 프로젝트 |
| 제품 크기(L x W x H) | 13.39 x 18.11 x 5.51 인치 |
| 품목 무게 | 15.4파운드(7킬로그램) |
| Tonearm Style | S Shape Tonearm, 10" Aluminum |
| 탄약통 | Pick it S2 C integrated cartridge/headshell |
| 플래터 | Precision aluminum platter with TPE damping, TPE-Damped Die-Cast Aluminum Record Platter |
| 섀시 소재 | Engineered Wood (MDF) with 8-coat hand-painted satin black finish |
| 모터 유형 | AC Motor with motor suspension |
| 특별 기능 | VTA & Azimuth Adjustment, 78 RPM Support, Height-adjustable TPE-damped metal feet |
| 색상 | 검은색 |
| 호환 장치 | Laptop, Desktop, Personal Computer, Headphone, Speaker (via appropriate amp화) |
보증 및 지원
보증 정보: Specific warranty terms and conditions for the Pro-Ject Debut PRO S Turntable are typically provided with the product packaging or can be found on the official Pro-Ject Audio Systems web사이트. 보증 청구를 위해 구매 증빙 자료를 보관하세요.
고객 지원: For technical assistance, troubleshooting beyond this manual, or service inquiries, please contact Pro-Ject Audio Systems customer support or your authorized dealer. Contact information can usually be found on the manufacturer's web사이트 또는 제품 설명서에서.
Ask a question about this manual
Ask about setup, troubleshooting, compatibility, parts, safety, or missing instructions. Manuals+ will review the question and use this page’s manual context to help answer it.