1. 제품 오버view
The ASUS ROG Strix X670E-E Gaming WiFi motherboard is designed for AMD Ryzen 7000 Series Desktop Processors, utilizing the AM5 (LGA 1718) socket. It features robust power delivery, advanced thermal solutions, and comprehensive connectivity options to support high-performance computing.
주요 특징:
- AMD 소켓 AM5 (LGA 1718): Supports AMD Ryzen 7000 Series Desktop Processors.
- 견고한 전력 솔루션: 18 + 2 teamed power stages with 8 + 8 pin ProCool II power connectors, high-quality alloy chokes, and durable capacitors.
- 최적화된 열 설계: Large VRM heatsinks, integrated aluminum I/O cover, high-conductivity thermal pad, L-shaped heatpipe, M.2 Combo-sink, M.2 backplate for PCIe 5.0 M.2_1 slot, three onboard M.2 heatsinks, and a bundled PCIe 5.0 M.2 heatsink.
- 고성능 네트워킹: Onboard WiFi 6E, Intel 2.5 Gb Ethernet, and ASUS LANGuard.
- 지능형 제어 : ASUS-exclusive tools including AI Cooling II, Two-Way AI Noise-Cancelation, and AI Networking for easy configuration.

Image 1.1: The ASUS ROG Strix X670E-E Gaming WiFi Motherboard and its retail packaging, showcasin제품의 디자인과 브랜딩.
2. 설정 및 설치
2.1 포장 풀기 및 내용물
Before beginning installation, carefully unpack all components and verify the contents against the packing list. Ensure no items are missing or damaged.

Image 2.1: An illustration detailing the contents typically found within the product box, including the motherboard, WiFi 6E antenna, manual, ROG Strix stickers, thank you card, massive M.2 heatsink, and ROG graphics card holder.
2.2 마더보드 레이아웃 및 구성 요소
Familiarize yourself with the motherboard's layout to ensure correct component placement and cable routing.

Image 2.2: A detailed diagram highlighting the AMD AM5 Socket, 18+2 Power Stages, DDR5 DIMM slots, 4x M.2 Slots (PCIe 5.0 and 4.0), and PCIe 5.0/4.0 x16 Expansion Slots.
2.3 프로세서 설치
- CPU 소켓 레버가 열려 있는지 확인하십시오.
- Align the AMD Ryzen 7000 Series processor with the AM5 socket, matching the triangular markers.
- 힘을 주지 말고 CPU를 소켓에 조심스럽게 넣으세요.
- Close the socket lever to secure the processor.
2.4 메모리(RAM) 설치
This motherboard supports DDR5 memory modules. Refer to the motherboard manual for recommended memory configurations and slot priority.
- DIMM 슬롯 양쪽 끝에 있는 클립을 엽니다.
- 메모리 모듈을 슬롯에 맞춰서 모듈의 홈이 슬롯의 키와 일치하는지 확인합니다.
- 클립이 제자리에 고정될 때까지 메모리 모듈의 양쪽 끝을 단단히 누릅니다.
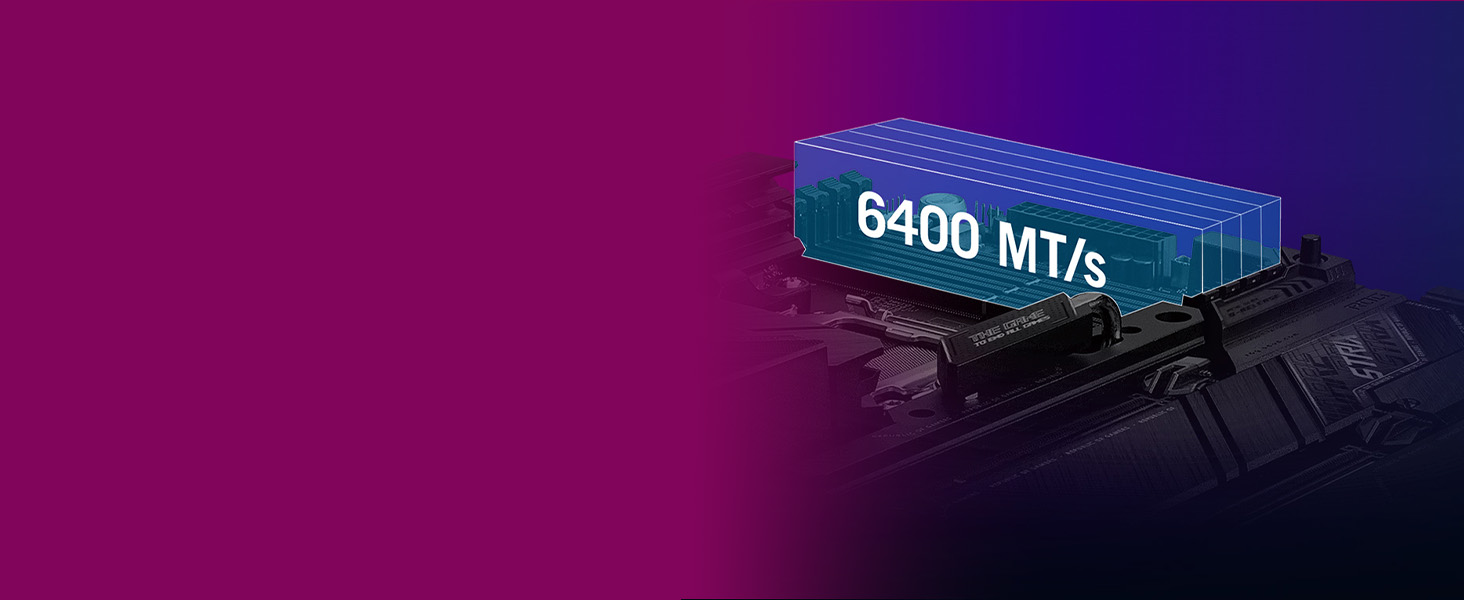
Image 2.3: An illustration demonstrating the DDR5 memory slots and their capability to support speeds up to 6400 MT/s.
2.5 저장 장치 설치 (M.2 SSD)
The motherboard features multiple M.2 slots, including PCIe 5.0 and PCIe 4.0 support. Utilize the M.2 Q-Latch mechanism for tool-less installation.
- Locate an available M.2 slot and remove any protective film or cover.
- M.2 SSD를 약간 기울여 슬롯에 삽입합니다.
- M.2 SSD가 마더보드에 완전히 밀착될 때까지 살살 눌러주세요.
- Secure the M.2 SSD using the M.2 Q-Latch by rotating it into position.
이미지 2.4: 클로즈업 view of the M.2 Q-Latch, illustrating the tool-less mechanism for securing M.2 drives.

이미지 2.5: 오버view of the M.2 slots, indicating support for various form factors (e.g., 2242, 2260, 2280, 22110).
2.6 그래픽 카드 설치
Install your graphics card into the primary PCIe 5.0 x16 slot. The PCIe Slot Q-Release button simplifies removal.
- PCIe x16 슬롯의 고정 클립을 엽니다.
- 그래픽 카드를 슬롯에 맞춰 끼우고 딸깍 소리가 나면서 제자리에 고정될 때까지 세게 누르십시오.
- Secure the card to the chassis with screws.
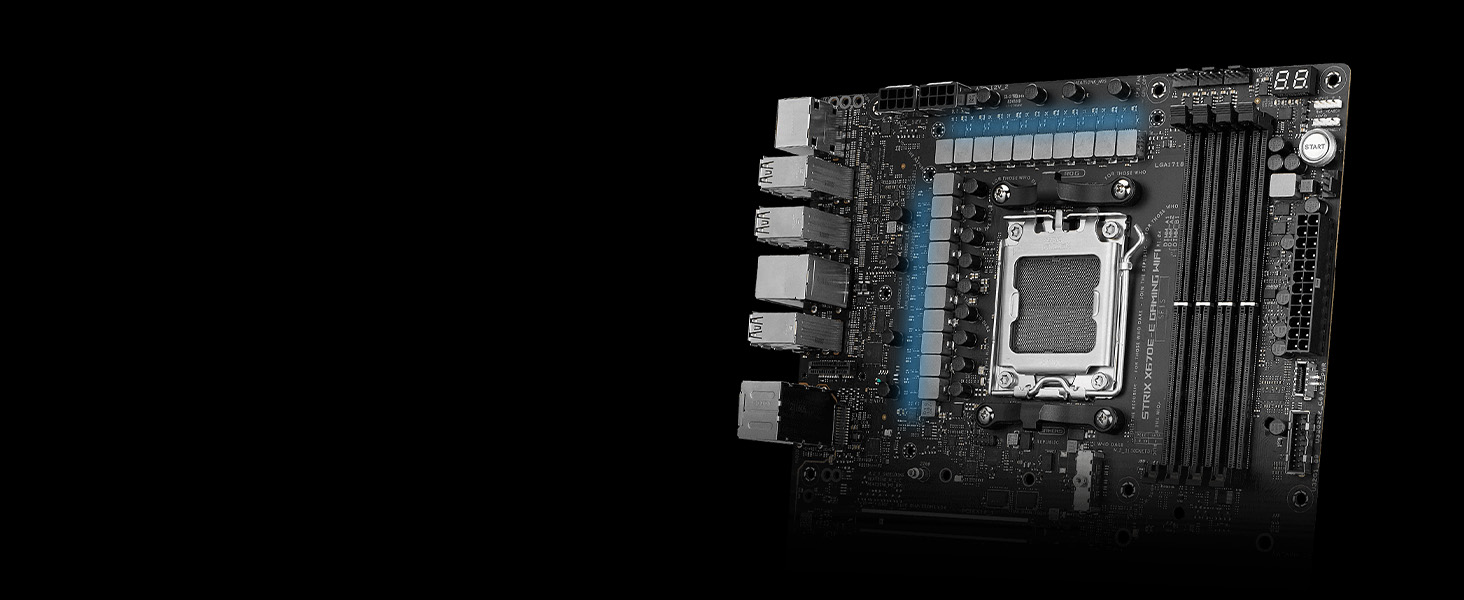
Image 2.6: A close-up of the PCIe Slot Q-Release button, designed for easy removal of graphics cards.
2.7 주변 장치 및 전원 연결
Connect all necessary power cables from your power supply unit (PSU) to the motherboard (24-pin ATX, 8-pin CPU, 8-pin CPU). Connect front panel headers, USB devices, and other peripherals.

Image 2.7: A diagram illustrating the full connectivity options, including HDMI, DisplayPort, 12x USB 3.2 Gen 2 ports, Intel 2.5 Gb Ethernet, WiFi 6E, Optical S/PDIF Out, Gold-plated Audio Jacks, USB 3.2 Gen 2x2 connectors, USB 3.2 Gen 1 headers, SATA 6Gb/s ports, USB 2.0 headers, and a Thunderbolt header.
3. 사용 설명서
3.1 초기 부팅 및 BIOS 설정
Upon first boot, the system may perform memory training, which can take several minutes. Access the BIOS/UEFI setup by pressing the 델 or F2 시작 시 키.
- AI Optimized CPU Core Ratio: The BIOS offers AI-optimized settings for CPU core ratios to enhance performance.
- 메모리 프로files: Select XMP/EXPO profiles for optimized memory performance.
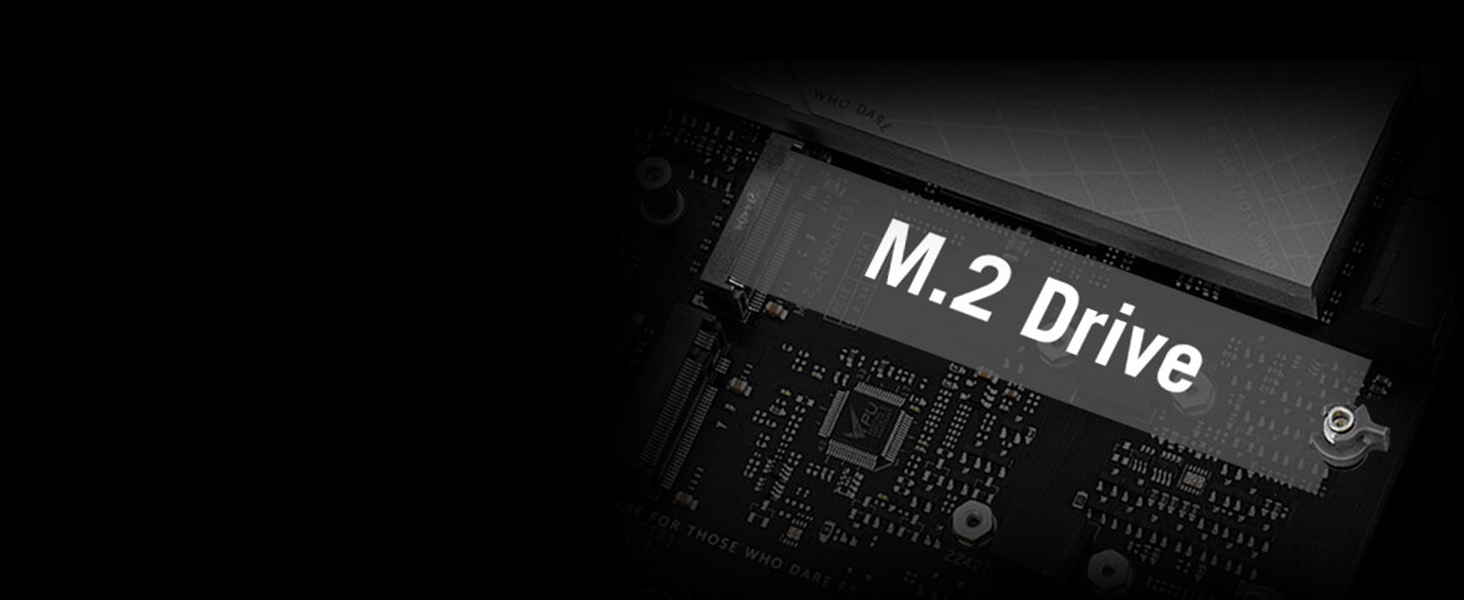
Image 3.1: A screenshot from the BIOS interface showing the option to select 'AI Optimized' for the CPU Core Ratio, allowing for intelligent performance tuning.
3.2 Intelligent Control Features
The motherboard integrates several ASUS-exclusive intelligent control features to optimize system performance and user experience.
- AI 냉각 II: Automatically balances thermals and acoustics for optimal system cooling.
- 양방향 AI 노이즈 제거: Enhances audio clarity by reducing background noise from both incoming and outgoing audio streams.
- AI 네트워킹: Optimizes network traffic for gaming and streaming.
3.3 Audio and Visual Experience
The integrated SupremeFX ALC4080 CODEC with Savitech SV3H712 AMP provides high-fidelity audio output.
- 120 dB SNR stereo playback output.
- 113 dB SNR recording input.
- SupremeFX shielding.
- Sonic Studio III + Sonic Studio Virtual Mixer + Sonic Suite Companion.
- Sonic Radar III.
- DTS® Sound Unbound™.

Image 3.2: A visual representation of the audio components and Aura Lighting zones on the motherboard, including 3x 3-pin Addressable Gen 2 RGB Headers and 1x 4-pin Aura RGB Header.
4. 유지관리
4.1 BIOS 업데이트
정기적으로 ASUS 지원을 확인하세요 website for the latest BIOS updates. BIOS updates can improve system stability, performance, and compatibility with new hardware.
- 사용하세요 BIOS 플래시백™ feature for convenient BIOS updates without a CPU or memory installed.
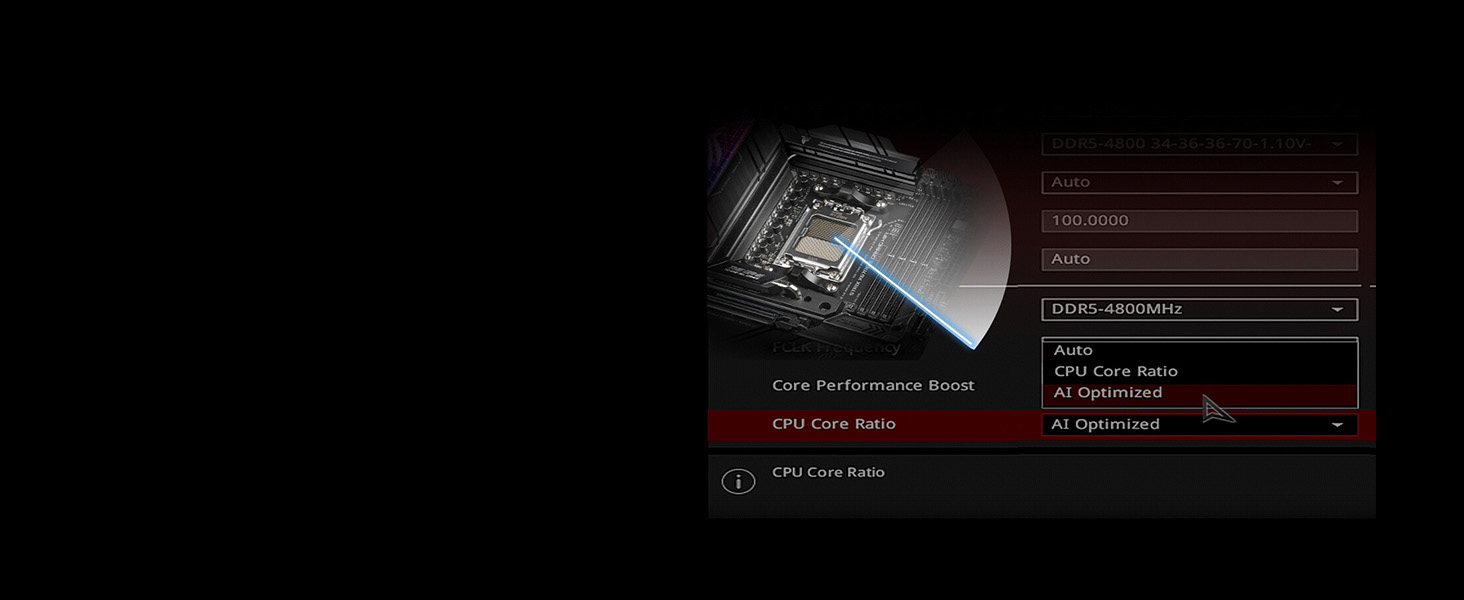
Image 4.1: A close-up of the BIOS FlashBack button located on the rear I/O panel, used for updating the BIOS.
4.2 Cleaning and Thermal Management
Keep your system clean to ensure optimal thermal performance. Dust accumulation can hinder airflow and increase component temperatures.
- Regularly clean dust from heatsinks, fans, and case filters using compressed air.
- PC 케이스 내부의 적절한 공기 흐름을 확보하십시오.

Image 4.2: A diagram illustrating the thermal control elements, including the VRM Heatsink Array, M.2 Combo-Sink, 3x M.2 Heatsinks, Chipset Heatsink, Massive M.2 Heatsink (accessory), AIO Pump Header, and 5x 4-pin PWM Chassis Fan Headers.
5. 문제 해결
5.1 Diagnostic Q-LED
The motherboard features a Q-LED (POST code display) that provides diagnostic codes during startup. These codes can help identify issues with the CPU, DRAM, VGA, or Boot device.
- Consult the motherboard manual's troubleshooting section for a list of Q-LED codes and their meanings.

Image 5.1: A close-up of the Q-LED display, showing a two-digit POST code for system diagnostics.
5.2 일반적인 문제 및 해결 방법
- No Display on Boot: Check power connections to the graphics card and monitor. Verify the graphics card is seated correctly. Observe Q-LED codes for VGA-related issues.
- 시스템 부팅 실패: Ensure all power cables are connected. Reseat RAM modules. Check Q-LED for CPU or DRAM errors.
- Memory Instability: If experiencing crashes or instability with XMP/EXPO profiles, try running memory at default speeds or update the BIOS. Some memory kits may require specific BIOS versions for optimal stability.
- 운영 체제 호환성: Ensure your chosen operating system has full driver support for the AMD X670E chipset and integrated components. Check the ASUS support web드라이버 다운로드 사이트.
6. 사양
Detailed technical specifications for the ASUS ROG Strix X670E-E Gaming WiFi Motherboard.
| 특징 | 사양 |
|---|---|
| 상표 | 아수스 |
| 모델명 | ROG STRIX X670E-E 게이밍 와이파이 |
| CPU 소켓 | LGA 1718 (AM5) |
| 호환 프로세서 | AMD Ryzen 7000 시리즈 데스크탑 프로세서 |
| 칩셋 유형 | AMD X670E |
| RAM 메모리 기술 | DDR5 |
| 메모리 클럭 속도 | 최대 6400MHz(OC) |
| 그래픽 코프로세서 | NVIDIA GeForce RTX 3050 (Note: This refers to a compatible GPU, not integrated graphics) |
| 무선형 | 802.11a/b/g/n/ac, 802.11ax(WiFi 6E) |
| 이더넷 | 인텔 2.5Gb 이더넷 |
| 제품 크기(LxWxH) | 10.8 x 3.1 x 13.5 인치 |
| 품목 무게 | 4.3파운드 |
| 운영 체제 호환성 | Windows 11 Pro, Windows 10 |
7. 보증 및 지원
7.1 보증 정보
ASUS products typically come with a limited manufacturer's warranty. Please refer to the warranty card included with your product or visit the official ASUS web해당 지역 및 제품 모델에 대한 자세한 보증 약관 및 조건은 해당 사이트에서 확인하세요.
7.2 기술 지원
기술 지원, 드라이버 다운로드, BIOS 업데이트 및 추가 제품 정보는 공식 ASUS 지원 센터를 방문하세요. web사이트에서 FAQ, 문제 해결 가이드, 고객 서비스 연락처 정보를 확인하실 수 있습니다.
ASUS 지원 Web대지: https://www.asus.com/support/