1. 서론
Thank you for choosing the WORKPRO 6-inch 1080W Dual Action Random Orbital Polisher. This manual provides essential information for the safe and effective operation, maintenance, and troubleshooting of your new polisher. Please read this manual thoroughly before first use and keep it for future reference. This tool is designed for various polishing and waxing applications, including car detailing, floor polishing, and metal polishing.
2. 안전 정보
화재, 감전, 신체 상해의 위험을 줄이려면 전기 제품을 사용할 때 항상 기본적인 안전 예방 조치를 따르세요.
- 안전 안경과 장갑 등 적절한 개인 보호 장비를 착용하세요.
- 작업 공간이 깨끗하고, 조명이 밝으며, 방해물이 없는지 확인하세요.
- Do not operate the polisher in damp 또는 습한 환경.
- 공구를 작동하는 동안 어린이와 구경꾼이 접근하지 못하도록 하십시오.
- Unplug the polisher from the power source before making any adjustments, changing accessories, or performing maintenance.
- Do not force the tool; use the correct speed and pressure for the application.
- 매번 사용하기 전에 전원 코드에 손상이 있는지 검사하십시오.
3. 패키지 내용
아래 나열된 모든 품목이 패키지에 포함되어 있는지 확인하세요. 품목이 누락되었거나 손상된 경우 고객 지원팀에 문의하세요.
- 1 × Polisher Machine
- 1 × Auxiliary Handle
- 1 × Backing Pad
- 1 × Woolen Buffer Pad
- 6 × Foam Pads (various types for different applications)
- 2 × Replaceable Carbon Brushes
- 1 × Hex Key
- 3 × Hex Head Bolts
- 1 × Towel

그림 3.1: 포함된 구성 요소
4. 제품 특징
The WORKPRO Buffer Polisher is engineered for efficiency and user comfort.
- 6 Variable Speed Control: Adjust speeds from 1400-5000 RPM to match project requirements, allowing for precise control during waxing and polishing.

Figure 4.1: Polisher Components Overview
- 고성능 모터: 9 장착 amp, 1080 watt motor and 15mm dual action orbital motion for powerful and efficient operation. Heat-resistant copper wire ensures longer working time.

Figure 4.2: High-Performance Motor
- 인체공학적 디자인: Features a comfortable grip hood and an auxiliary handle for non-slip control. The switch-locking mechanism reduces hand fatigue during extended use.

그림 4.3: 인체공학적 디자인
- Dual Action Orbital Motion: Provides high security and allows for polishing without glare, ensuring a smooth and even finish.

Figure 4.4: Dual Action Mechanism
5. 설정
- 보조 핸들을 부착하세요: Secure the auxiliary handle to the polisher using the provided hex head bolts and hex key. Ensure it is firmly tightened for safe operation.
- Install the Backing Pad: Align the backing pad with the spindle on the polisher and screw it on securely.
- Attach Polishing Pads: The foam pads and woolen buffer pad attach to the backing pad via hook-and-loop fasteners. Select the appropriate pad for your task (e.g., foam pads for compounding/polishing, woolen pad for buffing).
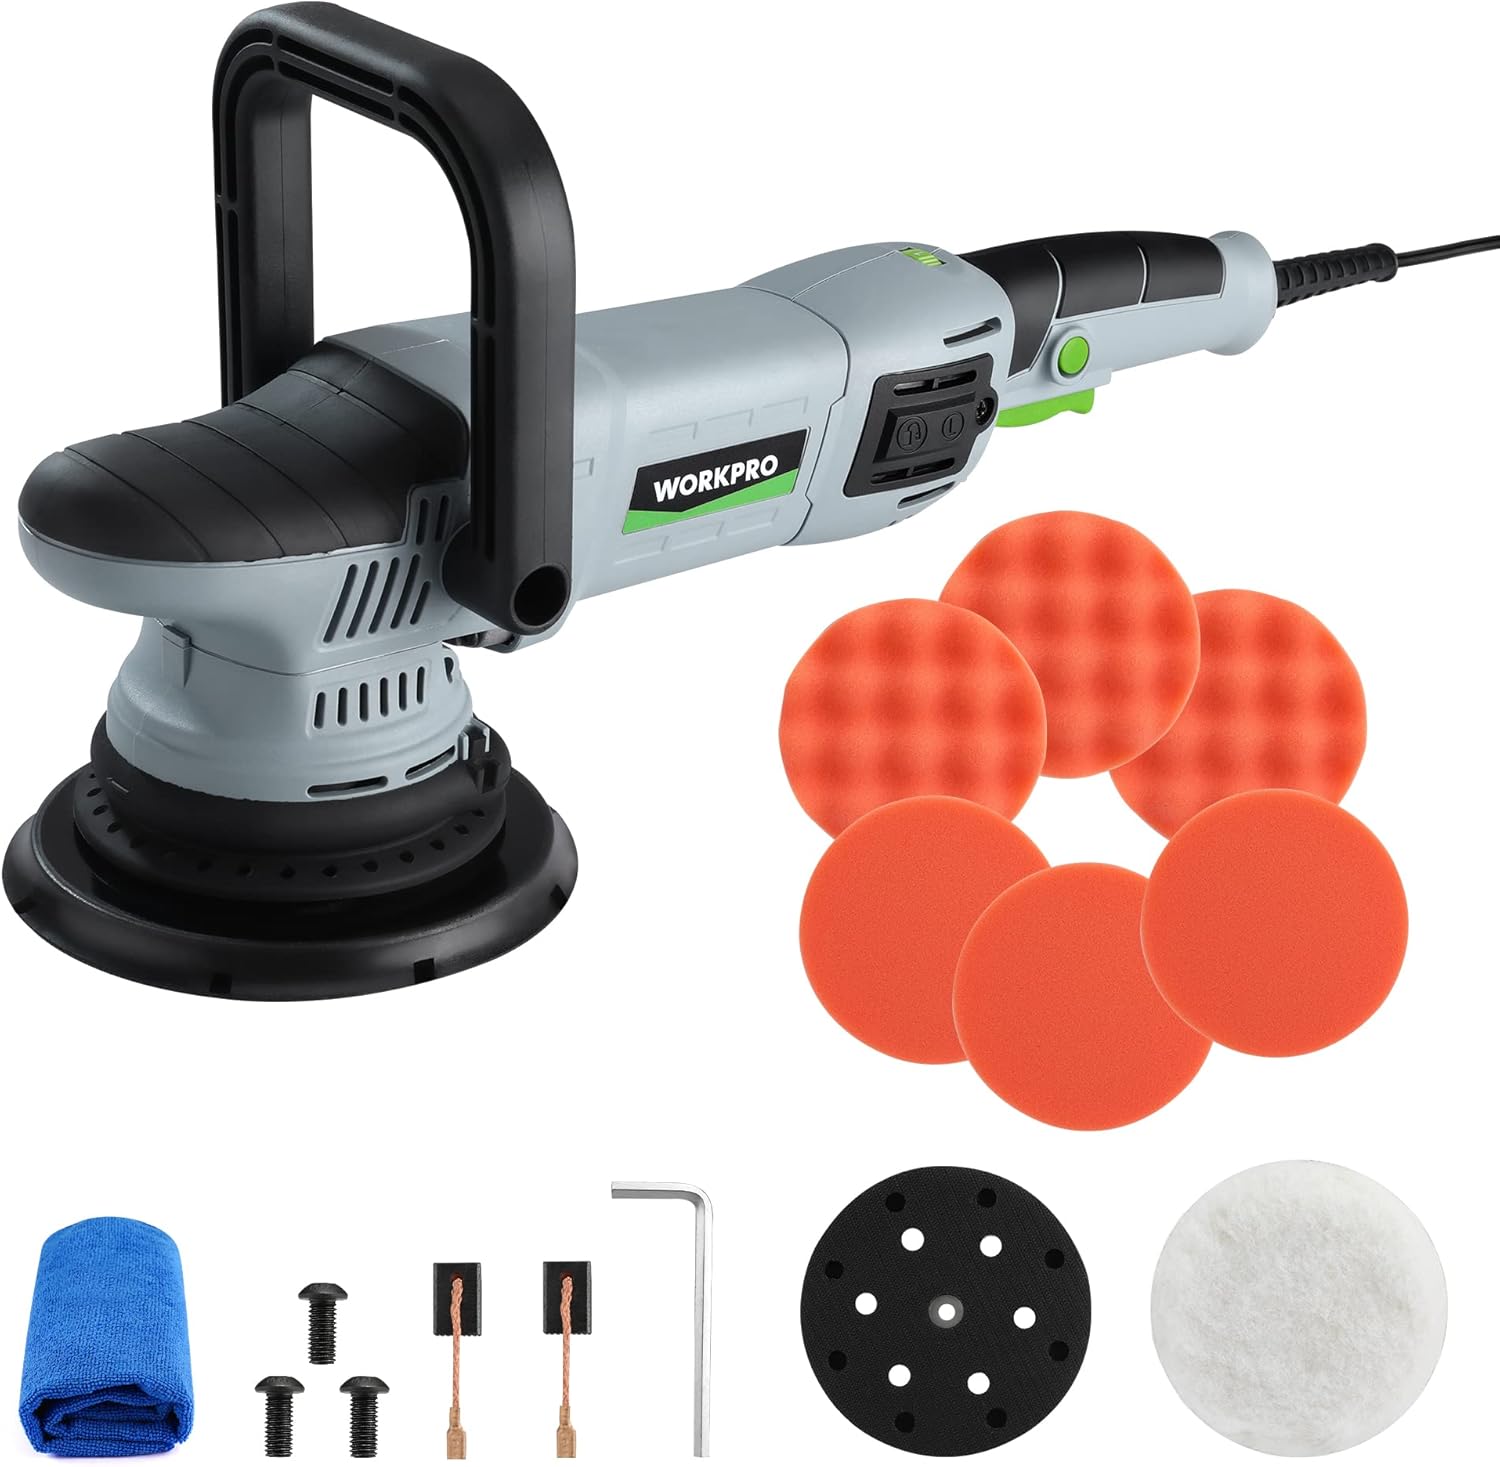
Figure 5.1: Polisher Setup
6. 사용 설명서
This section details the proper use of your WORKPRO Buffer Polisher for various applications.
- 전원 켜기/끄기: Plug the polisher into a suitable power outlet. Press the On/Off trigger to start the tool.
- Using the Switch Locking Mechanism: For continuous operation, press the lock button located near the trigger after starting the polisher. This will keep the tool running without needing to hold the trigger. Press the trigger again to release the lock and stop the tool.

Figure 6.1: Trigger and Lock Button
- 속도 조정: Use the 6-variable speed adjustor dial to select the desired RPM (1400-5000 RPM). Lower speeds are generally used for waxing and spreading compounds, while higher speeds are for polishing and buffing.

Figure 6.2: Speed Adjustor Dial
- 신청 방법: The polisher can be used with either the auxiliary handle for two-handed control or by gripping the main body for single-handed operation, depending on the task and user preference.

그림 6.3: 다양한 제어 방법
- 일반적인 사용: Apply a small amount of compound or wax directly to the pad or the surface. Start the polisher at a low speed to spread the product, then increase speed as needed for polishing or buffing. Maintain even pressure and move the polisher in overlapping passes.

그림 6.4: 광범위한 응용 분야
Video 6.1: WORKPRO Dual Action Buffer Polisher Kit in action, demonstrating variable speed control, switch locking mechanism, and various polishing applications on cars, tiles, and wood.
7. 유지관리
정기적인 유지 관리는 광택기의 수명과 최적의 성능을 보장합니다.
- 청소: After each use, wipe down the polisher with a clean, dry cloth. Remove any residue from the backing pad and ensure ventilation slots are clear.

Figure 7.1: Ventilation Slots
- 카본 브러시 교체: The carbon brushes are wear items and will need periodic replacement. When the tool's performance decreases or it stops working, check the carbon brushes. To replace, unscrew the carbon brush covers on the side of the motor housing, remove the old brushes, and insert new ones. Ensure the brushes are seated correctly before replacing the covers.

Figure 7.2: Carbon Brush Replacement
- 패드 관리: Clean polishing pads thoroughly after each use to remove product residue. This prolongs their life and maintains polishing effectiveness.
8. 문제 해결
| 문제 | 가능한 원인 | 해결책 |
|---|---|---|
| 광택기가 작동하지 않습니다. | 전원 공급 불량; 코드 손상; 카본 브러시 마모. | 전원 연결 상태를 확인하고, 전원 코드의 손상 여부를 점검하고, 카본 브러시를 교체하십시오. |
| Reduced power or erratic operation. | Worn carbon brushes; motor overheating; excessive pressure. | Replace carbon brushes; allow tool to cool; reduce pressure. |
| 과도한 진동이나 소음. | Loose backing pad; damaged pad; internal component issue. | Tighten backing pad; replace damaged pad; contact customer support. |
| 연마 결과가 좋지 않습니다. | Incorrect pad type; insufficient product; improper technique. | Use appropriate pad; apply sufficient product; review 작동 지침. |
9. 사양
| 기인하다 | 값 |
|---|---|
| 모델 번호 | W125163AE |
| 전원 | 코드식 전기 |
| 권tage | 12 볼트 |
| Amp에라 지 | 9 Amps |
| 왓tage | 1080 와트 |
| 속도 | 1400-5000 RPM(가변) |
| 품목 무게 | 7.41파운드(3.37킬로그램) |
| 패키지 크기 | 16.97 x 7.6 x 6.69 인치 |
| 재료 | 금속, 플라스틱 |
| 색상 | 회색, 검정색 |
10. 보증 및 지원
WORKPRO products are manufactured to high-quality standards. For specific warranty details, please refer to the warranty card included with your product or visit the official WORKPRO web대지.
For technical support, replacement parts, or any inquiries regarding your WORKPRO Buffer Polisher, please contact WORKPRO customer service. Contact information can typically be found on the product packaging or the official WORKPRO web대지.
You can also visit the WORKPRO Store on Amazon for more information and products: WORKPRO Amazon Store.