
소개
This manual provides detailed instructions for the setup, operation, and maintenance of your Dcorn DMR-07 7-inch HDMI Digital Microscope. Designed for a wide range of applications, from coin inspection to circuit board repair, this microscope offers up to 1300X magnification and a 16MP camera for clear, detailed viewing. Please read this manual thoroughly before using the device to ensure proper functionality and longevity.
패키지 내용
아래 나열된 모든 품목이 패키지에 포함되어 있는지 확인하세요.
- 7-inch LCD Display Microscope
- 금속베이스
- 금속 스탠드
- 3 Guidebooks (e.g., A Guide to Coin Collection, How to Solder)
- 무선 원격 제어
- HDMI 케이블
- 32GB TF 카드
- 라이트 배리어
- 선물 상자
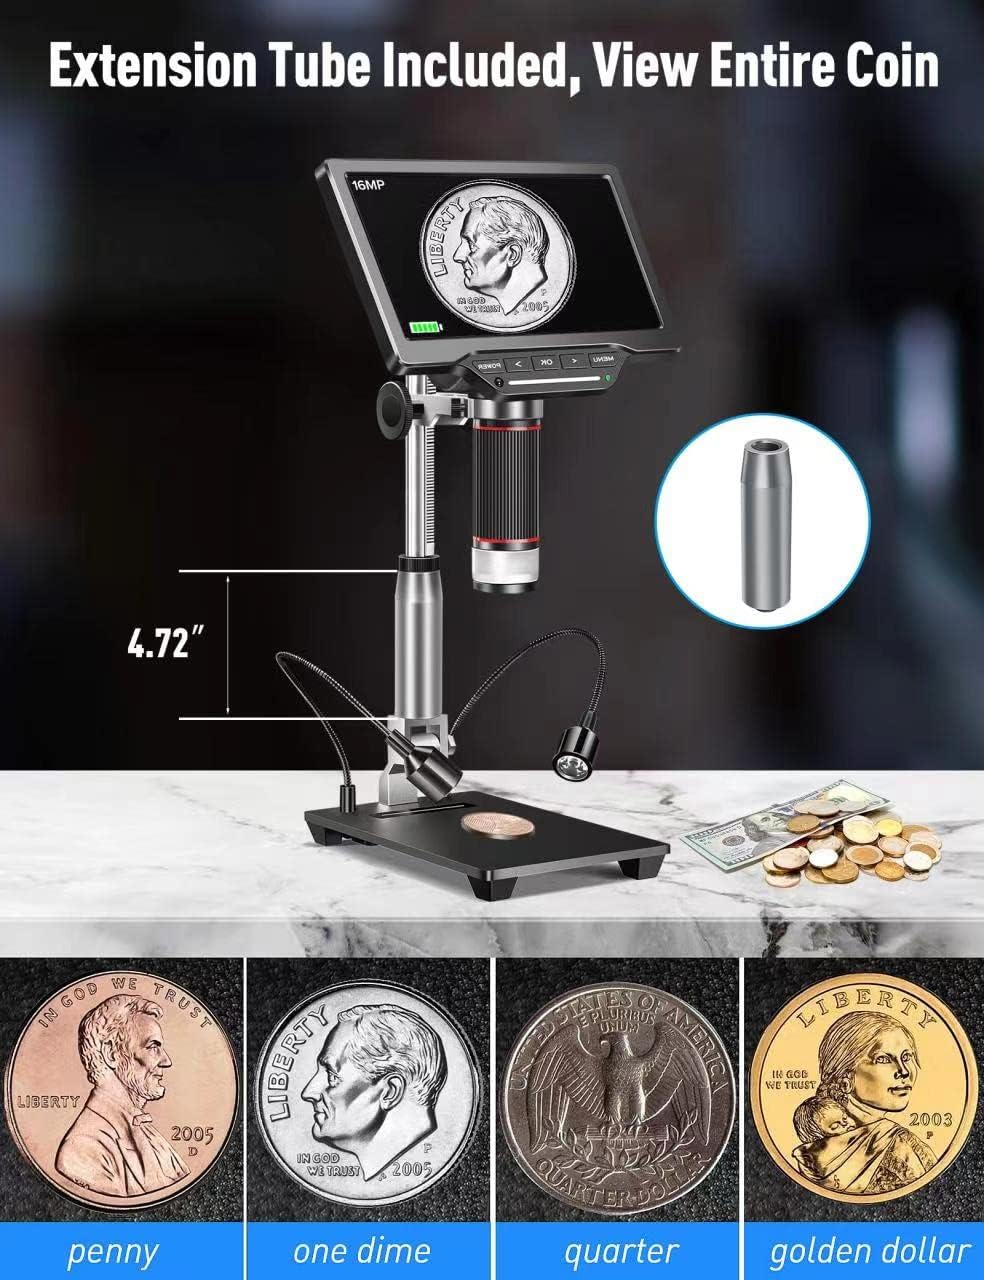
- Extension Tube (4.7 inches)
- 충전기
- 사용 설명서 (본 문서)

설정
1. Assembling the Stand and Microscope
- Attach the metal stand to the metal base. Secure it firmly using the provided knob.
- Mount the microscope unit onto the adjustable bracket on the metal stand. Ensure it is securely fastened.
- If extended working distance is required, insert the 4.7-inch extension tube between the microscope lens and the main body. This allows for a wider field of view, ideal for observing entire coins.
2. Connecting External LED Lights
The two external LED lights provide additional illumination for your specimens. Connect the Type-C end of the light cables to the USB output ports on the microscope base.
3. 전원 켜기
Connect the power adapter to the microscope and a power outlet. Press the 'POWER' button on the microscope to turn it on. The 7-inch LCD display will illuminate.
4. Video: How to Install
동영상 1 : A step-by-step guide demonstrating the physical assembly of the Dcorn DMR-07 Digital Microscope, including attaching the stand, microscope unit, and optional extension tube.
작동 지침
1. 기본 Viewing 및 집중
- Place the specimen on the observation platform.
- Adjust the height of the microscope unit using the knob on the stand until the specimen appears on the screen.
- Rotate the focus wheel on the microscope body to achieve a clear and sharp image.

2. LED 조명 조정
The microscope features built-in LEDs and two adjustable side lights. The side lights are controlled via touch-sensitive areas on the base.
- 내장 LED: These provide primary illumination.
- 측면 조명: Touch the designated areas on the base to turn the side lights on/off and adjust their brightness. These are useful for reducing glare and enhancing contrast on reflective surfaces.
3. Video: 10 LEDs - Touch Control
동영상 2 : Demonstration of the touch-controlled 10 LED lighting system on the Dcorn DMR-07 Digital Microscope.
4. 사진 및 비디오 촬영
The microscope supports capturing still images and recording video footage directly to the included 32GB TF card.
- Use the 'OK' button on the microscope or the corresponding button on the wireless remote control to capture a photo or start/stop video recording.
- Navigate through the menu using the arrow buttons to select photo/video mode and adjust settings like resolution.


5. Connecting to PC and TV
The microscope offers HDMI and USB output for viewing on larger screens.
- HDMI 출력: Connect the provided HDMI cable from the microscope's HD port to an HDMI input on a TV or monitor. This provides a direct, high-quality display.
- USB 출력: Connect the provided USB cable from the microscope's USB port to a computer. The microscope can function as a UVC (USB Video Class) device, allowing you to view the live feed using standard camera software on your computer (Windows/Mac compatible).

6. Video: How to Connect to a PC
동영상 3 : A guide demonstrating how to connect the Dcorn DMR-07 Digital Microscope to a PC and view 라이브 피드.
유지
- 렌즈 청소: Use the provided cleaning cloth or a soft, lint-free cloth to gently wipe the lens. For stubborn smudges, use a lens cleaning solution designed for optical devices.
- 화면 청소: Wipe the LCD screen with a soft, dry cloth. Avoid using abrasive cleaners or solvents.
- 일반 관리 : Keep the microscope in a clean, dry environment. Avoid exposing it to extreme temperatures, humidity, or direct sunlight. When not in use, store it in its original packaging or a protective case.
문제 해결
- 전원 없음: Ensure the power adapter is securely connected to both the microscope and a working power outlet. Check if the power button is pressed.
- 흐릿한 이미지: Adjust the focus wheel on the microscope body. Ensure the specimen is within the working distance of the lens. Clean the lens if necessary.
- No Image on External Display (HDMI/USB): Verify that the cables are correctly connected. For USB connection, ensure appropriate camera software is running on your computer and the microscope is selected as the input device.
- 불이 작동하지 않음: Check the connections of the external LED lights to the base. For touch-controlled lights, ensure you are touching the correct activation area.
- Cannot Capture Photos/Videos: Ensure the 32GB TF card is properly inserted and has sufficient free space. Check the menu settings to confirm the correct mode is selected.
명세서
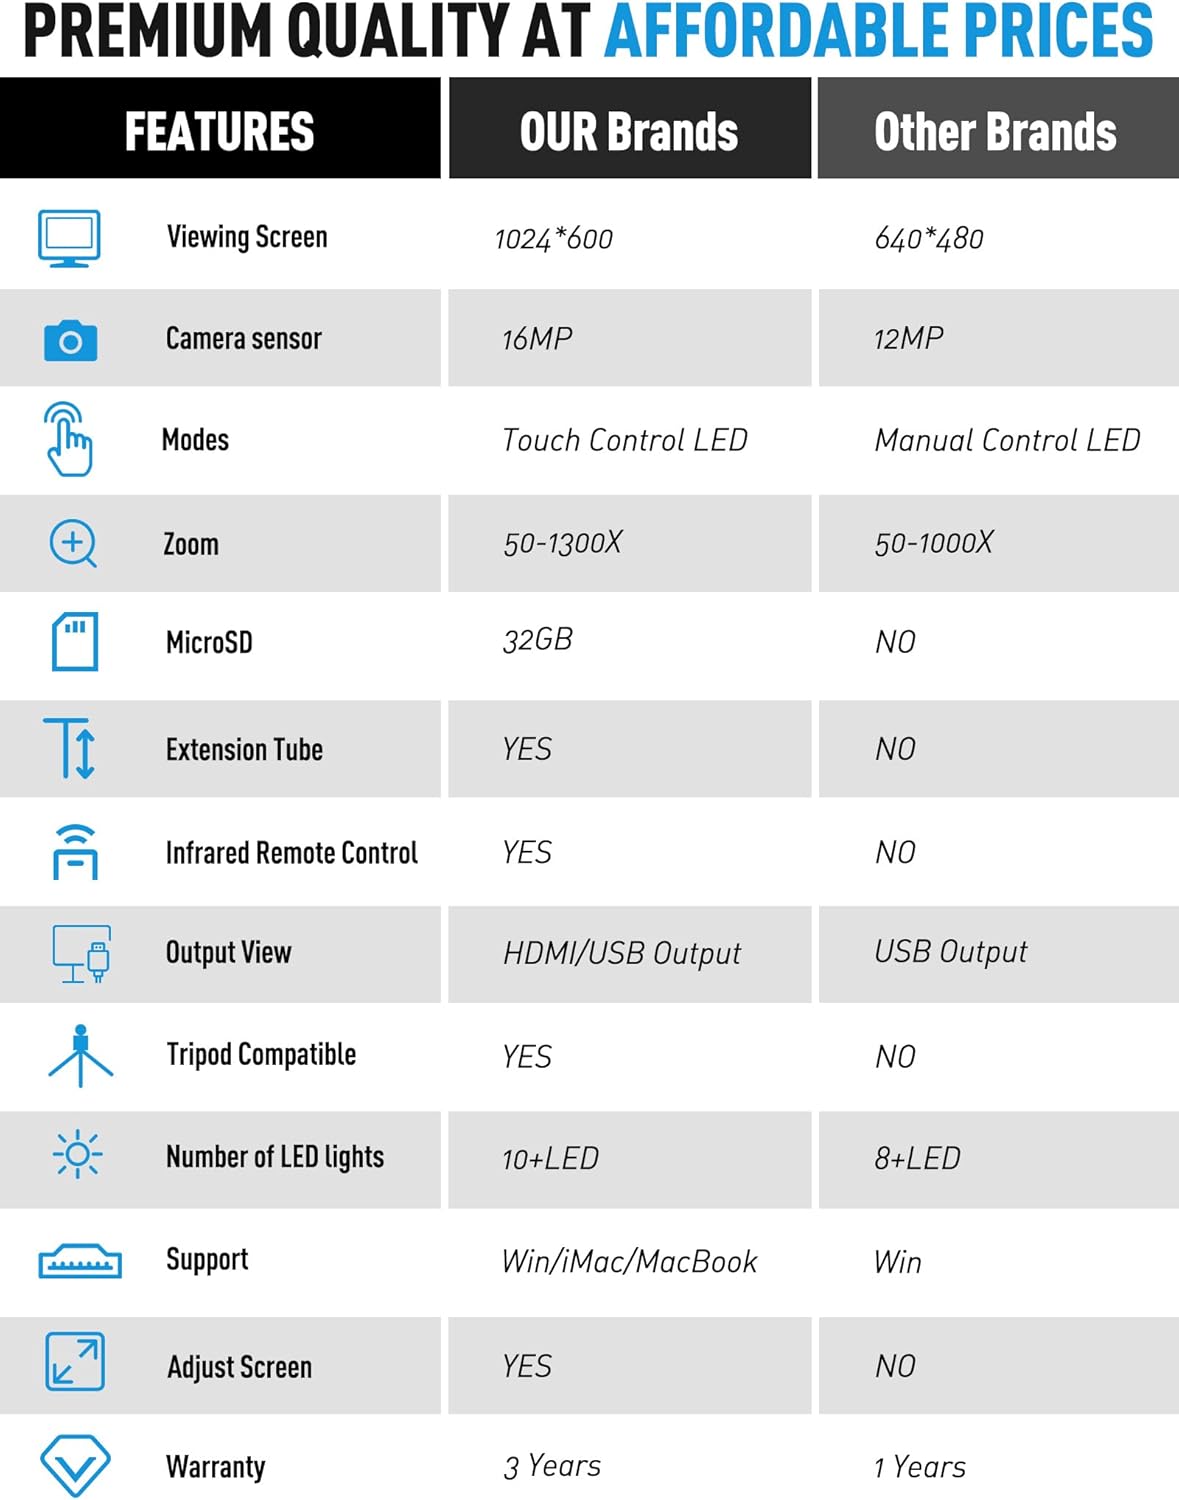
| 특징 | 사양 |
|---|---|
| 모델 | DMR-07 |
| 디스플레이 크기 | 7인치 LCD |
| 카메라 센서 | 16MP |
| 확대 | 최대 1300배 |
| 광원 | LED (Built-in & Touch Control Side Lights) |
| 산출 | HDMI, USB |
| 저장 | MicroSD (32GB TF card included) |
| 연장 튜브 | 4.7-inch included |
| 원격 제어 | Wireless Infrared Remote Control |
| 호환 장치 | 노트북, 개인용 컴퓨터, 텔레비전 |
| 운영 체제 지원 | 윈도우, 맥 |
| 색상 | 은 |
| 품목 무게 | 4.46파운드 |
| 패키지 크기 | 11.18 x 10.94 x 3.86 인치 |
보증 정보
The Dcorn DMR-07 Digital Microscope comes with a 3년 보증 구매일로부터 유효합니다. 본 보증은 제조상의 결함을 보증하며, 제품이 명시된 성능 기준을 충족함을 보장합니다. 보증 청구를 위해 구매 증빙 자료를 보관해 주십시오.
고객 지원
For any questions, technical assistance, or support regarding your Dcorn DMR-07 Digital Microscope, please contact our customer support team:
이메일: support@dcornus.com