
소개
Thank you for choosing the Schellenberg ACTION Mosquito Screen Door. This product is designed to provide reliable protection against insects for your balcony or terrace doors. It features a robust aluminum frame, high-quality fiberglass mesh, and a comprehensive installation kit. Please read this manual carefully before assembly and use to ensure proper installation and long-lasting performance.
안전 정보
- 조립 과정에서는 항상 장갑과 보안경과 같은 적절한 안전 장비를 착용하십시오.
- 질식 위험을 방지하려면 작은 부품을 어린이의 손이 닿지 않는 곳에 보관하십시오.
- Ensure all screws and fasteners are securely tightened to prevent the door from becoming unstable.
- If shortening profiles, use appropriate tools and take precautions to avoid injury.
- Do not hang or apply excessive force to the assembled screen door.
- Verify the installation depth (14 mm) if installing behind a roller shutter to ensure proper clearance.
패키지 내용
조립을 시작하기 전에 모든 구성 요소가 있는지 확인하세요.
- 2 x Aluminum frame profile초(95cm)
- 4 x Aluminum frame profile초(101cm)
- 1 x Central step profile (95cm)
- 2 x Central step connectors
- 1 x Cap for central step connectors
- 4 x Corner connectors
- 4 x Caps for corner connectors
- 1 x Fiberglass mesh fabric
- 1 x Handle (interior)
- 1 x Handle (exterior)
- 8 x Impact tubes
- 1 x Brush seal
- 3 x 힌지
- 2 x Neodymium magnets
- 2 x Magnetic counter plates
- 12 x Screws for hinges
- 4 x Screws for magnetic plate
- 1 x 조립 설명서 (본 설명서)
설정 및 조립
Follow these steps to assemble and install your Schellenberg ACTION Mosquito Screen Door. Ensure you have all components listed in the "Package Contents" section before starting.
Step 1: Prepare the Frame Profiles
Unpack all aluminum frame profiles. If your door opening is smaller than 100 x 210 cm, you may need to shorten the profiles to fit your specific dimensions. Measure carefully and cut the profiles to the required length using appropriate tools. Ensure clean cuts for proper assembly.

Image: Reference diagram for door dimensions (100 cm x 210 cm). Adjust profiles if your opening is smaller.
2단계: 프레임 조립
Connect the aluminum frame profiles using the provided corner connectors and central step connectors. The system uses a 플러그인 메커니즘 for easy assembly. Ensure all connections are secure and form a rigid rectangular frame.
Step 3: Install the Fiberglass Mesh
Lay the assembled frame on a clean, flat surface. Carefully unroll the fiberglass mesh over the frame, ensuring it is taut and evenly distributed. Secure the mesh into the frame's groove using the provided impact tubes (spline) and a spline roller or similar tool. Trim any excess mesh with a utility knife once secured.
Step 4: Attach Hinges and Handles
Attach the three hinges to one side of the assembled screen door frame using the hinge screws. Position them evenly along the frame's height. Install the interior and exterior handles on the opposite side of the frame.

Image: Detail of a hinge attachment point on the screen door frame.

Image: Detail of the handle installed on the screen door.
Step 5: Integrate Brush Seal and Magnets
통합된 brush seal should be positioned along the edges of the frame to prevent small insects from entering. Install the neodymium magnets and their corresponding magnetic counter plates. The magnets are designed to be integrated into the frame for a clean, invisible finish, ensuring the door remains securely closed.
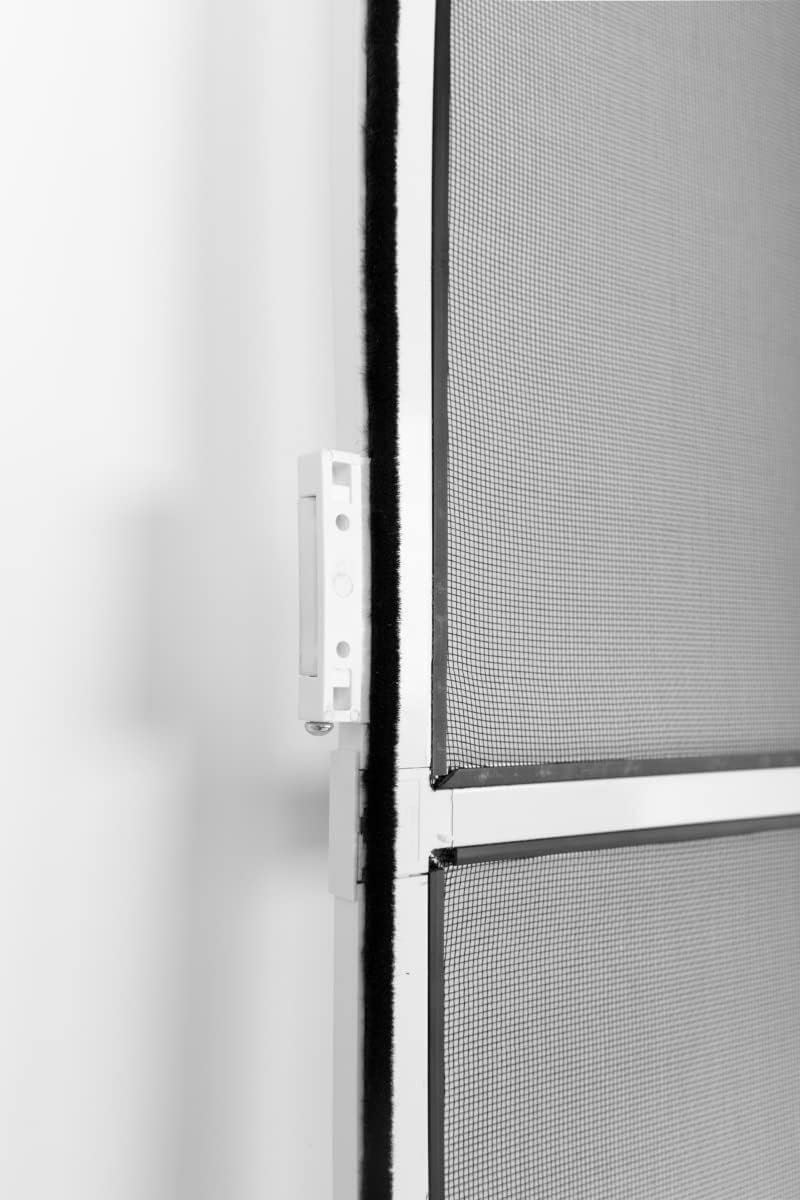
영상: View of the brush seal and the integrated magnet mechanism.
Step 6: Mount the Door
Position the assembled screen door against your existing door frame. Screw the screen door to the window/door frame using the three hinges. Alternatively, if you have a Schellenberg mounting frame, attach it there. Ensure the door swings freely and closes properly with the magnetic latch. If installing behind a roller shutter, confirm the installation depth of 14 mm is sufficient to avoid obstruction.
작동 지침
To open the mosquito screen door, gently pull the handle. The integrated neodymium magnet will release, allowing the door to swing open. To close, simply push the door shut until the magnet engages, securing it in place.
유지
- 메시 청소: Periodically clean the fiberglass mesh with a soft brush or a damp cloth to remove dust and debris. Avoid harsh chemicals that could damage the material.
- 프레임 세척: 알루미늄 프레임을 광고로 닦으세요amp 천과 순한 세제. 완전히 말리세요.
- Hinge and Magnet Check: Regularly inspect hinges for smooth operation and ensure all screws remain tight. Check the magnetic latch for proper function.
- Brush Seal: Ensure the brush seal is free of debris and remains intact for optimal insect protection.
문제 해결
| 문제 | 가능한 원인 | 해결책 |
|---|---|---|
| 문이 제대로 닫히지 않습니다. | Weak magnet engagement or misalignment. | Check that the neodymium magnets and magnetic counter plates are correctly aligned and securely installed. Adjust their position if necessary. Ensure the door frame is square. |
| 조립 시 어려움이 있습니다. | Incorrect profile cutting or improper connection. | Double-check all measurements before cutting profiles. Ensure plug-in connections are fully engaged. Refer to the assembly steps carefully. |
| 도착 시 부품이 누락되었거나 손상된 경우. | 포장 손상 또는 제조 오류. | Immediately contact Schellenberg customer support or your retailer with proof of purchase and details of the missing/damaged items. Do not attempt to assemble with missing critical components. |
| Door feels unstable or wobbly. | Loose screws or improper frame assembly. | Verify all frame connections are tight. Ensure hinges are securely fastened to both the screen door and the main door frame. |
명세서
| 상표 | Schellenberg |
| 모델 번호 | 70930 |
| 제품 이름 | ACTION Mosquito Screen Door |
| 색상 | 하얀색 |
| 재료 | Aluminum (Frame), Fiberglass (Mesh) |
| 치수(최대) | 100cm(폭) x 210cm(높이) |
| 제품 무게 | 2.03 킬로그램 |
| 조립이 필요합니다 | 예 |
| 설치 깊이 | 14 mm (behind roller shutters) |
| 원산지 | 중국 |
보증 및 지원
보증 정보
Specific warranty details for the Schellenberg ACTION Mosquito Screen Door may vary by region and retailer. Please refer to your purchase documentation or contact your point of sale for information regarding warranty coverage.
고객 지원
For technical assistance, missing parts, or further inquiries, please contact Schellenberg customer support through their official website or the retailer from whom you purchased the product. Have your model number (70930) and proof of purchase ready when contacting support.