
1. 중요한 안전 정보
Read and understand all instructions and safety warnings before assembling, operating, or servicing this appliance. Failure to follow these instructions could result in fire, explosion, property damage, personal injury, or death.
- 실외용: Never operate this appliance indoors or in an enclosed area.
- PROPANE GAS WARNING: This appliance uses propane gas. Ensure proper ventilation and never store propane cylinders indoors.
- 가연성 물질에 대한 허가: Maintain adequate clearance from combustible materials. Refer to local codes and regulations.
- CSA CERTIFIED: This PIZZELLO fire pit table is CSA certified, ensuring it meets high safety standards for propane fuel use.
- 아동 안전: Keep children and pets away from the fire pit during operation and while it is cooling down. Never leave children unattended near the appliance.
- 뜨거운 표면: The fire pit and surrounding surfaces will be hot during and after use. Allow sufficient time for cooling before touching.
- 연료 종류: Use only Liquefied Petroleum Gas (LPG). Do not use natural gas or any other fuel.
2. 패키지 내용
Verify all components are present and undamaged before assembly. If any parts are missing or damaged, do not proceed with assembly and contact customer service.
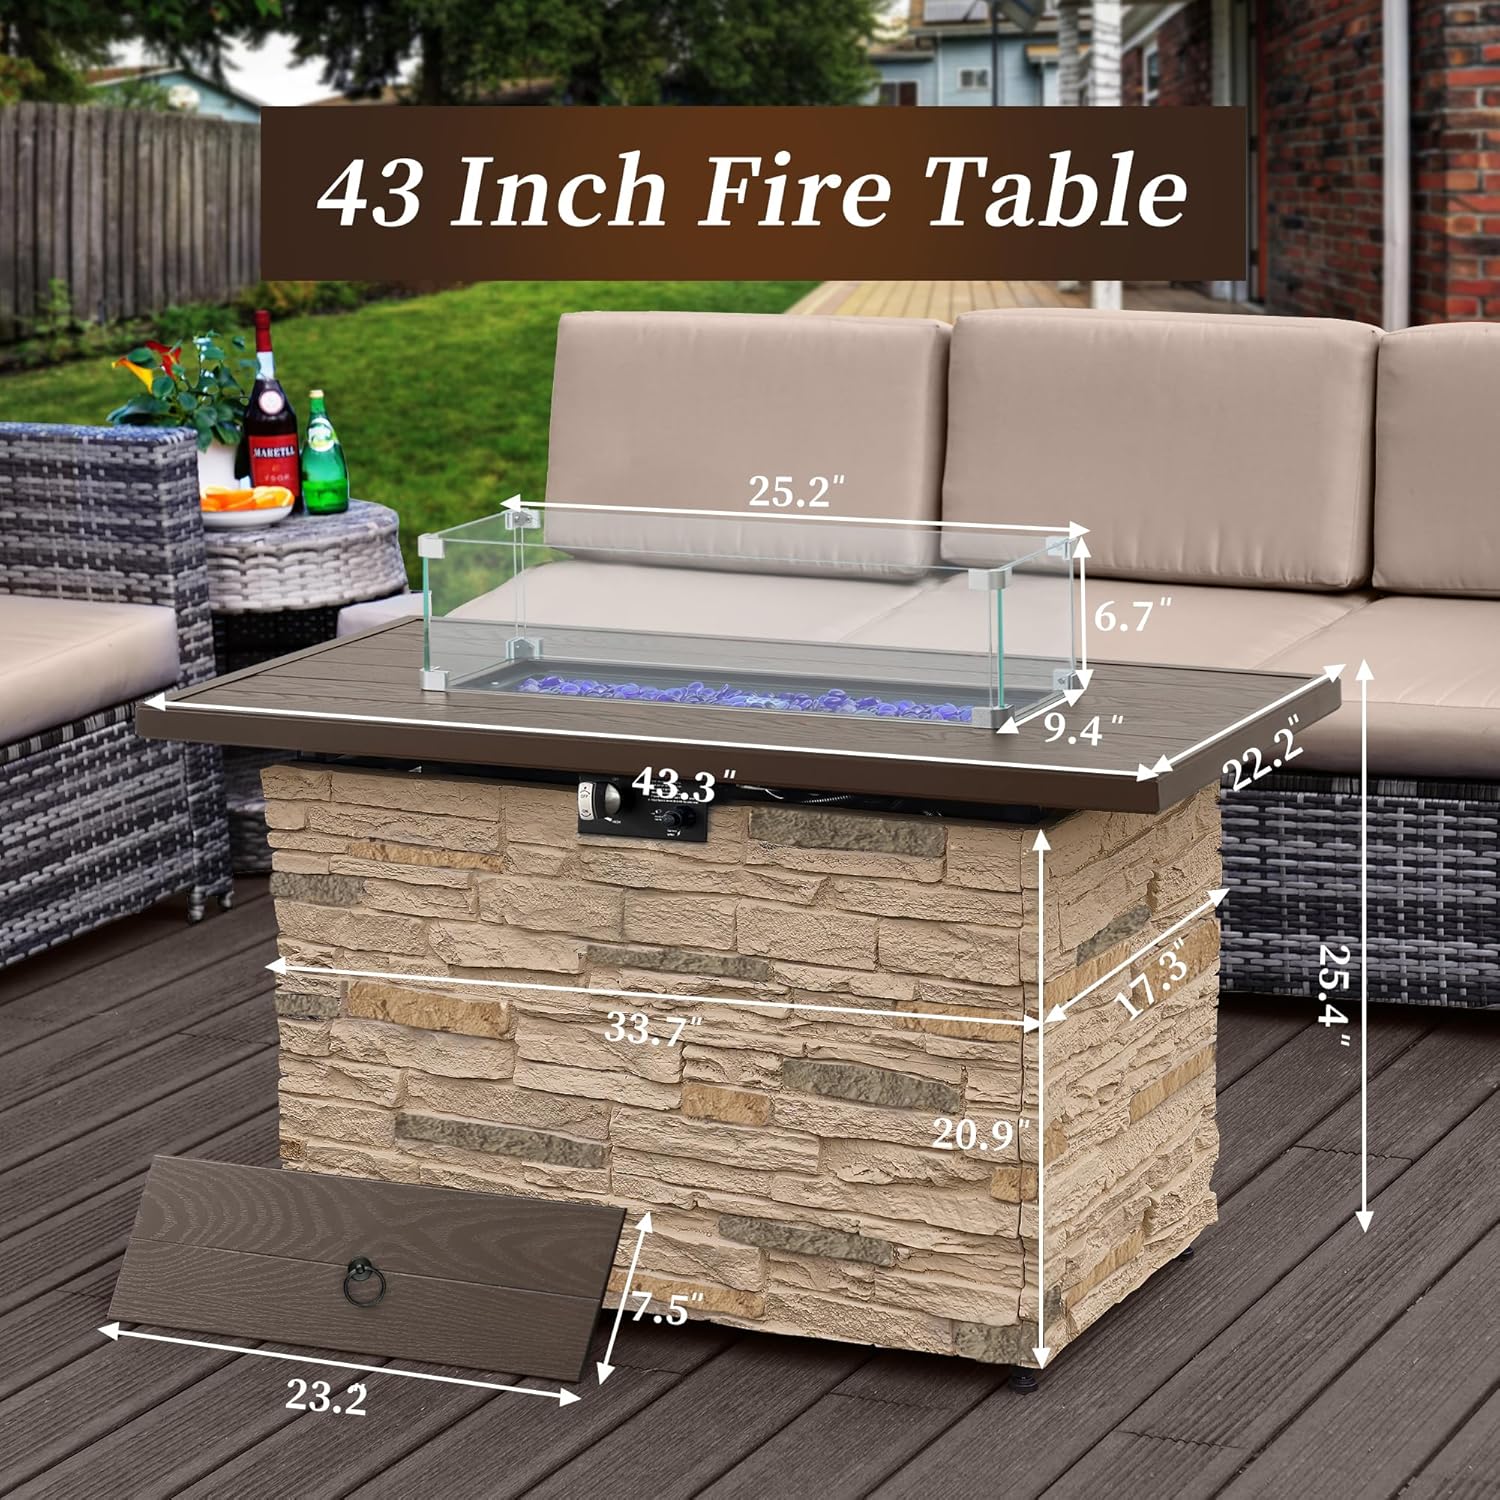
- Fire Pit Table (43"x23"x24.8") x 1
- Glass Wind Guard (23.6"x9.3"x4") x 1
- Fire Glass Stones (8 LBS) x 1
- 보호 커버 x 1
- Removable Lid x 1

3. 설치 및 조립
올바른 조립을 위해 다음 단계를 따르십시오. 일부 단계에서는 두 사람이 함께 작업하는 것이 좋습니다.
3.1. 조립 비디오 가이드
조립 과정을 시각적으로 확인하려면 공식 조립 영상을 참조하십시오.
3.2. 단계별 조립
- 베이스 준비: Lay the table top (part 6) upside down on a soft, clean surface to prevent scratches. Attach the side panels (parts 1 and 2) to the table top using the provided screws and washers.
- 내부 지원 장치 설치: Connect the internal support bars (part 8) to the side panels (parts 1 and 2) using screws. These bars provide structural integrity.
- 전면 패널 부착: Secure the front panel (part 5) to the assembled structure. Ensure all connections are tight.
- Install Propane Tank Tray: Attach the propane tank tray frame (part 4) to the base structure. This frame includes wheels for easy access to the propane tank.
- Install Drawer Tracks: Stretch the glide tracks (part 9L and 9R) and attach them to the side panels and the propane tank tray frame. Ensure the tracks are correctly oriented (Left/Right).
- Attach Rear Panel: Secure the rear panel (part 3) to complete the main body of the fire pit table.
- Place Fire Glass: Carefully pour the 8 LBS of fire glass stones (part 12) into the burner area. Distribute them evenly around the burner.
- Install Wind Guard: Assemble the glass wind guard (part 13) according to its separate instructions and place it around the burner area.
- 프로판 탱크 연결: Slide out the tank storage tray. Connect a 20 lb propane tank (not included) to the gas line. Ensure all connections are secure and check for leaks using a soapy water solution.


4. 사용 설명서
Follow these steps to safely ignite and operate your PIZZELLO fire pit table.
- 조명 전: Ensure the propane tank valve is fully open. Remove the removable lid from the burner area.
- 전자 점화: Push and turn the control knob to the 'LOW' position. While holding the knob, press the electronic ignitor button repeatedly until the burner lights.
- Release Control Knob: Once the burner is lit, continue to hold the control knob for 15 seconds to allow the thermocouple to heat up. Release the knob; the burner should remain lit. If the burner does not light or goes out, wait 5 minutes and repeat the lighting procedure.
- 화염 조정: Rotate the control knob to adjust the flame height and heat output (up to 50,000 BTUs) to your desired level.
- 끄기: Turn the control knob to the 'OFF' position. Close the valve on the propane tank. Allow the unit to cool completely before covering or moving.

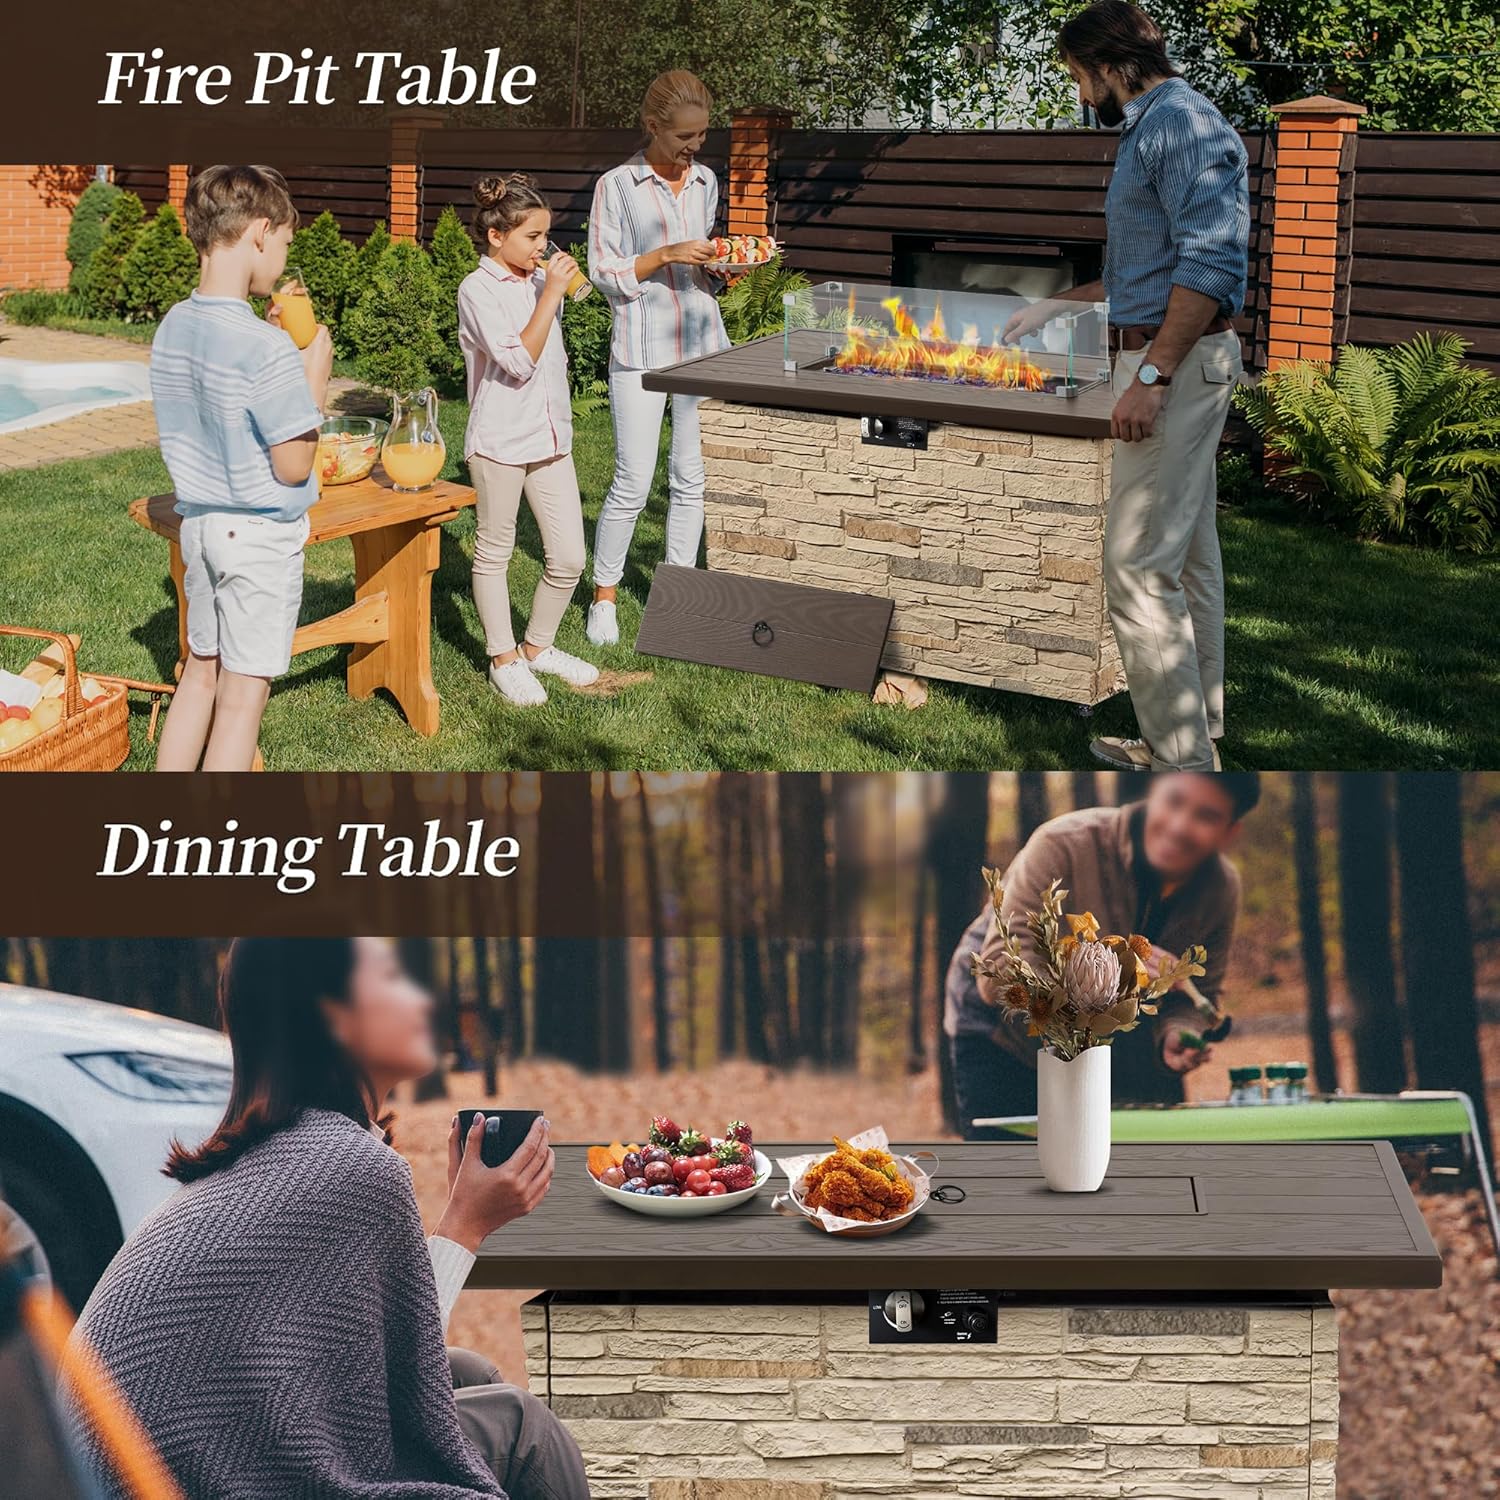
4.1. Converting to a Table
When not in use as a fire pit, the included removable lid allows you to convert the unit into a functional dining table, coffee table, or casual bar table.
5. 유지관리
Regular maintenance ensures the longevity and safe operation of your fire pit table.
- 청소: Clean the exterior surfaces with a soft cloth and mild soap solution. Avoid abrasive cleaners.
- Faux Stone Care: The faux stone surface is manufactured with specially formulated polyurethane, fire retardants, and UV inhibitors. Clean gently to maintain its visual appeal.
- 보호 커버: Always use the provided waterproof protective cover when the fire pit is not in use and has cooled down. This protects it from weather elements.
- 버너 유지관리: Periodically inspect the burner and gas connections for any signs of damage or blockages. Keep the burner ports clear of debris.

6. 문제 해결
화덕 테이블에 문제가 발생하면 다음의 일반적인 문제 및 해결 방법을 참조하십시오.
| 문제 | 가능한 원인 | 해결책 |
|---|---|---|
| 버너가 점화되지 않습니다. | Propane tank valve closed, low propane, ignitor issue, gas line blockage. | Ensure tank valve is open. Check propane level. Verify ignitor battery (AAA battery). Check for kinks in gas line. Wait 5 minutes and retry ignition. |
| 불꽃이 약하거나 불규칙적입니다. | Low propane, partially closed tank valve, burner ports blocked. | Check propane level. Ensure tank valve is fully open. Clean burner ports of any debris. |
| Fire pit does not stay lit after releasing 제어 노브. | Thermocouple not heated sufficiently, faulty thermocouple. | Hold control knob for the full 15 seconds after ignition. Ensure flame is directly contacting the thermocouple. If problem persists, contact customer service. |
| 가스 냄새가 감지되었습니다. | 가스 누출. | Immediately turn off gas supply at the tank. Evacuate the area. Do not attempt to light the appliance. Contact emergency services and/or a qualified gas technician. |
7. 사양
Detailed product specifications for your reference.
| 특징 | 세부 사항 |
|---|---|
| 모델 | B09TSJS281 |
| 상표 | 피젤로 |
| 재료 | 인조석 |
| 제품 크기(D x W x H) | 22.2인치 x 43.3인치 x 25.4인치 |
| 품목 무게 | 80 파운드 |
| 연료 유형 | 액화석유가스 |
| 열 출력 | 50,000 BTU |
| 포함된 구성 요소 | 43" Propane Fire Table, 8 Lbs Glass Fire Stones, Glass Wind Guard, Removable Lid, Waterproof Cover |
8. 보증 및 지원
Your PIZZELLO fire pit table comes with a 12-month warranty from the date of purchase.
For any questions, concerns, or warranty claims, please contact our customer service team. We are committed to responding within 24 hours to assist you.
고객 서비스 연락처 : Refer to your purchase documentation or the PIZZELLO official web연락처 정보 사이트.