1. 서론
This manual provides detailed instructions for the safe and effective operation of your Andoer 4K 48MP 60FPS WiFi Camcorder. Please read this manual thoroughly before using the device and retain it for future reference. This camcorder is designed for high-quality video recording and photography, featuring 4K Ultra HD resolution, 48-megapixel photos, a 3-inch IPS touchscreen, and infrared night vision capabilities. It is equipped with WiFi connectivity for easy file transfer and remote control, and comes with essential accessories such as an external microphone and a wide-angle macro lens.

Image 1.1: Andoer 4K Camcorder with included accessories.
2. 패키지 내용
아래 나열된 모든 품목이 패키지에 포함되어 있는지 확인하세요. 품목이 누락되었거나 손상된 경우 판매점에 문의하세요.

이미지 2.1: 패키지에 포함된 모든 구성품.
- 캠코더
- 마이크로폰
- 마이크용 윈드실드
- 3.5mm TRS to TRS 오디오 케이블
- USB 케이블
- 손잡이
- Camera Lens (Wide-angle macro lens)
- 렌즈 어댑터 링
- 2 x Lithium-polymer Batteries (2000mAh)
- 원격 제어
- Camcorder Storage Bag
- 렌즈 보관 가방
- Camcorder User Manual
- 마이크 사용 설명서
3. 제품 오버view
캠코더의 다양한 부분과 조작법을 숙지하세요.
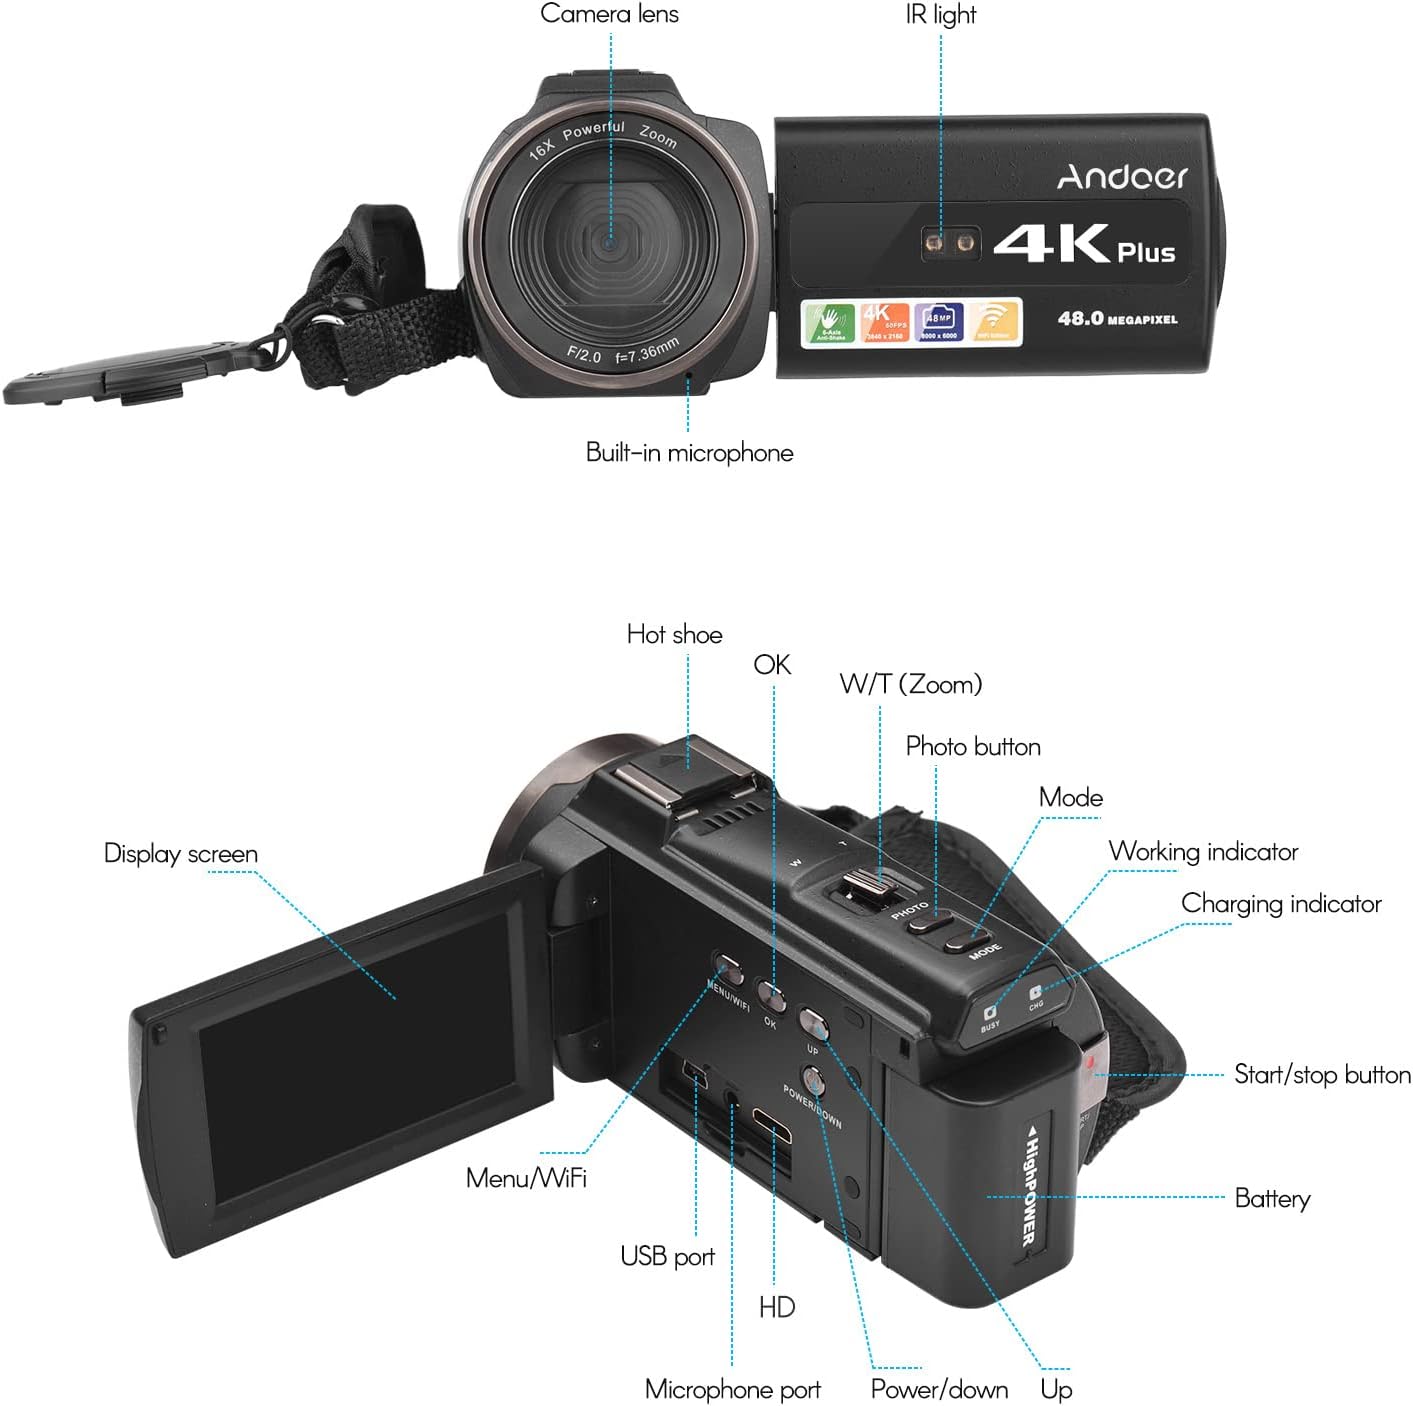
이미지 3.1: 앞면과 뒷면 View of the Camcorder with labeled components.
주요 구성 요소:
- 카메라 렌즈: 이미지와 비디오를 캡처하는 주요 광학 부품입니다.
- IR 라이트 : Emits infrared light for night vision recording.
- 내장 마이크: Captures audio. An external microphone can be connected for enhanced sound quality.
- 핫슈: Mount for external accessories like the included microphone or an LED video light.
- Display Screen (3" IPS Touch Screen): 을 위한 view잉 라이브 푸tage, playback, and navigating menus.
- 제어 버튼: Including Power, Mode, Photo, Zoom (W/T), OK, Menu/WiFi, Up/Down.
- 포트: USB, HD (HDMI), Microphone port.
- 배터리 칸: 충전식 배터리를 수용합니다.
4. 설정
4.1 배터리 충전
Before first use, fully charge the included lithium-polymer batteries. Insert one battery into the camcorder's battery compartment. Connect the camcorder to a power source using the provided USB cable. The charging indicator will illuminate during charging and turn off when fully charged. A full charge typically takes several hours.

Image 4.1: Battery installation and charging indication.
4.2 메모리 카드 삽입
The camcorder supports TF (MicroSD) cards up to 128GB. Ensure the card is formatted before first use in the camcorder's settings. Insert the memory card into the designated slot until it clicks into place.
- Use a Class 10 or higher speed rating for optimal performance, especially for 4K video recording.
- The camcorder supports V60 video speed class.
4.3 Attaching the External Microphone
For improved audio quality, attach the external stereo microphone to the hot shoe mount on top of the camcorder. Connect the microphone's 3.5mm audio cable to the microphone input port on the camcorder.
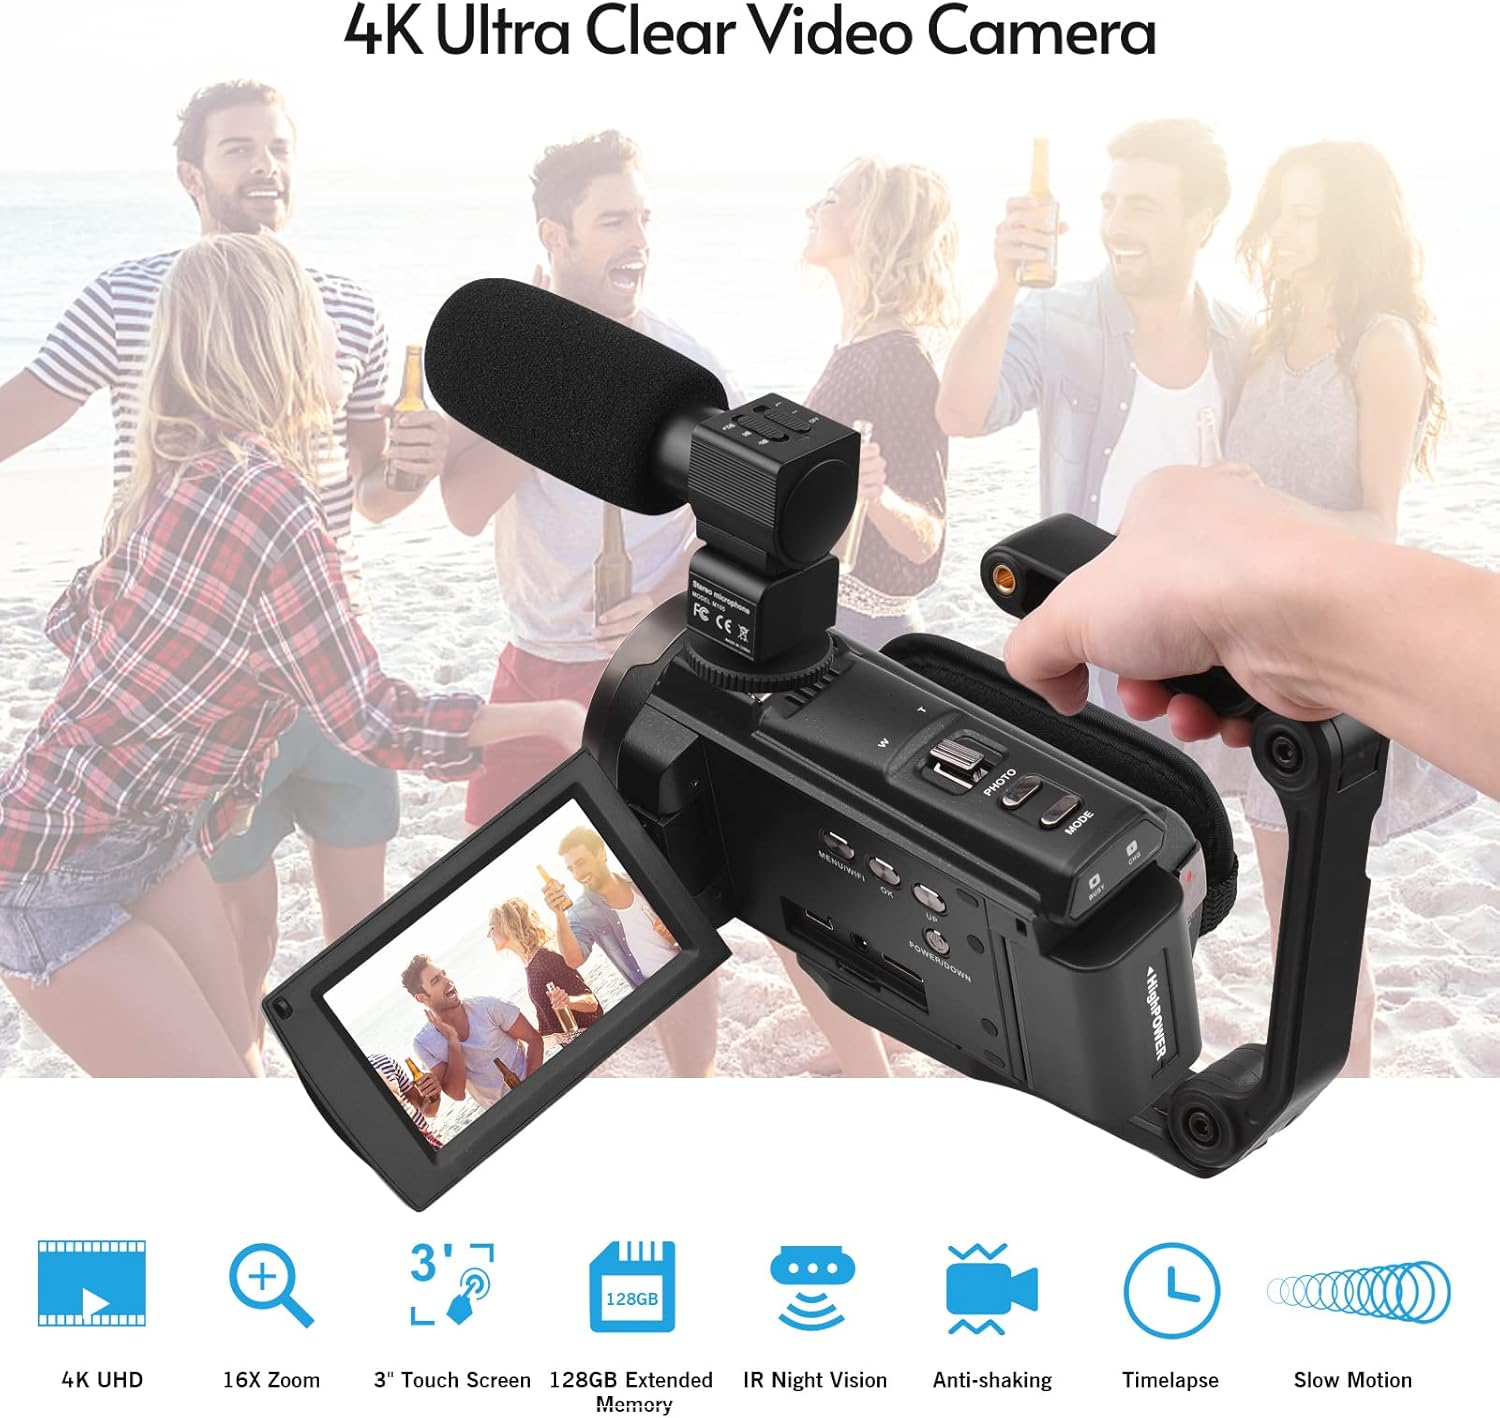
Image 4.2: External microphone attached to the camcorder.
4.4 Attaching the Wide-Angle Macro Lens
To use the wide-angle macro lens, first attach the lens adapter ring to the camcorder's main lens. Then, screw the wide-angle macro lens onto the adapter ring. This lens provides a broader perspective for your shots.

Image 4.3: Wide-angle macro lens for expanded field of view.
4.5 Attaching the Handgrip
The included handgrip can be attached to the bottom of the camcorder via the 1/4" screw hole for more stable handheld recording.
5. 사용 설명서
5.1 전원 켜기/끄기
To power on the camcorder, open the display screen and press the Power button. To power off, press and hold the Power button, or close the display screen.
5.2 비디오 녹화
- 캠코더를 켜세요.
- 를 누르세요 방법 button to select video recording mode.
- 를 누르세요 시작/중지 button to begin recording. The recording indicator will flash.
- 를 누르세요 시작/중지 버튼을 다시 눌러 녹음을 중지합니다.
The camcorder supports 4K/60FPS video resolution for clear and smooth footage.
5.3 사진 촬영
- 캠코더를 켜세요.
- 를 누르세요 방법 button to select photo mode.
- 디스플레이 화면을 사용하여 구도를 잡으세요.
- 를 누르세요 사진 button to capture a 48-megapixel image.
5.4 Using the 3" IPS Touch Screen
The capacitive touchscreen allows for intuitive navigation of menus and settings. Tap to select options, swipe to scroll, and pinch to zoom (if supported in specific modes).
5.5 WiFi Function
The built-in WiFi allows for wireless transmission of files to a compatible smartphone or tablet via a dedicated app. It also enables remote control of the camcorder from your mobile device.
- Activate WiFi on the camcorder via the menu.
- Download and install the specified app on your mobile device.
- Connect your mobile device to the camcorder's WiFi network.
- Use the app to control recording, view 라이브 푸tage, 그리고 전송 files.
5.6 IR 야간 투시경
For recording in low-light or dark conditions, activate the IR Night Vision feature. This utilizes infrared light to capture clear black and white footage.

Image 5.1: IR Night Vision in operation.
5.7 디지털 줌
Use the W/T (Wide/Telephoto) button to adjust the 16x digital zoom. Note that digital zoom can reduce image quality compared to optical zoom.
5.8 이미지 안정화
The camcorder features 6-axis image stabilization to reduce blur and shakiness in your recordings, especially during handheld use.
5.9 특수 기능
- 동작 감지: The camcorder can be set to automatically start recording when motion is detected.
- 얼굴 감지/인식: Optimizes focus and exposure for faces in the frame.
- 원격 제어: Use the included remote control to operate the camcorder from a distance, useful for self-recording or group shots.
- 셀프타이머: Set a delay before capturing a photo or starting a video recording.

Image 5.2: Tripod mounting for self-timer and stable shots.
5.10 외부 장치 연결
- USB: 컴퓨터에 연결 file 이전.
- HD(HDMI): TV나 모니터에 연결하세요 view 녹화된 영상을 더 큰 화면에서 감상하세요.
6. 유지관리
- 청소: 캠코더 본체는 부드럽고 마른 천으로 닦으십시오. 렌즈는 렌즈 전용 클리닝 천과 세척액을 사용하십시오. 강한 화학 약품은 사용하지 마십시오.
- 저장: 캠코더는 직사광선과 극한 온도 변화를 피해 서늘하고 건조한 곳에 보관하십시오. 장기간 보관할 경우에는 배터리를 분리하십시오.
- 배터리 관리 : Do not expose batteries to high temperatures. Recharge regularly even if not in use to maintain battery health.
- 펌웨어 업데이트: 제조사 확인해보세요 web최적의 성능과 새로운 기능을 보장하기 위해 정기적으로 사이트를 방문하여 펌웨어 업데이트를 확인하십시오.
7. 문제 해결
| 문제 | 가능한 원인 | 해결책 |
|---|---|---|
| 캠코더의 전원이 켜지지 않습니다. | 배터리가 방전되었거나 올바르게 삽입되지 않았습니다. | 배터리가 완전히 충전되었고 올바르게 삽입되었는지 확인하십시오. 다른 배터리를 사용해 보십시오. |
| 영상을 녹화하거나 사진을 찍을 수 없습니다. | Memory card is full, not inserted, or corrupted. Incorrect mode selected. | Check memory card status, ensure it's inserted and has free space. Format if necessary (backup data first). Select the correct mode. |
| 이미지/비디오 품질이 좋지 않습니다. | Lens is dirty. Low light conditions without IR. Digital zoom used excessively. | Clean the lens. Activate IR Night Vision in dark environments. Avoid excessive digital zoom. Ensure sufficient lighting. |
| WiFi 연결 문제. | Incorrect WiFi settings. App not installed or updated. | Ensure WiFi is enabled on camcorder and mobile device. Re-establish connection. Update or reinstall the mobile app. |
| 마이크가 오디오를 녹음하지 못하고 있습니다. | Microphone not connected properly or settings incorrect. | Check microphone cable connection. Verify audio input settings in the camcorder menu. |
8. 사양
| 특징 | 세부 사항 |
|---|---|
| 모델 번호 | ZOH0150584179474NZ |
| 비디오 해상도 | 60FPS에서 4K(3840x2160) |
| 사진 해상도 | 48 메가픽셀(8000x6000) |
| 이미지 안정화 | 6축 |
| 디스플레이 화면 | 3인치 IPS 정전식 터치스크린 |
| 디지털 줌 | 16배 |
| 연결성 | USB, Wi-Fi, HDMI |
| 메모리 카드 지원 | TF (MicroSD) up to 128GB (Class 10, V60 recommended) |
| 특별 기능 | IR Night Vision, Motion Detection, Face Detection, Remote Control |
| 배터리 | 2 x 2000mAh Lithium-polymer |
| 렌즈 조리개 | 조리개값 2.0 |
| 최소 초점 거리 | 39mm |
| 호환 장치 | Tripod, Microphone, TV, Computer, Smartphone |
| 운영 체제 호환성 | 윈도우 |
| 치수(패키지) | 18 x 15 x 11cm |
| 무게(패키지) | 1.01kg |
9. 보증 및 지원
Andoer products are designed for reliability and performance. For any technical assistance, troubleshooting beyond this manual, or warranty inquiries, please contact Andoer customer support through their official web사이트 또는 소매점.
보증 청구를 위해 구매 증명서를 보관하십시오.