1. 서론
Thank you for choosing the Scheppach BCRH170-20ProS 20V Rotary Hammer. This instruction manual provides important information regarding the safe operation, setup, maintenance, and troubleshooting of your new tool. Please read this manual thoroughly before first use and keep it for future reference. This cordless rotary hammer is designed for drilling in concrete, masonry, and stone, as well as for light chiseling work, and standard drilling in wood and metal when used with appropriate accessories.
2. 일반 안전 지침
경고: 이 전동 공구와 함께 제공된 모든 안전 경고, 지침, 그림 및 사양을 읽으십시오. 아래에 나열된 모든 지침을 따르지 않으면 감전, 화재 및/또는 심각한 부상을 입을 수 있습니다.
2.1. 작업장 안전
- 작업 구역을 깨끗하고 밝게 유지하세요. 어수선하거나 어두운 구역은 사고를 초래합니다.
- 가연성 액체, 가스 또는 먼지가 있는 폭발성 분위기에서 전동 공구를 작동하지 마십시오. 전동 공구는 먼지나 연기를 점화할 수 있는 불꽃을 생성합니다.
- 전동 공구를 작동하는 동안 어린이와 주변 사람을 멀리하십시오. 주의가 산만해지면 제어력을 잃을 수 있습니다.
2.2. 전기 안전
- 전동 공구 플러그는 콘센트와 일치해야 합니다. 플러그를 어떤 식으로든 변경하지 마십시오.
- 파이프, 라디에이터, 레인지, 냉장고와 같은 접지된 표면과의 신체 접촉을 피하십시오. 신체가 접지되거나 접지된 경우 감전 위험이 증가합니다.
- 전동 공구를 비나 습한 환경에 노출시키지 마십시오. 전동 공구에 물이 들어가면 감전 위험이 커집니다.
2.3. 개인 안전
- 항상 눈 보호 장비를 착용하세요. 보안경, 고글 또는 안면 보호대를 사용하세요.
- 장시간 전동 공구를 작동할 때는 청력 보호 장비를 착용하세요.
- 적절한 복장을 하십시오. 느슨한 옷이나 장신구를 착용하지 마십시오. 머리카락과 옷을 움직이는 부분에서 멀리 두십시오.
- 전동 공구를 작동할 때는 항상 주의를 기울이고, 작업 시 주의하고, 상식에 따라 행동하세요.
2.4. 전동공구 사용 및 관리
- 전동 공구에 힘을 가하지 마십시오. 귀하의 용도에 맞는 전동 공구를 사용하십시오.
- 조정을 하거나 액세서리를 교체하거나 전동 공구를 보관하기 전에 전동 공구에서 배터리 팩을 분리하십시오.
- 사용하지 않는 전동 공구는 어린이의 손이 닿지 않는 곳에 보관하고 전동 공구나 본 사용 설명서에 익숙하지 않은 사람이 전동 공구를 작동하지 않도록 하세요.
- 전동 공구와 액세서리를 유지 관리합니다. 움직이는 부품의 정렬 불량이나 바인딩, 부품 파손 및 전동 공구 작동에 영향을 줄 수 있는 기타 조건을 점검합니다.
3. 제품 오버view 및 구성 요소
Familiarize yourself with the main components of your Scheppach BCRH170-20ProS Rotary Hammer before operation.
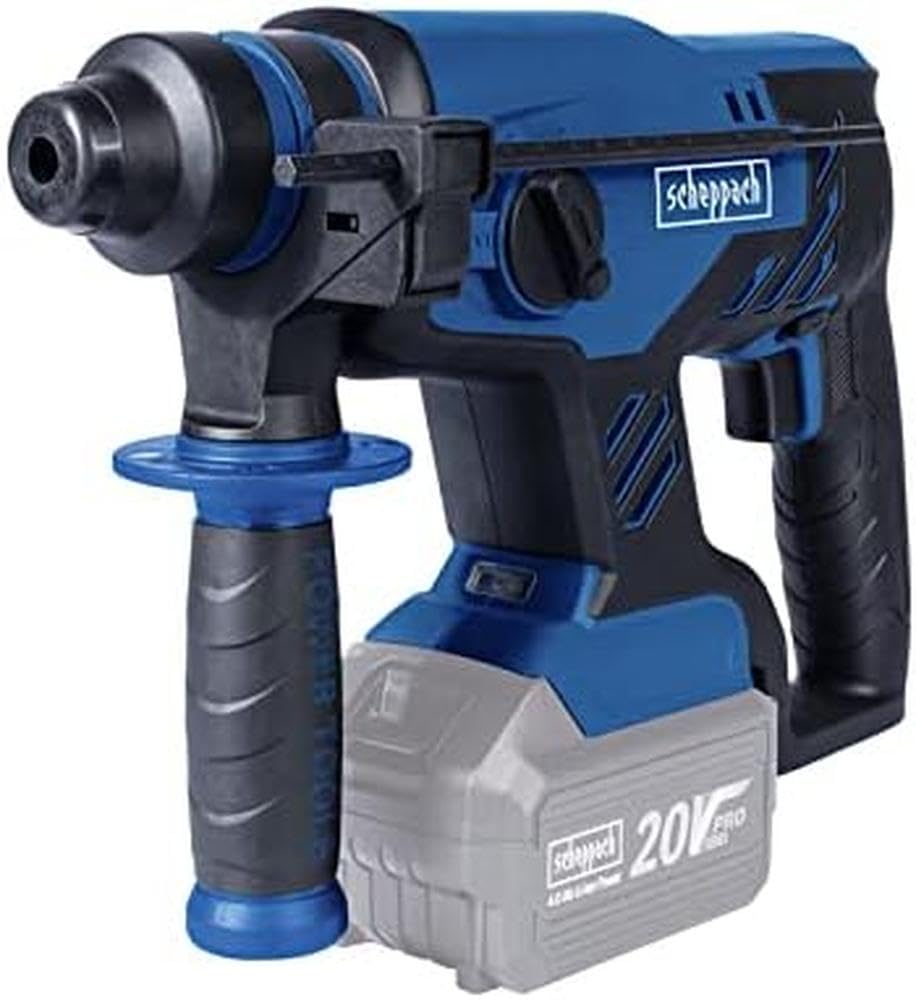
그림 1: Scheppach BCRH170-20ProS 20V Rotary Hammer. This image shows the main body of the rotary hammer, including the handle, motor housing, SDS chuck, and a compatible 20V battery pack attached at the base.

그림 2: 옆 view of the Scheppach BCRH170-20ProS Rotary Hammer. This view highlights the ergonomic design of the tool's body and the placement of controls.
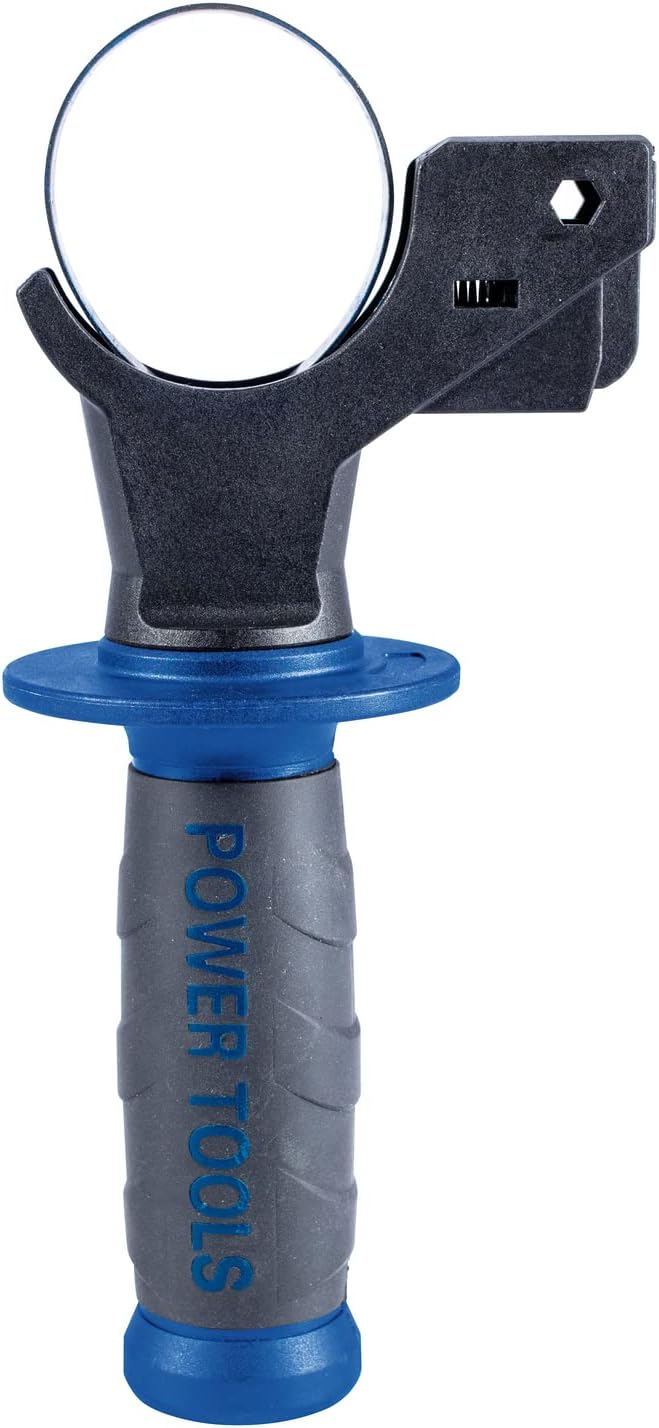
그림 3: Auxiliary handle. This adjustable handle provides additional grip and control during operation, enhancing user safety and precision.

그림 4: Depth stop. This accessory allows for precise control over drilling depth, preventing over-drilling.
주요 구성 요소:
- SDS-Plus Chuck: For quick and secure bit changes.
- Mode Selector Switch: To switch between drilling, hammer drilling, and chiseling modes.
- Trigger Switch: Activates the tool.
- Auxiliary Handle: Provides additional grip and control.
- Depth Stop: For precise drilling depth.
- Battery Interface: For attaching the 20V battery pack (not included).
4. 설정
4.1. 보조 손잡이 부착
- 보조 손잡이를 시계 반대 방향으로 돌려 느슨하게 합니다.
- Slide the handle over the chuck and onto the tool's neck.
- 손잡이를 편안하고 안전한 위치로 조정하세요.
- 손잡이를 시계 방향으로 돌려 단단히 고정될 때까지 조이십시오.
4.2. Inserting the Depth Stop
- 깊이 조절 막대를 보조 손잡이의 구멍에 삽입하십시오.
- Adjust the depth stop to the desired drilling depth.
- Ensure the depth stop is securely positioned before operation.
4.3. 배터리 팩 설치/제거
The battery pack and charger are not included with this tool and must be purchased separately. Use only Scheppach 20V Pro Series batteries and chargers.
- 설치하려면: Align the battery pack with the tool's battery interface and slide it in until it clicks into place.
- 제거하려면: 배터리 분리 버튼을 누르고 배터리 팩을 밀어서 빼내세요.
- 사용하기 전에 배터리가 완전히 충전되어 있는지 확인하세요.
4.4. Inserting SDS-Plus Drill Bits/Chisels
- Clean the shank of the drill bit/chisel.
- Pull back the SDS-Plus chuck sleeve.
- Insert the drill bit/chisel into the chuck until it locks into place.
- Release the chuck sleeve. Pull on the bit to ensure it is securely locked. A slight axial play is normal for SDS-Plus systems.
- To remove, pull back the chuck sleeve and pull the bit out.
5. 사용 설명서
5.1. 작동 모드 선택
원하는 작동 모드를 선택하려면 모드 선택 스위치를 돌리세요.
- 드릴링 모드(회전식 전용): 목재, 금속, 플라스틱 드릴링용. 망치질 기능은 없습니다.
- 해머 드릴링 모드(해머를 장착한 회전식): 콘크리트, 벽돌, 석재에 구멍을 뚫는 데 사용합니다.
- Chiseling Mode (Hammer Only): For light chiseling, chipping, or breaking work. The rotation is locked.
Always ensure the mode selector is firmly engaged in the desired position before starting the tool.
5.2. 공구 시작 및 정지
- 시작한다: Press the trigger switch. The tool speed is variable depending on how far the trigger is pressed.
- 그만하다: 트리거 스위치를 놓습니다.
5.3. 일반 작업 팁
- 공구를 사용할 때는 항상 주 손잡이와 보조 손잡이를 양손으로 단단히 잡으십시오.
- 일정하고 고르게 압력을 가하세요. 도구에 무리한 힘을 가하지 마세요.
- 해머 드릴링을 할 때는 공구의 해머링 작용이 작업을 수행하도록 하십시오.
- 깊은 구멍을 뚫을 때는 주기적으로 드릴 비트를 빼내어 이물질을 제거해야 합니다.
- 공작물이 단단히 고정되었는지 확인하십시오.amped or held to prevent movement.
6. 유지관리
Regular maintenance ensures the longevity and optimal performance of your rotary hammer. Always disconnect the battery pack before performing any maintenance.
6.1. 청소
- 모터 과열을 방지하려면 통풍구를 깨끗하게 유지하세요.
- 도구 하우징을 부드러운 천으로 닦으세요.amp 옷감. 솔벤트나 연마성 세제를 사용하지 마십시오.
- SDS-Plus 척을 정기적으로 청소하여 비트의 원활한 삽입 및 분리를 유지하십시오. 마모를 줄이기 위해 비트를 삽입하기 전에 비트 생크에 소량의 그리스를 바르십시오.
6.2. 보관
- 도구는 어린이의 손이 닿지 않는 건조하고 안전한 곳에 보관하세요.
- 보관하기 전에 도구에서 배터리 팩을 제거하세요.
- 배터리 팩은 직사광선과 극한 온도 변화를 피해 서늘하고 건조한 곳에 보관하십시오.
6.3. 배터리 관리
- Charge battery packs only with the specified Scheppach 20V Pro Series charger.
- Do not expose battery packs to water or moisture.
- Do not store battery packs in temperatures above 50°C (122°F) or below -20°C (-4°F).
7. 문제 해결
| 문제 | 가능한 원인 | 해결책 |
|---|---|---|
| 도구가 시작되지 않음 | 배터리가 올바르게 삽입되지 않았거나 방전되었습니다. | 배터리가 완전히 삽입되었는지 확인하십시오. 배터리 팩을 충전하십시오. |
| 성능 저하 | Battery low or tool overheating. | Charge battery. Allow tool to cool down. Clean ventilation slots. |
| 비트가 척에 잠기지 않음 | Chuck sleeve not pulled back far enough or debris in chuck. | Pull chuck sleeve fully back. Clean chuck and bit shank. |
| 과도한 진동 | Worn bit or damaged tool. | Replace worn bit. If problem persists, contact customer support. |
8. 기술 사양
| 특징 | 사양 |
|---|---|
| 모델 | SC-BCRH170-20ProS |
| 권tage | 20V 직류 |
| 임팩트 에너지 | 1.7 줄 |
| 척 타입 | SDS-플러스 |
| 치수(길이 x 너비 x 높이) | 45 x 50 x 20cm |
| 무게 | 500 grams (tool only, without battery) |
| 재료 | 합금강 |
| 배터리 충전기 | Not included (Scheppach 20V Pro Series compatible) |
9. 보증 및 지원
Scheppach products are manufactured to high-quality standards. In the unlikely event that your tool develops a fault, please refer to your purchase documentation for warranty details and contact information for customer support. Keep your proof of purchase for any warranty claims.
For technical assistance or spare parts, please visit the official Scheppach web사이트를 방문하거나 현지 대리점에 문의하십시오.