1. 서론
Thank you for choosing the Hodozzy Digital Wireless Reversing Camera Kit. This system is designed to provide a clear and stable view of your vehicle's surroundings, enhancing safety during reversing and maneuvering. It is suitable for a wide range of 12V-24V vehicles, including cars, RVs, trucks, trailers, buses, and caravans.
This manual provides detailed instructions for installation, operation, and maintenance to ensure optimal performance and longevity of your device. Please read it thoroughly before use.
2. 패키지 내용
아래 나열된 모든 품목이 패키지에 포함되어 있는지 확인하세요.
- 1 x 7-inch TFT LCD Monitor
- 2 x Wireless Reversing Cameras
- 1 x 자동차 충전기
- 2 x Power Cords for Cameras
- 1 x Monitor Mounting Bracket
- 모니터용 햇빛 가리개 1개
- 2 x 안테나
- 1 x 사용자 설명서
- Installation Kits (screws, adhesive sticker)

Figure 2.1: Hodozzy Digital Wireless Reversing Camera Kit Components
3. 사양
| 특징 | 사양 |
|---|---|
| 모델 번호 | Z2091 |
| 모니터 크기 | 7인치 TFT LCD |
| 카메라 해상도 | 720P (Effective Capture Resolution) |
| 카메라 센서 기술 | CMOS |
| 방수 등급 | IP69 |
| View 각도 | 130도 |
| 나이트 비전 | Yes (Color Night Vision with 8 LED lights) |
| 무선 신호 범위 | 20-40 feet (up to 70m in open area without interference) |
| 전원 입력 | 12V-24V DC |
| 모니터 디스플레이 모드 | Full screen, Dual split, Quad split (with additional cameras) |
| 녹음 기능 | Yes (with SD card, up to 128GB) |

그림 3.1: 제품 치수
4. 설정 및 설치
This system is designed for easy installation. Follow these steps carefully:
4.1 카메라 설치
- 장착 위치: Choose a suitable location for each camera at the rear of your vehicle. Ensure the camera has a clear, unobstructed view. The cameras are IP69 waterproof, shockproof, and dustproof, suitable for various weather conditions.
- 안전한 장착: Use the provided screws and brackets to securely attach the cameras. Adjust the camera angle for optimal view주고받음.
- 전원 연결: Connect the camera's power cable to a 12V-24V DC power source. For continuous monitoring, connect to a constant power source. For reversing assistance, connect to the vehicle's reverse lights (positive and negative wires).

Figure 4.1: IP69 Waterproof and Durable Cameras

Figure 4.2: Camera Waterproof Rating

그림 4.3: 130° 폭 View 각도
4.2 모니터 설치
- 설치: Attach the monitor to your dashboard or windshield using the provided mounting bracket. Ensure it is in a position that does not obstruct your view 운전하는 동안.
- 전원 연결: Plug the monitor's car charger into your vehicle's cigarette lighter socket or connect it to an ACC/fuse/radio power source.
- 안테나: Screw the antenna onto the monitor for optimal wireless signal reception.

Figure 4.4: Wireless Connection and Power Diagram

Figure 4.5: Wireless Signal Range
5. 사용 설명서
5.1 전원 켜기/끄기
Once connected to power, the monitor will automatically turn on when the vehicle is started or when the reverse gear is engaged (if wired to reverse lights). Press the 'POWER' button on the monitor to manually turn it on or off.
5.2 디스플레이 모드
7인치 모니터는 다양한 디스플레이 모드를 지원합니다.
- 전체 화면: Displays a single camera view.
- Dual Split: Displays two camera view동시에.
- 사분면 분할: Displays up to four camera views simultaneously (requires additional cameras, sold separately).
Use the 'CH' button on the monitor to cycle through the available camera channels (CH1, CH2, CH3, CH4) and the 'MODE' button to switch between full screen, dual split, and quad split display modes.

Figure 5.1: Full Screen and Split Screen Display

Figure 5.2: 4-Channel System Overview
5.3 Auxiliary Lines
The monitor can display auxiliary parking lines to assist with reversing. You can enable or disable these lines by pressing the dedicated button on the monitor.
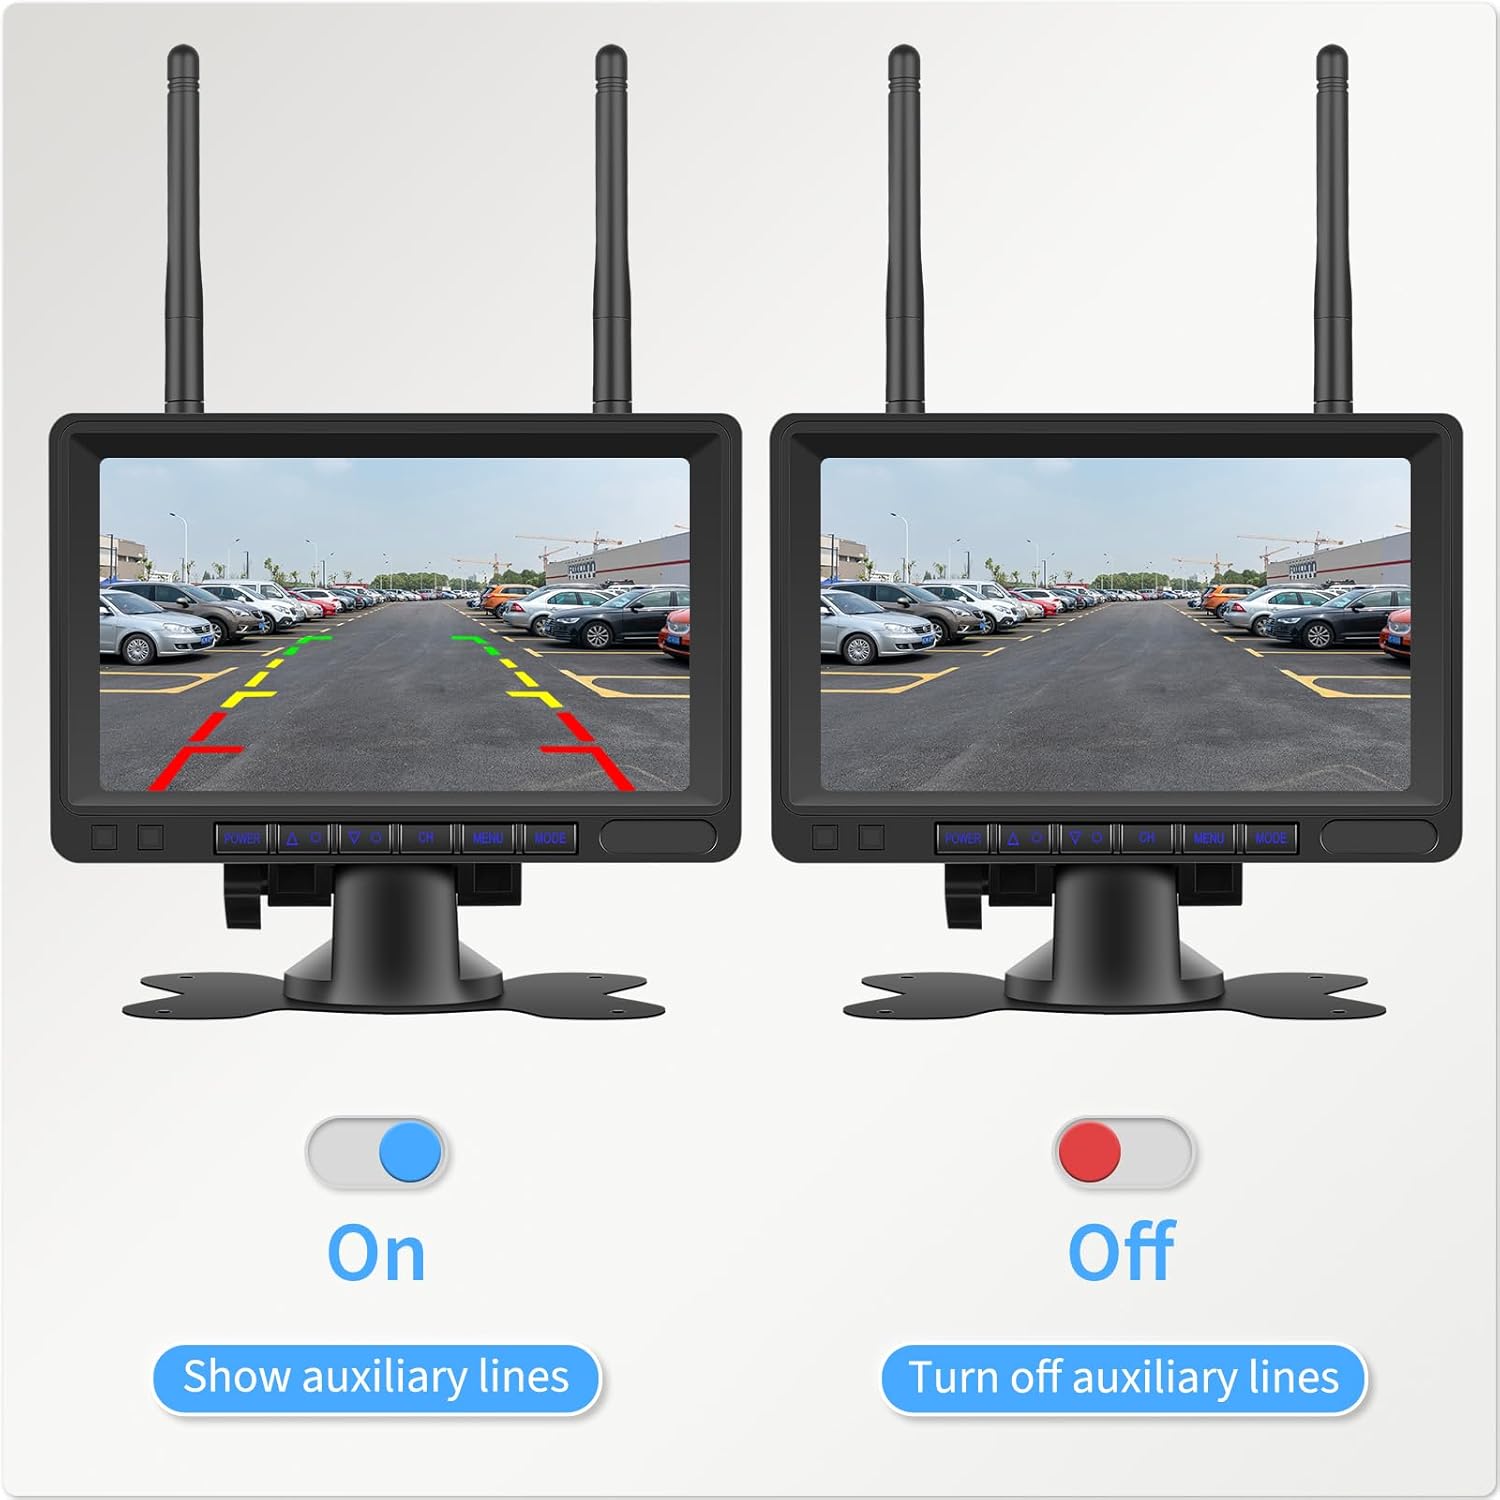
Figure 5.3: Auxiliary Lines On/Off

Figure 5.4: Guide Lines Control
5.4 이미지 플립
The monitor allows you to flip the camera image (horizontal, vertical, or both) to suit your mounting orientation and preference. Use the 'MENU' button to access settings and adjust the image flip option.

Figure 5.5: Image Flip Options
5.5 비디오 녹화
The monitor supports video recording to an SD card (up to 128GB, not included). Insert an SD card into the designated slot on the monitor to enable recording. The system will record footage from the active camera channels.

Figure 5.6: Video Recording Function

Figure 5.7: SD Card Slot for Recording
5.6 야간 투시경
The cameras are equipped with 8 LED lights and advanced chips to provide clear color night vision, ensuring visibility even in low-light conditions.
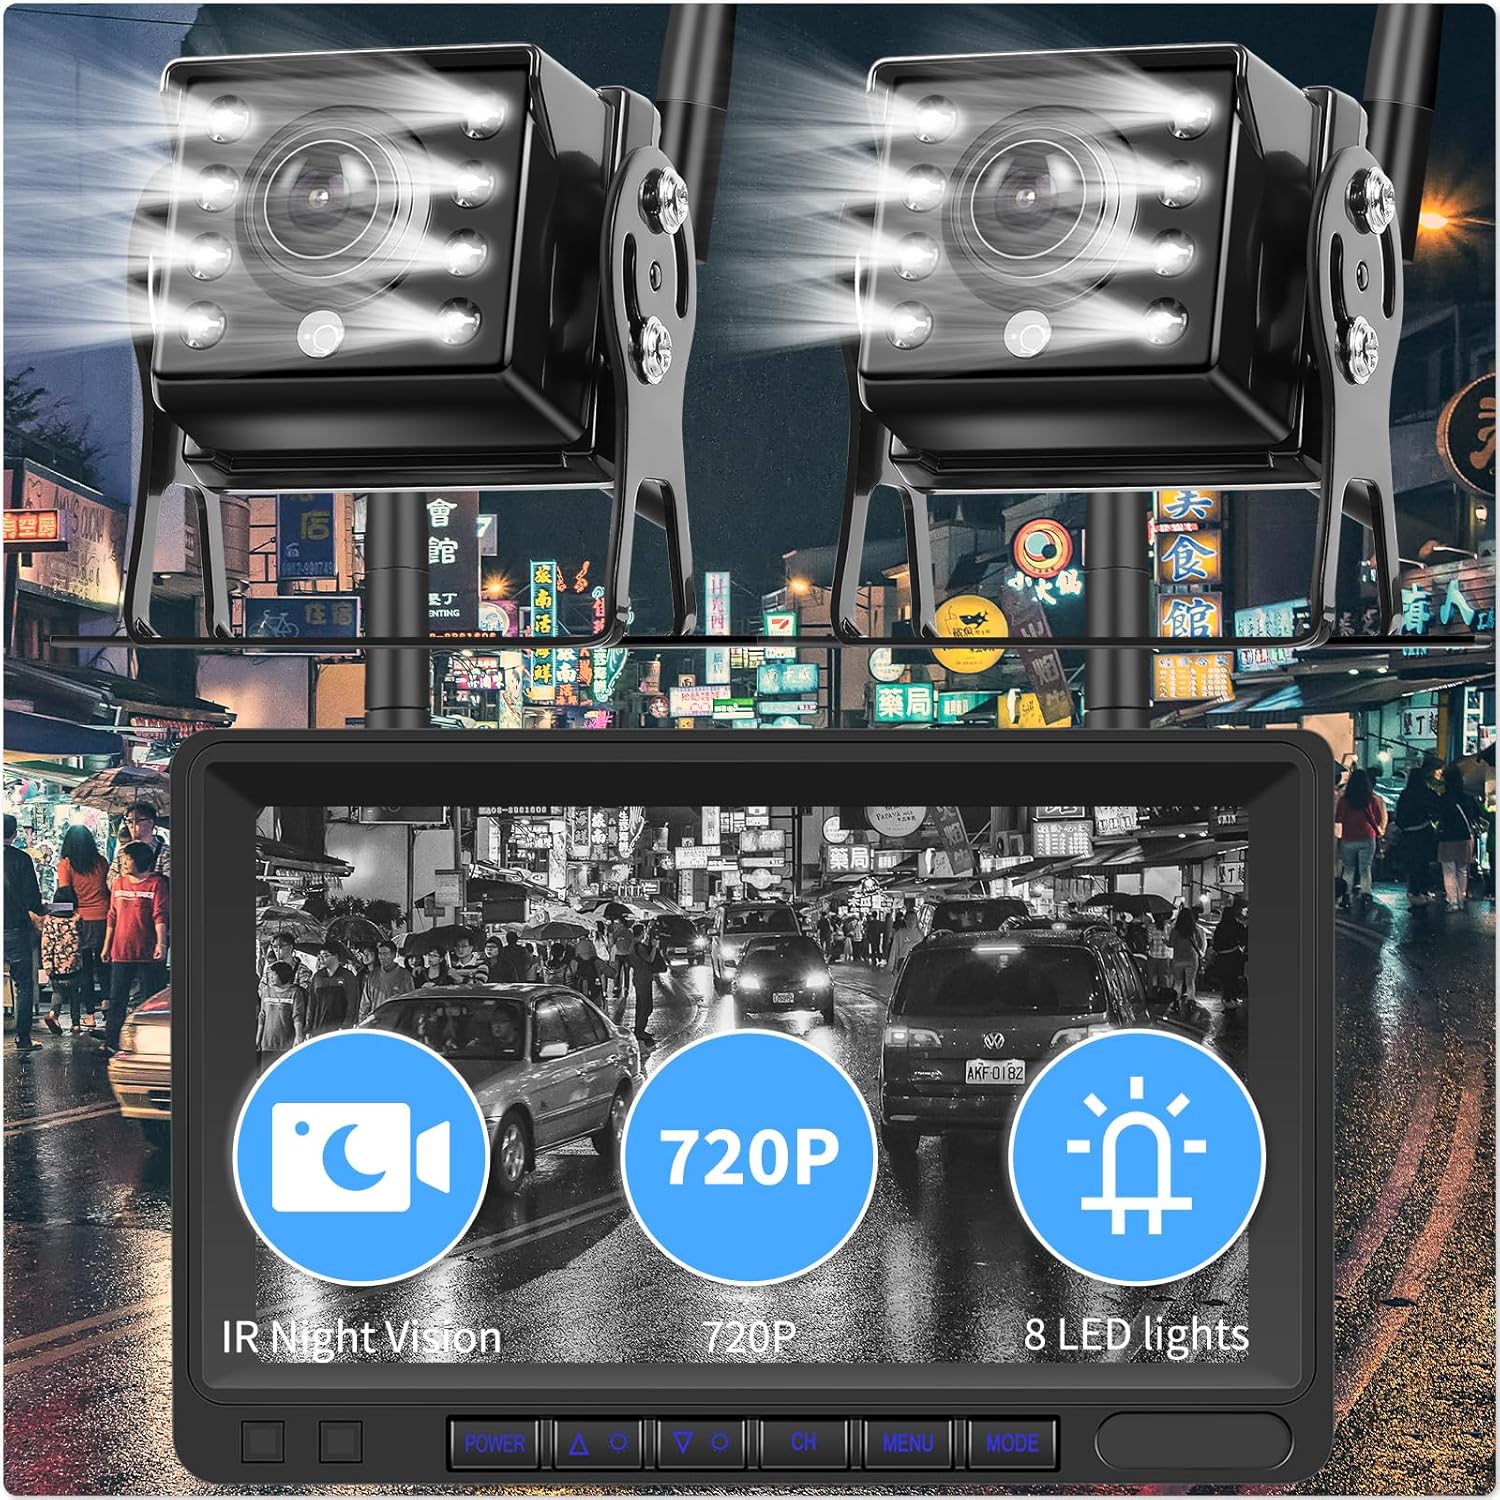
Figure 5.8: 720P Night Vision with 8 LED Lights

Figure 5.9: Color Night Vision Display
6. 유지관리
To ensure the longevity and optimal performance of your Hodozzy Reversing Camera Kit, follow these maintenance guidelines:
- 청소: 카메라 렌즈와 모니터 화면은 부드러운 천으로 정기적으로 닦아주세요.amp 천으로 닦으세요. 표면을 손상시킬 수 있는 연마성 세제나 용제는 사용하지 마세요.
- 케이블 연결: 모든 케이블 연결부를 주기적으로 점검하여 안전하고 부식이나 손상이 없는지 확인하세요.
- 카메라 하우징: Although the cameras are IP69 waterproof, inspect their housing for any cracks or damage that could compromise their water resistance, especially after exposure to harsh conditions.
- 소프트웨어 업데이트: 제조사 확인해보세요 web해당 사이트에서 기기에 사용할 수 있는 소프트웨어 업데이트를 확인하세요.
7. 문제 해결
If you encounter issues with your reversing camera kit, please refer to the following common problems and solutions:
| 문제 | 가능한 원인 | 해결책 |
|---|---|---|
| 모니터에 이미지가 없습니다 |
|
|
| 이미지가 깜빡이거나 불안정함 |
|
|
| 야간 시야가 흐릿함 |
|
|
| 녹음이 작동하지 않습니다 |
|
|
If these solutions do not resolve the issue, please contact Hodozzy customer support for further assistance.
8. 보증 및 지원
Hodozzy provides a 12-month replacement service and lifetime after-sales support for this product. If you encounter any defective product or issues, please do not hesitate to contact us. Our customer service team is available 24 hours a day to assist you.
연락처 정보:
- 이메일: hodozzyofficial@163.com
- Online Support: Refer to the contact details provided in your package or on the official Hodozzy web대지.

Figure 8.1: Hodozzy Customer Support Information