
plustek OF8300i AI
Plustek OpticFilm 8300i Ai 필름 스캐너 사용 설명서
Model: OF8300i AI
소개
The Plustek OpticFilm 8300i Ai is a high-resolution film scanner designed to convert 35mm film and slides into digital format. This manual provides comprehensive instructions for setting up, operating, maintaining, and troubleshooting your scanner, ensuring optimal performance and longevity.
Digitizing your film and slides helps preserve precious memories from fading colors, decomposition, or fungal attacks. The OpticFilm 8300i Ai is equipped with advanced features and software to achieve high-quality digital archives.

Figure 1: Plustek OpticFilm 8300i Ai Film Scanner with included software and calibration targets.
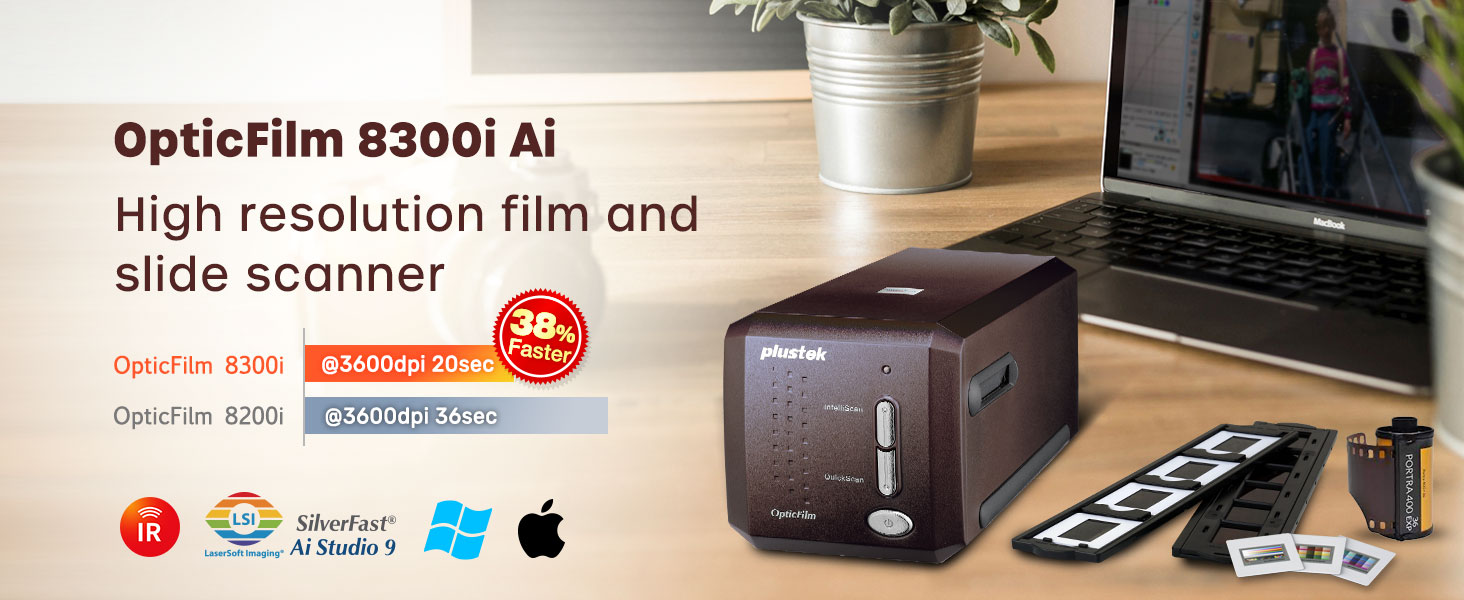
그림 2: 이상view of the Plustek OpticFilm 8300i Ai, highlighting its high resolution and improved scanning speed.
비디오 1: 소개 비디오 쇼asing the features and capabilities of the Plustek OpticFilm 8300i Ai film scanner, including its ability to digitize various 35mm film types and its advanced image correction features.
설정
1. 포장 풀기 및 내용물
상자에서 모든 구성품을 조심스럽게 꺼내십시오. 아래 나열된 모든 항목이 있는지 확인하십시오.
- Plustek OpticFilm 8300i Ai Scanner Unit
- SilverFast Ai Studio 9 Software (via USB flash drive and activation card)
- Plustek QuickScan Plus Software (via USB flash drive)
- 35mm 필름 홀더
- Mounted Slide Holder
- 3-slide 35mm IT8 Calibration Target
- USB 케이블
- 전원 어댑터
- 빠른 시작 가이드
- 운반 케이스

Figure 3: All components included in the Plustek OpticFilm 8300i Ai package.
2. 소프트웨어 설치
The scanner comes bundled with SilverFast Ai Studio 9 and Plustek QuickScan Plus. Use the provided USB flash drive for installation. An optical disc drive is not required.
- USB 플래시 드라이브를 컴퓨터에 삽입합니다.
- Follow the on-screen instructions to install SilverFast Ai Studio 9 and Plustek QuickScan Plus.
- For SilverFast activation, locate the SilverFast 9 card in the box. It contains the scanner's serial number and activation web대지.
- Visit the SilverFast account activation website and select your scanner model (OpticFilm 8300i).
- Verify the model name and enter the serial number. The serial number can be found on the back of the scanner or on the SilverFast card.
- If you do not have a MySilverFast account, fill out the registration form to create one. If you already have an account, log in.
- Complete your basic information and register.
- You will receive a registration confirmation email. Your license will be added to your MySilverFast account.

Figure 4: SilverFast activation card with serial number.
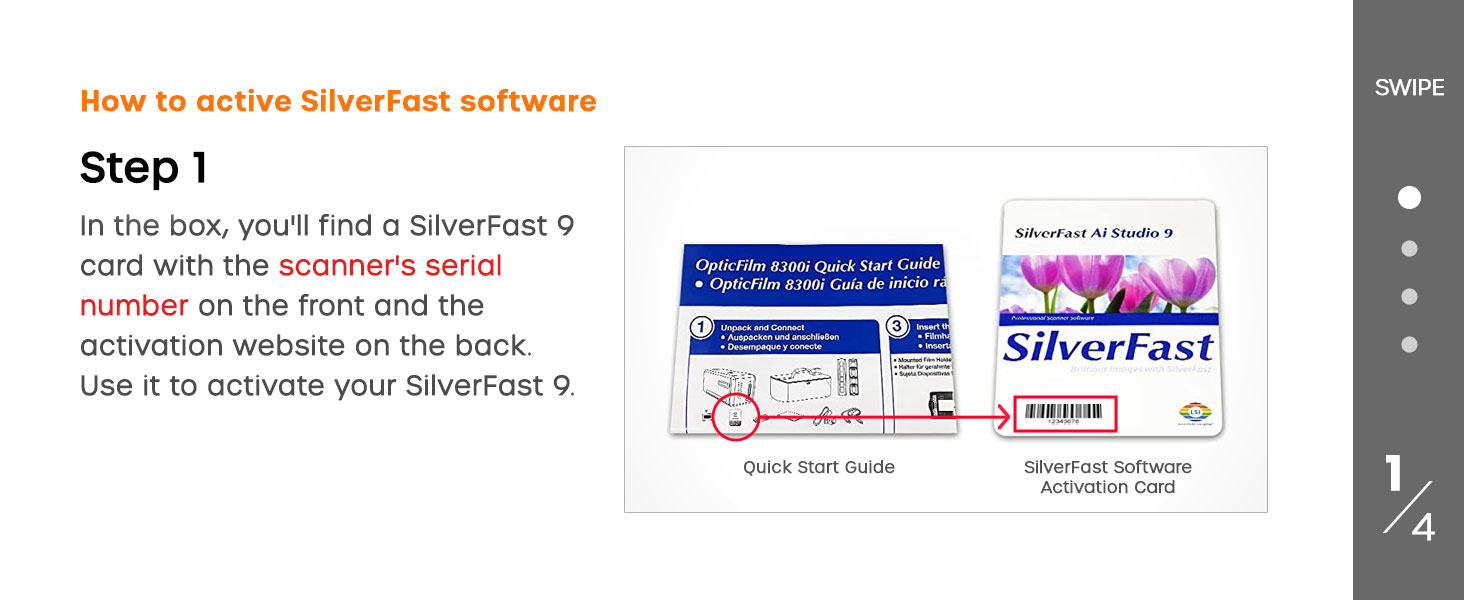
Figure 5: Selecting your scanner model on the activation web대지.
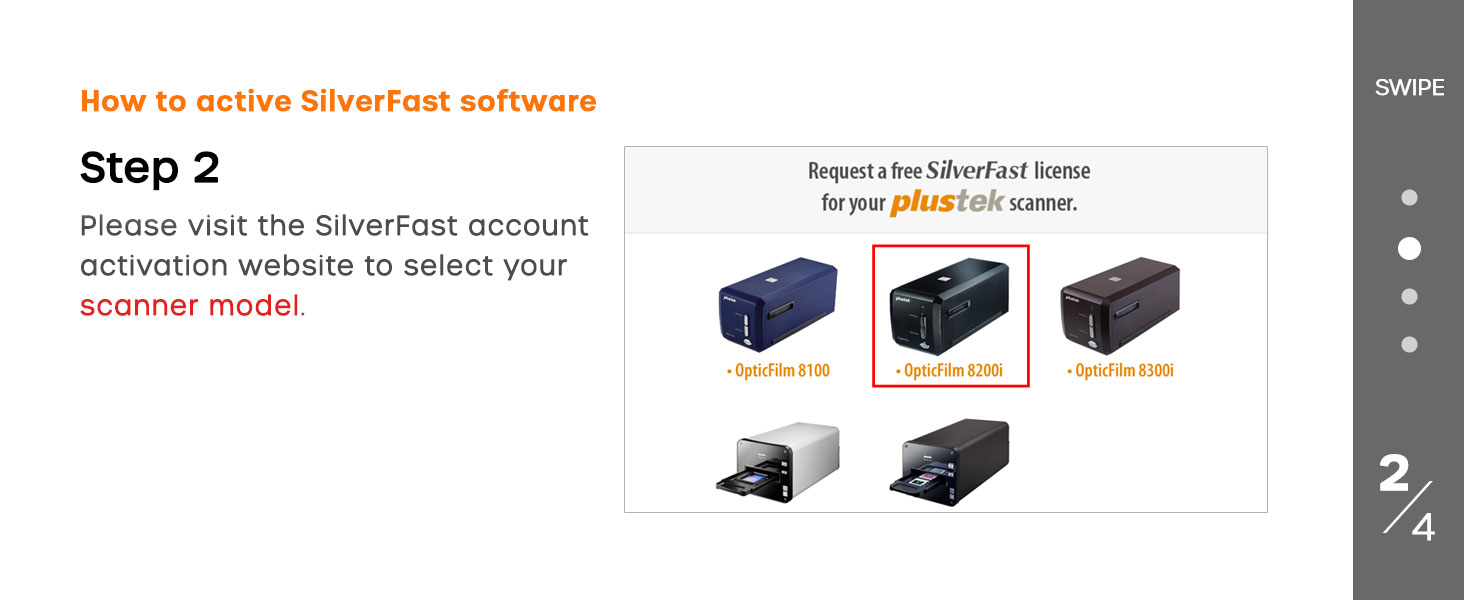
Figure 6: Entering the scanner serial number for activation.
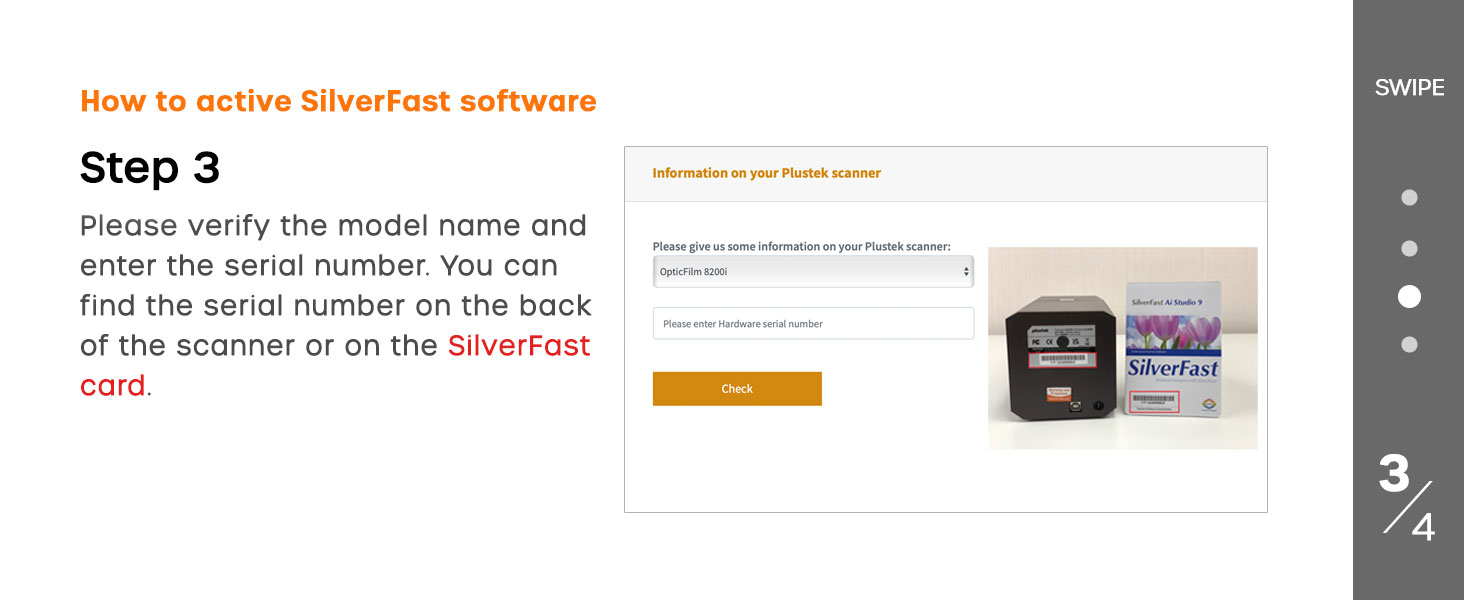
Figure 7: SilverFast account login or registration.
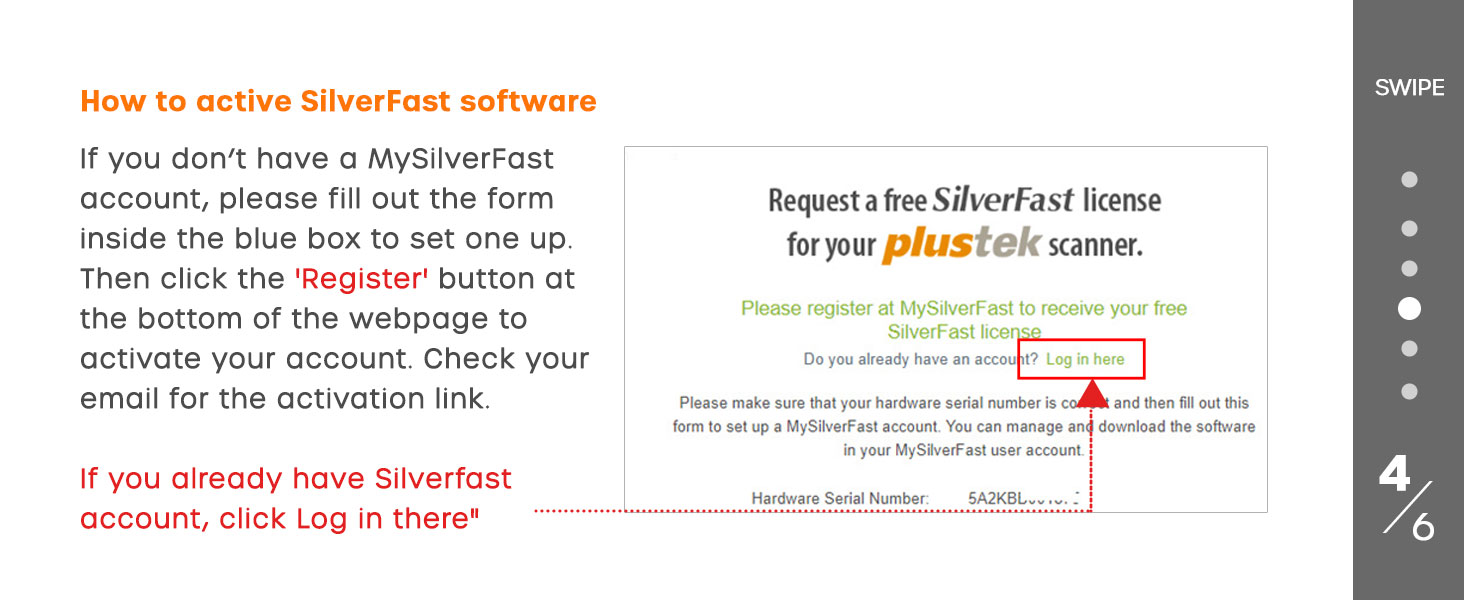
Figure 8: SilverFast account registration form.
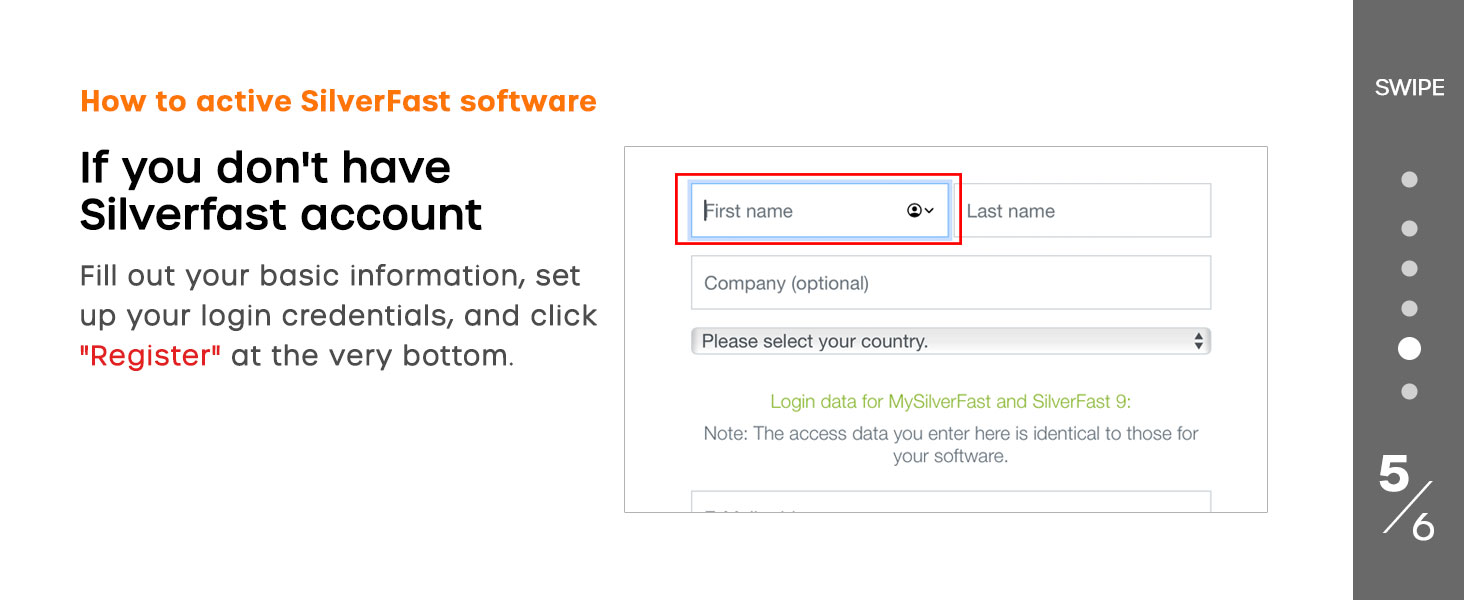
Figure 9: SilverFast registration confirmation.
3. 하드웨어 연결
- 스캐너를 안정적이고 평평한 표면에 놓으십시오.
- 스캐너의 USB 케이블을 컴퓨터의 사용 가능한 USB 포트에 연결하십시오.
- 전원 어댑터를 스캐너의 전원 입력 단자에 연결한 다음 전원 콘센트에 꽂으십시오.
- 전원 버튼을 사용하여 스캐너를 켜세요.
작동 지침
1. 필름 및 슬라이드 장착
Use the appropriate film or slide holder for your media type. Ensure the film or slides are clean and free of dust before loading.
- For 35mm film strips, use the film holder. Carefully insert the film into the designated slots.
- For mounted 35mm slides, use the slide holder. Place each slide into its slot, ensuring correct orientation.
- Insert the loaded holder into the scanner's film slot.

Figure 10: The scanner with film and slide holders, demonstrating how media is inserted.

Figure 11: The OpticFilm 8300i Ai offers 38% faster scanning speeds compared to previous models.
2. Scanning Process with Software
You can use either SilverFast Ai Studio 9 for advanced control or Plustek QuickScan Plus for simpler, faster scans.
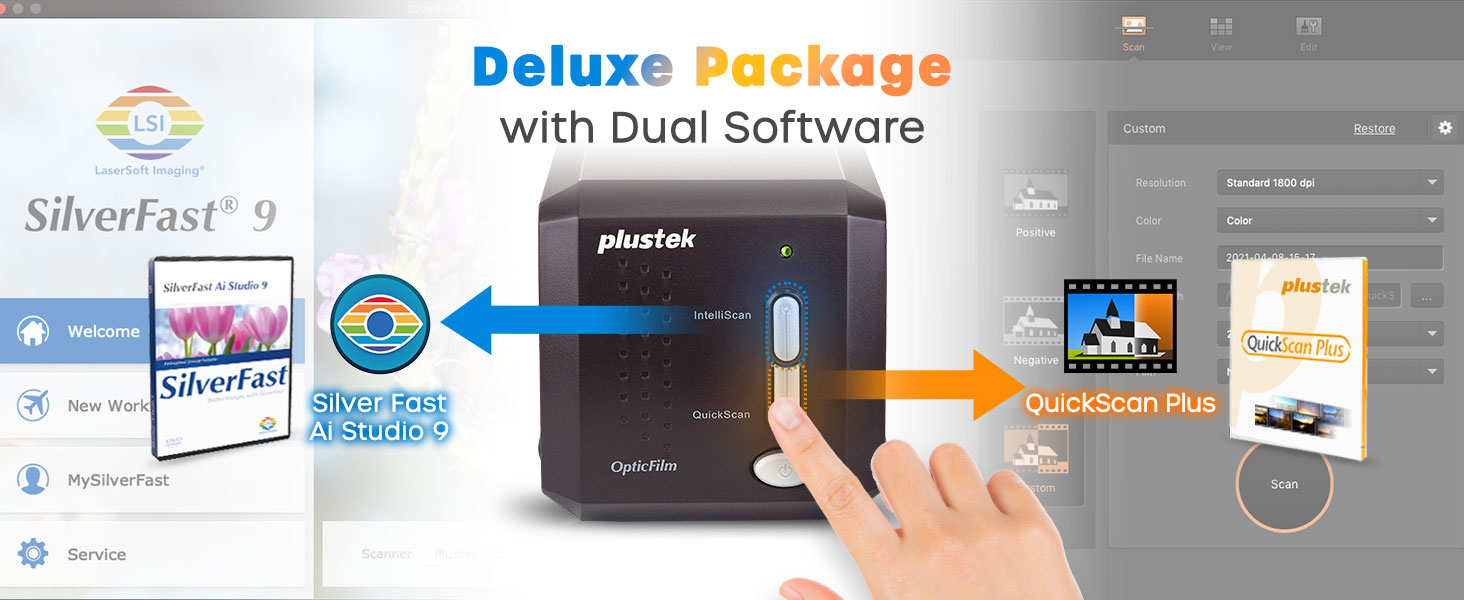
Figure 12: The scanner supports both SilverFast Ai Studio 9 for professional use and QuickScan Plus for ease of use.
Using SilverFast Ai Studio 9:
SilverFast offers extensive features for professional scanning and image optimization.
- Superb Scanning Resolution: The scanner provides a true 7200 dpi optical resolution, producing sharp and vivid images up to 68.9 megapixels.
- Advanced IT8 Calibration: Use the included 3-slide 35mm IT8 Calibration Target (ISO 12641-2 compliant 2019) for precise color calibration. This provides more measuring points for less interpolation, ensuring accurate color reproduction.
- iSRD (Infrared Smart Removal of Defects): This built-in infrared channel effectively removes dust and scratches from your scans. It works by performing a separate infrared scan to detect defects, then intelligently removes them from the final image without affecting important details. Note: iSRD does not work for B/W negatives as infrared rays cannot permeate the silver halide layer.
- Multi-Exposure: This feature increases the dynamic range of your scans, allowing for smoother gradations and fine shadow detail, especially in challenging lighting conditions.
- HDRi (High Dynamic Range Imaging): Captures RAW data from analog originals, including the infrared channel, into a 64-bit color HDRi file or a 32-bit grey scan HDRi file. This helps protect precious pictures against destruction and loss by preserving maximum image information.
- 16-bit Histogram: Provides a graphic representation of statistical visuals, allowing for precise adjustment of black point, white point, and midtones. Supports RGB and CMYK modes, combined or separated color channels, and color cast removal.
- NegaFix: Optimizes scans from negative film by providing profiles for various film types, ensuring accurate color and contrast conversion.
- 전문가 모드: For advanced users, Expert Mode provides enhanced functionality and control tools for fine-tuning images, allowing for more detailed settings and protective layers.
- Built-in ICC Profile: The 8300i includes built-in ICC profiles for different slide films, including Kodachrome slides, ensuring consistent color representation from scan to print/display.

Figure 13: The 7200x7200 DPI optical resolution ensures high-quality digital images.

Figure 14: The advanced IT8 target ensures accurate color calibration.

Figure 15: Visual representation of IT8 calibration improving image color accuracy.

Figure 16: iSRD technology for automatic dust and scratch removal.

Figure 17: Diagram illustrating how iSRD uses an infrared channel to detect defects.
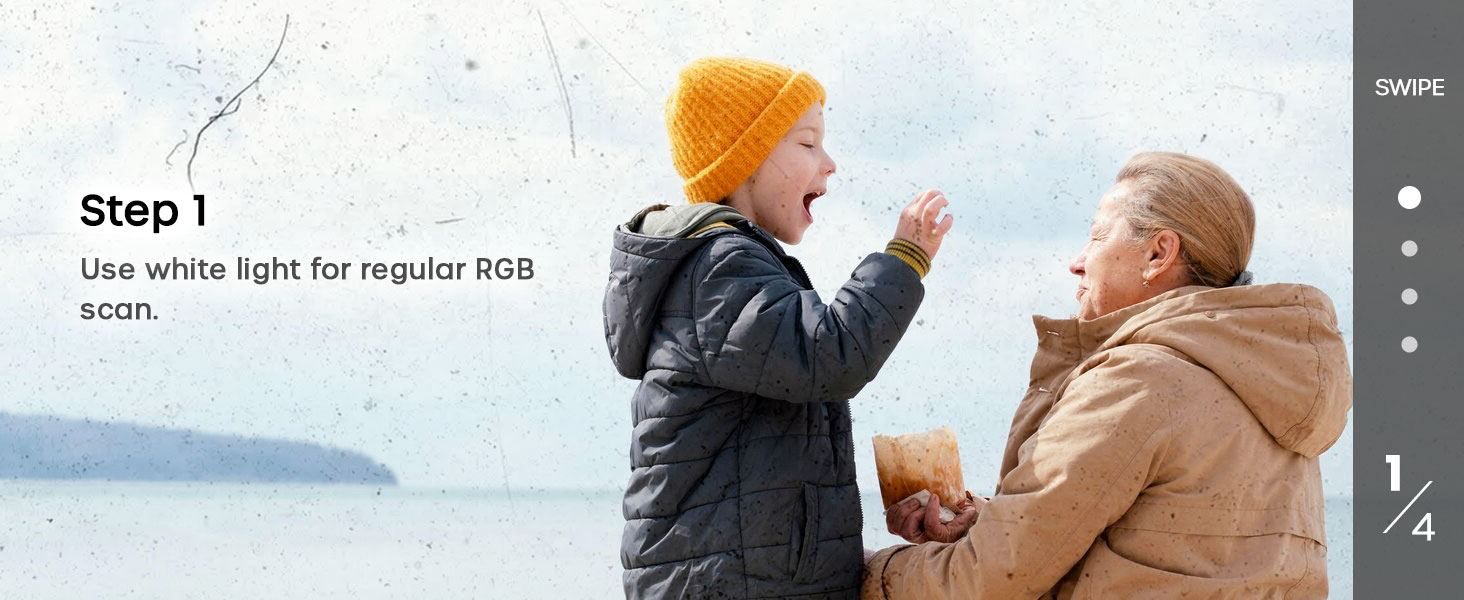
Figure 18: iSRD Step 1: Regular RGB scan.
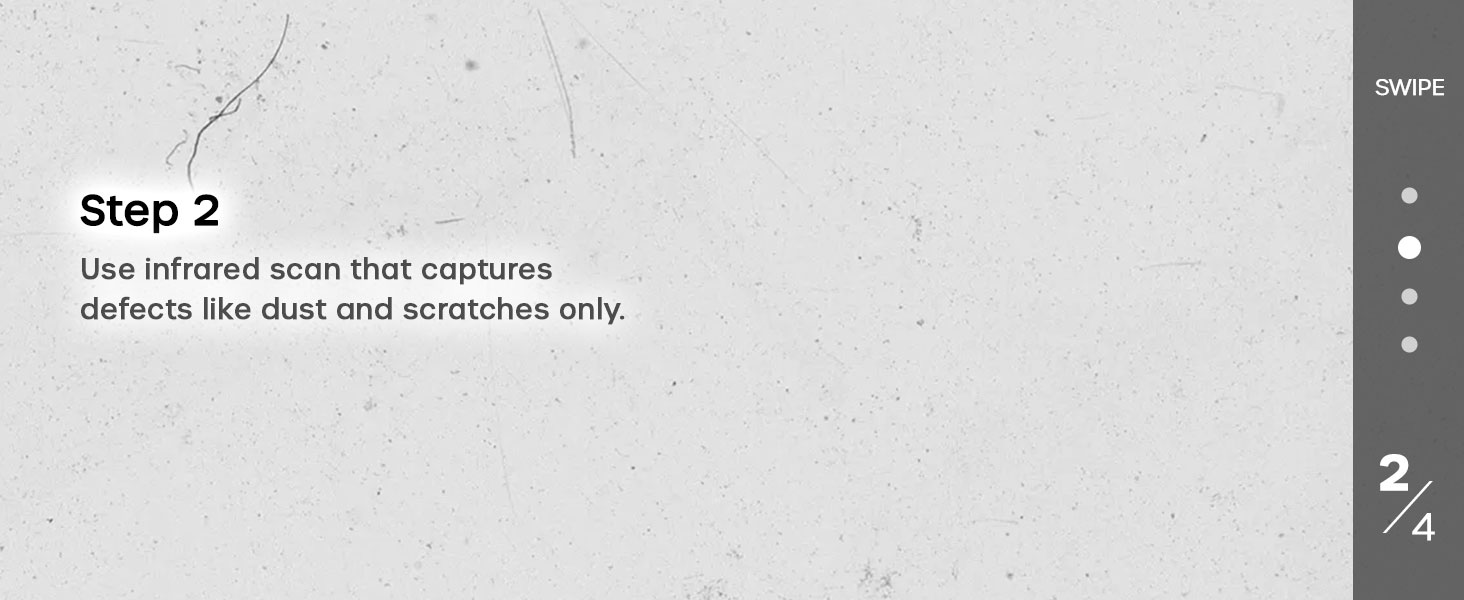
Figure 19: iSRD Step 2: Infrared scan for defects.

Figure 20: iSRD Step 3: Marking detected defects.

Figure 21: iSRD Step 4: Final image after defect removal.

Figure 22: Multi-Exposure enhances dynamic range for better detail in highlights and shadows.

Figure 23: HDRi preserves maximum image data for archival purposes.

Figure 24: The 16-bit Histogram provides detailed control over image tones.

Figure 25: Using the 16-bit Histogram for image error correction.

Figure 26: Expert Mode provides granular control over scanning parameters.
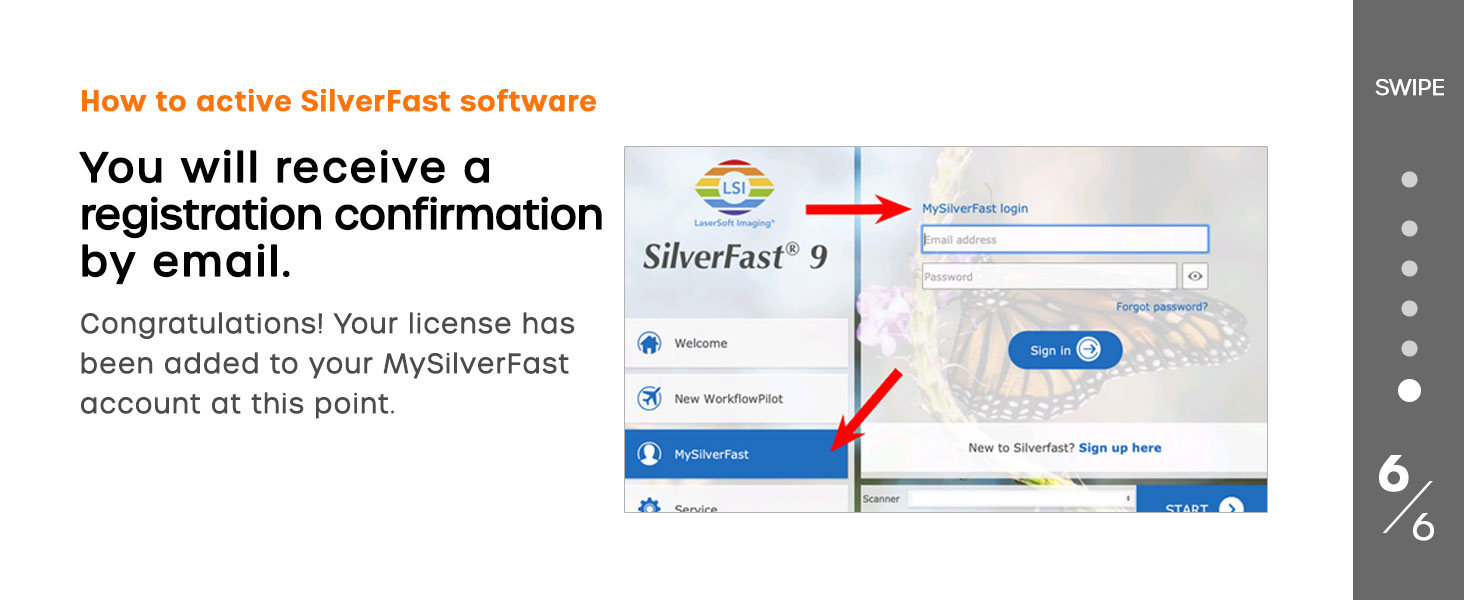
Figure 27: Expert Mode offers advanced settings for fine-tuning scans.
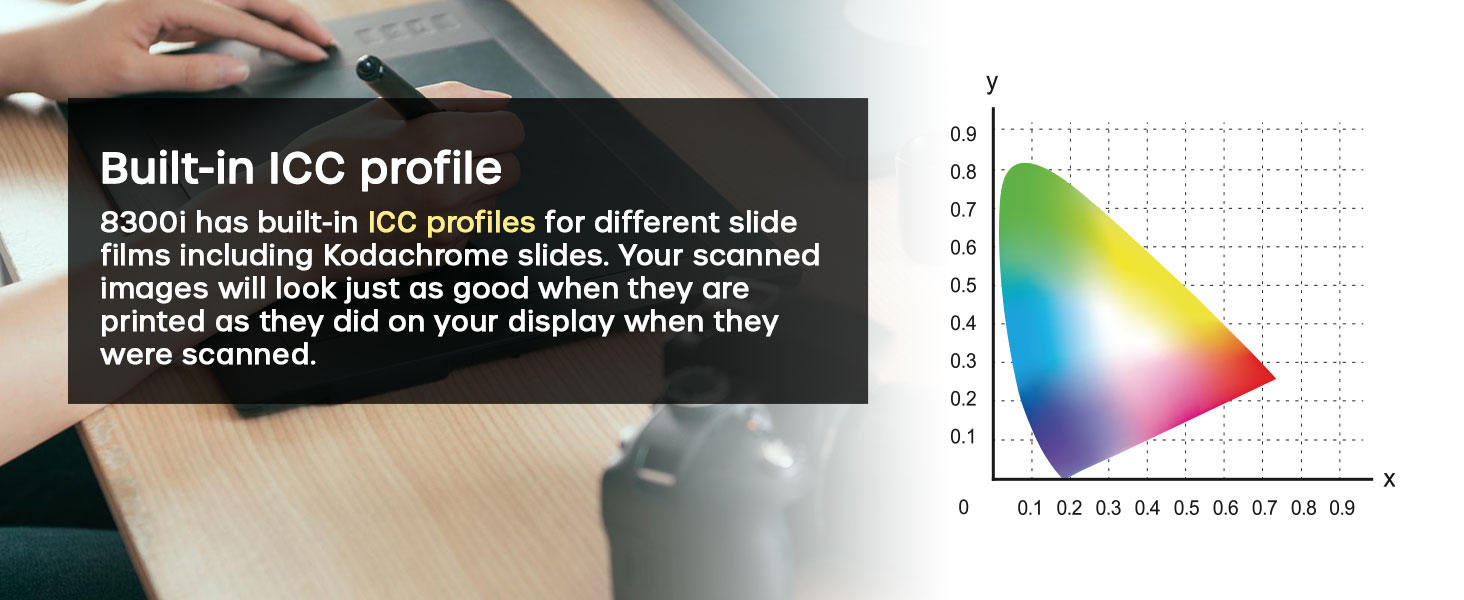
Figure 28: ICC profiles ensure color accuracy across devices.
Using Plustek QuickScan Plus:
For quick and easy digitization, QuickScan Plus provides a simplified interface. Select your media type (positive or negative), desired resolution, and output format, then initiate the scan.
3. Saving Scans
Both SilverFast and QuickScan Plus allow you to save scanned files in various formats, including JPEG, TIFF, and RAW (HDRi for SilverFast). Choose the format suitable for your needs (e.g., TIFF for maximum quality, JPEG for smaller file 크기).
유지
1. 스캐너 청소
Regular cleaning helps maintain scan quality and prolong the scanner's life.
- 외부: 외부를 부드럽고 마른 보풀 없는 천으로 닦으십시오. 연마성 세제나 용제를 사용하지 마십시오.
- Film/Slide Holders: Clean holders with a soft cloth or compressed air to remove dust and debris.
- 스캐닝 영역: Use a can of compressed air to gently blow away dust from the film scanning area. Avoid touching the glass surface directly with your fingers. If necessary, use a lens cleaning cloth specifically designed for optical surfaces.
2. 먼지 방지
To minimize dust accumulation, store the scanner in its protective carrying case when not in use. Always handle film and slides by their edges to avoid fingerprints and dust transfer.
문제 해결
This section addresses common issues you might encounter. For more detailed troubleshooting, refer to the full user manual (PDF) available on the Plustek web사이트를 방문하거나 고객 지원팀에 문의하세요.
| 문제 | 가능한 원인 | 해결책 |
|---|---|---|
| 컴퓨터에서 스캐너가 감지되지 않았습니다. | USB cable loose or faulty; drivers not installed correctly; scanner not powered on. | Ensure USB cable is securely connected. Reinstall scanner drivers. Verify scanner is powered on. Try a different USB port. |
| Poor scan quality (dust, scratches). | Dust/debris on film/slides or scanner glass; iSRD not enabled or configured correctly. | Clean film/slides and scanner glass. Enable and configure iSRD in SilverFast software. |
| 색상이 정확하지 않습니다. | Scanner not calibrated; incorrect film profile selected in software. | Perform IT8 color calibration using the provided target. Select the correct NegaFix profile for your film type in SilverFast. |
| 소프트웨어가 충돌하거나 멈춥니다. | Outdated software version; system resource issues; software conflict. | Update SilverFast/QuickScan Plus to the latest version. Close other demanding applications. Restart computer and scanner. |
명세서
Key technical specifications for the Plustek OpticFilm 8300i Ai scanner:
| 특징 | 세부 사항 |
|---|---|
| 모델명 | OpticFilm 8300i Ai |
| 품목 모델 번호 | OF8300i AI |
| 스캐너 유형 | 영화 |
| 미디어 유형 | 35mm Slide, 35mm Film |
| 광학 해상도 | 7200dpi |
| 색상 깊이 | 16 비트 |
| 광원 유형 | 주도의 |
| 연결 기술 | USB |
| 제품 치수 | 10.71 x 4.72 x 4.69인치(27.2 x 12 x 11.9cm) |
| 품목 무게 | 6.03파운드(2.74kg) |
| 운영 체제 지원 | Windows 7/8/10/11 and Mac OS |

Figure 29: Feature comparison across different Plustek OpticFilm scanner models.
보증 정보
Plustek products are covered by a manufacturer's warranty. Please refer to the warranty card included with your product or visit the official Plustek web해당 지역의 자세한 보증 약관 및 조건은 해당 사이트에서 확인하세요.
지원하다
For technical assistance, product inquiries, or troubleshooting not covered in this manual, Plustek offers various support channels:
- US-based Expert Services: Available via phone or online support.
- Realtime Online Zendesk Support
- Online Form/Email Support
- Consultant Support: For solution and SDK inquiries.
Please visit the official Plustek web최신 연락처 정보와 지원 리소스를 제공하는 사이트입니다.

Figure 30: Plustek offers quality US-based technical support.
Ask a question about this manual
Ask about setup, troubleshooting, compatibility, parts, safety, or missing instructions. Manuals+ will review the question and use this page’s manual context to help answer it.