Cabletech URZ0336B
Cabletech URZ0336B DVB-T2 H.265 HEVC Digital Tuner
사용자 설명서
1. 서론
This manual provides comprehensive instructions for the installation, operation, and maintenance of your Cabletech URZ0336B DVB-T2 H.265 HEVC Digital Tuner. Please read this manual thoroughly before using the device to ensure proper functionality and to prevent damage.
2. 안전 정보
감전, 화재 또는 기기 손상을 방지하기 위해 항상 다음 안전 수칙을 준수하십시오.
- 장치를 비나 습기에 노출시키지 마십시오.
- c를 열지 마세요asing. 모든 서비스는 자격을 갖춘 담당자에게 의뢰하세요.
- 기기 주변의 환기가 잘 되도록 하십시오. 통풍구를 막지 마십시오.
- 장치와 함께 제공된 전원 어댑터만 사용하십시오.
- 장치를 열원이나 직사광선으로부터 멀리 두십시오.
- 장기간 사용하지 않을 경우 전원 플러그를 벽면 콘센트에서 뽑으십시오.
3. 패키지 내용
다음 품목이 패키지에 포함되어 있는지 확인하세요.
- Cabletech URZ0336B DVB-T2 H.265 HEVC Digital Tuner
- 원격 제어
- AAA 배터리(2개)
- 전원 어댑터
- 사용 설명서 (본 문서)
4. 제품 오버view
Familiarize yourself with the main components and connections of your Cabletech URZ0336B tuner.
4.1. 기기 및 리모컨
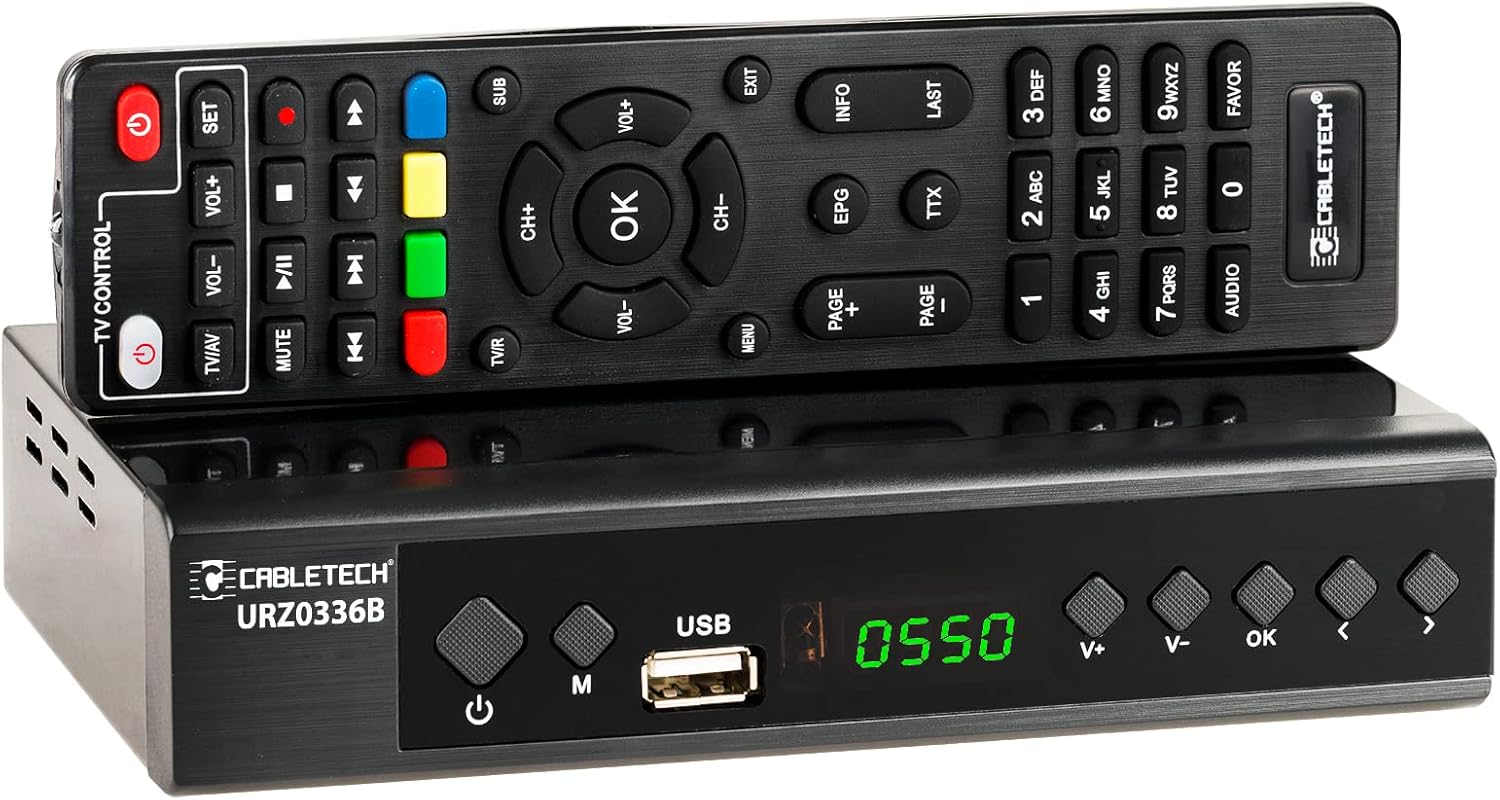
Image: The Cabletech URZ0336B DVB-T2 H.265 HEVC Digital Tuner shown with its accompanying remote control. The tuner is a compact black box, and the remote is also black with various control buttons.
4.2. 전면 패널
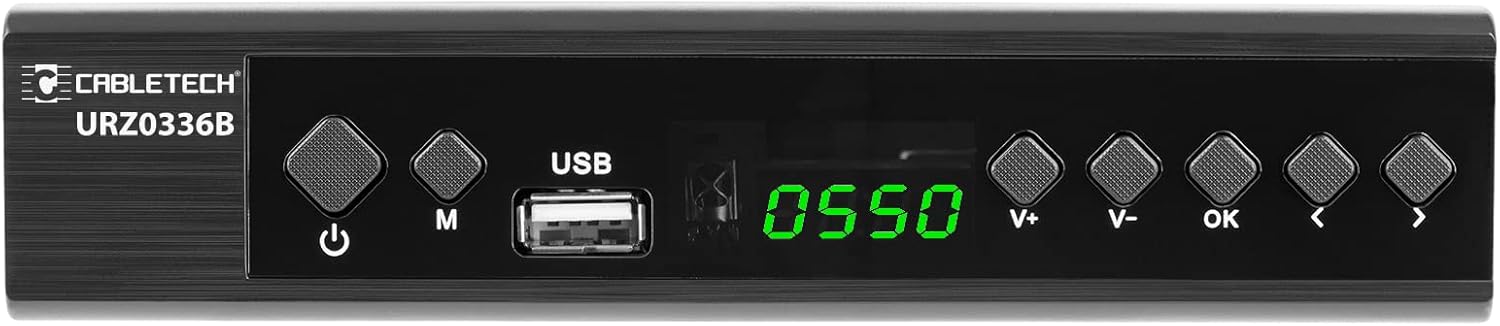
Image: Close-up of the Cabletech URZ0336B front panel, featuring a power button, menu button (M), USB 2.0 port, LED display showing "0550", and navigation/volume buttons (V+, V-, OK, <, >).
- 전원 버튼: Turns the device on/off or to standby.
- M(메뉴) 버튼: 주 메뉴에 액세스합니다.
- USB 2.0 포트 : For software updates, PVR recording, and media playback.
- LED 디스플레이: 채널 번호 또는 시간을 표시합니다.
- V+/V- Buttons: 볼륨을 조정합니다.
- 확인 버튼: 선택 사항을 확인합니다.
- </> Buttons: Navigates through menus or changes channels.
4.3. 후면 패널 연결

Image: The rear panel of the Cabletech URZ0336B, showing various input and output ports: ANT IN (IEC socket), COAXIAL, USB, HD OUT (HDMI), SCART, and the power input (110-240V~ 50/60Hz).
- 개미: Connects to your DVB-T/T2 antenna.
- 같은 축의: 디지털 오디오 출력.
- USB: Additional USB 2.0 port for external devices.
- HD 출력(HDMI): 고화질 영상과 음성을 위해 TV에 연결하세요.
- SCART: Connects to older TVs or VCRs.
- 전원 입력: 전원 어댑터에 연결합니다.
4.4. 원격 제어 레이아웃

이미지: 상세 view of the Cabletech URZ0336B remote control, showing buttons for power, TV/AV, volume, channel, mute, playback controls, EPG, TTX, INFO, numeric keypad, and special function buttons.
The remote control provides full functionality for operating your tuner. Insert 2x AAA batteries into the battery compartment before first use.
5. 설정
5.1. Connecting the Tuner
- 안테나 연결: Connect your DVB-T/T2 antenna cable to the 개미가 들어와요 port on the rear panel of the tuner.
- TV에 연결:
- HD TV의 경우: HDMI 케이블을 TV에서 TV로 연결하세요. HD 출력(HDMI) port on the tuner to an HDMI input on your TV.
- 구형 TV의 경우: SCART 케이블을 연결하세요. 스카트 port on the tuner to the SCART input on your TV.
- 전원 연결: Connect the power adapter to the tuner's power input and then plug it into a wall outlet.
- 배터리 삽입: Open the battery compartment on the remote control and insert 2x AAA batteries, observing polarity.
5.2. First-Time Installation and Channel Scan
- Turn on your TV and select the correct HDMI or SCART input source that the tuner is connected to.
- Power on the Cabletech URZ0336B tuner using the power button on the front panel or remote control.
- The first-time installation wizard should appear on your TV screen. Follow the on-screen prompts.
- 원하는 언어와 국가를 선택하세요.
- Initiate an 자동 검색 for channels. The tuner will scan for all available DVB-T/T2 channels in your area. This process may take several minutes.
- Once the scan is complete, the tuner will save the found channels and display the first channel.
Note: If you experience poor signal quality, adjust your antenna position or consider using a signal amp리퍼.
6. 사용 설명서
6.1. 기본 기능
- 전원 켜기/끄기: 를 누르세요 힘 리모컨의 버튼을 누르세요.
- 채널 변경: 사용하세요 CH + / CH- buttons or the numeric keypad to enter a channel number.
- 볼륨 조절: 사용하세요 VOL + / VOL- 버튼.
- 무음: 를 누르세요 음소거 오디오를 일시적으로 음소거하는 버튼입니다.
- 메뉴: 를 누르세요 메뉴 설정 및 기능 메뉴에 접근하려면 이 버튼을 클릭하세요.
- OK : Confirms selections in menus or displays the channel list.
- 출구: 현재 메뉴나 화면을 종료합니다.
6.2. 전자 프로그램 가이드(EPG)
The 7-day EPG provides a schedule of current and upcoming programs.
- 를 누르세요 전자책 리모컨의 버튼을 누르세요.
- Navigate through channels and program times using the arrow buttons.
- 누르다 OK 에게 view 선택한 프로그램에 대한 자세한 정보입니다.
6.3. PVR (Program Recording) and Timeshift
Connect a USB storage device (e.g., USB flash drive or external hard drive) to one of the USB 2.0 ports to use PVR and Timeshift functions.
- PVR 녹화:
- 를 누르세요 기록 button (red circle) on the remote to start immediate recording of the current program. Press 멈추다 (square) to end recording.
- Schedule recordings via the EPG: Select a program in the EPG and press OK, then choose the record option.
- 시간 이동:
- 프로그램을 시청하는 동안 정지시키다 button. The tuner will begin recording the live broadcast to the USB device.
- 그 다음에는 할 수 있습니다 놀다, 빨리 감기, 또는 되감기 within the buffered content.
- 누르다 멈추다 to exit Timeshift and return to live TV.
6.4. 미디어 재생
The tuner supports playback of various media file연결된 USB 저장 장치에서 가져온 이미지입니다.
- Connect your USB device to a USB port on the tuner.
- Go to the main menu and select "Media" or "USB".
- 원하는 항목으로 이동 file type (MP3, WMA, JPEG, BMP, AVI) and select the file 놀다.
6.5. 지원되는 애플리케이션
The tuner supports various online applications when connected to the internet via an external MT7601 Wi-Fi adapter (not included).
- 날씨: View local weather forecasts.
- IPTV: Access Internet Protocol Television streams.
- 유튜브: 유튜브에서 동영상을 시청하세요.
- RSS: Read RSS news feeds.
Note: An external MT7601 Wi-Fi adapter is required for internet connectivity and access to these applications.
6.6. 자녀 보호 기능
Set up parental control to restrict access to certain channels or programs based on age ratings.
- 메인 메뉴에서 "자녀 보호" 섹션에 액세스하세요.
- Enter your PIN (default is usually 0000 or 1234, check your device for specifics).
- Configure age restrictions or lock specific channels.
6.7. 타이머 기능
The timer function allows you to schedule the tuner to turn on/off at specific times or to switch to a particular channel.
- Navigate to the "Timer" section in the main menu.
- Set the event type (e.g., Power On, Power Off, Record), time, and duration.
7. 유지관리
7.1. 청소
To clean the device, disconnect it from the power supply and wipe the exterior with a soft, dry cloth. Do not use liquid or aerosol cleaners.
7.2. 소프트웨어 업데이트
Software updates can improve performance and add new features. Updates are performed via the USB port.
- 최신 펌웨어를 다운로드하세요 file from the official Cabletech support web사이트(가능한 경우).
- 펌웨어를 복사합니다 file USB 플래시 드라이브의 루트 디렉터리로 이동합니다.
- Connect the USB flash drive to the tuner's USB port.
- Go to the "System" or "Tools" menu, then select "Software Update" or "Upgrade by USB".
- Follow the on-screen instructions to complete the update. Do not power off the device during the update process.
8. 문제 해결
If you encounter issues with your tuner, refer to the following common problems and solutions:
| 문제 | 가능한 원인 | 해결책 |
|---|---|---|
| 그림이나 소리가 나지 않습니다 | Incorrect TV input selected; Loose cable connections; Tuner not powered on. | Select correct TV input (HDMI/SCART); Check all cable connections; Ensure tuner is powered on. |
| "신호 없음" 메시지 | Antenna not connected; Poor antenna signal; No channels scanned. | Connect antenna properly; Adjust antenna position; Perform an automatic channel scan. |
| 리모컨이 작동하지 않습니다 | Batteries are dead or inserted incorrectly; Obstruction between remote and tuner. | Replace batteries; Check battery polarity; Remove any obstructions; Point remote directly at the tuner. |
| USB에 녹화할 수 없습니다 | USB device not connected or formatted incorrectly; Insufficient storage space. | Ensure USB device is connected; Format USB device to FAT32 or NTFS; Free up space on USB device. |
| No internet access for apps | No MT7601 Wi-Fi adapter connected; Network configuration issues. | Connect a compatible MT7601 Wi-Fi adapter; Check network settings in the tuner's menu. |
9. 사양
| 특징 | 세부 사항 |
|---|---|
| 모델 번호 | URZ0336B |
| CPU | GX6702S5 |
| 내부 메모리 | 32메가바이트 |
| 숫양 | 512MB DDR2 |
| ANT 커넥터 | IEC 소켓 |
| 주파수 범위 | VHF: 170–230 MHz, UHF: 470–862 MHz |
| 복조 | QPSK, 16QAM, 64QAM, 256QAM |
| 대역폭 | 7MHz, 8MHz |
| 디코딩 | MPEG-1, MPEG-2, MPEG-4, H.264, H.265, AAC, HE-AAC, AC-3, DD+ |
| 입력/출력 | 2x USB 2.0, HDMI, SCART, COAXIAL |
| 종횡비 | Auto, 16:9 WS, 16:9 PB, 16:9 PS; 4:3 LB, 4:3 PS, 4:3 Full |
| 지원되는 형식 | MP3, WMA, JPEG, BMP, AVI |
| 화면 해상도 | 480i, 480p, 576i, 576p, 720p, 1080i, 1080p |
| 비디오 해상도 | 1920 x 1080 픽셀 |
| 오디오 디코딩 | MPEG-1 LayerI/II, Dolby-Downmix 2-Channel (License), AAC LC, HE-AAC v1/V2, PCM-Downmix, IEC958 SPDIF |
| File 체계 | FAT32, NTFS |
| 호환성 | Fully compatible with DVB-T2/DVB-T |
| 원격 제어 | Requires 2x AAA batteries |
| 전력 소비 | Max. 6 W (Operating), Max. 50/60 Hz (Standby) |
| 치수(폭 x 높이) | 168mm x 36mm |
| Wi-Fi 지원 | Requires external MT7601 chip adapter |
| Tuner Bit Depth | 10비트 |
10. 보증 및 지원
This product comes with a standard manufacturer's warranty. For specific warranty terms and conditions, please refer to the documentation included with your purchase or contact Cabletech customer support.
For technical assistance, troubleshooting beyond this manual, or warranty claims, please contact your retailer or the official Cabletech support channels.
Ask a question about this manual
Ask about setup, troubleshooting, compatibility, parts, safety, or missing instructions. Manuals+ will review the question and use this page’s manual context to help answer it.