
1. 서론
The NVX XMICROLOC2 is a compact 2-channel line output converter designed to integrate aftermarket amplifiers with factory (OEM) car audio systems. It converts high-level speaker outputs from a factory head unit into low-level RCA signals, allowing for the addition of an amplifier. This device features an input circuit that corrects crossover distortion, individual adjustable outputs, and an auto turn-on function via DC offset, simplifying installation and ensuring optimal audio quality.
2. 안전 정보
Please read all instructions carefully before installation. Failure to follow these guidelines may result in damage to the product, vehicle, or personal injury.
- 전기 설비 작업을 시작하기 전에 항상 차량 배터리의 음극 단자를 분리하십시오.
- Ensure all wiring is properly routed and secured to prevent pinching, cutting, or short circuits.
- 모든 연결에는 적절한 전선 굵기를 사용하십시오.
- 설치 과정의 어떤 부분이든 확실하지 않은 경우 전문 자동차 오디오 설치자에게 문의하세요.
- Do not operate the product in wet conditions or expose it to excessive moisture.
3. 패키지 내용
패키지에 모든 품목이 들어 있는지 확인하세요.
- NVX XMICROLOC2 2-Channel Line Output Converter
- 사용 설명서(본 문서)
4. 특징
- 2-Channel Micro Line Output Converter
- Input Circuit corrects crossover distortion
- Individual adjustable outputs
- Auto turn-on via DC offset
- Compact design allows for easy installation
5. 설정 및 설치
The NVX XMICROLOC2 is designed for straightforward integration into existing car audio systems. Follow these steps for proper installation.
5.1 배선 연결
The XMICROLOC2 connects to your factory speaker wires and provides RCA outputs for your amplifier, along with a remote turn-on signal.

Figure 1: NVX XMICROLOC2 showing the wiring harness for input connections.
- 입력 배선: Connect the high-level speaker outputs from your factory head unit or amplifier to the corresponding input wires on the XMICROLOC2.
- Identify the positive (+) and negative (-) wires for the left and right speaker channels.
- Connect these to the XMICROLOC2's input wires. Refer to the wire color code (if provided on the device or packaging) for correct connections. Typically, these are twisted pairs.
- RCA 출력 : Connect standard RCA cables from the XMICROLOC2's RCA outputs to the input of your aftermarket amp리퍼.
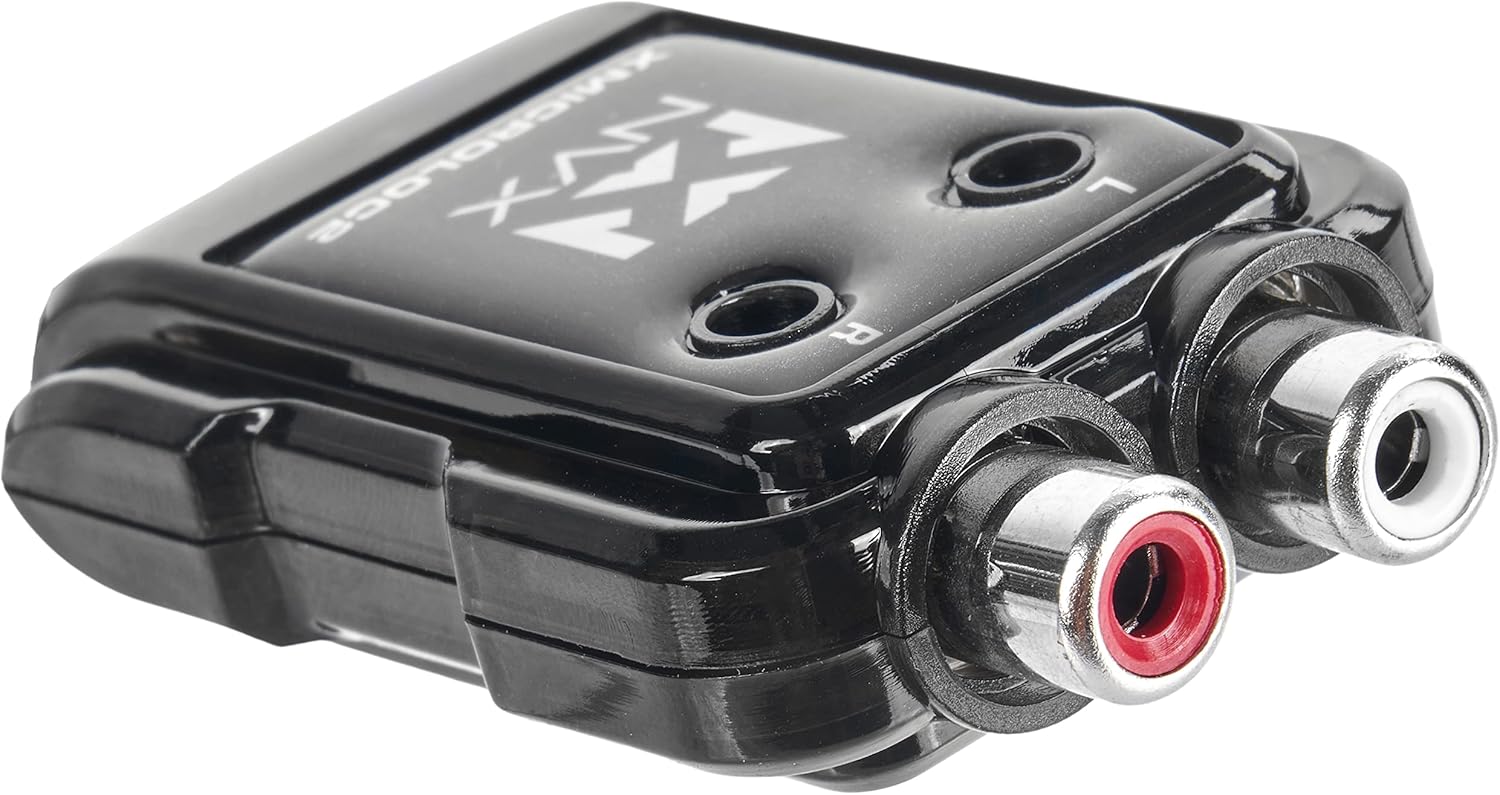
Figure 2: NVX XMICROLOC2 displaying the Left and Right RCA output jacks.
- 원격 켜기: The XMICROLOC2 features an auto turn-on function via DC offset. This means it detects when the factory head unit is on and provides a 12-volt remote turn-on signal to your amp리퍼.
- Connect the remote output wire from the XMICROLOC2 (usually a blue wire) to the remote turn-on input of your amp리퍼.
- No separate remote wire from the head unit is typically needed for this feature to work.
- 전원 및 접지: The XMICROLOC2 typically draws power directly from the speaker input signals and does not require a separate 12V power and ground connection for its operation, relying on the DC offset for turn-on. However, always verify the specific wiring instructions provided with the unit.
5.2 출력 레벨 조정
The XMICROLOC2 has individual adjustable outputs for the left and right channels. These adjustments are typically small potentiometers (screws) located on the unit, often labeled 'L' and 'R'.

그림 3: 상단 view of the NVX XMICROLOC2, showing the Left (L) and Right (R) adjustment screws.
- Before making adjustments, set your amp앰프의 게인 컨트롤을 최소(가장 낮은) 설정으로 맞추십시오.
- Play a familiar audio track at a moderate volume level on your factory head unit.
- Using a small screwdriver, slowly turn the 'L' and 'R' adjustment screws clockwise on the XMICROLOC2 until you hear a clean, undistorted signal from your amplifier. Avoid turning them too high, as this can introduce distortion.
- Once the XMICROLOC2 outputs are set, you can fine-tune the amplifier's gain controls to achieve the desired overall volume and balance.
5.3 장착
The compact design of the XMICROLOC2 allows for flexible mounting options. Choose a location that is dry, away from excessive heat, and easily accessible for adjustments if needed. Secure the unit using screws or double-sided tape (not included) to prevent movement.
6. 사용 설명서
Once installed and adjusted, the NVX XMICROLOC2 operates automatically. When your factory head unit is turned on, the XMICROLOC2 will detect the DC offset from the speaker signals and activate the remote turn-on output for your amplifier. When the head unit is turned off, the remote turn-on signal will cease, and your amplifier will power down.
The primary operational aspect is the initial setting of the output levels. After the initial setup, no further user interaction is typically required unless you change your amplifier or head unit, or if you wish to re-balance the audio levels.
7. 유지관리
The NVX XMICROLOC2 requires minimal maintenance. Follow these guidelines to ensure longevity:
- 기기를 깨끗하게 유지하고 먼지와 이물질이 쌓이지 않도록 하십시오. 청소할 때는 부드럽고 마른 천을 사용하십시오.
- 제품을 극한 온도나 장시간 직사광선에 노출시키지 마십시오.
- Ensure all wiring connections remain secure. Periodically check for any loose connections.
8. 문제 해결
If you encounter issues with your NVX XMICROLOC2, refer to the following common problems and solutions:
- 소리가 나지 않음 Amp정수기:
- Check all wiring connections, especially the input speaker wires and RCA outputs.
- Verify that the factory head unit is producing sound to the speaker inputs.
- 확인하십시오 amplifier is receiving a remote turn-on signal from the XMICROLOC2. Check the amplifier's power indicator.
- 확인하다 amplifier's gain settings are not at minimum.
- 왜곡된 소리:
- Reduce the output level adjustments on the XMICROLOC2.
- Reduce the gain settings on your amp리퍼.
- Ensure the input signal from the factory head unit is not already distorted.
- Amplifier Does Not Turn On:
- Verify that the factory head unit is powered on and playing audio. The XMICROLOC2 uses DC offset for turn-on.
- Check the remote turn-on wire connection between the XMICROLOC2 and the amp리퍼.
- Some factory head units may not produce sufficient DC offset on their speaker outputs. In rare cases, a separate remote turn-on wire from the vehicle's ignition might be required, bypassing the XMICROLOC2's auto turn-on feature.
- 윙윙거리는 소리 또는 소음:
- Ensure all ground connections are secure and free from paint or corrosion.
- Check for proper routing of RCA cables away from power wires to prevent interference.
- Verify that the XMICROLOC2's output levels are not set too high, causing the amplifier to clip.
9. 사양

Figure 4: NVX XMICROLOC2 dimensions and key specifications.
| 사양 | 값 |
|---|---|
| 모델 | NVX XMICROLOC2 |
| 채널 수 | 2 |
| 최대 전력 처리 | 300W (채널당 150W) |
| 입력 회로 | Corrects crossover distortion |
| 출력 조정 | Individual adjustable outputs (6:1 Step Down) |
| Turn-On Method | Auto turn-on via DC offset |
| 원격 켜기 출력 | 12-volt output for amp앰프 원격 켜기 |
| Maximum RCA Output Voltage | 2 볼트 |
| 운영 볼륨tage | 12 Volts (from vehicle electrical system) |
| 치수(길이 x 너비 x 높이) | 2.5 x 1.5 x 0.04 인치 |
| 품목 무게 | 2.11 온스 |
| 한국어: | 810021844732 |
10. 보증 및 지원
For warranty information and technical support, please refer to the official NVX website or contact NVX customer service directly. Keep your purchase receipt as proof of purchase for any warranty claims.
추가 지원을 받으려면 다음을 방문하세요. 아마존에서 NVX 스토어를 만나보세요 또는 공식 브랜드 web대지.