1. 서론
This manual provides detailed instructions for the installation, operation, and maintenance of your Crunch SA-2100.4 Smash Series 4-Channel Class AB Car Audio Amp앰프입니다. 설치 또는 작동 전에 본 설명서를 꼼꼼히 읽어 올바른 사용법을 숙지하고 제품 또는 차량 오디오 시스템의 손상을 방지하십시오.
The Crunch SA-2100.4 amplifier is designed to deliver reliable power and performance for your car audio setup, featuring a robust design and flexible configuration options.
2. 안전 정보
- 전기 작업을 시작하기 전에 항상 차량 배터리 음극 단자를 분리하세요.
- Ensure all wiring is properly routed and secured to prevent pinching, cutting, or short circuits.
- 이 설명서에 명시된 대로 전원 및 접지 연결에 적합한 규격의 배선을 사용하세요.
- 설치하다 amp과열을 방지하기 위해 적절한 환기가 가능한 위치에 보관하세요.
- 장착을 피하십시오 amp습기나 과도한 진동에 노출되는 장소에는 증폭기를 설치하지 마십시오.
- 설치 과정 중 확실하지 않은 부분이 있으면 전문 자동차 오디오 설치자에게 문의하세요.
3. 패키지 내용
패키지에 모든 품목이 들어 있는지 확인하세요.
- Crunch SA-2100.4 4-Channel Class AB Amp리퍼
- 사용 설명서 (본 문서)
- 장착 하드웨어(나사 등)
- Note: The Gravity Magnet Phone Holder is a separate bundled item and not part of the amplifier's core package.
4. Amp리퍼 기능
The Crunch SA-2100.4 amplifier는 다음과 같은 주요 기능을 제공합니다.
- 4 channels x 85 watts at 2 ohms
- 4 channels x 65 watts at 4 ohms
- 2 channels x 130 watts (mono bridged) at 4 ohms
- Operates in 4-channel stereo, dual stereo bridged, stereo + bridged mono, or dual bridged mono configurations.
- Fully adjustable variable electronic crossover: 12 dB per octave.
- Integrated heat sink for thermal management.
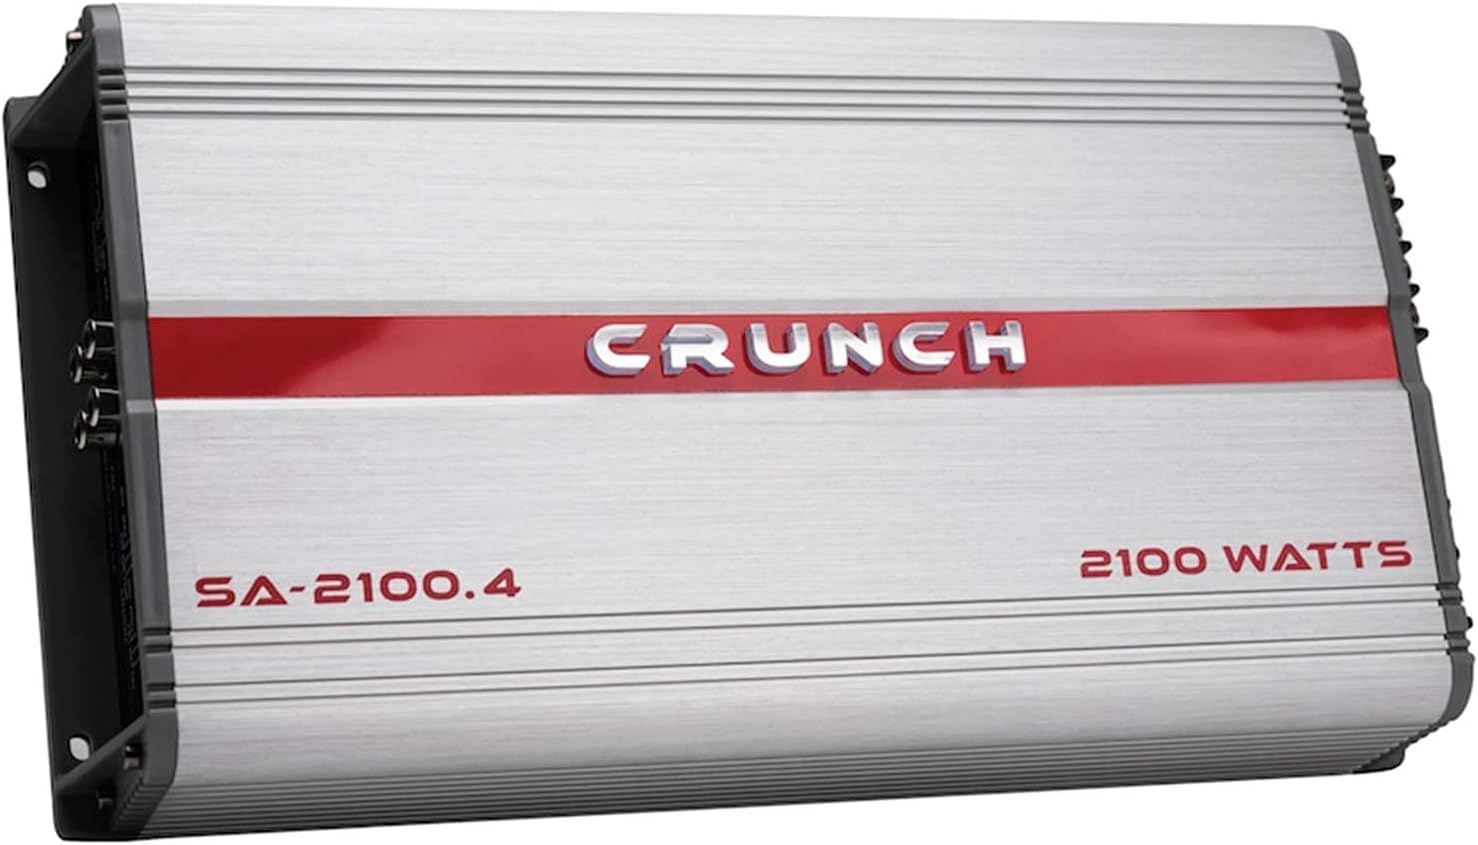
이미지 4.1: 맨 위 view of the Crunch SA-2100.4 amp리파이어, 쇼크asing its brushed aluminum finish and red Crunch logo. This view highlights the compact design and robust casing.
5. 설치
5.1 설치 위치
Choose a mounting location that is dry, well-ventilated, and protected from direct sunlight or excessive heat. Common locations include under seats, in the trunk, or behind panels. Ensure the amp증폭기는 차량 운행 중 움직임을 방지하기 위해 견고한 표면에 단단히 고정되어 있습니다.
5.2 배선 연결
Refer to the diagrams below for proper wiring connections. Use high-quality wiring components for optimal performance and safety.

이미지 5.1: Rear panel of the Crunch SA-2100.4 amplifier, showing power input terminals (GND, REM, +12V), dual 30A fuses, and speaker output terminals for channels 1-4, including bridged options.
5.2.1 전원 연결
- GND(접지): Connect to a clean, bare metal point on the vehicle chassis. Ensure a solid connection to prevent noise and ensure proper operation. Use a wire of the same gauge as the +12V power wire.
- REM(원격 켜기): 헤드 유닛의 원격 켜짐 출력 단자에 연결하십시오. 이 선은 신호를 보냅니다. amp앰프를 오디오 시스템과 함께 켜고 끌 수 있습니다.
- +12V(전원): Connect directly to the positive terminal of the vehicle's battery. Install an in-line fuse holder (not supplied) within 18 inches (45 cm) of the battery, with a fuse rating appropriate for the amplifier (e.g., 60A total for two 30A fuses).
5.2.2 스피커 출력 연결
Connect your speakers to the appropriate terminals. The amplifier supports 4-channel stereo, dual stereo bridged, stereo + bridged mono, or dual bridged mono configurations. Ensure correct polarity (+ to + and - to -) for all speakers.
- CH1, CH2, CH3, CH4: Individual speaker outputs for stereo operation.
- Bridged (CH1/CH2, CH3/CH4): For higher power output to a single speaker (e.g., a subwoofer), connect to the designated bridged terminals. Minimum impedance for bridged operation is 4 ohms.
5.2.3 입력 연결
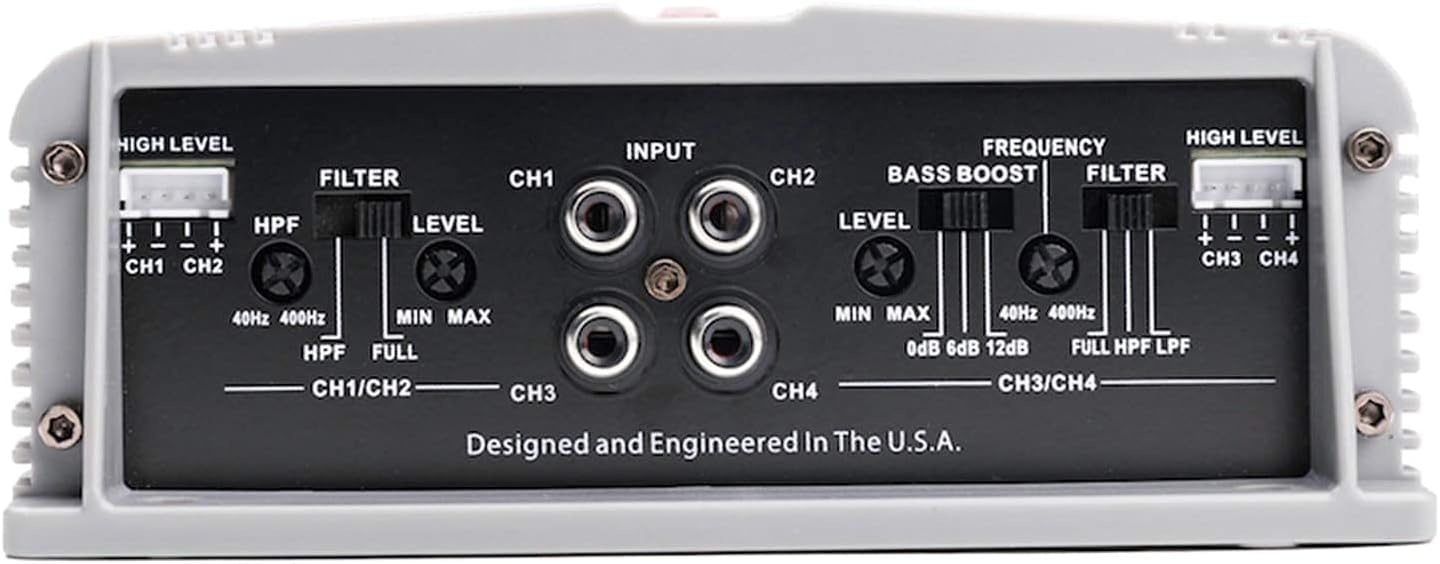
이미지 5.2: Front panel of the Crunch SA-2100.4 amplifier, displaying RCA input jacks for channels 1-4, high-level input connectors, and various control knobs for filter, level, bass boost, and frequency adjustments.
- RCA 입력(CH1, CH2, CH3, CH4): 헤드 유닛의 사전에서 RCA 케이블을 연결하세요.amp outputs to these jacks.
- High Level Input (CH1/CH2, CH3/CH4): If your head unit does not have RCA outputs, use the high-level input connectors. Connect speaker-level wires from your head unit's speaker outputs to these inputs.
6. 제어 및 조정
전면 패널 amplifier features several controls for fine-tuning your audio system (refer to Image 5.2):
- FILTER (HPF/FULL/LPF):
- HPF(하이패스 필터): Allows frequencies above the set frequency to pass through. Useful for protecting smaller speakers from low bass.
- 가득한: Allows the full frequency range to pass through.
- LPF(저역 통과 필터): Allows frequencies below the set frequency to pass through. Useful for subwoofers.
- LEVEL (Min/Max): 입력 감도를 조정합니다. amp출력 볼륨과 일치하도록 lifiertage of your head unit. Start at minimum and slowly increase until desired volume is achieved without distortion.
- BASS BOOST (0dB/6dB/12dB): Provides an adjustable bass enhancement at a specific frequency. Use sparingly to avoid distortion.
- FREQUENCY (40Hz-400Hz): Adjusts the cutoff frequency for the High Pass and Low Pass filters.
7. 사용 설명서
- Ensure all connections are secure and correct before powering on the system.
- 차량의 점화 장치와 헤드 유닛을 켜십시오. amp앰프는 원격 전원 켜짐선을 통해 자동으로 전원이 켜져야 합니다.
- 로 시작하세요 amplifier's LEVEL control at its minimum setting.
- Play a familiar piece of music through your head unit at about 75% of its maximum volume.
- 천천히 증가 amplifier's LEVEL control until you hear slight distortion, then back it off slightly until the sound is clear.
- Adjust the FILTER, FREQUENCY, and BASS BOOST controls to achieve your desired sound balance.
- When turning off the system, the amplifier will power down automatically with the head unit.
8. 유지관리
- 청소: 주기적으로 닦아주세요 amp부드럽고 마른 천으로 기기 외부를 닦으세요. 강한 화학 물질이나 연마성 세척제는 사용하지 마세요.
- 사이: Regularly check all power, ground, remote, and speaker connections to ensure they are tight and free from corrosion. Loose connections can lead to poor performance or damage.
- 통풍: 다음을 확인하세요. amp쿨러의 방열판 핀은 먼지와 이물질이 없어 적절한 냉각 상태를 유지합니다.
- 퓨즈 : 만약 amplifier fails to power on, check the fuses on the rear panel (Image 5.1). Replace blown fuses only with fuses of the same type and rating (30A).
9. 문제 해결
| 문제 | 가능한 원인 | 해결책 |
|---|---|---|
| 전원 없음 / Amp리퍼가 켜지지 않습니다 |
|
|
| 소리가 출력되지 않음 |
|
|
| 왜곡된 소리 |
|
|
| Amp리파이어 과열 |
|
|
10. 사양
| 특징 | 사양 |
|---|---|
| 모델 | SA-2100.4 |
| 채널 | 4 |
| 수업 | AB |
| RMS 전력(4옴) | 4 x 65W |
| RMS 전력(2옴) | 4 x 85W |
| 실효 출력(4옴 브리지 모드) | 2 x 130W |
| 크로스오버 | Variable Electronic (12 dB/octave) |
| 필터 범위 | 40Hz - 400Hz |
| 베이스 부스트 | 0dB, 6dB, 12dB |
| 퓨즈 | 2 x 30A |
| 재료 | 금속 |
| 품목 무게 | 5.5파운드 |
| 치수(길이 x 너비 x 높이) | 약 15.94 x 8.43 x 4.25인치(패키지 크기) |
| 한국어: | 789591810068 |
11. 보증 및 지원
Crunch products are designed for reliability and performance. For specific warranty terms and conditions, please refer to the warranty card included with your product or visit the official Crunch website. For technical support or service inquiries, please contact Crunch customer service through their official channels.
보증 청구를 위해 구매 증빙서류로 구매 영수증을 보관하세요.