
ECG DM-817
ECG DM-817 디지털 멀티미터 사용 설명서
모델: DM-817
소개
The ECG DM-817 is an auto-ranging digital multimeter designed for precise electrical measurements. It features a 6000-count display and 3-5/6 digit resolution, making it suitable for a wide range of applications. This manual provides detailed instructions for the safe and effective operation, maintenance, and troubleshooting of your DM-817 multimeter.
안전 정보
Always observe the following safety precautions when using the DM-817 multimeter:
- 어떤 기능에 대해서도 최대 입력 한도를 초과하지 마십시오.
- vol로 작업할 때 각별히 주의하십시오.tag60V DC 또는 30V AC RMS 이상입니다.
- Ensure the test leads are properly connected and the function switch is in the correct position before making measurements.
- 멀티미터가 손상된 것처럼 보이거나 테스트 리드가 닳은 경우에는 멀티미터를 사용하지 마세요.
- 배터리와 퓨즈는 반드시 지정된 종류와 정격의 제품으로만 교체하십시오.
- 기능을 변경하기 전에 항상 테스트 리드를 회로에서 분리하십시오.
- 모든 지역 및 국가 안전 규정을 준수하십시오.
경고: 이 제품에는 캘리포니아 주에서 암, 선천적 기형 또는 기타 생식 장애를 유발하는 것으로 알려진 화학 물질이 포함되어 있습니다. 자세한 내용은 다음을 방문하십시오. www.P65Warnings.ca.gov.
패키지 내용
패키지에 모든 품목이 들어 있는지 확인하세요.
- ECG DM-817 Digital Multimeter
- 테스트 리드(빨간색 1개, 검은색 1개)
- 운반 케이스
- AAA 배터리 2개(사전 설치 또는 별도 포함)
- 사용 설명서 (본 문서)

Image: The ECG DM-817 Digital Multimeter displayed alongside its included test leads, carrying case, and batteries.
제품 끝view
Familiarize yourself with the components of your DM-817 multimeter:

이미지: 앞면 view of the ECG DM-817 Digital Multimeter, showing the display, function dial, and input jacks.
- LCD 디스플레이: Shows measurement readings, units, and function indicators. Features a backlight for low-light conditions.
- 기능 다이얼: 측정 기능을 선택하기 위한 회전 스위치(Voltage, Current, Resistance, Capacitance, Temperature, Frequency, Diode, Continuity).
- 선택 버튼: Toggles between AC/DC, Diode/Continuity, or other sub-functions within a dial setting.
- 홀드 버튼: 디스플레이에 현재 판독값을 고정합니다.
- 백라이트 버튼: 디스플레이 백라이트를 활성화하거나 비활성화합니다.
- 입력 잭:
- VΩHzCAP°C: Vol에 대한 입력tag예: 저항, 주파수, 정전 용량 및 온도 측정.
- mAµA: 밀리에 대한 입력amp여기와 마이크로amp현재 측정값(융합).
- 오전 10시 XNUMX분: Input for high current measurements up to 10A (fused).
- 통신: 모든 측정에 대한 공통(접지) 입력.
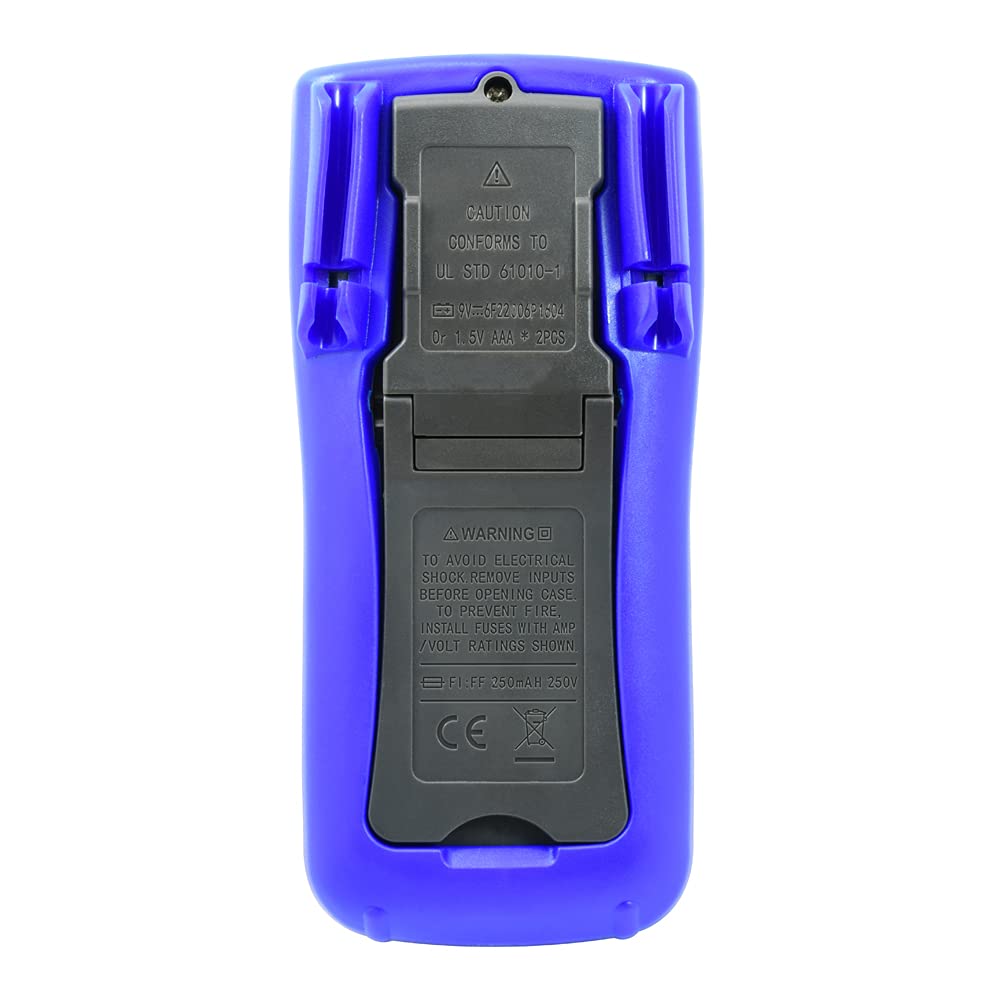
이미지: 뒤로 view of the ECG DM-817 Digital Multimeter, showing the battery compartment and kickstand.
The back of the multimeter features a battery compartment cover and a foldable kickstand for convenient hands-free operation.
설정
배터리 설치
The DM-817 requires two AAA batteries for operation. These are typically included. If not, or if the low battery indicator appears on the display, follow these steps:
- 멀티미터의 전원이 꺼져 있는지 확인하고 모든 테스트 리드를 분리하십시오.
- 장치 뒷면에서 배터리 덮개를 찾으세요.
- 드라이버를 사용하여 배터리 덮개를 고정하는 나사를 풀어주세요.
- 덮개를 제거하세요.
- 배터리함 안쪽에 표시된 극성(+와 -)을 확인하여 AAA 배터리 두 개를 삽입하십시오.
- 배터리 커버를 교체하고 나사로 고정합니다.
작동 지침
Before any measurement, ensure the test leads are securely plugged into the correct input jacks and the function dial is set to the desired measurement type.
DC Vol 측정tage(VDC)
- Plug the red test lead into the VΩHzCAP°C jack and the black test lead into the COM jack.
- 기능 다이얼을 V (DC 권tage) position. The multimeter is auto-ranging.
- 측정할 부품 또는 회로에 테스트 리드를 연결하고 극성을 확인하십시오.
- vol을 읽어보세요tagLCD 디스플레이의 e 값.
AC Vol 측정tag전자(VAC)
- Plug the red test lead into the VΩHzCAP°C jack and the black test lead into the COM jack.
- 기능 다이얼을 V~ (AC Voltage) position. The multimeter is auto-ranging.
- 측정할 부품이나 회로에 테스트 리드를 연결합니다.
- vol을 읽어보세요tagLCD 디스플레이의 e 값.
Measuring DC Current (DCA)
- 회로의 전원을 끕니다.
- For currents up to 600mA, plug the red test lead into the mAµA jack. For currents up to 10A, plug the red test lead into the 10A jack. Plug the black test lead into the COM jack.
- 기능 다이얼을 A (직류 전류) 위치.
- Break the circuit and connect the multimeter in series with the circuit.
- 회로에 전원을 공급하고 LCD 디스플레이에서 전류 값을 읽습니다.
- Turn off power and disconnect the multimeter before restoring the circuit.
Measuring AC Current (ACA)
- 회로의 전원을 끕니다.
- For currents up to 600mA, plug the red test lead into the mAµA jack. For currents up to 10A, plug the red test lead into the 10A jack. Plug the black test lead into the COM jack.
- 기능 다이얼을 A~ (AC Current) position.
- Break the circuit and connect the multimeter in series with the circuit.
- 회로에 전원을 공급하고 LCD 디스플레이에서 전류 값을 읽습니다.
- Turn off power and disconnect the multimeter before restoring the circuit.
저항 측정 (Ω)
- Plug the red test lead into the VΩHzCAP°C jack and the black test lead into the COM jack.
- 기능 다이얼을 Ω (저항) 위치.
- 저항을 측정하기 전에 회로의 전원이 차단되었는지 확인하십시오.
- 측정할 부품에 테스트 리드를 연결합니다.
- LCD 디스플레이에서 저항값을 읽으세요.
Measuring Capacitance (F)
- Plug the red test lead into the VΩHzCAP°C jack and the black test lead into the COM jack.
- 기능 다이얼을 캡 (정전용량) 위치.
- 측정 전에 콘덴서가 완전히 방전되었는지 확인하십시오.
- 테스트 리드를 커패시터에 연결합니다.
- LCD 디스플레이의 커패시턴스 값을 읽습니다.
Measuring Temperature (°C/°F)
- Plug the temperature probe (if included, otherwise use appropriate adapter) into the VΩHzCAP°C and COM jacks, observing polarity.
- 기능 다이얼을 ° C / ° F (Temperature) position.
- The display will show the ambient temperature. Place the probe on or near the object whose temperature is to be measured.
- Read the temperature value on the LCD display. Use the SELECT button to toggle between Celsius and Fahrenheit.
측정 주파수(Hz)
- Plug the red test lead into the VΩHzCAP°C jack and the black test lead into the COM jack.
- 기능 다이얼을 Hz (Frequency) position.
- 테스트 리드를 신호 소스에 연결하십시오.
- LCD 디스플레이의 주파수 값을 읽습니다.
다이오드 테스트 및 연속성 검사
- Plug the red test lead into the VΩHzCAP°C jack and the black test lead into the COM jack.
- 기능 다이얼을 다이오드/연속성 위치.
- 다이오드 테스트: 빨간색 리드를 다이오드의 양극에, 검은색 리드를 음극에 연결합니다. 순방향 볼륨tag전압 강하가 표시됩니다. 리드를 반대로 연결하면 개방 회로(OL)가 표시됩니다.
- 연속성 확인: Connect the test leads across the circuit or component. If continuity exists (resistance below approximately 50Ω), the buzzer will sound.
유지
청소
광고로 케이스를 닦으세요amp 천과 순한 세제를 사용하십시오. 연마제나 용제를 사용하지 마십시오. 입력 단자에 먼지와 습기가 들어가지 않도록 하십시오.
퓨즈 교체
If the current measurement functions stop working, the fuses may need replacement. Always use fuses with the specified ratings:
- mAµA input: F1 250mA/250V fast-blow fuse.
- 10A input: F2 10A/250V fast-blow fuse.
퓨즈를 교체하려면:
- 멀티미터의 전원이 꺼져 있는지 확인하고 모든 테스트 리드를 분리하십시오.
- "배터리 설치" 섹션에 설명된 대로 배터리함 덮개를 여십시오.
- The fuses are located inside the battery compartment. Carefully remove the old fuse.
- Insert a new fuse of the correct type and rating.
- 배터리 커버를 교체하고 고정합니다.
저장
If the multimeter is not used for an extended period, remove the batteries to prevent leakage and damage to the unit. Store the multimeter in its carrying case in a cool, dry place away from direct sunlight and extreme temperatures.
문제 해결
| 문제 | 가능한 원인 | 해결책 |
|---|---|---|
| 디스플레이가 없거나 어둡습니다 | 배터리가 방전되었거나 부족함 | 배터리를 교체하세요. |
| "OL"(과부하) 표시 | Input value exceeds range; incorrect function selected | Select a higher range (if manual ranging) or correct function. Ensure leads are connected properly. |
| 현재 측정 없음 | Blown fuse; incorrect lead connection | Check and replace fuse if necessary. Ensure leads are in the correct current input jacks (mAµA or 10A). |
| 부정확한 판독 | Low battery; poor lead contact; external interference | Replace batteries. Ensure leads are clean and make good contact. Move away from strong electromagnetic fields. |
명세서
The following table outlines the key specifications of the ECG DM-817 Digital Multimeter:

Image: Detailed specifications printed on the back of the ECG DM-817 product packaging.
| 측정 유형 | 범위 | 정확성 |
|---|---|---|
| DC 볼륨tage | 600mV에서 1000V까지 | ±(0.5% + 5 digits) to ±(0.8% + 5 digits) |
| AC 볼륨tage(참 RMS) | 600mV에서 750V까지 | ±(0.8% + 5 digits) to ±(1.2% + 10 digits) |
| 직류 전류 | 600µA ~ 10A | ±(1.0% + 5 digits) to ±(2.0% + 30 digits) |
| AC 전류 | 600µA ~ 10A | ±(1.2% + 5 digits) to ±(2.5% + 30 digits) |
| 저항 | 600Ω ~ 60MΩ | ±(0.8% + 5 digits) to ±(2.0% + 20 digits) |
| 정전 용량 | 10nF to 6000µF | ±(3.5% + 20 digits) to ±(5.0% + 10 digits) |
| 빈도 | 10Hz ~ 10MHz | ±(0.1% + 3자리) |
| 온도 | -20°C ~ 1000°C / -4°F ~ 1832°F | ±(1.0% + 5 digits) to ±(2.0% + 5 digits) |
일반 사양:
- 표시하다: 6000 Counts, 3-5/6 Digit LCD with Backlight
- 자동 전원 끄기: 예
- 데이터 보유 : 예
- 전원: AAA 배터리 2개(포함)
- 치수: 7.25 x 3.5 x 1.78 인치
- 무게: 1 파운드
- 안전 등급: CAT IV 600V, CAT III 1000V
보증 및 지원
For warranty information and technical support, please contact ECG customer service. Refer to the product packaging or the official ECG web최신 연락처 정보는 사이트에서 확인하세요.
제조업체: ECG, NTE
Ask a question about this manual
Ask about setup, troubleshooting, compatibility, parts, safety, or missing instructions. Manuals+ will review the question and use this page’s manual context to help answer it.