1. 서론
구매해주셔서 감사합니다asing the IKEA BJORKASEN Laptop Stand. This manual provides essential information for the safe assembly, operation, and maintenance of your new laptop stand. Please read these instructions carefully before use and keep them for future reference.
2. 안전 정보
- Ensure all parts are securely fastened before use. Periodically check and re-tighten screws as needed.
- 최대 적재 용량은 12kg(26lbs)을 초과하지 마십시오.
- Keep small parts away from children to prevent choking hazards during assembly.
- 뜨거운 물건을 보호용 받침대 없이 표면에 직접 올려놓지 마십시오.
- 넘어지는 것을 방지하려면 평평하고 안정적인 표면에 사용하세요.
3. 패키지 내용
조립을 시작하기 전에 모든 구성 요소가 있는지 확인하세요.
- 테이블 탑
- 지원 레일
- 내부 튜브
- 외부 튜브
- 베이스
- 힌지
- 커버 캡
- 다리
- 컵 홀더
- Bushing/Tube caps
- Assembly hardware (screws, Allen key)
4. 조립 설명서
This product requires assembly. Follow the steps below carefully.
- Attach the Cup Holder: Secure the cup holder to the designated slot on one of the leg frames using the provided hardware. Ensure it is firmly attached.
- Assemble the Leg Frames: Connect the inner and outer tubes to form the adjustable leg frames. Ensure the sliding mechanism for height adjustment is functional.
- 테이블 상판에 다리 프레임을 부착하세요: Position the tabletop upside down on a soft, clean surface. Attach the assembled leg frames to the underside of the tabletop using the hinges and screws. Ensure the hinges are correctly aligned and secured.
- 기지를 확보하세요: Attach the base to the bottom of the leg frames. Ensure all screws are tightened to provide stability.
- 최종 확인: Once assembled, gently test the stability of the stand and ensure all connections are tight.
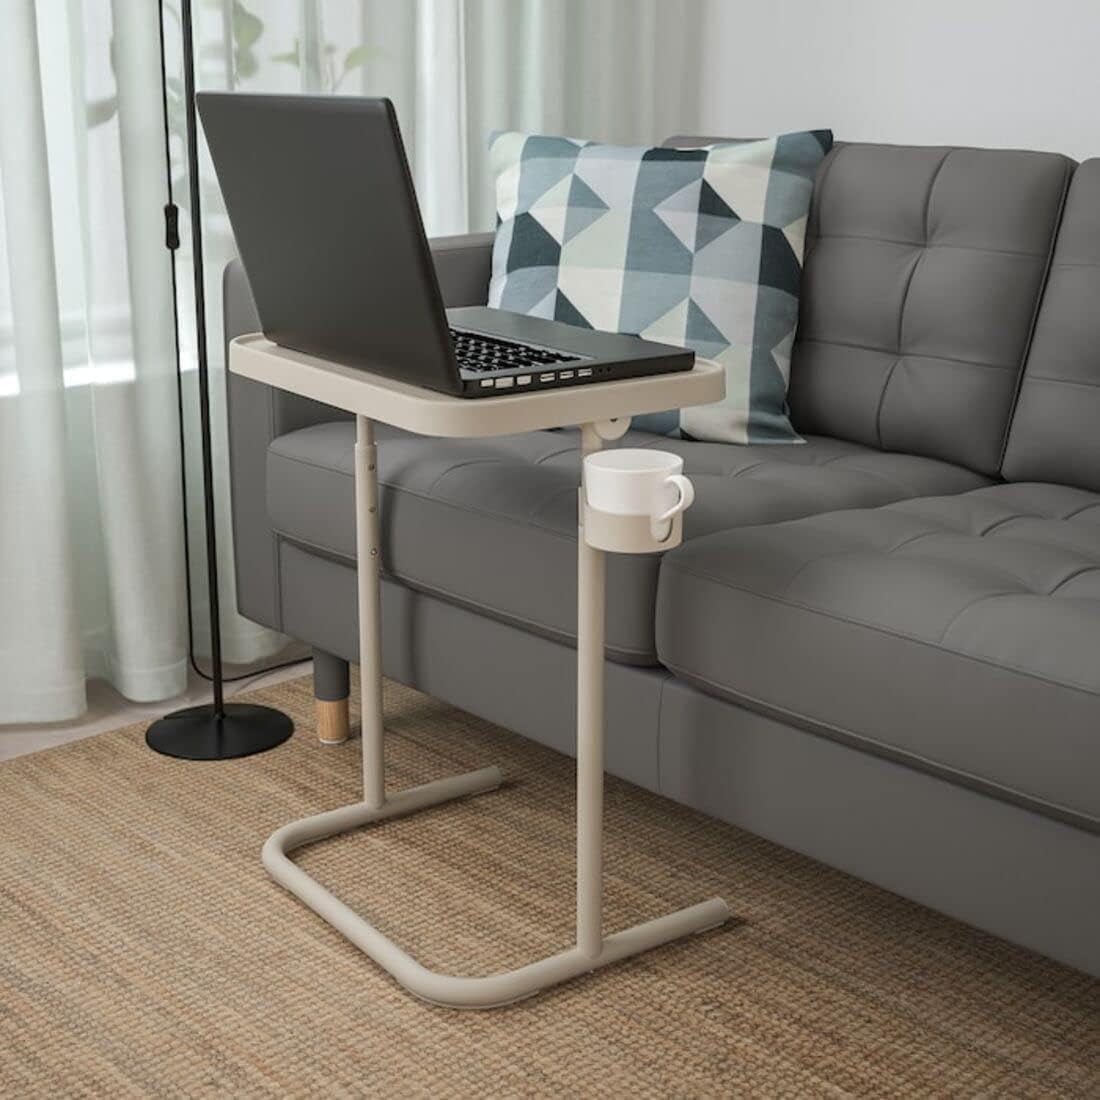
Image: The assembled laptop stand with a laptop and cup holder, demonstrating its functionality.

이미지: 클로즈업 view of the integrated cup holder, designed to keep beverages secure and within reach.
5. 사용 설명서
5.1 높이 조정
The laptop stand features an adjustable height mechanism. To adjust the height, locate the adjustment points on the leg frames. Press the release buttons or loosen the knobs (depending on the specific design) and slide the inner tube to your desired height. Ensure the mechanism locks securely into place before placing items on the stand.
5.2 Tabletop Tilt Adjustment
The tabletop can be tilted to provide an ergonomic working angle. Locate the tilt adjustment mechanism beneath the tabletop. Release the lock, adjust the tabletop to your preferred angle, and then secure the lock to prevent movement.

Image: The tabletop is shown in a tilted position, ideal for reading or using a tablet.

Image: The stand in use, showcasing the tilted surface for a laptop and a book, with a cup in the holder.
5.3 보관을 위한 접기
The stand is designed for easy folding to save space. Simply tilt the tabletop to its vertical position and fold the legs inward. This compact design allows for convenient storage when not in use.

Image: The laptop stand folded and stored upright, highlighting its minimal footprint.
6. 유지관리
6.1 청소
Wipe the stand clean with a cloth dampened in a mild detergent solution. Follow with a dry, clean cloth to remove any moisture. Avoid abrasive cleaners or harsh chemicals that may damage the surface.
6.2 Screw Tightening
Periodically check all screws and fittings to ensure they are tight. Re-tighten as necessary to maintain the stability and safety of the stand.
7. 문제 해결
- 받침대가 흔들거립니다. Check that all assembly screws are tightened. Ensure the stand is on a flat, even surface.
- 높이 조절이 어렵습니다. Ensure no debris is obstructing the sliding mechanism. If necessary, clean the tubes and apply a small amount of silicone-based lubricant.
- Tabletop does not tilt smoothly: Check the tilt mechanism for obstructions. Ensure the locking mechanism is fully disengaged before attempting to tilt.
8. 사양
| 특징 | 세부 사항 |
|---|---|
| 상표 | 이케아 |
| 모델 번호 | 104.764.79 |
| 색상 | 베이지색 |
| 너비 | 46cm(18.1인치) |
| 높이(최소) | 60cm(23.6인치) |
| 높이(최대) | 70cm(27.6인치) |
| 최대 부하 | 12kg(26파운드) |
| 재료 | Steel (Epoxy/polyester powder coating), Reinforced polyamide resin, Acetal resin, Polypropylene plastic |
| 조립이 필요합니다 | 예 |
9. 보증 및 지원
For warranty information or customer support, please refer to the documentation provided at the time of purchase or visit the official IKEA web사이트. 보증 청구를 위해 구매 증빙 자료를 보관하세요.