
1. 서론
Thank you for choosing the HOFTRONIC Esto 2-Light GU10 Black LED Spotlight. This product is designed for indoor use, providing adjustable lighting with two GU10 LED bulbs. Constructed from high-quality aluminum, this spotlight offers a modern aesthetic and reliable performance. Please read this manual carefully before installation and use to ensure safe and optimal operation.
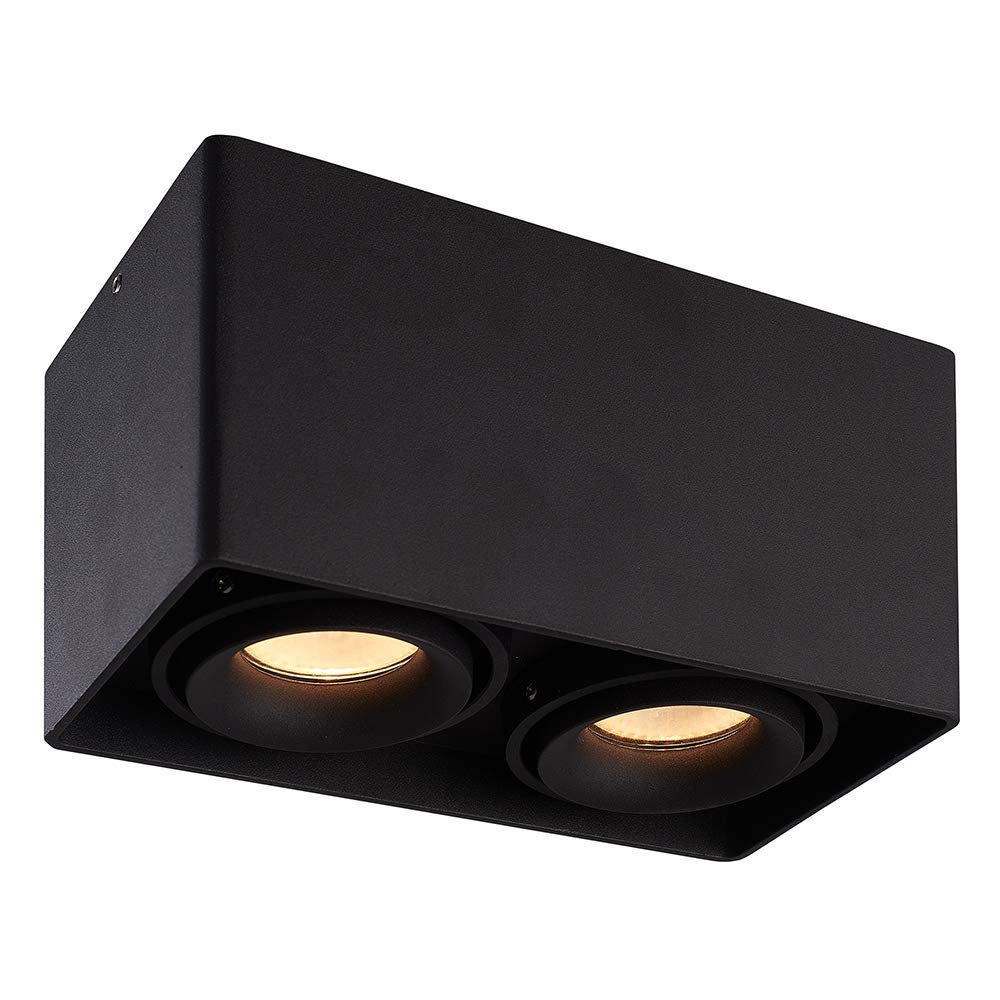
Image: The HOFTRONIC Esto 2-Light GU10 Black LED Spotlight installed on a ceiling, providing illumination in a modern interior setting.
2. 안전 지침
- Always disconnect the main power supply before attempting any installation, maintenance, or bulb replacement.
- 설치는 지역 전기 규정 및 안전 기준을 준수하기 위해 자격을 갖춘 전기 기술자가 수행해야 합니다.
- This product is rated IP20 and is suitable for 실내에서만 사용 가능. Do not expose to moisture or direct water.
- 볼륨을 확보하세요tage supply matches the product's requirements (230V AC).
- 최대 와트를 초과하지 마십시오tage of 35 Watts per GU10 LED bulb.
- 과열을 방지하기 위해 조명기구 주변에 적절한 환기를 확보하세요.
- Do not cover the fixture with insulating material unless specifically designed for it.
3. 상자 내용물
설치를 진행하기 전에 모든 구성품이 있는지, 손상되지 않았는지 확인하십시오.

Image: Contents of the product box, including the spotlight fixture and mounting hardware.
- 1x HOFTRONIC Esto Double Black LED Ceiling Spot Fixture
- 1x 알렌 키
- 4x 나사
- 4x 와셔
- 4x 벽 플러그
4. 설정 및 설치
Follow these steps for safe and correct installation of your LED spotlight.
- 설치 준비: 설치 구역의 주 전원이 차단기에서 차단되었는지 확인하십시오.
- 드릴링 지점 표시: Position the fixture on the ceiling at the desired location. Use the mounting holes on the base of the fixture to mark the drilling points. Refer to the diagram below for mounting dimensions.
- 드릴 구멍: 표시된 지점에 구멍을 뚫으세요. 제공된 벽 플러그를 뚫은 구멍에 삽입하세요.
- 배선 연결: Open the terminal cover on the fixture. Carefully connect the electrical wires from your ceiling to the terminal block inside the fixture. Ensure correct connections: Live (L), Neutral (N), and Earth (⌀). The cable inlet supports a maximum diameter of 12mm.
- 고정장치 장착: Align the fixture's mounting holes with the wall plugs. Secure the fixture to the ceiling using the provided screws and washers. Do not overtighten.
- GU10 전구를 삽입하세요: GU10 LED 전구 2개(별도 구매)를 소켓에 끼우세요.amp holders. Ensure they are securely twisted into place. Do not exceed 35 Watts per bulb.
- 복원력 : Once installation is complete and all connections are secure, restore the main power supply.

Image: Detailed diagram of the spotlight's base with mounting hole dimensions (69mm x 69mm spacing, 4mm diameter holes, 13mm edge distance, max 12mm cable inlet).
5. 사용 설명서
The HOFTRONIC Esto spotlight is designed for simple operation.
- 전원 켜기/끄기: Control the spotlight using your standard wall light switch.
- 조명 방향 조정: The GU10 fittings are tiltable, allowing you to adjust the light direction by up to 30 degrees. Gently pivot the inner lamp holders to direct the light as desired.

Image: Illustration of the adjustable light direction, demonstrating the 30-degree tilt capability of the GU10 fittings.
6. 유지관리
Regular maintenance will help prolong the life and appearance of your spotlight.
- 청소: Ensure the power is off and the fixture is cool before cleaning. Wipe the exterior of the spotlight with a soft, dry, or slightly damp 천으로 닦아주세요. 연마성 세제, 용제 또는 강한 화학 물질은 마감재를 손상시킬 수 있으므로 사용하지 마세요.
- 전구 교체:
- 조명기에 대한 전원 공급 장치를 끄십시오.
- 최근에 전구를 사용했다면 완전히 식히십시오.
- Gently push the GU10 bulb into its fitting and twist it counter-clockwise to remove.
- Insert a new GU10 LED bulb (max 35W) by pushing it into the fitting and twisting clockwise until secure.
- 전원을 복구합니다.
7. 문제 해결
스포트라이트 사용에 문제가 발생하면 다음의 일반적인 문제 및 해결 방법을 참조하십시오.
- 표시등이 켜지지 않음:
- 메인 전원이 켜져 있는지 확인하십시오.
- 벽 스위치가 '켜짐' 위치에 있는지 확인하십시오.
- Verify that the GU10 bulbs are correctly inserted and not faulty.
- 배선 연결부가 헐거워지거나 손상된 부분이 있는지 점검하십시오(점검 전에 전원을 끄십시오).
- 불빛이 깜빡거립니다:
- Ensure GU10 bulbs are fully seated in their sockets.
- Try replacing the bulb to rule out a faulty bulb.
- (전원을 끈 상태에서) 느슨한 배선 연결을 확인하세요.
- Fixture feels hot:
- Confirm that the installed GU10 bulbs do not exceed the maximum wattag35W의 e.
- Ensure there is no obstruction preventing proper heat dissipation.
문제가 지속되면 고객 지원 센터 또는 자격을 갖춘 전기 기술자에게 문의하십시오.
8. 사양
| 상표 | 호프트로닉 |
| 모델 번호 | 446496 |
| 색상 | 검은색 |
| 재료 | 알류미늄 |
| 스타일 | 현대의 |
| 특정 용도 | 실내에서만 사용 가능 |
| 전원 | 교류 230V |
| 전구 유형 | 주도의 |
| 권tage | 230볼트(AC) |
| 최대 와트tage (전구당) | 35 와트 |
| 전구베이스 | GU10 |
| 에너지 효율 라벨 | A+ |
| 장착 유형 | 천장 장착 |
| 제품 무게 | 5그램 |
| 치수(길이 x 너비 x 높이) | 187mm x 94mm x 105mm |
| IP 등급 | IP20 |

Image: Overall dimensions of the HOFTRONIC Esto 2-Light GU10 Black LED Spotlight.
9. 보증
This HOFTRONIC product comes with a 3년 보증, reflecting our commitment to quality and durable construction. The robust aluminum enclosure ensures a long lifespan for your ceiling light.

Image: Warranty information, indicating a 3-year warranty and durable build quality.
10. 지원
For further assistance, technical support, or warranty claims, please contact your retailer or the HOFTRONIC customer service department. Refer to your purchase documentation for contact details.