
소개
This manual provides detailed instructions for the installation, operation, and maintenance of your Crunch Ground Pounder GP-2000.2 2-Channel Amp앰프입니다. 설치 또는 작동 전에 본 설명서를 꼼꼼히 읽어 올바른 사용법을 숙지하고 제품 또는 차량 오디오 시스템의 손상을 방지하십시오. 나중에 참조할 수 있도록 본 설명서를 보관하십시오.
안전 정보
경고: 이 제품에는 캘리포니아 주에서 암, 선천적 기형 또는 기타 생식 장애를 유발하는 것으로 알려진 화학 물질이 포함되어 있습니다. 자세한 내용은 다음을 방문하십시오. www.P65Warnings.ca.gov.
- 차량의 전기 부품을 설치하거나 정비하기 전에 항상 차량 배터리를 분리하십시오.
- 날카로운 모서리나 움직이는 부품으로 인한 손상을 방지하기 위해 모든 배선이 올바르게 배치되고 고정되었는지 확인하십시오.
- Use appropriate gauge wiring for power and ground connections to prevent overheating and potential fire hazards.
- 마운트하지 마십시오 amp직사광선, 과도한 열, 습기 또는 먼지에 노출되는 장소에 증폭기를 설치하지 마십시오.
- 설치 과정의 어떤 부분이든 확실하지 않은 경우 전문 설치자에게 문의하세요.
패키지 내용
패키지에 모든 품목이 들어 있는지 확인하세요.
- Crunch Ground Pounder GP-2000.2 Amp리퍼
- 사용자 설명서
제품 끝view
The Crunch Ground Pounder GP-2000.2 is a 2-channel amplifier designed for car audio systems. It features a Class A/B topology for sound quality and robust protection circuitry.
AmpLifier 치수
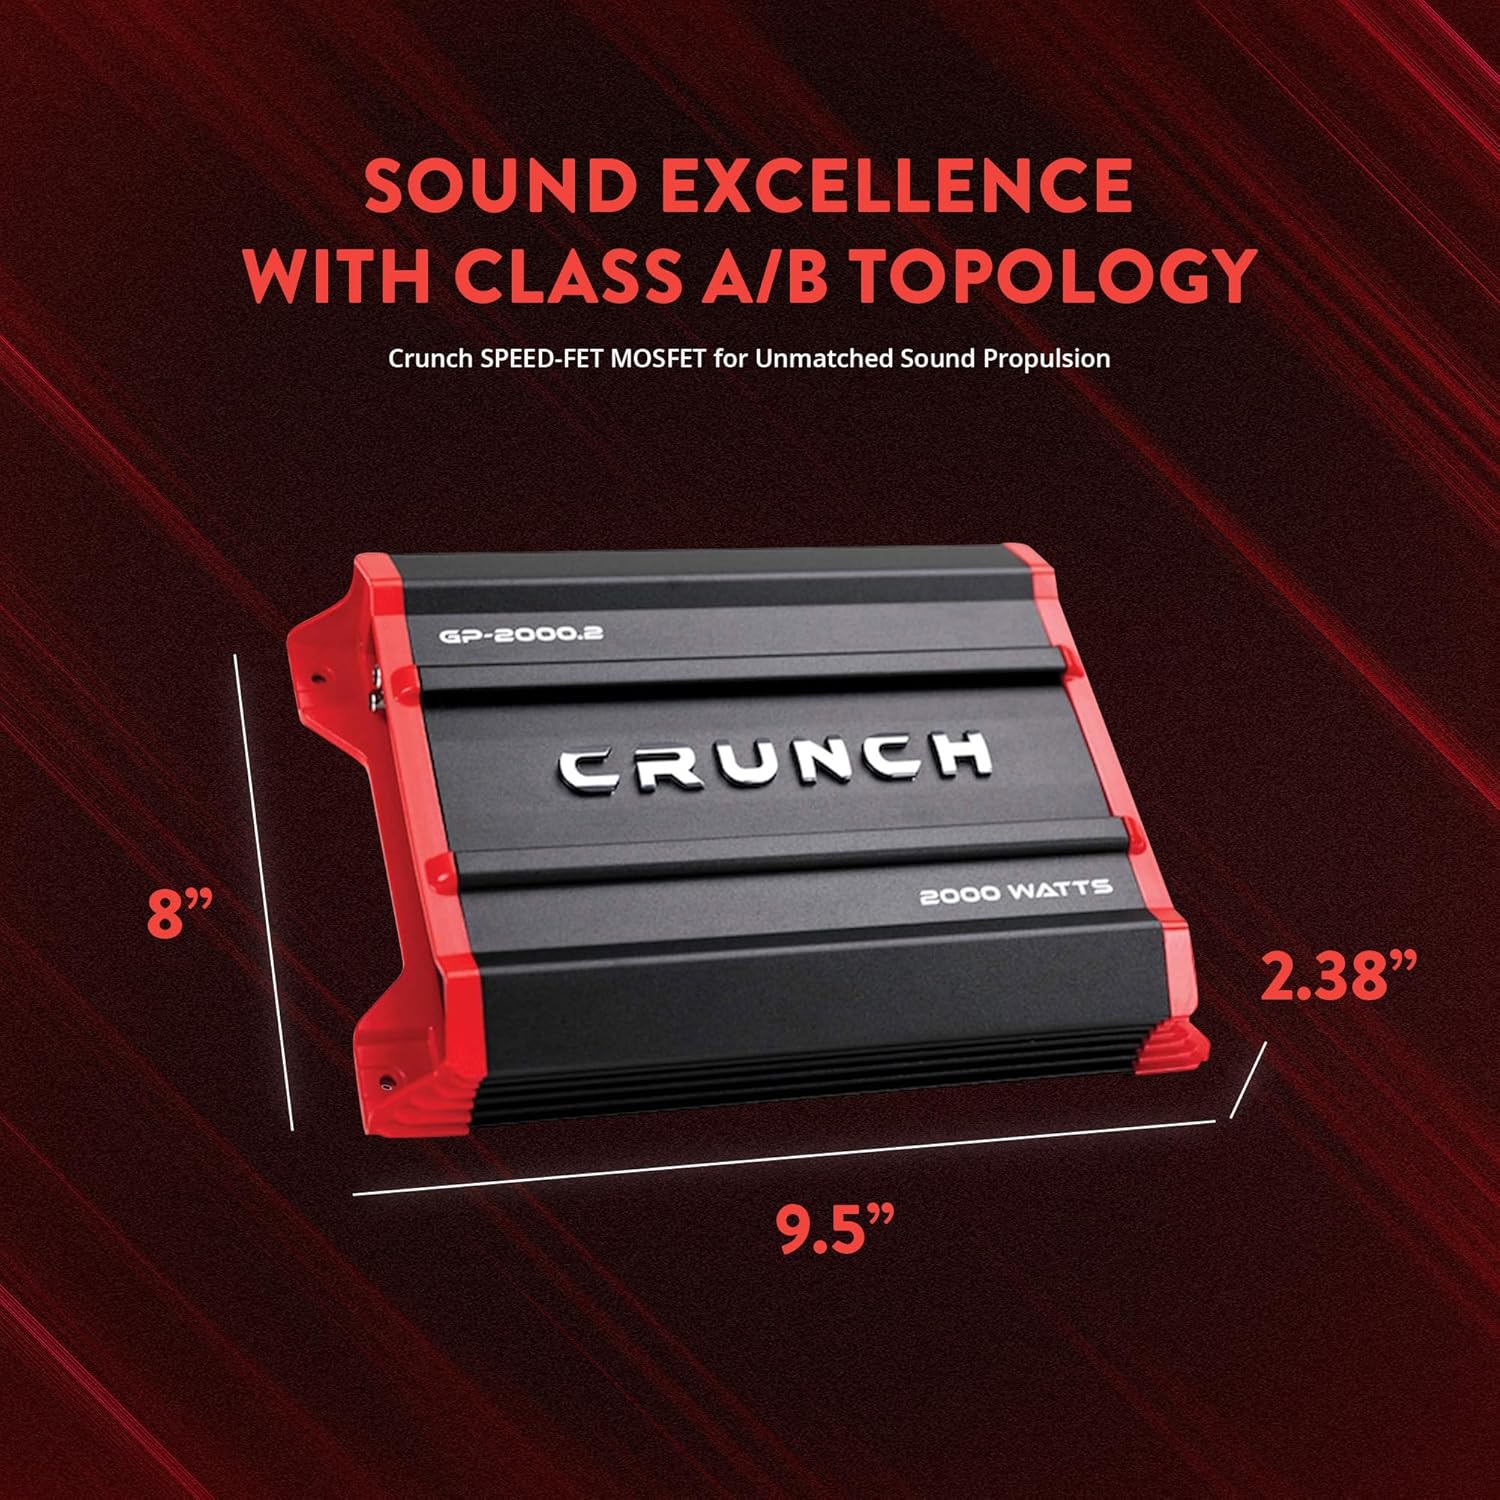
Image showing the Crunch GP-2000.2 amplifier with its physical dimensions labeled: 9.5 inches in length, 8 inches in width, and 2.28 inches in height.
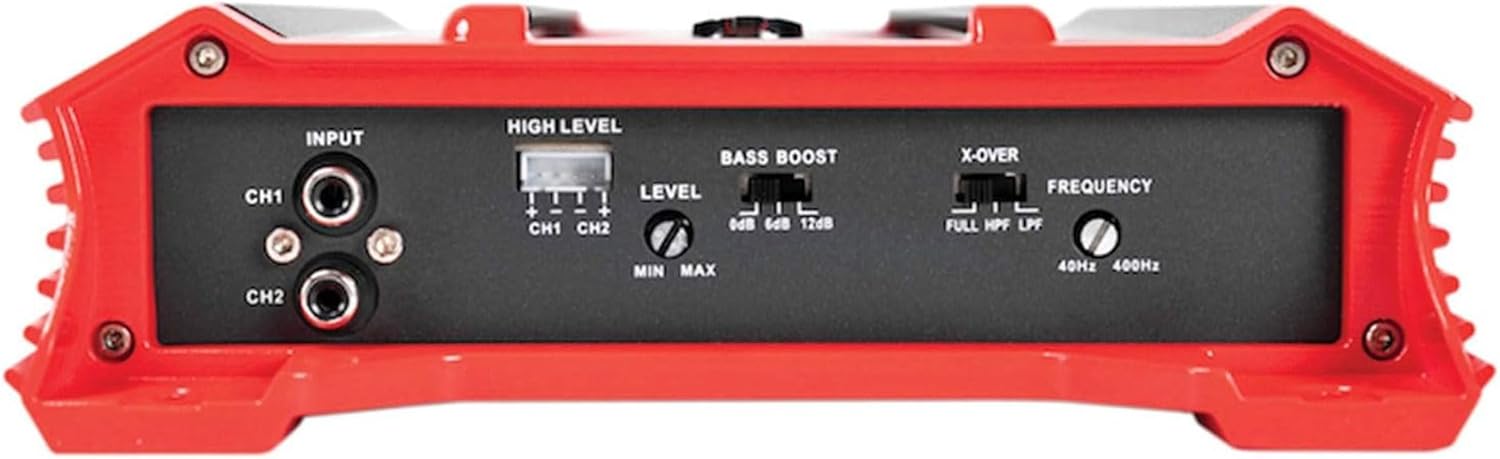
제어판 이상view

This image displays the control panel of the GP-2000.2 amplifier, featuring RCA inputs for CH1 and CH2, a High Level input connector, Level adjustment knob (Min/Max), Bass Boost switch (0dB, 6dB, 12dB), and an X-OVER switch with Frequency knob (40Hz-400Hz) for Full, HPF, and LPF settings.
Power and Speaker Output Panel
This image shows the rear panel of the GP-2000.2 amplifier, detailing the power input terminals (GND, REM, +12V), a 30A fuse, PRT/PWR indicator lights, and speaker output terminals for CH1 and CH2, including bridged mono configuration.
설정 및 설치
Proper installation is crucial for optimal performance and safety. If you are not confident in your ability to install this amp증폭이 필요한 경우 전문가의 도움을 받으십시오.
장착 위치
Choose a mounting location that is dry, well-ventilated, and protected from direct sunlight and excessive heat. Ensure there is sufficient space around the amplifier for proper cooling. Avoid mounting on carpeted surfaces that can impede airflow.

Example of the GP-2000.2 amplifier installed in a vehicle, demonstrating how it can be integrated into a car audio setup.
배선 연결
배선을 할 때는 다음 지침을 따르세요. amp정수기:
- 전원(배터리 +12V): Connect directly to the positive terminal of the vehicle's battery using an appropriate gauge power cable. Install an in-line fuse holder within 18 inches of the battery.
- 접지(GND): 차량 섀시의 깨끗하고 도색되지 않은 금속 표면에 연결하십시오. 견고한 전기 연결이 이루어졌는지 확인하십시오.
- 원격(REM): 헤드 유닛의 리모트 턴온 리드에 연결하세요. 이 선은 차량의 전원을 켜줍니다. amp자동차 오디오 시스템과 연동하여 파이어를 켜고 끌 수 있습니다.
- RCA 입력(INPUT CH1/CH2): 헤드 유닛 또는 신호 처리 장치의 RCA 출력에 연결하십시오.
- 높은 수준의 입력: If your head unit does not have RCA outputs, use the high-level input connector.
- Speaker Outputs (SPEAKER OUTPUT CH1/CH2): Connect your speakers to these terminals. Observe correct polarity (+ to + and - to -).
그만큼 amplifier supports stereo, bridged mono, or stereo/bridged mono configurations. Refer to the diagram below for a typical wiring setup.
Video demonstrating the Crunch GP-2000.2 amplifier, highlighting its features and potential installation scenarios. This video is provided by Spreetail, a seller of the product.
작동 지침
초기 설정 및 조정
- 레벨 컨트롤(게인): Start with the Level control set to minimum. Gradually increase the volume on your head unit until distortion is heard, then reduce it slightly. Slowly increase the amplifier's Level control until the desired volume is achieved without distortion.
- 베이스 부스트 : The Bass Boost switch offers 0dB, 6dB, and 12dB options. Use this to enhance low frequencies. Start with 0dB and adjust as needed. Excessive bass boost can cause distortion and speaker damage.
- 크로스오버(X-OVER):
- 가득한: Full range audio output.
- HPF(하이패스 필터): Allows frequencies above the set frequency to pass through. Useful for full-range speakers to prevent low-frequency distortion.
- LPF(저역 통과 필터): Allows frequencies below the set frequency to pass through. Essential for subwoofers.
유지
- 청소: 부드럽고 건조한 천을 사용하여 청소하십시오. amp증폭기 외부에는 강한 화학 물질이나 연마성 세척제를 사용하지 마십시오.
- 퓨즈 교체: 만약 amplifier does not power on, check the 30A fuse located on the power input panel. Replace with a fuse of the same type and rating only.
- 통풍: 확인하십시오 amplifier's cooling fins are free from obstructions to maintain proper heat dissipation.
문제 해결
| 문제 | 가능한 원인 | 해결책 |
|---|---|---|
| 전원 없음 / 소리 없음 |
|
|
| 왜곡된 소리 |
|
|
| No Output from One Channel |
|
|
명세서
| 특징 | 세부 사항 |
|---|---|
| 모델 | GP-2000.2 |
| 상표 | 결정적 시기 |
| 채널 수 | 2 |
| 출력 전력(2옴) | 2 x 1,000W |
| 출력 전력(4옴) | 2 x 500W |
| Output Power (Mono Bridged 4 Ohms) | 1 x 2,000W |
| 크로스오버 | Variable Electronic Crossover: 12 dB per octave (HPF/LPF/FULL) |
| 주파수 범위 | 40Hz - 400Hz (Crossover) |
| 베이스 부스트 | 0dB, 6dB, 12dB |
| 치수(길이 x 너비 x 높이) | 9.5 x 8 x 2.28 인치 |
| 권tage | 9 Volts (Minimum Supply) |
| 재료 유형 | 금속과 플라스틱 |
| 제조업체 | 결정적 시기 |
| 한국어: | 806576231080 |
보증 및 지원
The Crunch Ground Pounder GP-2000.2 amplifier는 1년 보증 from the date of purchase. This warranty covers defects in materials and workmanship under normal use. It does not cover damage caused by improper installation, accident, misuse, abuse, negligence, or unauthorized modification.
For warranty claims or technical support, please contact your authorized Crunch dealer or visit the official Crunch website for contact information. Please have your proof of purchase and product model number ready when seeking support.