
1. 서론
The PNI House IP516 is a 16-channel Network Video Recorder (NVR) designed for advanced surveillance systems, supporting up to 5MP IP cameras and H.265 video compression. This NVR allows for local and remote monitoring, recording, and management of your security cameras. It is compatible with ONVIF protocol cameras, offering flexibility in camera selection. This manual provides essential information for the proper installation, operation, and maintenance of your PNI House IP516 NVR.
2. 패키지 내용
아래 나열된 모든 품목이 패키지에 포함되어 있는지 확인해 주세요. 품목이 누락되었거나 손상된 경우 판매점에 문의하세요.
- PNI House IP516 NVR Unit
- USB 마우스
- 전원 어댑터
- 사용 설명서 (본 문서)
- CD with Software
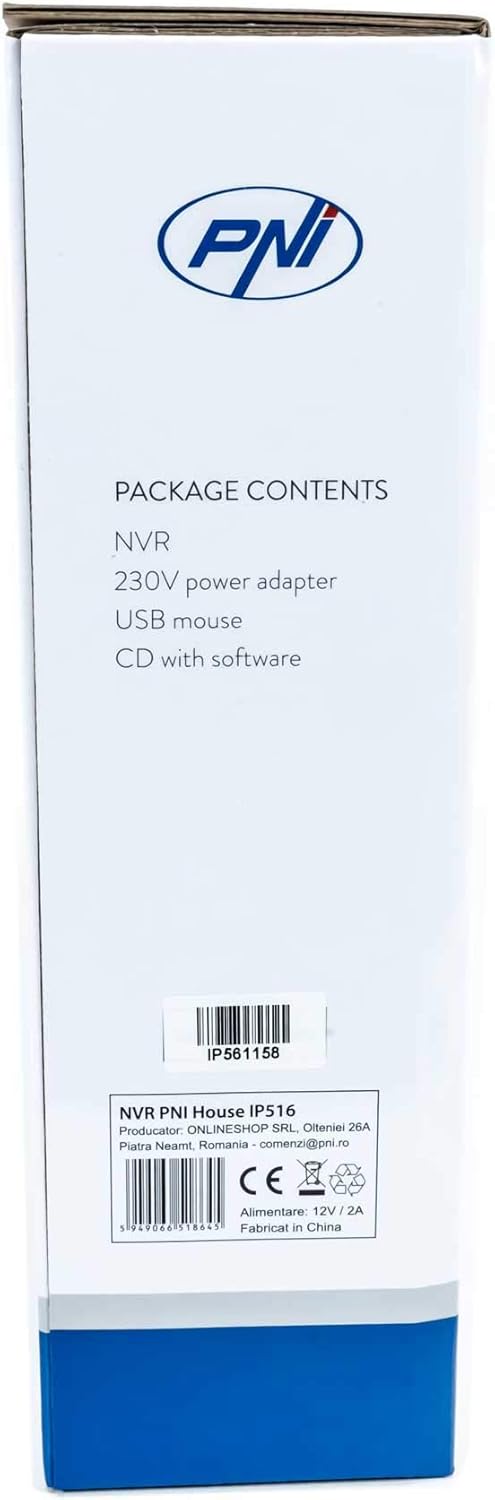
Image: Side of the NVR box detailing the package contents.

Image: The PNI House IP516 NVR unit, power adapter, and USB mouse included in the package.
3. 제품 오버view
3.1 전면 패널
The front panel of the NVR features indicator lights for system status.
- PWR(전원): Indicates the NVR is powered on.
- REC (녹음): Flashes when recording is active.
- NET(네트워크): 네트워크 활동을 나타냅니다.

이미지: 앞면 view of the PNI House IP516 NVR, showing the power, record, and network indicator lights.
3.2 후면 패널
The rear panel provides all necessary connection ports for the NVR.
- VGA 포트: VGA 모니터에 연결합니다.
- HDMI 포트 : Connects to an HDMI monitor or TV for high-definition video output.
- LAN Port (RJ45 10/100 Mbps): Connects to your network router or switch.
- USB 포트(x2): For connecting the USB mouse, external storage, or for system upgrades.
- DC 12V 전원 입력: 포함된 전원 어댑터에 연결합니다.

이미지: 후면 view of the PNI House IP516 NVR, displaying VGA, HDMI, LAN, USB, and DC 12V power input ports.
4. 설정
4.1 하드 드라이브 설치(선택 사항)
The NVR supports a hard drive up to 8 TB for video storage. It is recommended to use dedicated CCTV hard drives for optimal reliability and endurance.
- NVR 상단 커버의 나사를 풀어 제거합니다.
- Connect the SATA data and power cables from the NVR to the hard drive.
- 제공된 나사를 사용하여 하드 드라이브를 NVR 섀시에 고정하십시오.
- 윗 덮개를 다시 덮고 나사로 고정합니다.
4.2 초기 연결
- Connect a monitor to the NVR's VGA or HDMI port.
- USB 마우스를 NVR의 USB 포트 중 하나에 연결하세요.
- NVR의 LAN 포트에서 네트워크 라우터나 스위치로 이더넷 케이블을 연결합니다.
- 전원 어댑터를 NVR의 DC 12V 입력 단자에 연결한 다음 전원 콘센트에 꽂으세요. NVR이 자동으로 켜집니다.
4.3 최초 부팅 및 기본 설정
Upon the first boot, the NVR will guide you through an initial setup wizard. Follow the on-screen prompts to:
- 관리자 계정에 강력한 비밀번호를 설정하세요.
- 날짜 및 시간 설정을 구성합니다.
- Format the installed hard drive (if applicable).
- Perform network settings (DHCP is usually enabled by default).
- 검색 and add IP cameras to the NVR. The NVR supports up to 16 cameras at 2560x1920px (5MP) and is compatible with ONVIF protocol cameras.
5. NVR 작동
5.1 로컬 운영
Use the connected mouse to navigate the NVR's graphical user interface (GUI) on the monitor. Right-click to access the main menu, which includes options for live view, playback, recording settings, system configuration, and more.
5.2 원격 접속
The PNI House IP516 NVR can be accessed remotely for live view재생, 설정 및 구성.
- Mobile Application (XMEye): Download the XMEye app from the Android Play Store or Apple App Store. Register an account, add your NVR by scanning its QR code or entering its serial number, and then you can view your cameras from anywhere with an internet connection.
- PC Software (General CMS): Install the General CMS software from the included CD or download it from the PNI support website. This software allows for comprehensive management of your NVR and cameras from a Windows PC.
5.3 녹화 관리
NVR은 다양한 녹화 모드를 지원합니다.
- 연속 녹화 : 24시간 내내 기록합니다.
- 예약 녹화 : 특정 기간 동안의 기록.
- 모션 감지 녹화: 카메라가 움직임이 감지될 때만 녹화합니다.
Configure these settings in the NVR's menu under 'Record' or 'Storage' settings.
5.4 동작 감지 및 알림
When motion is detected, the system can trigger various alerts:
- 모바일 알림: Text notifications sent via the XMEye mobile application.
- 이메일 알림 : An email sent to a predefined address.
- FTP 업로드: The recording saved to an FTP server.
These alert settings can be configured in the NVR's 'Alarm' or 'Event' menu.
6. 유지관리
6.1 하드 드라이브 관리
Regularly check the status of your hard drive in the NVR's storage settings. If the hard drive becomes full, the NVR will typically overwrite the oldest recordings (loop recording). You may need to format the hard drive periodically if you encounter issues or wish to clear all data.
6.2 시스템 업데이트
Periodically check the PNI support website for firmware updates. Firmware updates can improve performance, add new features, or fix bugs. Follow the instructions provided with the firmware update carefully to avoid damaging the device.
6.3 청소
Ensure the NVR unit is kept clean and free from dust. Use a soft, dry cloth to wipe the exterior. Do not use liquid cleaners or aerosols directly on the unit.
7. 문제 해결
| 문제 | 가능한 원인 | 해결책 |
|---|---|---|
| NVR 전원이 켜지지 않습니다. | 전원 공급 안 됨; 전원 어댑터 불량 | 전원 연결을 확인하십시오. 전원 어댑터를 테스트하십시오. 다른 콘센트에 연결해 보십시오. |
| 모니터에 비디오 출력이 없습니다 | Loose cable; incorrect input selected on monitor | Ensure VGA/HDMI cable is securely connected; select correct input on monitor. |
| NVR에 원격으로 접속할 수 없습니다 | Network issue; incorrect app settings; NVR not connected to internet | Verify NVR network connection; check router settings; ensure correct NVR ID/serial in app. |
| 카메라가 표시되지 않음 | Camera not powered; network issue; incorrect camera IP/protocol | Check camera power and network cables; ensure cameras are ONVIF compatible; verify camera IP addresses. |
| 녹음 없음 | Hard drive not installed/formatted; recording schedule not set; motion detection not configured | Install and format HDD; configure recording schedule; set up motion detection zones and sensitivity. |
8. 사양
| 특징 | 세부 사항 |
|---|---|
| 모델 번호 | IP516 |
| 채널 | 16 |
| 최대 해상도 | 5MP (2560 x 1920px) |
| 비디오 압축 | H.265 |
| 호환 장치 | IP Cameras, Smartphone |
| 연결 기술 | HDMI, USB, VGA, RJ45 Ethernet |
| 통신 인터페이스 | RJ45 10/100Mbps |
| 최대 저장 용량 | 8 TB (HDD) |
| USB 포트 | 2 |
| 전력 소비 | 10 와트 |
| 제조업체 부품 번호 | PNI-1920P |
9. 보증
The PNI House IP516 NVR comes with a standard manufacturer's warranty. Please refer to the warranty card included in your package or visit the official PNI web보증 범위, 기간 및 서비스 절차에 관한 자세한 약관은 해당 웹사이트를 참조하십시오. 보증 청구를 위해 구매 증빙 자료를 보관하십시오.
10. 지원
For technical support, troubleshooting assistance, or further inquiries regarding your PNI House IP516 NVR, please visit the official PNI website or contact their customer service department. You can find contact information and additional resources on the PNI brand store page: PNI Brand Store.