1. 서론
Thank you for choosing the COMICA BoomX-D D2 2.4G Wireless Microphone System. This manual provides detailed instructions for the proper setup, operation, and maintenance of your new wireless microphone system. Please read this manual thoroughly before use to ensure optimal performance and to prevent damage to the device. Keep this manual for future reference.
2. 제품 오버view
2.1 주요 특징
- 2.4G Digital Wireless Technology: Ensures stable and reliable audio transmission.
- Dual Transmitters, One Receiver: Allows simultaneous recording from two sources.
- Visual Power & Audio Dynamic Monitor: Real-time display of battery status and audio levels.
- Internal & External MIC Input Modes: Flexibility to use built-in microphone or external lavalier.
- Mono/Stereo Switchable Output: Adaptable for various recording needs.
- Broadcasting-Quality Audio: Delivers clear and crisp sound.
- 낮은 지연 시간: Less than 20ms for synchronized audio and video.
- 작업 범위: 개방된 공간에서는 최대 50미터(164피트)까지 가능합니다.
- Multi-functional Belt Clip: For easy attachment and portability.
- 컴팩트하고 가벼운 디자인: Ideal for on-the-go recording.
- USB-C 충전: 편리하고 보편적인 충전 방식입니다.
2.2 포함된 구성 요소
The COMICA BoomX-D D2 system typically includes the following components:
- 1 x 수신기(RX)
- 2 x 송신기(TX)
- 2 x 3.5mm TRS Lavalier Microphones
- 2 x Wind Muffs for Lavalier Microphones
- 1 x 3.5mm TRS-TRS Audio Cable (for cameras)
- 1 x 3.5mm TRS-TRRS Audio Cable (for smartphones)
- 1 x USB-C to USB-A Charging Cable (may include multiple for simultaneous charging)
- 1 x 사용자 설명서
- 1 x Storage Case (or packaging)
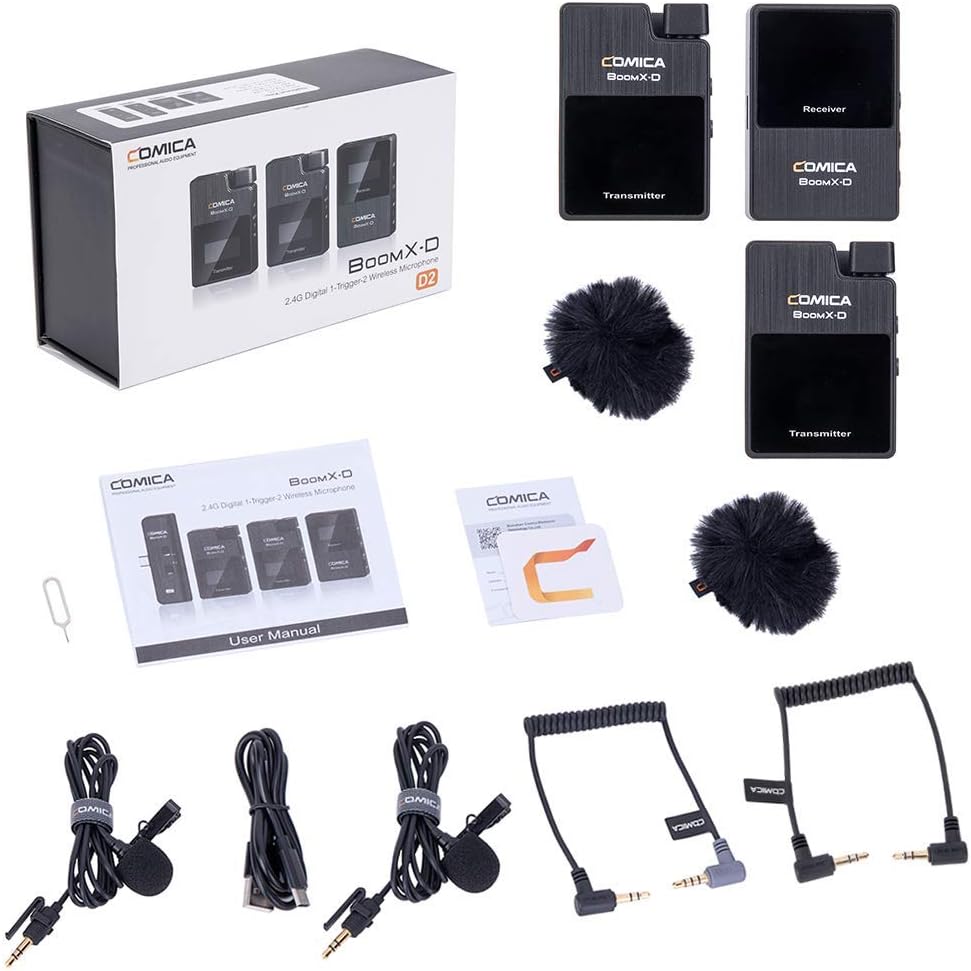
Figure 1: Complete contents of the COMICA BoomX-D D2 package, showing the receiver, two transmitters, lavalier microphones, wind muffs, various audio cables, and charging cable.
3. 설정 가이드
3.1 기기 충전
Before initial use, fully charge the receiver and both transmitters using the provided USB-C charging cable. Connect the USB-C end to the device and the USB-A end to a compatible USB power adapter (not included) or a computer USB port.
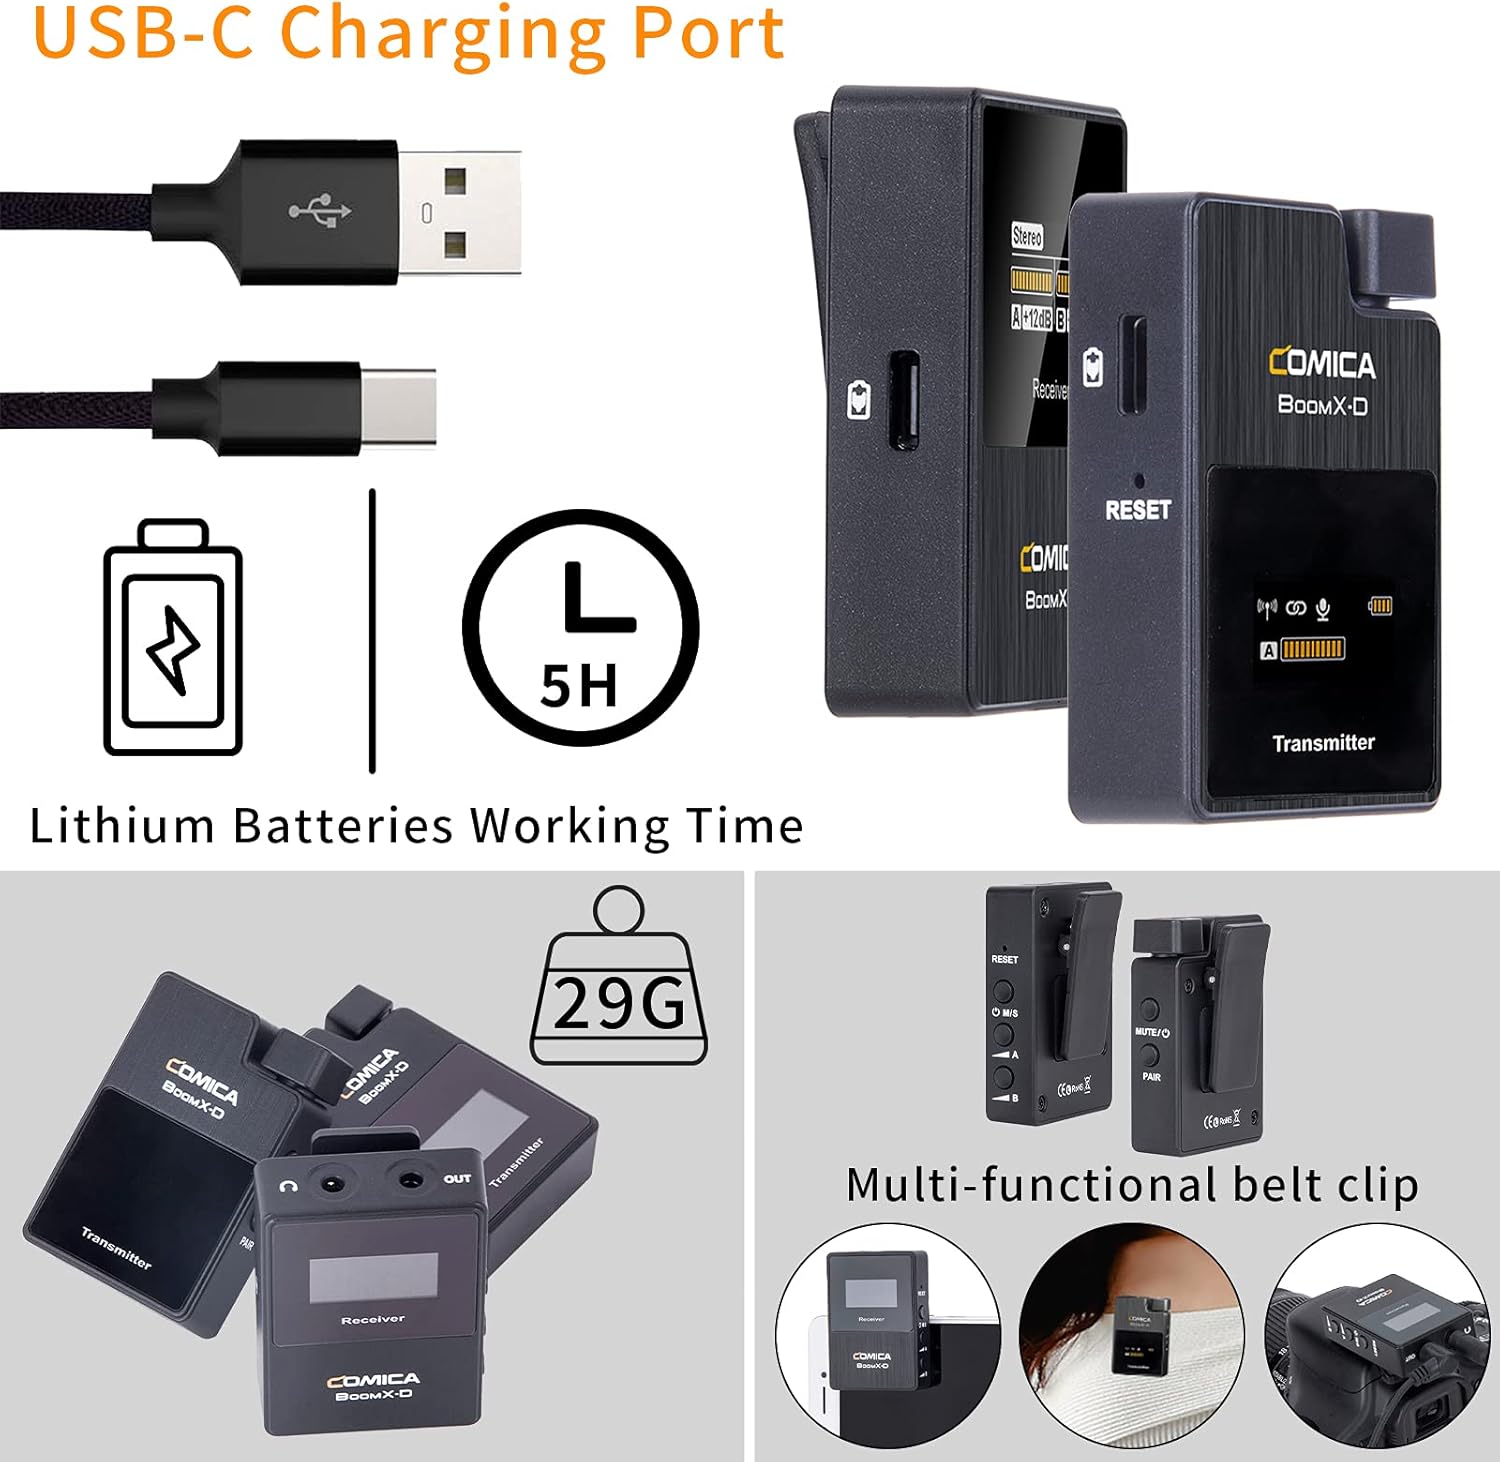
Figure 2: Illustration of the USB-C charging port on the COMICA BoomX-D D2 units, highlighting the charging process and battery life indication.
3.2 전원 켜기/끄기 및 페어링
- 전원 켜기: Press and hold the power button on both the receiver and transmitters until the screen illuminates.
- 자동 페어링: The units are designed to pair automatically upon power-on. Observe the screens for connection indicators. If pairing fails, refer to the troubleshooting section or the seller video for manual pairing instructions.
Video 1: A seller-provided video demonstrating the setup and pairing process of the COMICA BoomX-D D2 wireless microphone system, including how to connect to various devices.
3.3 녹음 장치 연결하기
Use the appropriate audio cable to connect the receiver to your recording device (camera, smartphone, etc.).
- 카메라(DSLR/미러리스)용: Use the 3.5mm TRS-TRS audio cable. Connect one end to the receiver's output and the other to your camera's microphone input.
- 스마트폰/태블릿의 경우: Use the 3.5mm TRS-TRRS audio cable. Connect one end to the receiver's output and the other to your smartphone's headphone/microphone jack. For devices without a 3.5mm jack, an appropriate adapter (e.g., USB-C to 3.5mm or Lightning to 3.5mm) may be required (not included).

Figure 3: The COMICA BoomX-D D2 receiver connected to a smartphone, illustrating its use for mobile video recording with low latency and a 50-meter range.

Figure 4: A visual guide to the compatibility of the COMICA BoomX-D D2 with various devices, including Canon, Nikon, Sony, Panasonic, Fujifilm cameras, and iPhone, Huawei, Samsung smartphones, using different audio cables.
4. 사용 설명서
4.1 Using the Lavalier Microphone or Built-in Mic
Each transmitter has a built-in omnidirectional microphone. For discreet placement or improved audio quality, you can connect the included 3.5mm TRS lavalier microphone to the transmitter's MIC input port.
- With Lavalier Mic: Plug the lavalier microphone into the 3.5mm MIC input on the transmitter. Clip the lavalier mic to clothing, approximately 6-8 inches from the speaker's mouth.
- Without Lavalier Mic (Built-in): Ensure no external microphone is plugged in. Clip the transmitter directly onto clothing, ensuring the built-in microphone faces the sound source.

Figure 5: Demonstrates the flexibility of the COMICA BoomX-D D2, allowing users to choose between the external lavalier microphone or the built-in microphone on the transmitter, depending on their recording needs.
4.2 Mono/Stereo Output Switching
The receiver allows you to switch between mono and stereo output modes. This is useful for post-production flexibility or specific recording scenarios.
- 모노 모드 : Combines audio from both transmitters into a single mono track.
- 스테레오 모드 : Records audio from each transmitter to separate left and right channels.
Refer to the receiver's display and control buttons to switch between these modes. The display will clearly indicate the selected mode.
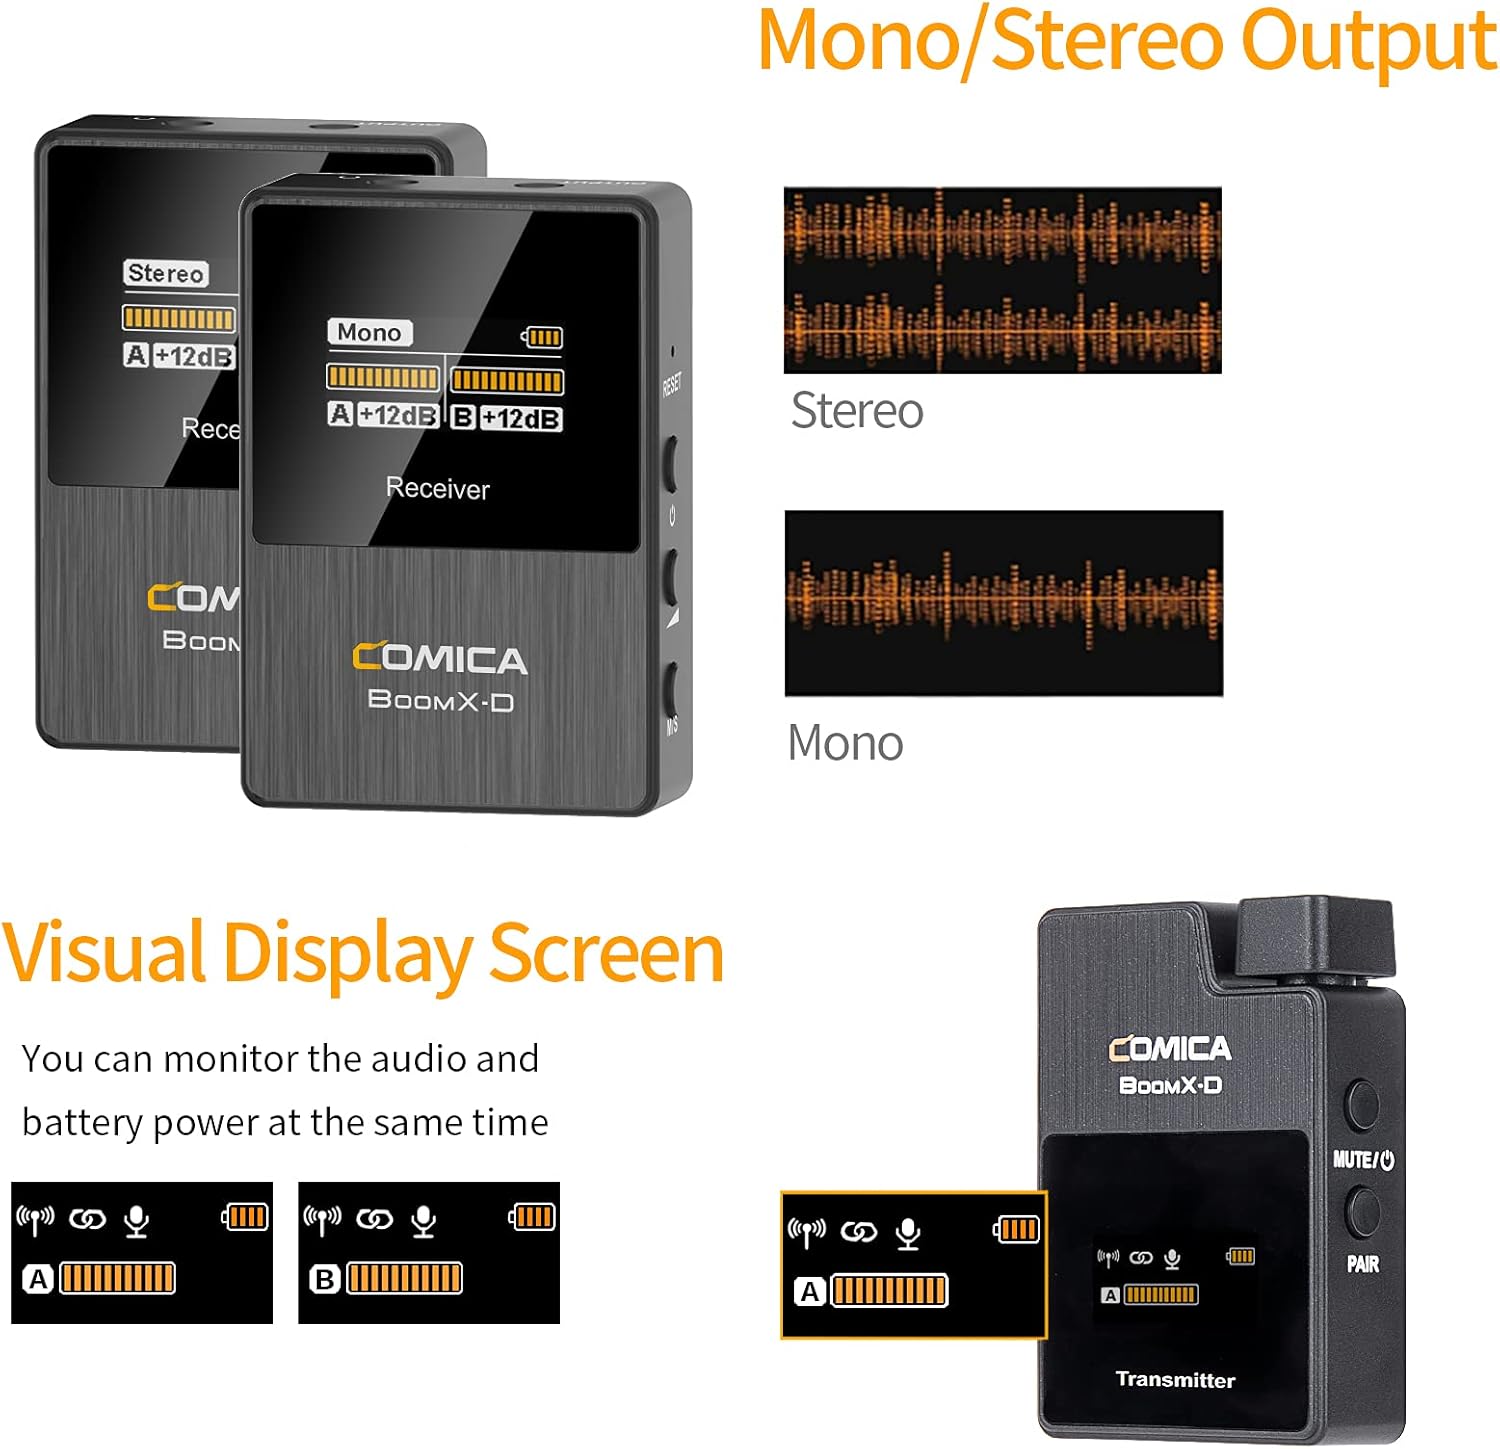
Figure 6: The visual display screen of the COMICA BoomX-D D2 receiver, showing options for Mono/Stereo output and real-time monitoring of audio levels and battery status for both transmitters.
4.3 실시간 오디오 모니터링
Connect headphones to the receiver's 3.5mm headphone output jack to monitor your audio in real-time. This ensures that your audio is being recorded correctly and helps identify any potential issues during recording.

Figure 7: A user monitoring real-time audio through headphones connected to the COMICA BoomX-D D2 receiver, which is mounted on a camera, ensuring sound quality during recording.
5. 유지관리
- 청소: 부드럽고 마른 천으로 기기를 닦으십시오. 독한 화학 약품이나 연마제를 사용하지 마십시오.
- 저장: 마이크 시스템은 직사광선과 극한 온도 변화를 피해 서늘하고 건조한 곳에 보관하십시오.
- 배터리 관리 : 최적의 배터리 수명을 위해 기기를 자주 완전히 방전시키지 마세요. 장시간 사용하지 않더라도 정기적으로 충전하세요.
- 습기를 피하세요: 기기 손상을 방지하기 위해 물과 높은 습도로부터 멀리하십시오.
6. 문제 해결
| 문제 | 가능한 원인 | 해결책 |
|---|---|---|
| 소리가 출력되지 않음 | Low battery; Incorrect cable connection; Unpaired devices; Muted microphone. | Charge devices; Ensure cables are securely connected; Re-pair transmitter and receiver; Check if transmitter is muted. |
| 간섭/음질 불량 | Obstructions between TX/RX; Too far from receiver; Strong electromagnetic interference. | Reduce distance between TX/RX; Ensure clear line of sight; Move away from other wireless devices; Check external microphone connection. |
| Devices Not Pairing | Out of range; Pairing mode not activated. | Bring devices closer; Follow manual pairing instructions (if automatic fails); Ensure both are powered on. |
| 짧은 배터리 수명 | Old battery; Frequent full discharge. | Ensure full charge before use; Avoid frequent full discharge; Consider battery replacement if significantly degraded. |
7. 사양
- 상표: 코 미카
- 모델 번호: D2
- 연결 기술 : USB, Wireless (2.4G Digital)
- 커넥터 유형: USB-C, 3.5mm (TRS/TRRS)
- 특징: 클립형 디자인
- 극성 패턴: 전방위
- 오디오 감도: 86데시벨
- 마이크 폼 팩터: 마이크 시스템
- 전원: USB-C
- 신호 대 잡음비 : 86데시벨
- 채널 수: 2
- 작업 범위: 최대 50m(164피트)
- 숨어 있음: <20ms
8. 보증 및 지원
COMICA products are covered by a limited warranty against defects in materials and workmanship. For specific warranty terms, registration, and technical support, please visit the official COMICA web사이트를 방문하거나 고객 서비스에 문의하세요. 보증 청구를 위해 구매 증빙 자료로 구매 영수증을 보관하세요.
공식적인 Web대지: www.comica-audio.com