1. 서론
This manual provides detailed instructions for the installation, operation, and maintenance of your Anlapus 1080p HD-TVI Surveillance Camera. Please read this manual thoroughly before using the product to ensure proper function and safety.
The Anlapus HD-TVI camera is designed for both indoor and outdoor surveillance, offering high-definition video quality and robust performance in various environmental conditions.
2. 패키지 내용
아래 나열된 모든 품목이 패키지에 포함되어 있는지 확인하세요. 품목이 누락되었거나 손상된 경우 고객 지원팀에 문의하세요.
- 4 x Anlapus 1080p HD-TVI Cameras
- 4 x BNC Video Cables
- 1 x 전원 공급 장치
- 1 x 1-to-4 Power Splitter Cable
- 경고 스티커 4개
- 4 x Mounting Screw Bags (including screws and wall plugs)
- 4 x Mounting Hole Templates
- 1 x 빠른 시작 가이드
3. 제품 특징
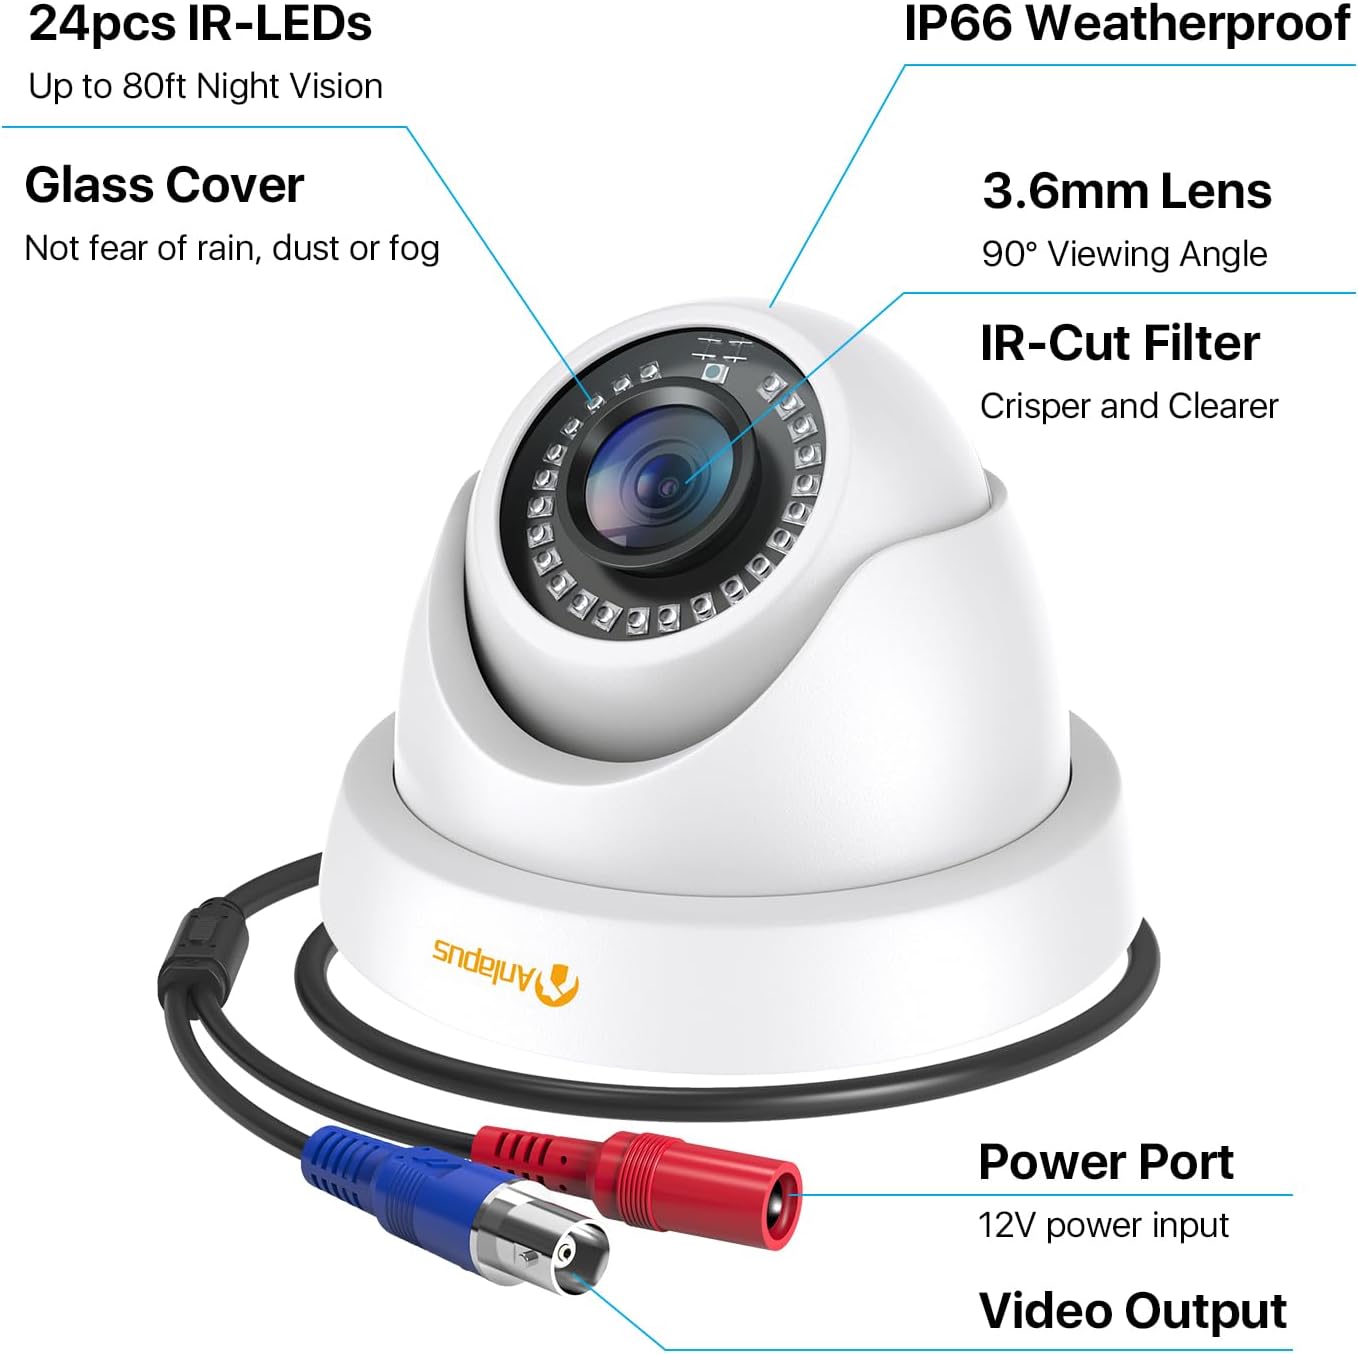
- 1080p HD 해상도: 선명하고 자세한 비디오 제공tage (1920x1080 pixels).
- 넓은 View각도: Equipped with a 3.6mm lens, offering a 90-degree field of view.
- HD-TVI Compatibility: Designed to work with HD-TVI DVRs. Ensure your DVR supports HD-TVI technology.
- 고급 야간 투시경: Features 24 IR-Cut LEDs for up to 24 meters (80 feet) of clear black and white night vision.
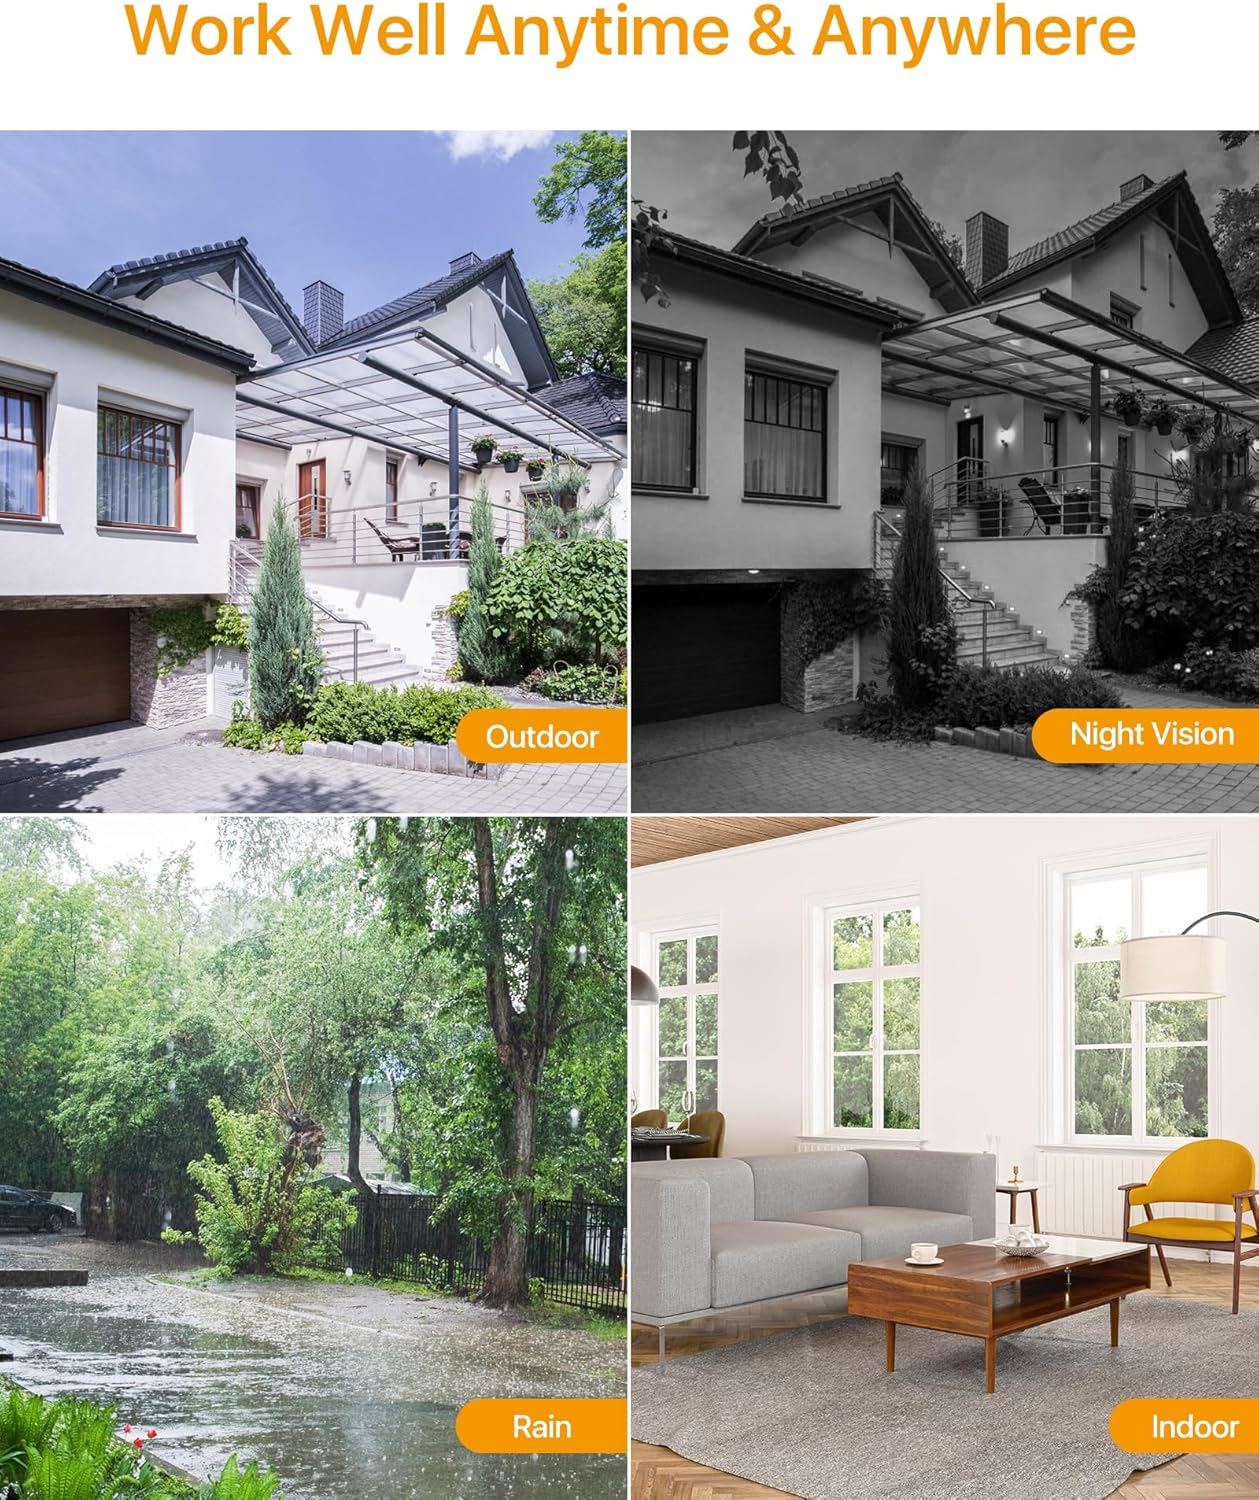
- IP66 방수 등급: Robust metal housing ensures protection against dust and water, suitable for both indoor and outdoor use in various weather conditions.
- 유연한 장착: Features a 3-axis adjustable bracket for ceiling or wall mounting, allowing 360-degree horizontal and 180-degree vertical adjustment.




4. 설정 및 설치
4.1 설치 전 체크리스트
- Ensure your DVR is compatible with HD-TVI cameras.
- Plan the camera placement to cover desired surveillance areas.
- Ensure power outlets are accessible for the camera power supply.
- Gather necessary tools: drill, screwdriver, ladder (if mounting high).
4.2 카메라 장착
- Select a suitable mounting location (wall or ceiling) that provides the desired viewing angle and is within reach of the BNC cable and power supply.
- Use the provided mounting hole template to mark the drill points on the surface.
- 표시된 위치에 파일럿 구멍을 뚫습니다.
- Insert the wall plugs into the drilled holes (if mounting on masonry or drywall).
- 제공된 나사를 사용하여 카메라 받침대를 표면에 고정하십시오.
- Adjust the camera angle using the 3-axis bracket. The bracket allows for 360-degree horizontal rotation and 180-degree vertical tilt. Tighten the adjustment screws once the desired angle is achieved.
4.3 카메라 연결
Refer to the connection diagram below for proper wiring.
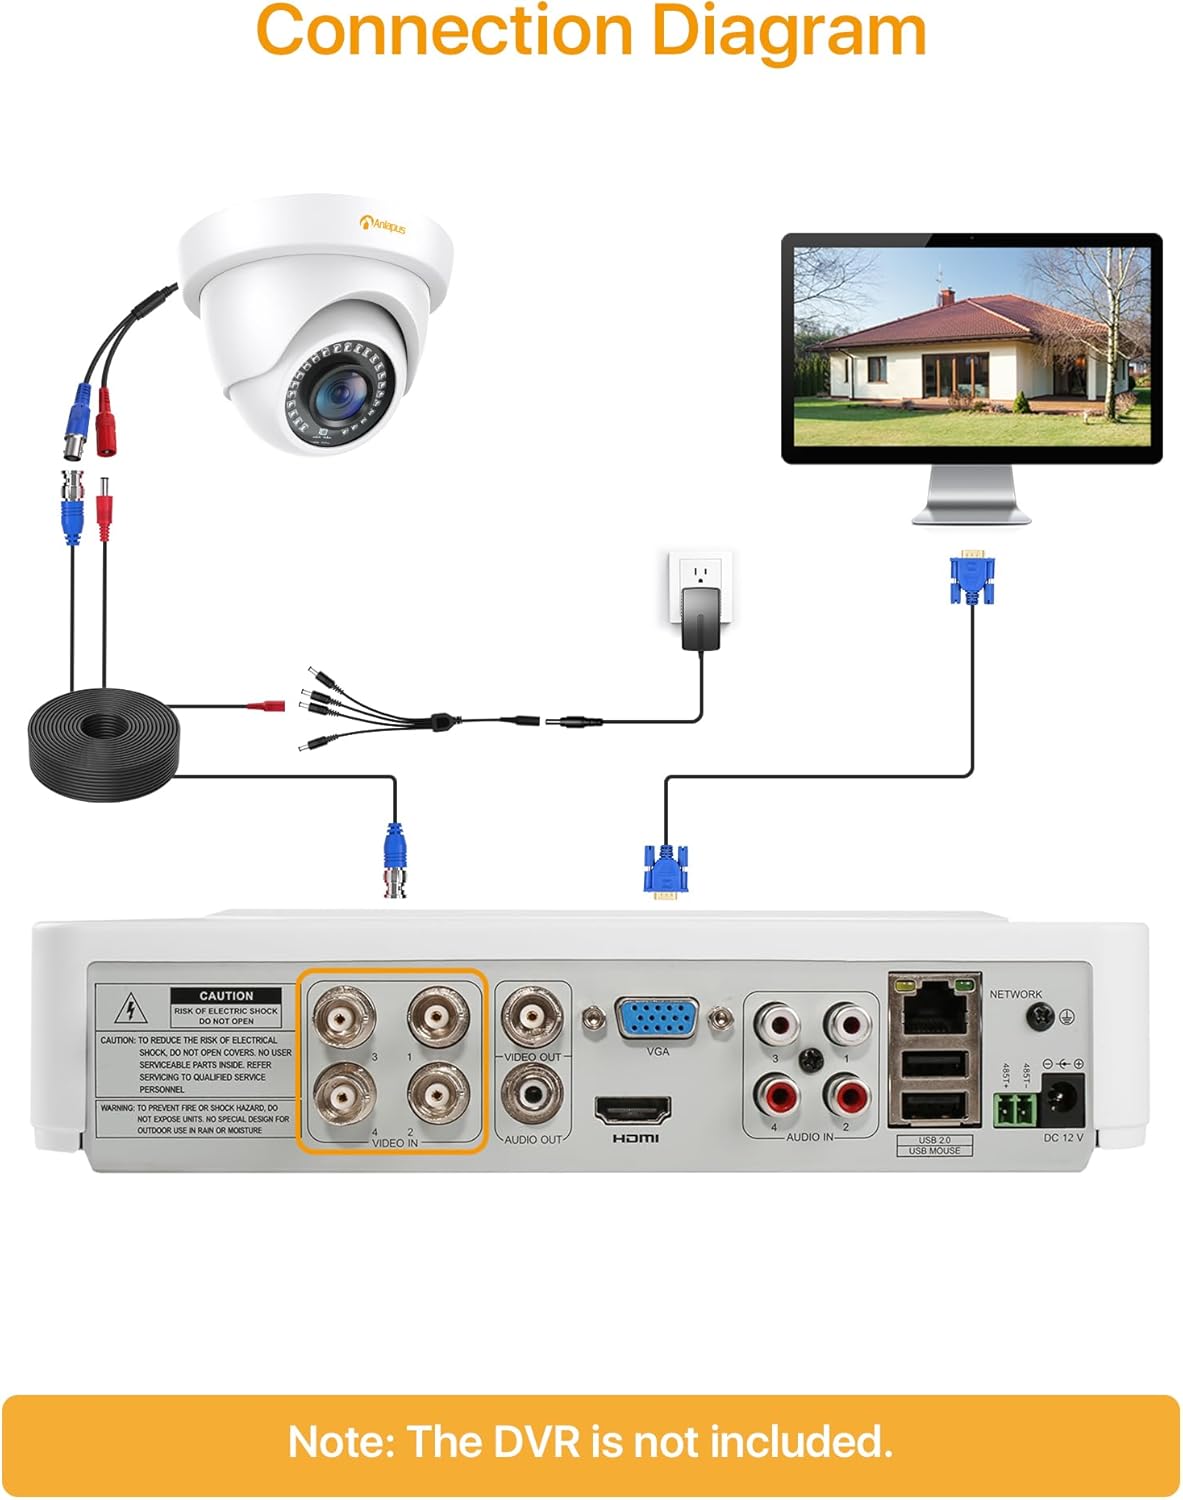
- Connect one end of the BNC video cable to the video output port of the camera.
- Connect the other end of the BNC video cable to a "VIDEO IN" port on your HD-TVI DVR.
- Connect the camera's power input to one of the outputs on the 1-to-4 power splitter cable.
- Connect the power supply to the 1-to-4 power splitter cable.
- 전원 공급장치를 표준 전기 콘센트에 꽂습니다.
- Repeat these steps for all cameras.
중요한: 시스템 전원을 켜기 전에 모든 연결이 안전한지 확인하십시오.
5. 사용 설명서
Once the cameras are properly installed and connected to your HD-TVI DVR, refer to your DVR's instruction manual for specific operating procedures, including:
- View잉 라이브 푸tage 카메라에서.
- Recording and playback of video.
- Configuring motion detection and alerts.
- Accessing the system remotely via mobile app or web 인터페이스.
- Adjusting camera settings (if supported by your DVR).
The Anlapus camera provides a continuous video feed to the DVR. Its night vision capabilities activate automatically in low-light conditions.
6. 유지관리
- 청소: 카메라 렌즈와 하우징을 부드러운 천으로 주기적으로 청소하십시오.amp 천으로 닦으세요. 연마성 세제나 용제는 사용하지 마세요.
- 케이블 검사: Regularly check all cables for signs of wear, damage, or loose connections.
- 펌웨어 업데이트: While the camera itself does not typically require firmware updates, ensure your DVR's firmware is up-to-date for optimal performance and compatibility.
- 환경 보호: Although the camera is IP66 weatherproof, extreme weather conditions (e.g., heavy snow, ice) may temporarily affect performance. Ensure the camera is securely mounted to withstand strong winds.
7. 문제 해결
| 문제 | 가능한 원인 | 해결책 |
|---|---|---|
| No image on DVR screen |
|
|
| 화질이 좋지 않음 / 영상이 흐릿함 |
|
|
| 야간 투시경이 작동하지 않음 |
|
|
If you encounter issues not covered here, please contact Anlapus customer support.
8. 사양
| 모델 번호 | AJ-A4K-202T4-WPES |
| 비디오 해상도 | 1080p (1920 x 1080 픽셀) |
| 렌즈 | 3.6mm |
| View잉 각도 | 90도 |
| 나이트 비전 범위 | 최대 24미터(80피트) |
| 적외선 LED가 | 24 pcs IR-Cut LEDs |
| 비바람에 견디는 등급 | IP66 |
| 재료 | 금속 |
| 연결 기술 | 유선(BNC) |
| 전원 입력 | 12 볼트 |
| 전력 소비 | 12 와트 |
| 치수(길이 x 너비 x 높이) | 42.9 x 27 x 8.71cm |
| 무게 | 2.61 kilograms (for the package) |
| 권장 사용 | 감시 |
| 호환 장치 | 디지털 비디오 레코더 (DVR) |
9. 보증 및 지원
Anlapus products are designed for reliability and performance. For warranty information and technical support, please refer to the warranty card included in your package or visit the official Anlapus web대지.
If you require assistance with installation, troubleshooting, or have any questions regarding your Anlapus surveillance camera, please contact our customer support team. Contact details can typically be found on the Anlapus brand store page or in the quick start guide.