
1. 서론
구매해주셔서 감사합니다asing the Nobsound Mini EL34 Tube Integrated Amplifier. This Class A, single-ended Hi-Fi amplifier is designed to deliver warm and rich audio performance. This manual provides essential information for the safe and optimal use of your amp증폭기 설치, 작동, 유지 보수 및 문제 해결을 포함합니다.
2. 안전 지침
- 전원 공급 장치: 확인하십시오 amplifier is connected to a 100V AC power supply. Using an incorrect voltag제품이 손상될 수 있으며 보증이 무효화될 수 있습니다.
- 통풍: Do not block the ventilation holes on the amplifier. Ensure adequate airflow around the unit to prevent overheating.
- 수분: 유지하다 amp물, 습기 및 높은 습도 환경을 피해 발전기를 설치하십시오.
- 열원: 배치하지 마십시오 amp라디에이터, 난방기, 스토브 또는 기타 열 발생 기기와 같은 열원 근처에 증폭기를 설치하지 마십시오.
- 튜브 취급: Vacuum tubes can become very hot during operation. Avoid touching them directly. Allow sufficient time for tubes to cool before handling or replacing.
- 서비스: 이 제품을 직접 수리하려고 하지 마십시오. 모든 서비스는 자격을 갖춘 서비스 담당자에게 문의하십시오.
- 청소: 청소하기 전에 전원 코드를 분리하세요. 부드럽고 마른 천을 사용하세요. 액체 세제나 에어로졸 세제는 사용하지 마세요.
3. 패키지 내용
패키지에 모든 품목이 들어 있는지 확인하세요.
- Nobsound Mini EL34 Tube Integrated Amp리퍼(x1)
- 전원 코드(x1)
- Vacuum Tubes: 5Z2P (x1), EL34 (x2), 6N1 (x1)

Description: This image displays the Nobsound Mini EL34 Tube Integrated Amplifier along with its accessories. The amplifier unit is shown with its dimensions (260W x 230D x 175H mm). Also included are the power cord and the four vacuum tubes (one 5Z2P, two EL34, and one 6N1) that come with the amp리퍼.
4. 제품 오버view
4.1 전면 패널
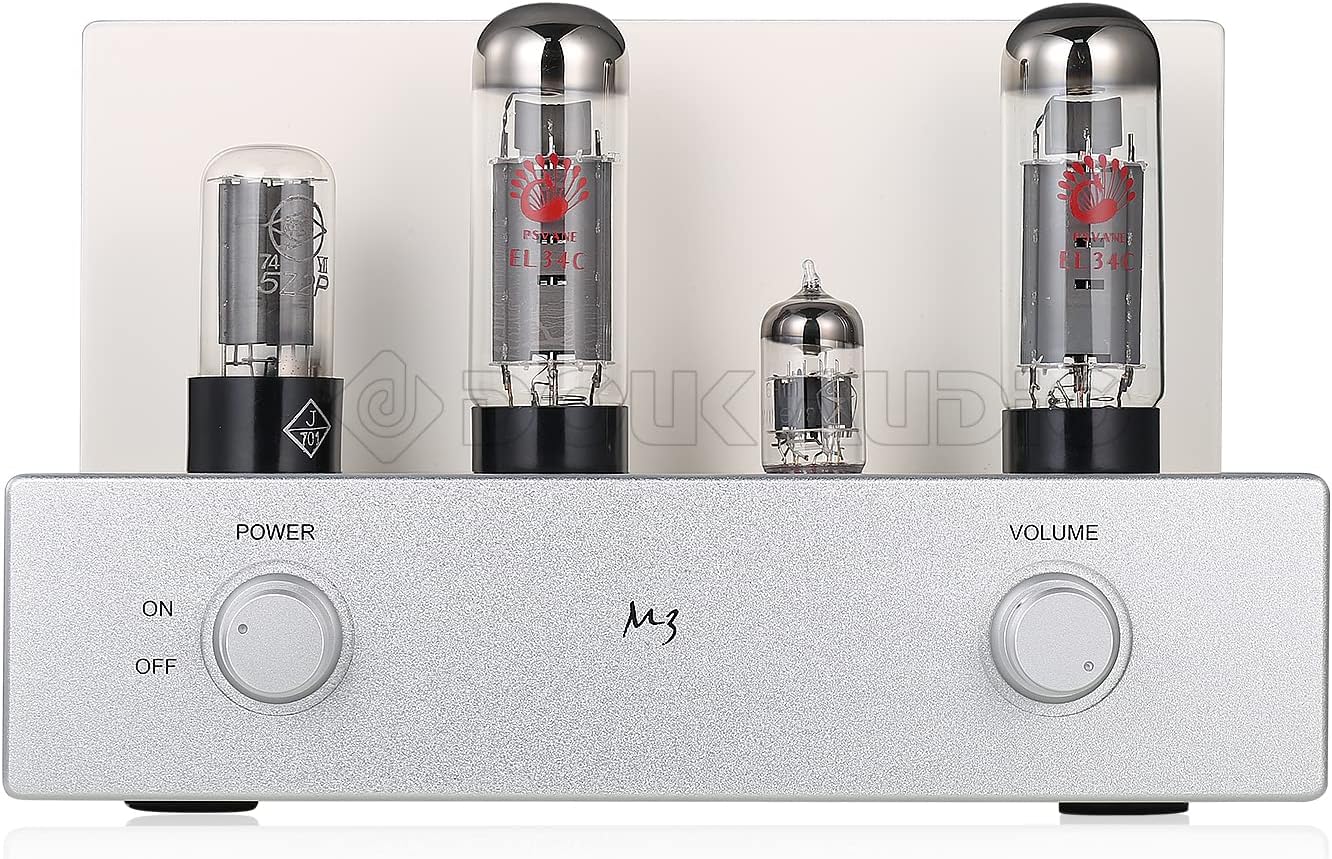
Description: This image shows the front panel of the Nobsound Mini EL34 Tube Integrated Amplifier. On the left, there is a rotary power switch with 'ON' and 'OFF' positions. On the right, a rotary volume control knob is visible. The vacuum tubes are prominently displayed on top of the unit.
- 전원 스위치: 회전합니다 amp라이터를 켜거나 끕니다.
- 볼륨 조절: 전체 출력 볼륨을 조절합니다.
4.2 후면 패널

Description: This image displays the rear panel of the Nobsound Mini EL34 Tube Integrated Amplifier. From left to right, it features two sets of RCA audio inputs labeled 'PC' and 'CD', with a selector switch to choose between them. To the right are the speaker output terminals, supporting both 4Ω and 8Ω impedance connections via banana plugs or bare wire. On the far right is the AC power input socket.
- PC Input (RCA L/R): Audio input for connecting devices like computers.
- CD Input (RCA L/R): Audio input for connecting devices like CD players.
- 입력 선택기 스위치: Toggles between PC and CD audio inputs.
- 스피커 출력 단자: Connect your passive speakers. Supports 4Ω and 8Ω impedance.
- 전원 입력: 여기에 제공된 전원 코드를 연결합니다.
5. 설정
5.1 튜브 설치 (사전 설치되지 않은 경우)
If the vacuum tubes are not pre-installed, follow these steps:
- Carefully remove the tubes from their packaging.
- Identify the correct sockets for each tube type (5Z2P, EL34, 6N1). Refer to the markings on the amp리퍼 섀시.
- Align the pins of each tube with the corresponding holes in the socket. Gently push the tube straight down until it is firmly seated. Do not force it.

설명: 이 이미지는 클로즈업 사진을 제공합니다. view of the four vacuum tubes used in the Nobsound Mini EL34 Tube Integrated Amplifier. From left to right, they are one 5Z2P rectifier tube, two EL34 power tubes, and one 6N1 pre-amplifier tube.
5.2 스피커 연결하기
- 확인하십시오 amp앰프의 전원이 꺼져 있고 전원 콘센트에서 플러그가 뽑혀 있습니다.
- Connect your passive speakers to the speaker output terminals on the rear panel.
- Match the speaker impedance (4Ω or 8Ω) to the corresponding terminals on the amp리퍼.
- 스피커의 양극(+) 단자를 전원 케이블의 양극(+) 단자에 연결하십시오. amp앰프의 음극(-) 단자와 스피커의 음극(-) 단자를 앰프의 음극(-) 단자에 연결하십시오. amplifier. Ensure secure connections.
5.3 오디오 소스 연결
- Connect your audio source (e.g., CD player, PC, streamer) to either the 'CD' or 'PC' RCA input jacks on the rear panel using appropriate RCA cables.
- Ensure left (L) and right (R) channels are correctly connected.
5.4 전원 연결
- After all audio and speaker connections are made, connect the supplied power cord to the power input socket on the rear panel.
- Plug the other end of the power cord into a 100V AC power outlet.
6. 사용 설명서
- 전원 켜기: Turn the Power Switch on the front panel to the 'ON' position. The tubes will begin to glow, indicating the amp앰프가 예열 중입니다. 오디오를 재생하기 전에 진공관이 안정될 때까지 잠시 기다려 주십시오.
- 입력 선택: Use the Input Selector Switch on the rear panel to choose between the 'PC' or 'CD' audio input, corresponding to your connected source.
- 볼륨 조절: Start with the Volume Control knob at its minimum setting. Begin playing audio from your source, then slowly turn the Volume Control clockwise to achieve your desired listening level.
- 전원 끄기 : 끄려면 amplifier, turn the Power Switch to the 'OFF' position.
7. 유지관리
- 청소: 정기적으로 닦아주세요 amplifier's exterior with a soft, dry cloth to remove dust. Do not use abrasive cleaners or solvents.
- 튜브 교체: Vacuum tubes have a finite lifespan. If you notice a degradation in sound quality or a tube fails, it may need replacement. Ensure the amplifier is OFF and unplugged, and the tubes have cooled completely before attempting replacement. Gently pull the old tube straight out and insert the new tube, aligning the pins carefully.
- 통풍: Ensure the ventilation holes remain unobstructed to prevent overheating.
8. 문제 해결
| 문제 | 가능한 원인 | 해결책 |
|---|---|---|
| 사운드 출력이 없습니다 |
|
|
| 왜곡된 소리 |
|
|
| 윙윙거리는 소리 |
|
|
9. 사양
- 유형: 진공관 통합 Amp리퍼
- 모델: Single-ended Class A
- 채널: 2.0
- 입력 감도: 550mV
- 전력 출력: 2 × 8W (Ultralinear connection)
- S/N 비율: 85데시벨
- 입력 임피던스: 100KΩ
- 출력 임피던스: 4Ω, 8Ω
- 전원 공급 장치: 100V 교류
- 전력 소비량: 76와트
- 주파수 응답: 30Hz ~ 38KHz
- 진공관: 5Z2P (x1), EL34 (x2), 6N1 (x1)
- 오디오 입력: Stereo L/R RCA (CD / AUX, PC)
- 오디오 출력: 바나나 스피커 잭
- 치수(W×D×H): 260mm × 230mm × 175mm
- 무게: 7.5kg
10. 보증 및 지원
Nobsound products are designed for reliability and performance. For warranty information or technical support, please refer to the documentation provided with your purchase or contact your retailer. Keep your purchase receipt as proof of purchase.
For further assistance, you may visit the official Nobsound web사이트 또는 고객 서비스 부서에 문의하십시오.