
NVX XC4N1
NVX XC4N1 범용 4-in-1 후면view 백업 카메라 사용 설명서
Model: XC4N1
소개
This manual provides detailed instructions for the installation, operation, and maintenance of your NVX XC4N1 Universal 4-in-1 Rearview 후방 카메라. 올바른 기능과 안전을 위해 설치 및 사용 전에 이 설명서를 자세히 읽어주세요.

Image: The NVX XC4N1 camera shown with its various mounting configurations, highlighting its versatility.
안전 정보
- 전기 작업을 수행하기 전에 항상 차량의 배터리를 분리하세요.
- 단락이나 손상을 방지하기 위해 모든 배선이 적절하게 절연되고 고정되었는지 확인하십시오.
- 운전자의 시야를 방해하지 마십시오. view 또는 설치 중에 차량 제어 장치에 간섭을 일으킬 수 있습니다.
- This camera is an aid for reversing and parking; it does not replace the driver's responsibility to check surroundings.
- 설치 과정에 대해 확신이 서지 않는 부분이 있으면 전문가에게 문의하십시오.
패키지 내용
설치를 시작하기 전에 모든 구성 요소가 있는지 확인하세요.
- NVX XC4N1 Backup Camera Unit
- 스퀘어 마운트
- 각진 마운트
- 플러시 마운트
- 고무 마운트
- License Plate Bar Mount
- 전원 케이블
- RCA 비디오 케이블
- Mounting Hardware (screws, adhesive pad)
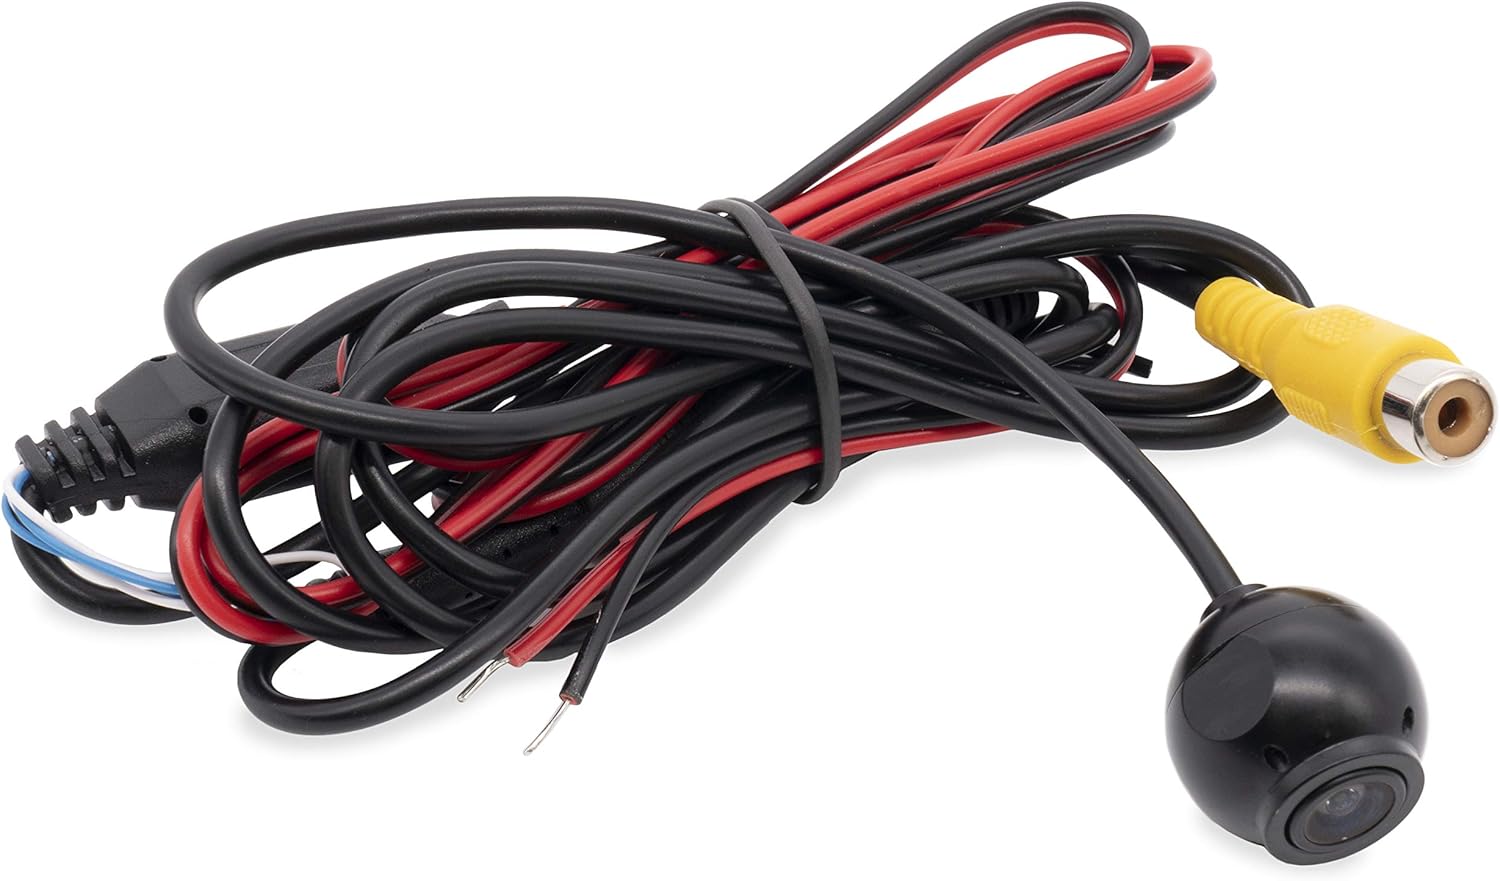
Image: The main camera unit with its attached power and RCA video cables.

Image: A collection of mounting brackets and screws included with the camera for different installation types.

Image: Supplementary mounting accessories, including a flush mount housing and adhesive pad.
설정 및 설치
The NVX XC4N1 offers four primary mounting options to suit various vehicle types and preferences.

Image: Visual representation of the four mounting styles: Flush, Square, Rubber (angled), and Bar (angled for license plate).
장착 옵션:
- 플러시 마운트: For a discreet, integrated look. Requires drilling a hole for the camera body.
- 스퀘어 마운트: A surface-mount option, typically used on flat areas.
- Rubber Mount (Angled): Provides an angled view, often used for specific bumper or panel contours.
- License Plate Bar Mount (Angled): Designed to attach to the vehicle's license plate frame for easy installation.
일반 설치 단계:
- 장착 위치 선택: Select the optimal mounting location based on visibility and vehicle aesthetics.
- Install Camera Mount: Secure the chosen mount using the provided screws or adhesive. Ensure the camera is oriented correctly.
- 케이블 경로: Carefully route the power and video cables from the camera to the vehicle's interior, avoiding moving parts, sharp edges, and heat sources.
- 전원 연결:
- Connect the red wire of the power cable to a 12V reverse light power source (positive). This ensures the camera activates when the vehicle is in reverse.
- Connect the black wire of the power cable to a vehicle ground (negative).
- 연결 비디오:
- Connect the yellow RCA video cable from the camera to the video input of your display monitor or head unit.
- If your monitor requires a trigger wire for reverse activation, connect the small red wire integrated into the RCA cable to the reverse trigger input of your monitor.
- 테스트 시스템 : Reconnect the vehicle battery. Engage reverse gear (with the parking brake on and foot on the brake pedal) to verify the camera image appears on your display.
- 설치 마무리: Secure all cables and components, ensuring no loose wires or potential hazards.
작동 지침
The NVX XC4N1 camera automatically activates when the vehicle is shifted into reverse, displaying the rear view 연결된 모니터에서.
주요 특징:
- Ultra-Wide 170-Degree View: 광범위한 분야를 제공합니다 view behind your vehicle, minimizing blind spots.

Image: A visual representation of the camera's 170-degree wide viewing angle, showing an extended area behind a vehicle.
- 주차라인: Integrated color parking lines assist in judging distance and alignment. These lines are fixed and cannot be adjusted.

Image: A screenshot of the camera's output, showing green, yellow, and red parking guide lines overlaid on the rear view.
- 초저조도 야간 투시경: The camera operates effectively in low-light conditions with a minimum illumination of 0.08 Lux, enhancing visibility at night.

Image: A split image comparing the night vision performance of a competitor's camera (left, darker) versus the NVX XC4N1 (right, brighter) in low light conditions.
- Penetrating Fog Function: Designed to improve visibility in foggy conditions.
유지
The NVX XC4N1 camera is designed for durability and minimal maintenance.
- 방수 구조: The camera is IP68 certified, meaning it is fully dustproof and can withstand submersion in water. This protects it from rain, car washes, and other environmental elements.

Image: The camera lens partially submerged in water, illustrating its IP68 waterproof capability.
- 청소: 카메라 렌즈는 주기적으로 부드러운 천으로 닦아주세요.amp 깨끗한 이미지를 얻으려면 천으로 닦아주십시오. 렌즈에 흠집을 낼 수 있는 연마성 세척제나 재질은 사용하지 마십시오.
- 케이블 검사: Occasionally check the cables for any signs of wear, damage, or loose connections.
문제 해결
If you encounter issues with your NVX XC4N1 camera, refer to the following common problems and solutions:
| 문제 | 가능한 원인 | 해결책 |
|---|---|---|
| 반전 시에는 화면에 아무것도 표시되지 않습니다. |
|
|
| 이미지가 흐릿하거나 왜곡되었습니다. |
|
|
| Parking lines are not visible. |
|
|
명세서
| 특징 | 세부 사항 |
|---|---|
| 모델 | XC4N1 |
| 상표 | 엔비엑스 |
| 해결 | 720 x 480 픽셀 |
| View잉 각도 | 170도 (실제 각도) View) |
| 광센서 기술 | CMOS |
| 광학 센서 크기 | 1/3 인치 |
| 최소 조명 | 0.08 럭스 |
| 방수 등급 | IP68 |
| 권tage | 12 볼트 |
| 커넥터 유형 | (주)알에이씨에이 |
| 설치 유형 | Bracket Mount (4-in-1 Universal) |
| 품목 무게 | 1.5파운드 |
보증 및 지원
For warranty information or technical support, please refer to the documentation included with your purchase or visit the official NVX website. Contacting customer support with your product model (XC4N1) and purchase details will help expedite assistance.
Visit the NVX Store on Amazon 더 많은 정보와 제품을 확인하세요.
Ask a question about this manual
Ask about setup, troubleshooting, compatibility, parts, safety, or missing instructions. Manuals+ will review the question and use this page’s manual context to help answer it.