
Amazon Basics BM1349-UL-B
Amazon Basics Programmable Bread Maker Instruction Manual
Model: BM1349-UL-B
소개

Figure 1: Amazon Basics Programmable Bread Maker. This image shows the black bread maker from an angled front view, highlighting its compact design, control panel with LCD display, and program settings listed on the top surface.
구매해주셔서 감사합니다asing the Amazon Basics Programmable Bread Maker. This appliance is designed to simplify the process of making fresh bread, doughs, and jams at home. Please read this instruction manual thoroughly before first use to ensure safe operation and optimal performance. Keep this manual for future reference.
중요 안전 지침
- 기기를 사용하기 전에 모든 지침을 읽으세요.
- 뜨거운 표면을 만지지 마십시오. 손잡이나 손잡이를 사용하십시오.
- 감전을 예방하려면 코드, 플러그 또는 기기를 물이나 기타 액체에 담그지 마십시오.
- 어린이가 가전제품을 사용하거나 어린이 근처에서 사용할 때는 면밀한 감독이 필요합니다.
- 사용하지 않을 때와 세척하기 전에는 콘센트에서 플러그를 뽑으세요. 부품을 끼우거나 떼기 전에 식히세요.
- 코드나 플러그가 손상된 경우 또는 기기가 오작동하거나 어떤 식으로든 손상된 경우에는 기기를 작동하지 마십시오.
- 가전제품 제조업체가 권장하지 않는 부속품을 사용하면 부상을 입을 수 있습니다.
- 옥외에서는 사용하지 마십시오.
- 코드가 테이블이나 카운터 가장자리에 걸려 있거나 뜨거운 표면에 닿지 않도록 하세요.
- 뜨거운 가스나 전기 버너 근처 또는 가열된 오븐에 두지 마십시오.
- 뜨거운 기름이나 기타 뜨거운 액체가 담긴 가전제품을 옮길 때는 극히 조심해야 합니다.
- 연결을 끊으려면 모든 제어 장치를 "끄기"로 돌린 다음 벽면 콘센트에서 플러그를 뽑으세요.
- 본 제품을 본래 용도 외에는 사용하지 마십시오.
제품 구성 요소
Familiarize yourself with the parts of your bread maker before operation.

그림 2: 포함된 액세서리. This image displays the bread pan with handle, a clear plastic measuring cup, a black kneading blade, a white double-sided measuring spoon (teaspoon/tablespoon), and a metal hook for removing the kneading blade.
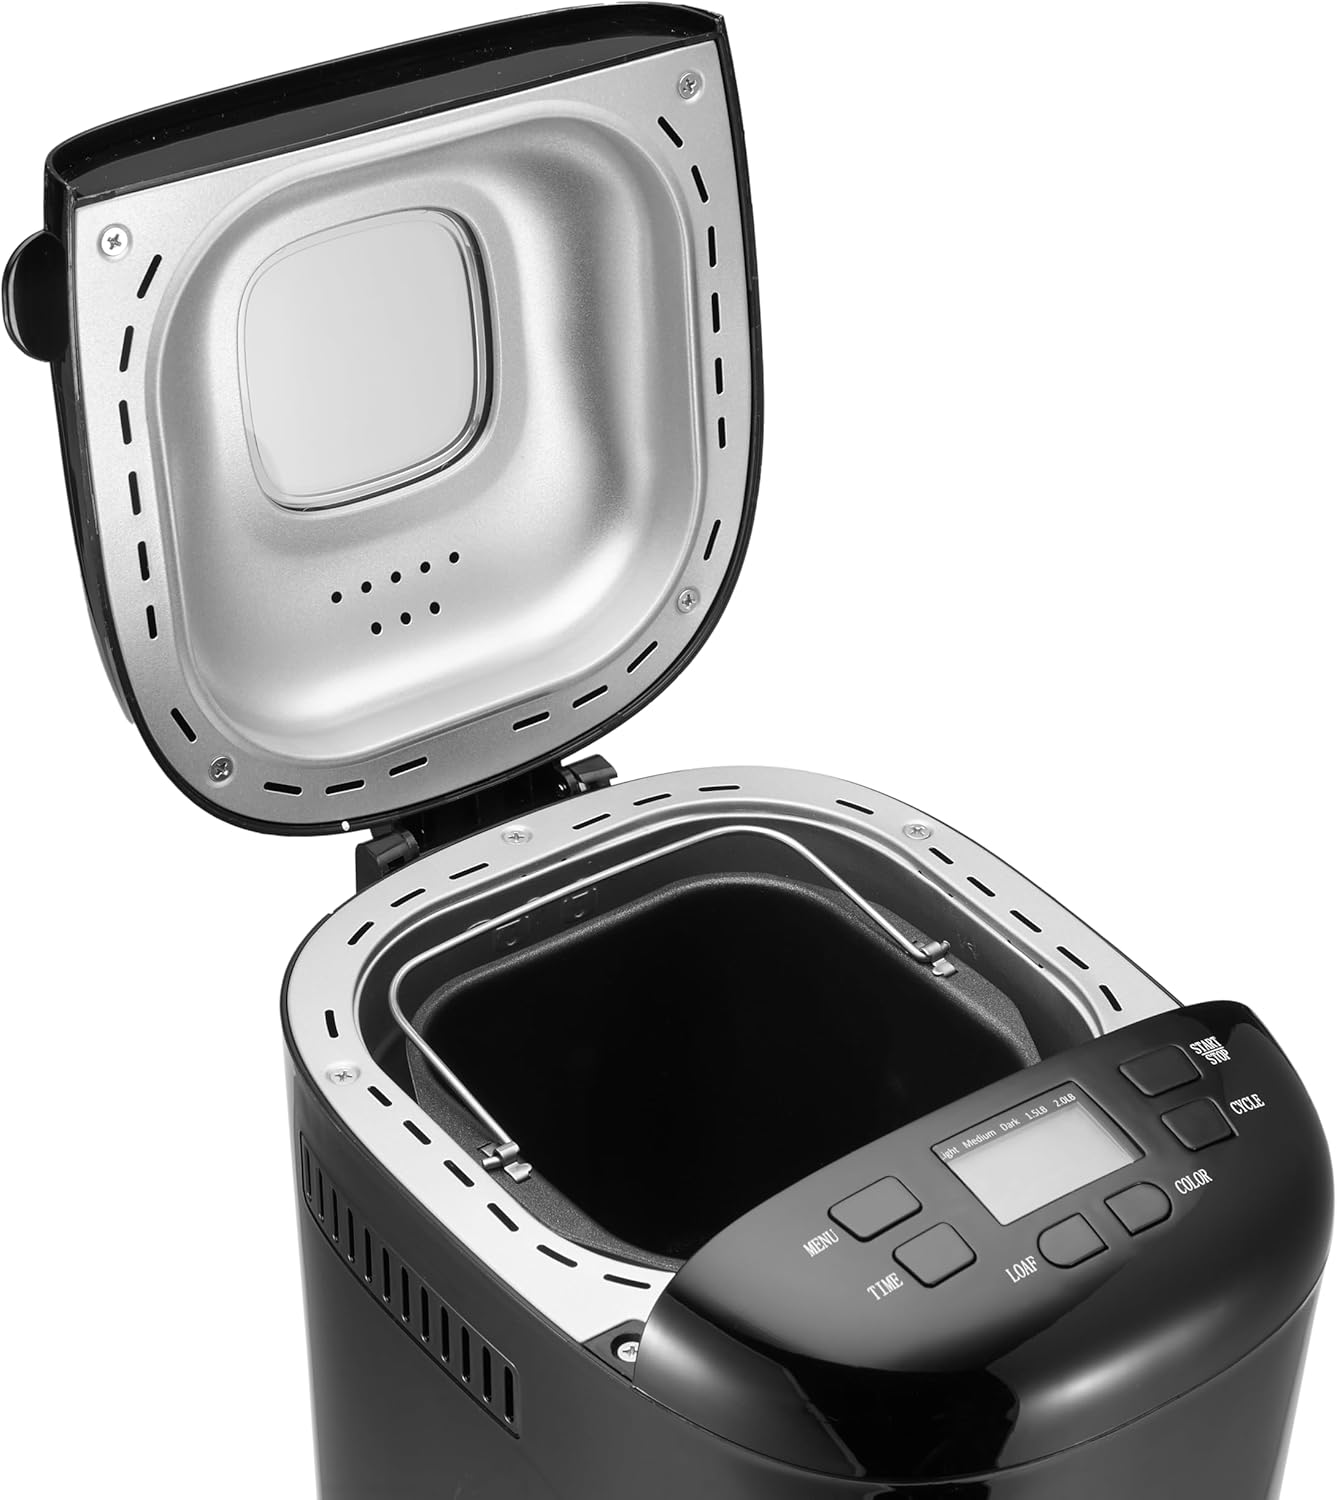
Figure 3: Bread Maker Interior. This image shows the bread maker with its lid open, revealing the heating element and the space where the bread pan is inserted. The control panel with its LCD display and buttons is visible at the front.
- 메인 유닛: 빵 제조기의 주요 하우징.
- 제어판: Features an LCD display and buttons for program selection, time, loaf size, and crust color.
- 뚜껑: 베이킹실을 덮습니다. 보통 덮개로 덮습니다. view잉 창.
- 빵 팬: Non-stick baking pan where ingredients are placed and bread is baked.
- 반죽 블레이드: 빵틀 안쪽의 축에 부착하여 반죽을 섞고 치대는 데 사용합니다.
- 계량컵: For liquid and dry ingredients.
- 계량 스푼: For smaller measurements (teaspoon/tablespoon).
- 훅: Used to remove the kneading blade from the baked loaf.
설정 및 첫 사용
- 짐 풀기: 제빵기와 모든 부속품을 포장에서 조심스럽게 꺼내세요. 나중에 보관하거나 운반할 수 있도록 포장을 보관하세요.
- 청소: Before first use, wash the bread pan and kneading blade with warm, soapy water. Rinse thoroughly and dry completely. Wipe the exterior of the bread maker with a damp 옷감. 본체를 물에 담그지 마십시오.
- 초기 번오프: It is recommended to run the bread maker empty for approximately 10 minutes on a "Bake" cycle (if available, or a short custom bake cycle) to burn off any manufacturing oils. Some smoke or odor may be present; this is normal. Ensure adequate ventilation. After this, allow the unit to cool completely and clean the interior again.
- 놓기: 제빵기를 직사광선과 열원으로부터 멀리 떨어진 안정적이고 평평하며 내열성이 있는 표면에 놓으십시오. 기기 주변에 충분한 환기가 이루어지도록 하십시오.
- 전원 연결: Plug the power cord into a grounded electrical outlet. The display will illuminate, indicating the unit is ready for use.
작동 지침
This section guides you through the process of making bread with your appliance.
제어판 이상view
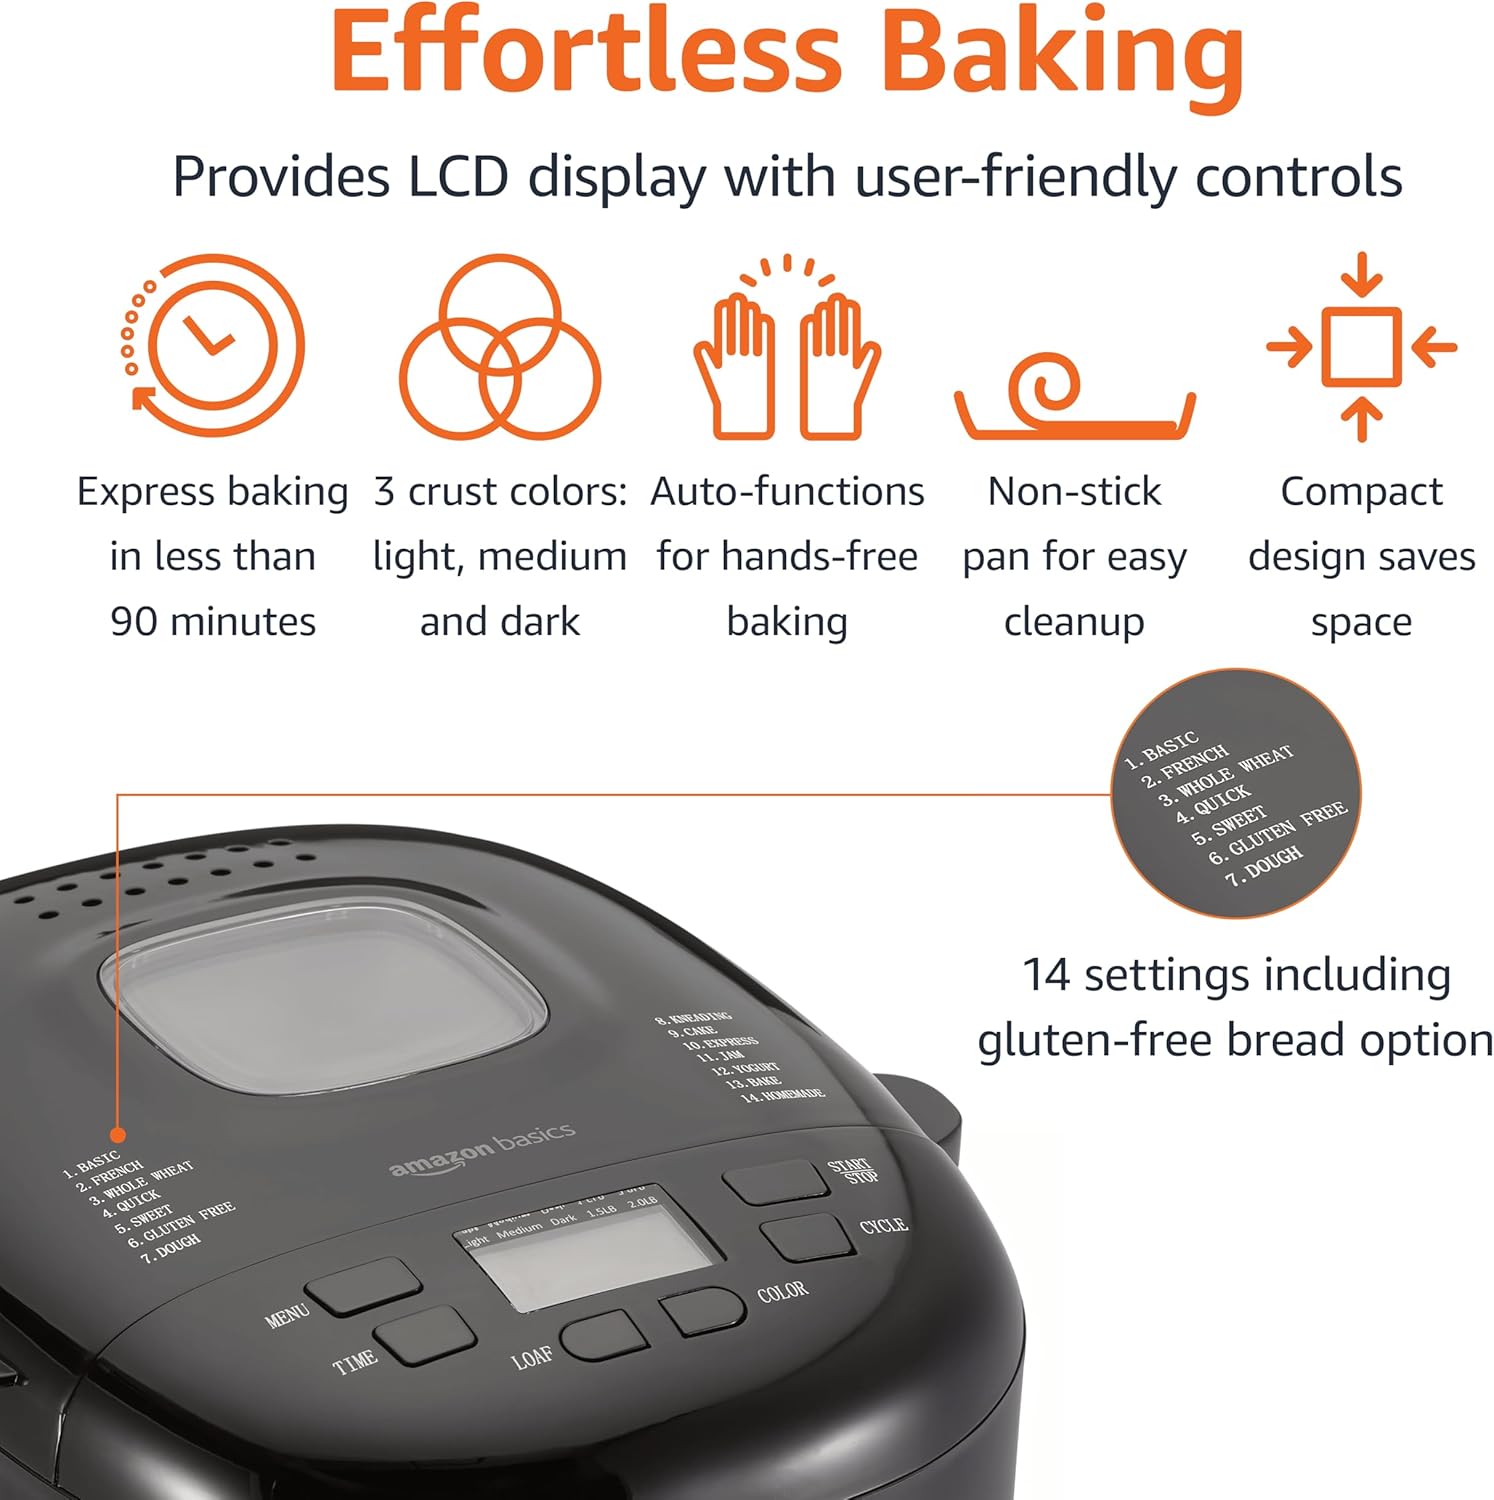
그림 4: 제어판. This image highlights the bread maker's control panel, featuring an LCD screen that displays program information. Buttons for 'MENU', 'TIME', 'LOAF', 'COLOR', and 'CYCLE' are clearly visible, along with a list of 14 program settings.
- 메뉴 버튼: Selects one of the 14 available programs (e.g., Basic, French, Whole Wheat, Sweet, Gluten Free, Dough, Jam).
- TIME Buttons (+/-): 지연 베이킹의 지연 타이머를 조정합니다.
- 로프 버튼: Selects the loaf size (e.g., 1.5 lb or 2 lb).
- 컬러 버튼: Selects the crust darkness (Light, Medium, Dark).
- CYCLE (Start/Stop) Button: Starts or stops the selected program.
- LCD 디스플레이: Shows the selected program, time remaining, loaf size, and crust color.
빵 만들기의 기본 단계
- 반죽 블레이드 삽입: 반죽용 칼날을 빵틀 안쪽의 축에 끼우세요.
- 재료 추가: Add ingredients to the bread pan in the order specified by your recipe (typically liquids first, then dry ingredients, with yeast last and separate from liquids/salt). Ensure accurate measurements.
- 빵 팬 놓기: Insert the bread pan into the bread maker, ensuring it is securely locked in place. Close the lid.
- 프로그램 선택: 를 누르세요 메뉴 button to choose the desired program (e.g., "Basic" for white bread).
- 빵 크기 선택: 를 누르세요 덩어리 button to select the appropriate loaf size (1.5 lb or 2 lb).
- 크러스트 색상 선택: 를 누르세요 색상 버튼을 눌러 원하는 빵껍질 색깔(옅음, 중간, 짙음)을 선택하세요.
- 프로그램 시작: 를 누르세요 주기 button to start the program. The machine will begin mixing.
- 모니터링: During the kneading cycles, you may check the dough consistency by opening the lid briefly. If the dough is too dry, add a small amount of liquid; if too wet, add a small amount of flour.
- 완성: Once the program is complete, the bread maker will usually beep and switch to a "Keep Warm" cycle. Press the 주기 기계를 멈추려면 버튼을 누르세요.
- 빵을 제거하세요: Using oven mitts, carefully remove the hot bread pan from the machine. Invert the pan onto a wire rack to release the bread. If the kneading blade remains in the loaf, use the provided hook to carefully remove it.
- 냉각: 빵을 자르기 전에 최소 20~30분 동안 식힘망에서 식혀주세요. 이렇게 하면 빵의 내부 구조가 단단해집니다.
지연 타이머 기능
The delay timer allows you to program the bread maker to finish baking at a later time, up to 13 hours. This is useful for having fresh bread ready in the morning.
- After selecting your program, loaf size, and crust color, press the 시간 버튼을 사용하여 원하는 지연 시간을 설정할 수 있습니다. 표시되는 시간에는 베이킹 사이클 시간이 포함됩니다.
- 를 누르세요 주기 button. The timer will count down, and the machine will start automatically when the delay time expires.
- 주의: 우유, 계란, 신선한 과일과 같이 쉽게 상하는 재료가 포함된 레시피에는 지연 타이머를 사용하지 마십시오. 이러한 재료는 굽기 시작하기도 전에 상할 수 있습니다.
레시피 안내
The Amazon Basics Bread Maker offers 14 settings for various types of baked goods. For best results, always use recipes specifically designed for bread makers and ensure accurate measurement of ingredients.
- 빵 프로그램: Basic, French, Whole Wheat, Sweet, Gluten-Free, ExpressBake.
- 반죽 프로그램: For pizza dough, pasta dough, or rolls.
- 전문 프로그램: Jam, Cake, Yogurt.
Refer to the recipe book that came with your bread maker or reliable bread machine recipe sources for ingredient quantities and specific instructions for each program.
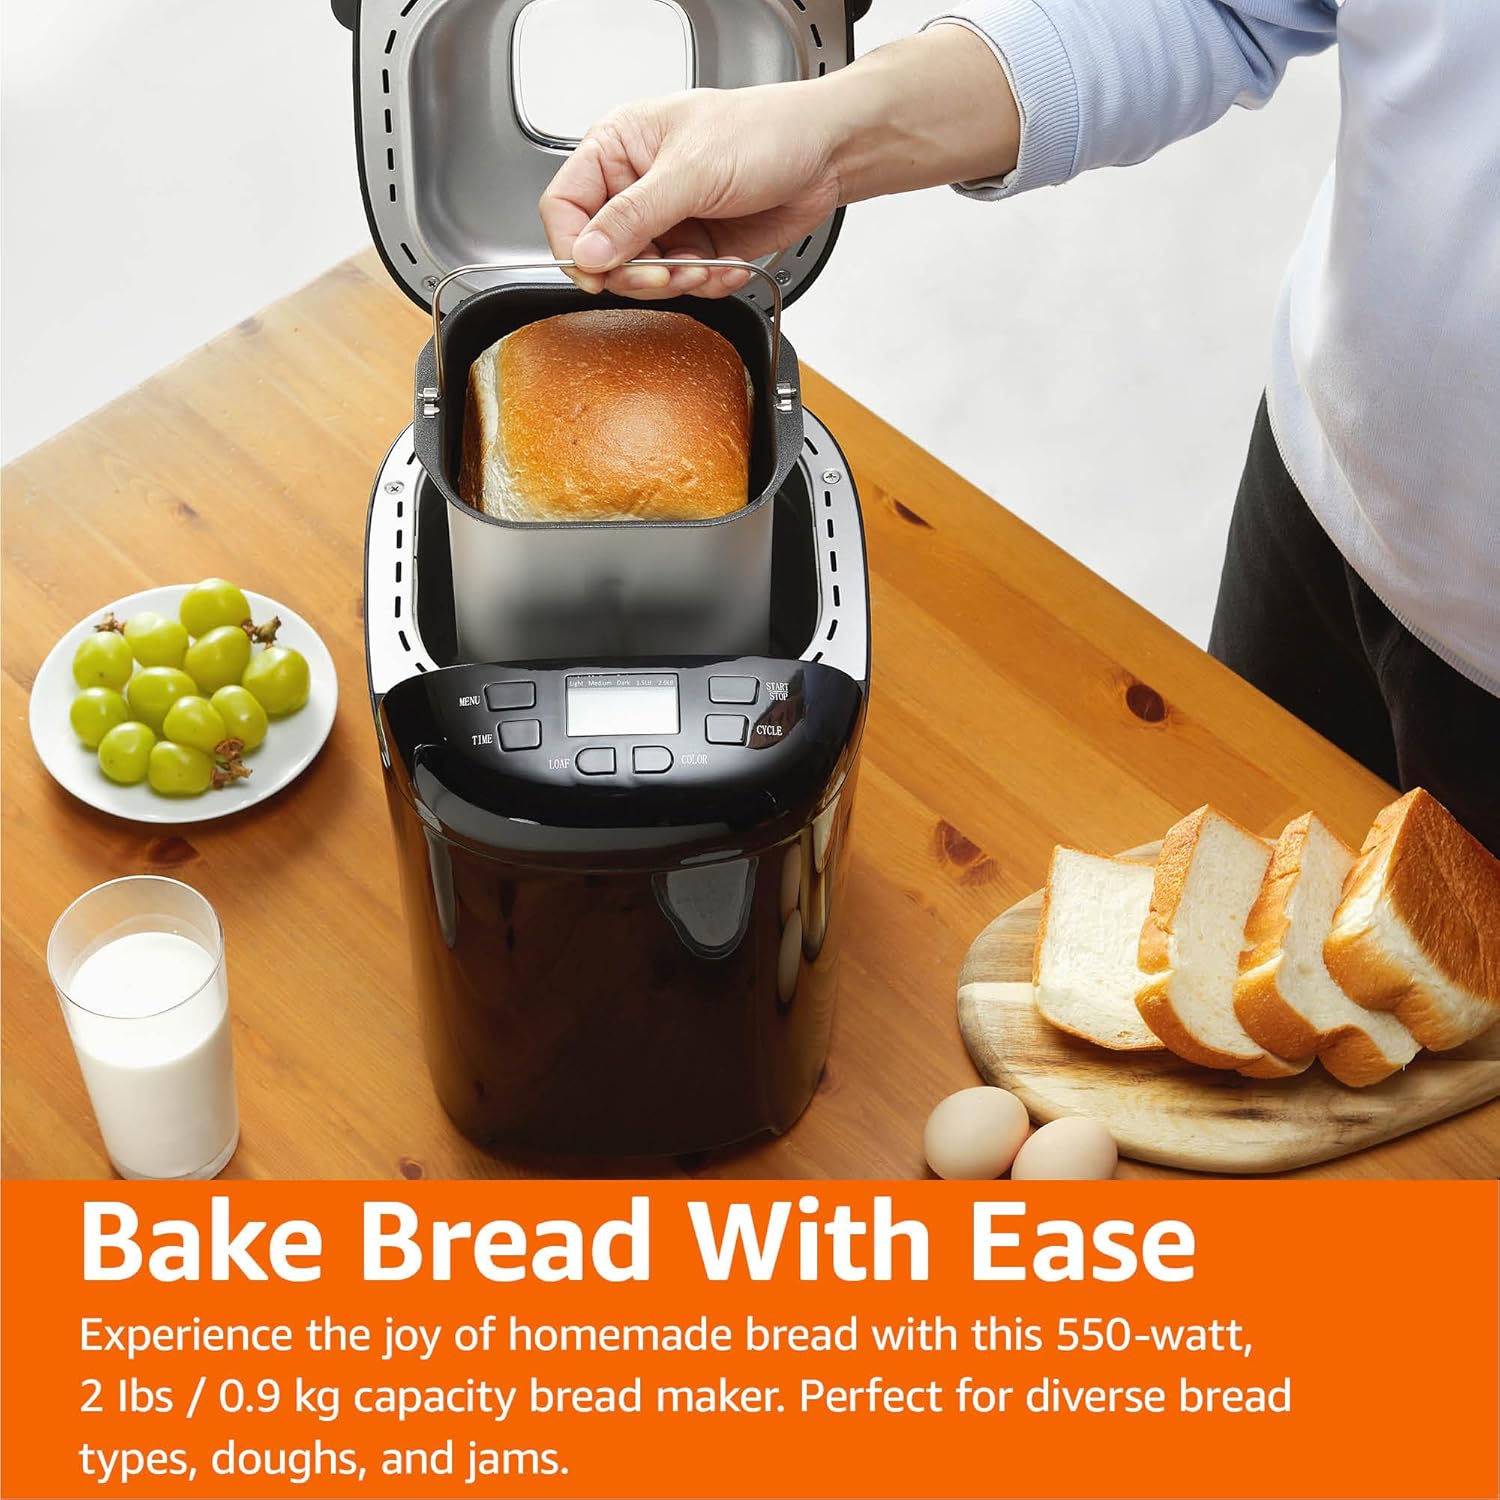
Figure 5: Freshly Baked Bread. This image shows a person carefully lifting the bread pan, containing a golden-brown loaf, out of the bread maker. Surrounding the machine are fresh grapes, a glass of milk, and slices of bread, illustrating the end result of the baking process.
관리 및 유지 보수
적절한 청소와 유지관리를 통해 빵 제조기의 수명을 연장할 수 있습니다.
- 플러그를 뽑다: 항상 기기를 전원 콘센트에서 뽑고 완전히 식힌 후에 청소하세요.
- 빵틀과 반죽날: Wash the bread pan and kneading blade with warm, soapy water. Do not use abrasive cleaners or metal scouring pads, as this can damage the non-stick coating. Rinse thoroughly and dry completely.
- 외부: 빵 제조기 외부를 부드러운 천으로 닦으세요.amp 옷감. 강한 화학 물질이나 연마성 세제를 사용하지 마십시오.
- 내부: 베이킹 챔버 내부를 광고로 청소하세요.amp 천으로 닦아 부스러기나 잔여물을 제거하세요.
- 저장: Store the bread maker in a clean, dry place. Ensure the bread pan and kneading blade are clean and dry before storing.
문제 해결 가이드
If you encounter issues with your bread maker, refer to the following common problems and solutions.
| 문제 | 가능한 원인 | 해결책 |
|---|---|---|
| 빵은 부풀지 않습니다. | Expired or inactive yeast, incorrect water temperature, too much salt, not enough sugar. | 효모 유통기한을 확인하세요. 미지근한 물(40~46°C)을 사용하세요. 재료의 양을 정확하게 조절하세요. |
| 빵이 너무 밀도가 높거나 무겁습니다. | Too much flour, not enough liquid, incorrect yeast amount, high humidity. | Measure ingredients accurately, especially flour (use a scale if possible). Adjust liquid slightly in humid conditions. |
| 빵은 굽는 동안 꺼진다. | Too much liquid, too much yeast, high altitude, opening lid too often. | Reduce liquid slightly. Ensure correct yeast amount. Avoid opening the lid during baking. |
| 빵에 반죽 칼날이 끼어 있음. | 흔히 발생하는 일입니다. | Use the provided hook to carefully remove the blade after the bread has cooled slightly. |
| 기계가 시작되지 않습니다. | 플러그가 꽂혀 있지 않음, 전원이 꺼짐tag뚜껑이 제대로 닫히지 않았거나 프로그램이 선택되지 않았습니다. | Check power connection. Ensure lid is fully closed. Select a program and press START. |
제품 사양
Technical details for the Amazon Basics Programmable Bread Maker.
- 모델 번호: BM1349-UL-B
- 상표: 아마존 기본 정보
- 색상: 검은색
- 힘: 550 와트
- 덩어리 용량: 최대 2파운드
- 프로그램 수: 14
- 제품 크기: 11.6인치 깊이 x 8.8인치 너비 x 11.4인치 높이
- 품목 무게: 8파운드
- 제조업체: 아마존
- 관리 지침: (외부) 마른 천으로 닦아주세요.
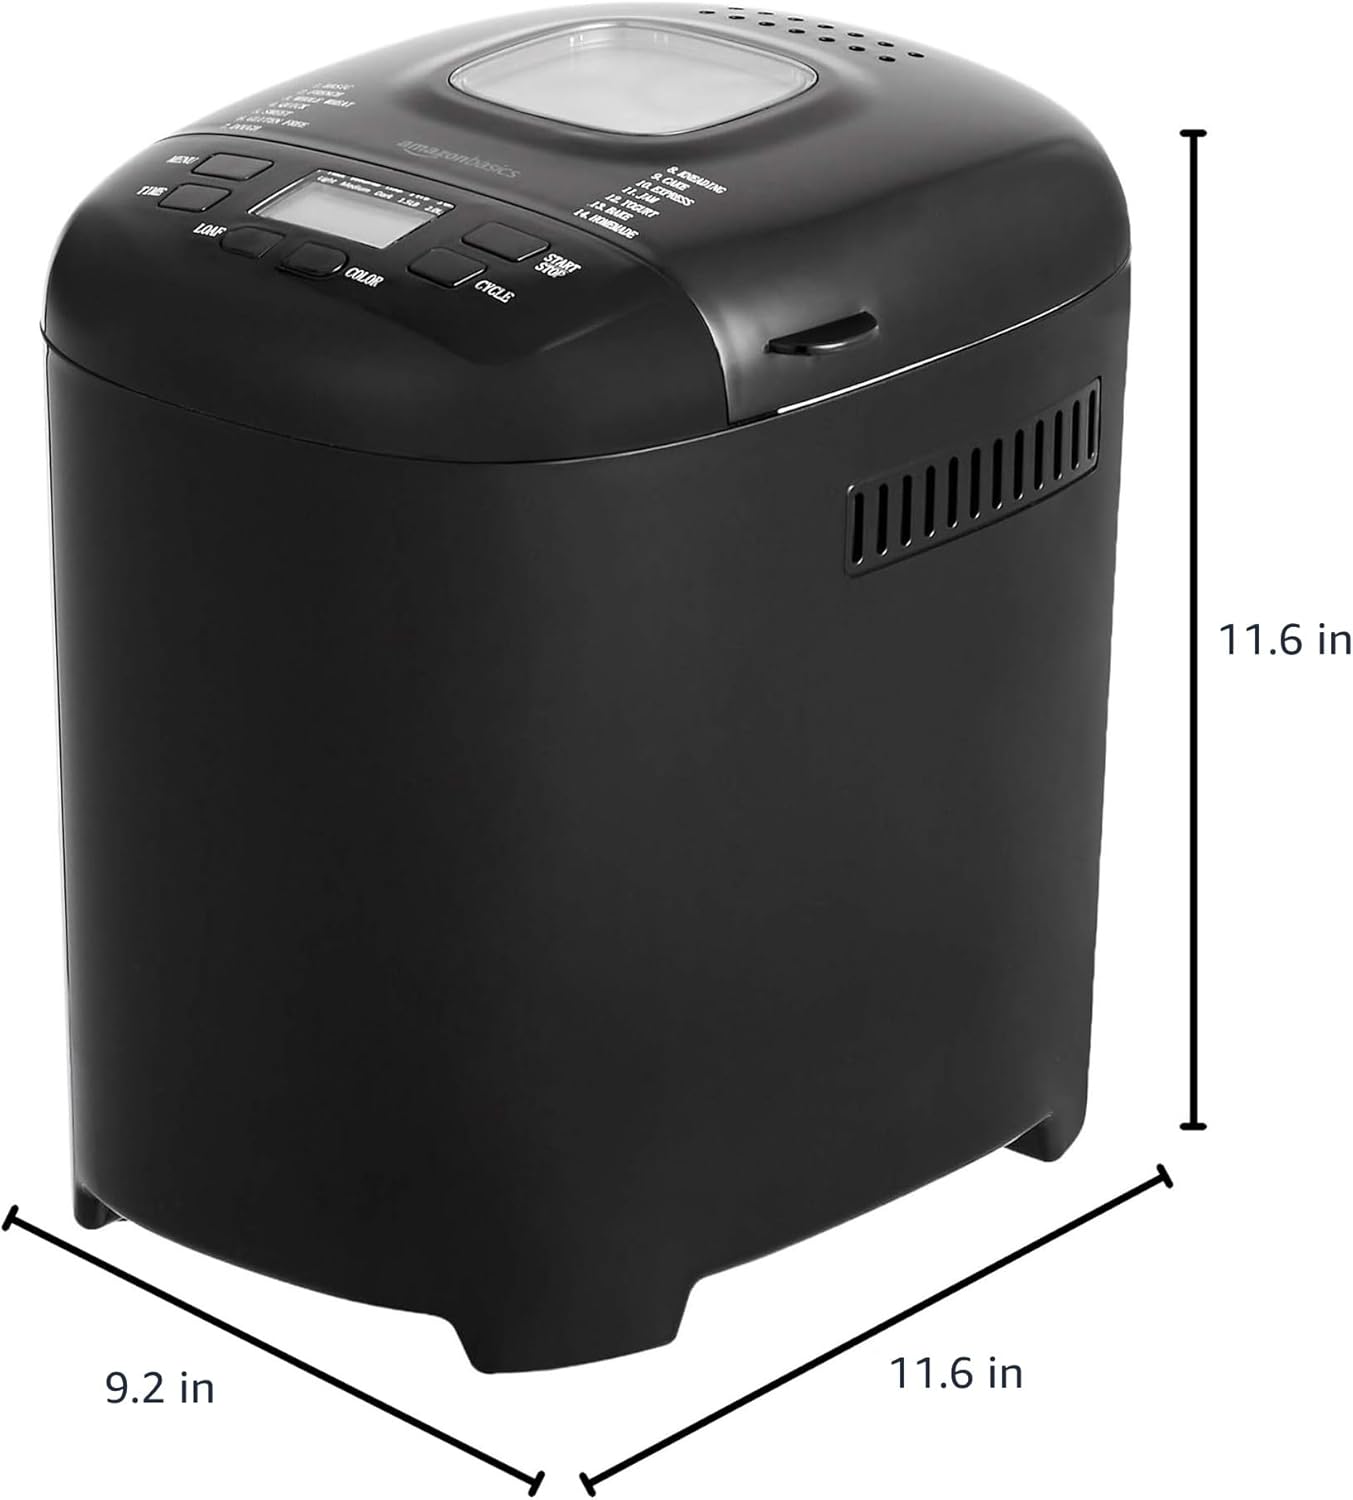
그림 6: 제품 치수 This image provides a visual representation of the bread maker's dimensions, indicating a depth of 11.6 inches, a width of 9.2 inches, and a height of 11.6 inches.
보증 정보
For detailed warranty information, please refer to the warranty card included with your product packaging or visit the official Amazon Basics web사이트. 보증은 일반적으로 정상적인 사용 중에 발생하는 재료 및 제조상의 결함을 보장합니다.
고객 지원
If you have any questions, require assistance, or need to report an issue with your Amazon Basics Bread Maker, please contact Amazon Basics Customer Service. You can typically find contact information on the Amazon website under the "Help" or "Customer Service" sections, or through your order details.
온라인 지원을 받으려면 다음을 방문하세요. 아마존 고객 서비스
Ask a question about this manual
Ask about setup, troubleshooting, compatibility, parts, safety, or missing instructions. Manuals+ will review the question and use this page’s manual context to help answer it.