
1. 제품 오버view
The XTUGA MI7 is a 7-piece wired dynamic drum microphone kit designed for professional sound reinforcement and studio recording. This kit provides a tailored frequency response for various instruments, ensuring high-quality audio capture.
주요 특징
- 맞춤형 주파수 응답: Designed for kick drums and other bass instruments, providing superb attack and punch.
- Studio Quality Sound: Delivers high-quality audio even at extremely high sound pressure levels.
- Supercardioid Pickup Pattern: Ensures high gain before feedback and excellent rejection of unwanted noise.
- Built-in Locking Stand Adapter: Features an integral XLR connector for simplified installation.
- Standard Thread Compatibility: Each instrument microphone includes standard 3/8" or 5/8" stand threads.
- 다양한 응용 분야: Suitable for close miking of tom-toms, percussion instruments, guitar amplifiers, brass instruments, woodwinds, and vocals.
- Standard XLR Connectors: Compatible with most audio instruments.
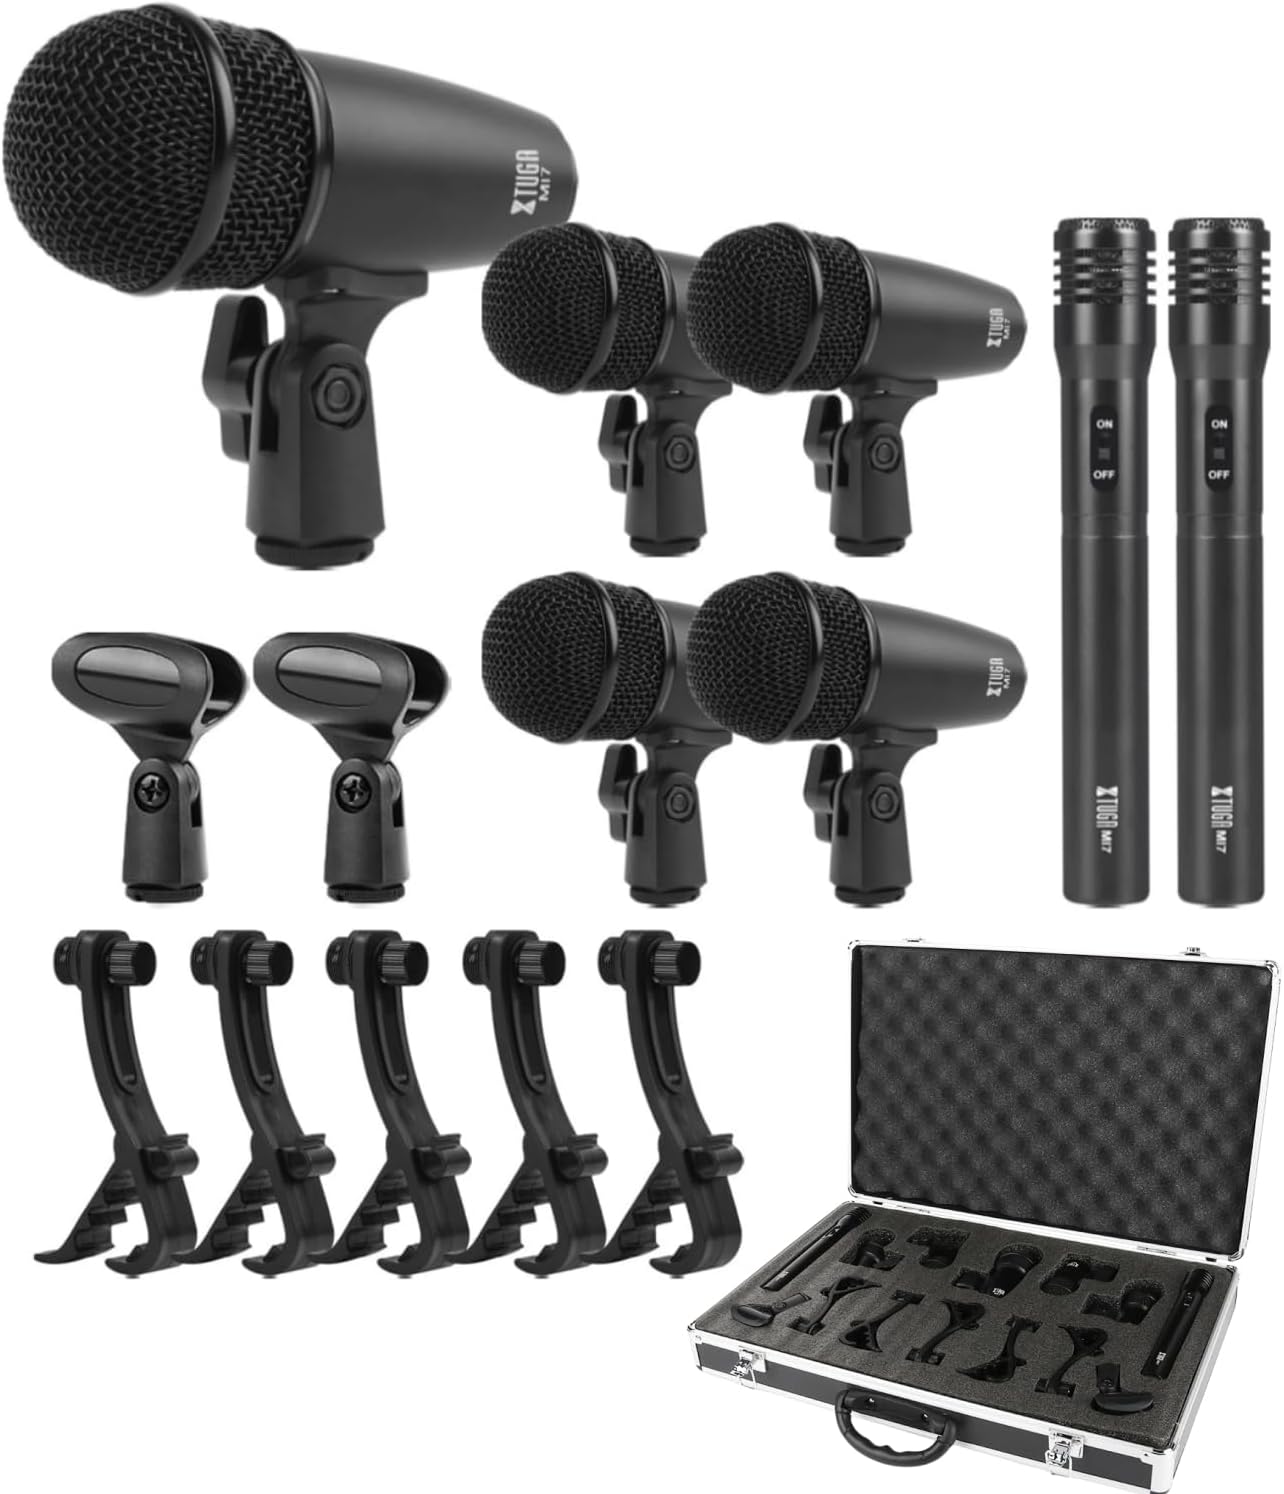
Figure 1: Complete XTUGA MI7 7-Piece Wired Dynamic Drum Microphone Kit with carrying case.
2. 패키지 내용
The XTUGA MI7 kit includes the following components:
- 1 x Big Drum Microphone
- 4 x Small Drum Microphones
- 콘덴서 마이크 2개 (홀더 포함)
- 4 x Thread Clips
- 스레드 삽입
- 4xClamps for Snare/Tom Mics
- 2 x Wind Screens for Condenser Mics
- 1 x Aluminum Carry Case
3. Microphone Types and Characteristics
3.1 Big Drum Microphone
This dynamic microphone is specifically designed for kick drums and other bass instruments, providing a powerful low-frequency response.
- 요소: 무빙 코일 다이내믹
- 극성 패턴: 단방향
- 주파수 응답: 50Hz-15kHz
- 감광도: -60 dB +/- 3 dB (0 dB=1 V/Pa at 1 kHz)
- 출력 임피던스: 500Ω +/-30% (at 1 kHz)
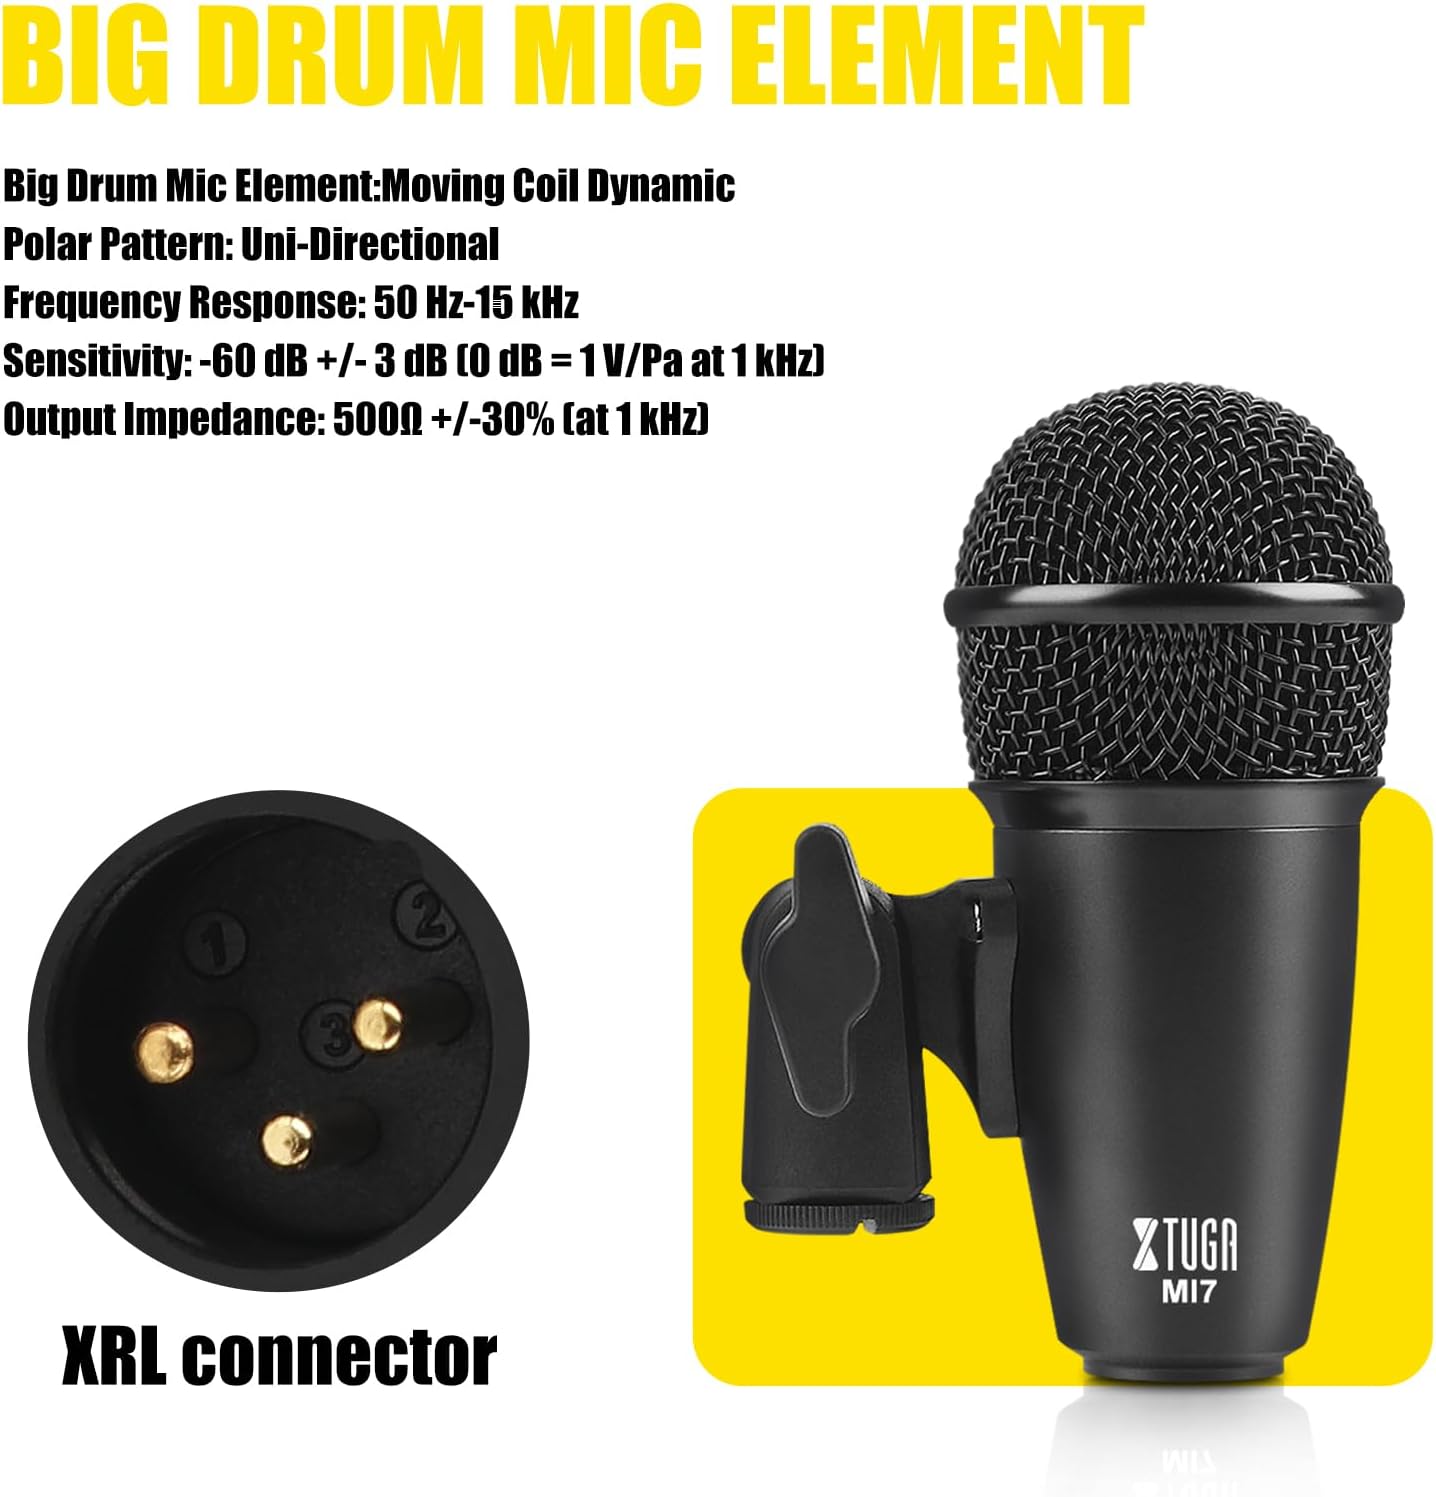
Figure 2: Big Drum Microphone with detailed specifications.
3.2 Small Drum Microphones (4 pieces)
These compact dynamic microphones are ideal for tom-toms, snare drums, and other percussion instruments, offering a clear and focused sound.
- 요소: 무빙 코일 다이내믹
- 극성 패턴: 단방향
- 주파수 응답: 50Hz-14kHz
- 감광도: -52 dB +/- 3 dB (0 dB=1 V/Pa at 1 kHz)
- 출력 임피던스: 500Ω +/-30% (at 1 kHz)

Figure 3: Small Drum Microphones with detailed specifications.
3.3 Condenser Microphones (2 pieces)
These electret condenser microphones are suitable for cymbals, pianos, and vocals, capturing detailed high-frequency sounds. They require 48V phantom power.
- 요소: 일렉 트릿 콘덴서
- 극성 패턴: 단방향
- 주파수 응답: 50Hz-18kHz
- 감광도: -45 dB +/- 3 dB (0 dB=1 V/Pa at 1 kHz)
- 출력 임피던스: 200Ω
- 최대 입력 SPL: 130dB(1kHz < 1% THD에서)
- S/N 비율: 70데시벨
- 전원 공급 장치: 팬텀 48V

Figure 4: Condenser Microphones with detailed specifications.
4. 설정 가이드
4.1 Attaching Microphones to Clips
Each dynamic microphone (big drum and small drums) comes with a built-in locking stand adapter. The condenser microphones use separate holders. The clamps for snare/tom mics are designed to securely attach the small drum microphones to the drum rims.
- For dynamic microphones, ensure the microphone is securely screwed into its respective clip or stand adapter.
- For condenser microphones, slide the microphone into its holder.
- Attach the drum clamps to the rims of your snare and tom drums.
- Adjust the angle and position of each microphone using the clip's adjustment mechanisms to achieve optimal sound capture.

그림 5: 상세 view of microphone construction and clip attachment.
4.2 Connecting to an Audio Mixer
The XTUGA MI7 kit uses standard XLR connectors for all microphones, allowing for versatile integration with most audio mixers.
- Connect the XLR cables from each microphone to the input channels of your audio mixer.
- For the two condenser microphones, ensure your mixer provides 48V phantom power. Activate the phantom power on the relevant channels or globally on your mixer.
- Adjust the gain and volume levels on your mixer for each microphone to achieve a balanced sound.
- Connect your mixer's main outputs to your speakers or recording interface.
Video 1: XTUGA MI7 Microphone Set Setup Guide. This video demonstrates the physical setup and connection of the MI7 microphones to a mixer.
Video 2: General Drum Mic Kit to Audio Mixer Connection. This video provides a general guide on connecting drum microphones to an audio mixer, including phantom power considerations.
5. 사용 설명서
5.1 마이크 배치
Proper microphone placement is crucial for optimal sound quality. Experiment with different positions to find the best sound for your specific drum kit and environment.
- Big Drum Microphone: Place inside or just outside the kick drum's resonant head for a full, punchy sound.
- Small Drum Microphones: Attach to the rims of snare and tom drums. Position them a few inches above the drum head, pointing towards the center for attack, or towards the rim for more body.
- 콘덴서 마이크: Use as overheads, positioned above the cymbals and drum kit to capture the overall sound, including cymbals and room ambiance.

Figure 6: Recommended microphone placement on a drum kit.
5.2 Adjusting Microphone Angle
The microphone clips and holders allow for flexible adjustment of the microphone angle. Loosen the adjustment knob, position the microphone as desired, and then tighten the knob to secure it.

Figure 7: Adjusting microphone angle for optimal sound capture.
6. 유지관리 및 관리
To ensure the longevity and optimal performance of your XTUGA MI7 microphone kit, follow these maintenance guidelines:
- 청소: Use a soft, dry cloth to wipe down microphones and accessories after each use. Avoid using harsh chemicals or abrasive materials.
- 저장: Store the microphones and accessories in the provided aluminum carry case when not in use. This protects them from dust, moisture, and physical damage.
- 손질: Handle microphones with care. Avoid dropping them or exposing them to excessive force, which can damage internal components.
- 케이블 관리 : Coil XLR cables neatly after use to prevent tangling and damage.
7. 문제 해결
If you encounter issues with your XTUGA MI7 microphone kit, refer to the following common troubleshooting steps:
- 소리 없음:
- 모든 케이블 연결이 안전한지 확인하십시오.
- Verify that the mixer's input gain and channel faders are raised.
- For condenser microphones, confirm that 48V phantom power is activated on the mixer.
- Test microphones with different cables or mixer channels to isolate the problem.
- 왜곡된 소리:
- Reduce the input gain on the mixer channel to prevent clipping.
- Ensure microphones are not placed too close to the sound source, especially for loud instruments.
- Check for damaged cables or faulty mixer channels.
- 피드백:
- Reposition microphones to avoid pointing directly at speakers.
- Lower the gain on the affected microphone channels.
- Use the mixer's EQ to cut problematic frequencies.
8. 사양
| 특징 | 값 |
|---|---|
| 상표 | 엑스투가 |
| 모델명 | NEW MI7 |
| 품목 모델 번호 | 미7 |
| 연결 기술 | XLR |
| 커넥터 유형 | XLR |
| 마이크 폼 팩터 | 미니 |
| 극성 패턴 | 단방향 |
| 오디오 감도 | 58데시벨 |
| 신호 대 잡음 비율 | 70데시벨 |
| 재료 | 금속 |
| 색상 | 검은색 |
| 품목 무게 | 2.6킬로그램(5.72파운드) |
| 제품 크기(L x W x H) | 4.72 x 19.69 x 14.17 인치 |
| 전원 | Corded Electric (for mixer) |
| 배터리 수 | 1 Lithium Ion batteries required (for some condenser mics if mixer lacks phantom power) |
| 하드웨어 플랫폼 | PC |
| 채널 수 | 1 (per microphone) |
| 제품의 권장 용도 | Karaoke, Drum Recording, Instrument Miking |
| 첫 번째 이용 가능 날짜 | 29년 2019월 XNUMX일 |
9. 보증 및 지원
XTUGA products are manufactured to high-quality standards. For warranty information, technical support, or any inquiries regarding your MI7 7-Piece Wired Dynamic Drum Microphone Kit, please contact XTUGA customer support through their official channels or the retailer where the product was purchased.
보증 청구를 위해 구매 증빙서류를 보관하세요.