1. 서론
This manual provides detailed instructions for the installation, operation, and maintenance of your ASRock B365 PRO4 ATX Motherboard. Please read this manual thoroughly before proceeding with installation to ensure correct setup and to prevent damage to the components.
The ASRock B365 PRO4 motherboard supports 9th and 8th Generation Intel Core Processors, offering a robust platform for personal computing. It features a Digi Power Design with an 8 Power Phase Design, ensuring stable power delivery to the CPU.
2. 안전 정보
- 부품을 설치하거나 제거하기 전에 항상 전원 공급 장치를 차단하십시오.
- 정전기 방전(ESD)으로 인한 민감한 부품 손상을 방지하기 위해 정전기 방지 손목 스트랩을 착용하십시오.
- 민감한 부품을 만지지 않도록 마더보드의 가장자리를 잡으세요.
- 과열을 방지하려면 PC 케이스 내부의 적절한 환기를 확보하세요.
- 마더보드를 습기와 극한 온도에 두지 마세요.
3. 설정 및 설치
3.1 패키지 내용
패키지에 모든 품목이 들어 있는지 확인하세요.
- ASRock B365 PRO4 Motherboard
- 빠른 설치 가이드
- 지원 CD
- I / O 실드
- 2 x SATA 데이터 케이블
- M.3 소켓용 나사 2개
- M.2 소켓용 스탠드오프 1개

Image: ASRock B365 PRO4 Motherboard and its included accessories, including the quick installation guide, support CD, I/O shield, SATA cables, and M.2 screws/standoff.
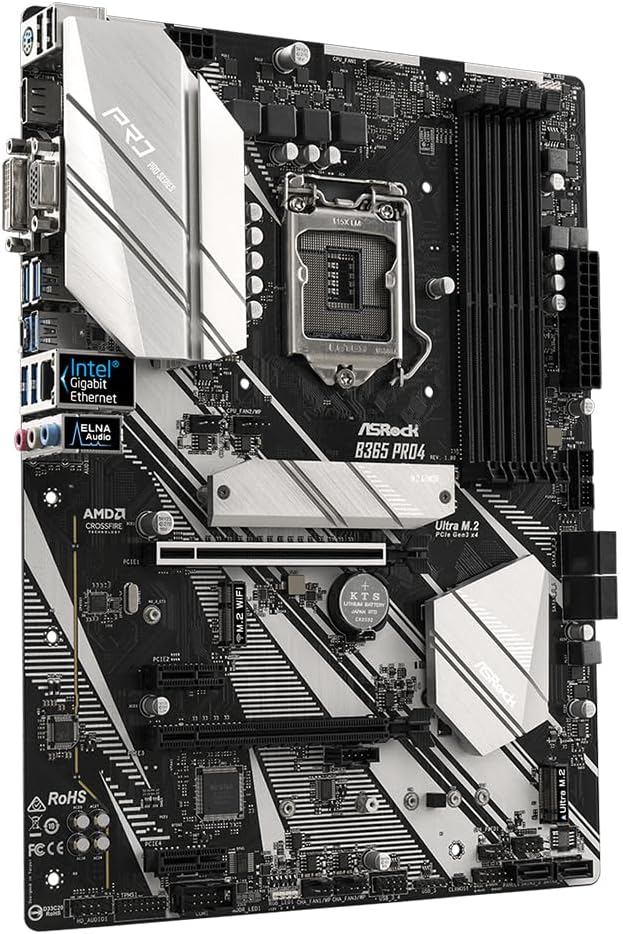
3.2 마더보드 레이아웃
메인보드의 주요 구성 요소와 커넥터를 숙지하십시오.

이미지: 위에서 아래로 view of the ASRock B365 PRO4 Motherboard, highlighting the CPU socket, RAM slots, PCIe slots, and M.2 slots.

이미지: 각도 view of the ASRock B365 PRO4 Motherboard, showing the heatsinks and various connectors.
3.3 CPU 설치(LGA1151)
- CPU 소켓 레버를 열고 로드 플레이트를 들어 올립니다.
- CPU를 소켓에 조심스럽게 맞추고 CPU의 황금 삼각형이 소켓의 삼각형과 일치하는지 확인하세요.
- CPU를 억지로 끼우지 말고 조심스럽게 소켓에 넣으세요.
- 적재판을 닫고 레버로 고정하십시오.
3.4 메모리(RAM) 설치
The motherboard features 4 DDR4 DIMM slots, supporting dual-channel memory up to 64GB.
- DIMM 슬롯의 양쪽 끝에 있는 클립을 엽니다.
- RAM 모듈의 홈을 DIMM 슬롯의 키에 맞춥니다.
- Insert the RAM module firmly until the clips snap into place.
3.5 저장장치 설치
The motherboard supports 6 SATA3 ports and 2 Ultra M.2 ports.
- SATA 드라이브: Connect SATA data cables to the SATA ports on the motherboard and to your storage devices (HDDs/SSDs). Connect power cables from your power supply to the devices.
- M.2 SSD: Locate the M.2 slots. Insert the M.2 SSD into the slot at an angle, then gently push it down and secure it with the provided screw and standoff.
3.6 확장 카드 설치(PCIe)
The motherboard has 2 PCI-Express 3.0 x16 slots and 2 PCI-Express 3.0 x1 slots.
- Select an appropriate PCIe slot for your expansion card (e.g., graphics card).
- PC 케이스에서 해당 금속 브래킷을 제거하십시오.
- 카드를 슬롯에 맞춰 넣고 제대로 고정될 때까지 세게 누르십시오.
- 카드를 나사로 PC 케이스에 고정합니다.
3.7 Connecting Peripherals to the I/O Panel
후면 I/O 패널에는 외부 장치를 연결하기 위한 다양한 포트가 제공됩니다.
이미지: 클로즈업 view of the ASRock B365 PRO4 Motherboard's rear I/O panel, showing ports for PS/2, USB 2.0, USB 3.1 Gen 1, VGA, DVI-D, HDMI, LAN, and audio jacks.
- USB 포트: Connect USB devices (keyboard, mouse, external drives) to the available USB 2.0 (5 ports) and USB 3.1 Gen 1 (8 ports, including 1 Type-C rear) ports.
- 비디오 출력: Connect your monitor to the VGA, DVI-D, or HDMI port.
- LAN 포트: 네트워크 액세스를 위해 이더넷 케이블을 연결합니다.
- 오디오 잭: Connect speakers, headphones, or microphones to the audio jacks.
- PS/2 포트: Connect a PS/2 keyboard or mouse.
4. 사용 설명서
4.1 첫 번째 부팅 및 BIOS 설정
- After assembling all components, connect the power supply and monitor.
- Power on your system. Press 델 or F2 시작하는 동안 BIOS/UEFI 설정 유틸리티로 들어갑니다.
- 부팅 순서, 시스템 시간 및 기타 필요한 설정을 구성합니다. 변경 사항을 저장하고 종료합니다.
- Install your operating system from a bootable USB drive or optical media.
4.2 드라이버 설치
After installing the operating system, install the necessary drivers from the provided Support CD or download the latest versions from the ASRock web사이트. 주요 동인은 다음과 같습니다.
- 칩셋 드라이버
- 오디오 드라이버(Realtek ALC892)
- LAN Drivers (Intel I219V Gigabit Ethernet)
- 그래픽 드라이버(통합 그래픽 또는 개별 GPU용)
5. 유지관리
- 먼지 제거: Regularly clean dust from the motherboard and case fans using compressed air. Ensure the system is powered off and unplugged before cleaning.
- BIOS 업데이트: ASRock을 확인하세요 website periodically for BIOS updates. Updates can improve system stability and compatibility. Follow the instructions carefully when updating the BIOS.
- 케이블 관리 : 공기 흐름을 개선하고 간섭을 방지하기 위해 케이블이 깔끔하게 배선되었는지 확인하세요.
6. 문제 해결
- 전원 없음:
- Check all power connections, including the 24-pin ATX and 8-pin 12V CPU power connectors.
- 전원 스위치가 켜짐 위치에 있는지 확인하십시오.
- 디스플레이 없음:
- Verify that the monitor is connected to the correct video output (either integrated graphics or discrete GPU).
- 그래픽 카드와 RAM 모듈을 다시 장착하세요.
- 시스템 불안정/충돌:
- RAM 모듈이 제대로 장착되었는지 확인하세요.
- CPU 쿨러가 제대로 설치되어 있고 접촉이 양호한지 확인하십시오.
- 드라이버와 BIOS를 최신 버전으로 업데이트하세요.
- M.2 SSD가 감지되지 않음:
- Ensure the M.2 SSD is correctly seated and secured.
- Check BIOS settings to ensure M.2 slots are enabled and configured correctly (SATA vs. PCIe mode).
7. 사양
| 특징 | 세부 사항 |
|---|---|
| CPU 소켓 | LGA 1151 |
| 호환 프로세서 | 9th/8th Generation Intel Core Processors (up to 95W) |
| 칩셋 | 인텔 B365 |
| 메모리 | 4 x DDR4 DIMM slots, Dual Channel, Non-ECC, Buffered, Max 64GB (2666/2400/2133 MHz) |
| 확장 슬롯 | 2 x PCIe 3.0 x16, 2 x PCIe 3.0 x1 |
| 멀티 그래픽 지원 | AMD Quad CrossFireX and CrossFire Technology |
| 저장 | 6 x SATA3 ports (RAID 0, 1, 5, 10), 2 x Ultra M.2 ports (PCIe Gen3 x4 & SATA3) |
| 오디오 | Realtek ALC892 7.1 채널 HD 오디오 |
| 랜 | Intel I219V Gigabit Ethernet |
| USB 포트 | 8 x USB 3.1 Gen1 (1 Type-C rear, 5 rear, 2 via header), 5 x USB 2.0 (2 rear, 3 via header) |
| 비디오 출력 | VGA 1개, DVI-D 1개, HDMI 1개 |
| 폼 팩터 | ATX (12.0 x 9.0 inch / 30.5 x 22.9 cm) |
8. 보증 및 지원
8.1 보증 정보
The ASRock B365 PRO4 Motherboard comes with a 1년 한정 보증. This warranty covers defects in materials and workmanship under normal use. For specific terms and conditions, please refer to the warranty card included with your product or visit the official ASRock web대지.
Note: Damage caused by improper installation, misuse, unauthorized modifications, or natural disasters is not covered under warranty.
8.2 기술 지원
For technical assistance, driver downloads, BIOS updates, or further troubleshooting, please visit the official ASRock support web대지:
ASRock 고객 서비스 센터에 직접 문의하실 수도 있습니다. web개인 맞춤형 지원을 위한 사이트입니다.