
1. 서론
구매해주셔서 감사합니다asing the DBPOWER RD810 Portable Mini Projector. This manual provides essential information for the safe and optimal use of your projector. Please read it thoroughly before operating the device and retain it for future reference.
This projector is designed for home entertainment, offering a portable solution for displaying videos, photos, and presentations. Ensure all safety guidelines are followed to prevent damage to the device or personal injury.
2. 패키지 내용
Please verify that all components are present in your package. If any items are missing or damaged, contact DBPOWER customer support.
- DBPOWER RD810 Portable Mini Projector
- 원격 제어
- 전원 케이블
- HDMI 케이블
- AV 케이블
- 사용자 설명서
3. 제품 오버view
Familiarize yourself with the various parts of your DBPOWER RD810 projector.

그림 3.1: 전면 view of the DBPOWER RD810 Projector, showing the lens and ventilation.
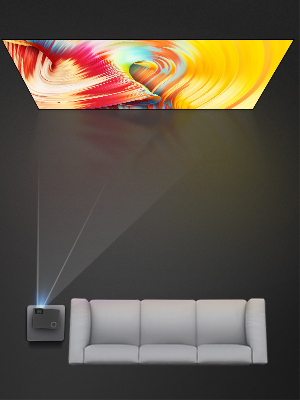
그림 3.2: 측면 view of the projector, illustrating input ports such as HDMI, USB, and VGA.
주요 구성 요소:
- 렌즈: 화면에 이미지를 투사합니다.
- 초점 링: 이미지 선명도를 조정합니다.
- 키스톤 보정 노브: 사다리꼴 이미지 왜곡을 보정합니다.
- 제어판: On-device buttons for basic navigation and settings.
- 입력 포트 : HDMI, USB, VGA for connecting various devices.
- 전원 포트: 전원 케이블을 연결합니다.
- 환기 그릴: 열 방출에 필수적입니다. 막지 마십시오.
4. 설정
4.1 배치
- Place the projector on a stable, flat surface (Tabletop Mount).
- Ensure there is adequate space around the projector for proper ventilation.
- Position the projector perpendicular to the projection surface for the best image quality.
4.2 전원 연결
- 프로젝터의 전원 포트에 전원 케이블을 연결하세요.
- 전원 케이블의 다른 쪽 끝을 전원 콘센트에 꽂습니다.
- 프로젝터의 전원 표시등에 불이 들어와야 합니다.
4.3 입력 장치 연결
The projector supports HDMI, USB, and VGA connectivity.
- HDMI : Connect an HDMI cable from your source device (e.g., laptop, DVD player, game console) to the HDMI port on the projector.
- USB: 미디어를 재생하려면 USB 포트에 USB 드라이브를 삽입하세요. files directly. Note: The USB port is primarily for media playback and charging, not for direct computer connection for display.
- VGA : 컴퓨터의 VGA 케이블과 프로젝터의 VGA 포트를 연결하세요.
- 오디오 출력: If desired, connect external speakers to the projector's audio output port for enhanced sound.
5. 사용 설명서
5.1 전원 켜기/끄기
- 전원 켜기: Press the power button on the projector or the remote control. The projector lamp 켜질 것이다.
- 전원 끄기 : Press the power button again. The projector will initiate a shutdown sequence. Do not unplug the power cable until the fan has stopped and the projector has fully cooled down.
5.2 초점 및 키스톤 조정
- 집중하다: Rotate the focus ring located around the lens until the projected image appears sharp and clear.
- 키스톤 보정: If the image appears trapezoidal (wider at the top or bottom), adjust the keystone correction knob until the image is rectangular.
5.3 입력 소스 선택
After connecting your input device, you need to select the correct source:
- Press the 'Source' button on the remote control or the projector's control panel.
- Use the arrow keys to navigate through the input options (HDMI, USB, VGA).
- Press 'OK' or 'Enter' to confirm your selection.
5.4 메뉴 탐색
Use the 'Menu' button on the remote or projector to access settings. Navigate with arrow keys and confirm with 'OK' or 'Enter'. Common settings include Picture Mode, Aspect Ratio, Sound Settings, and Time Settings.
6. 유지관리
6.1 렌즈 세척
Use a soft, lint-free cloth or lens cleaning paper to gently wipe the lens. Avoid using abrasive cleaners or excessive force, which can scratch the lens surface.
6.2 Ventilation Cleaning
Regularly check and clean the ventilation grilles to prevent dust buildup, which can lead to overheating. Use a soft brush or a vacuum cleaner with a brush attachment to remove dust from the vents.
6.3 보관
장기간 사용하지 않을 경우 프로젝터를 서늘하고 건조하며 먼지가 없는 곳에 보관하십시오. 손상을 방지하기 위해 원래 포장재 또는 보호 케이스를 사용하십시오.
7. 문제 해결
| 문제 | 가능한 원인 | 해결책 |
|---|---|---|
| 전원이 없습니다 | Power cable not connected; Power outlet faulty; Projector overheated. | Ensure power cable is securely connected; Test power outlet; Allow projector to cool down. |
| 이미지 없음 | 잘못된 입력 소스가 선택되었습니다. 입력 케이블이 헐거워졌거나 불량입니다. 소스 장치가 신호를 출력하지 않습니다. | Select correct input source; Check cable connections; Ensure source device is on and configured to output. |
| 흐릿한 이미지 | 초점이 조정되지 않았습니다. 키스톤이 조정되지 않았습니다. 프로젝터가 스크린에서 너무 멀리/가깝게 떨어져 있습니다. | Adjust focus ring; Adjust keystone correction knob; Reposition projector. |
| 소리가 나지 않습니다 | Volume too low; Mute enabled; External speakers not connected/configured; Source device audio settings. | Increase volume; Disable mute; Connect external speakers if desired; Check audio settings on source device. |
| 리모컨이 작동하지 않음 | Batteries depleted; Obstruction between remote and projector; Remote sensor blocked. | Replace batteries; Remove obstructions; Ensure remote sensor on projector is clear. |
8. 사양
| 특징 | 사양 |
|---|---|
| 상표 | DB파워 |
| 모델명 | RD810 |
| 모델 번호 | 810X |
| 연결 기술 | HDMI, USB, VGA |
| 네이티브 디스플레이 해상도 | 800 x 480 |
| 최대 디스플레이 해상도 | 1920 x 1080 |
| 디스플레이 유형 | 액정표시장치 |
| 대비율 | 1000시 1분 |
| 광원 작동 수명 | 30,000시간 |
| 왓tage | 24 와트 |
| 제어 방법 | 리모컨, 버튼 제어 |
| 장착 유형 | 탁상 마운트 |
| 폼 팩터 | 가지고 다닐 수 있는 |
9. 보증 및 지원
DBPOWER products are designed and manufactured to the highest quality standards. For information regarding warranty coverage, technical support, or service inquiries, please refer to the warranty card included with your product or visit the official DBPOWER website. Please have your model number (RD810 / 810X) and purchase details ready when contacting support.