
소개
Welcome to the world of sewing with your new Janome IT 1028 Glamour mechanical sewing machine. This manual provides essential information for the safe and efficient operation, setup, maintenance, and troubleshooting of your machine. Please read it thoroughly before using the machine to ensure optimal performance and longevity.
The Janome IT 1028 Glamour is designed for ease of use, featuring 12 stitch types, a free arm for circular sewing, an oscillating hook, automatic buttonholes, and adjustable stitch length and width. It also includes a double presser foot lift, feed dog lowering, a thread cutter, a needle threader, and a soft cover for protection.
안전 지침
감전, 화상, 화재 또는 인명 부상의 위험을 줄이려면:
- 항상 사용 직후, 청소, 덮개 제거 또는 사용자 정비 조정을 하기 전에는 반드시 전기 콘센트에서 기계의 플러그를 뽑아 두십시오.
- 이 기계를 장난감으로 사용하지 마십시오. 어린이가 이 기계를 사용하거나 어린이 근처에 있을 때는 각별한 주의를 기울여야 합니다.
- 이 기계는 본 설명서에 명시된 용도로만 사용하십시오. 제조업체에서 권장하는 부속품만 사용하십시오.
- 전원 코드나 플러그가 손상되었거나, 제대로 작동하지 않거나, 떨어뜨리거나 손상된 경우, 또는 물에 빠뜨린 경우에는 절대로 이 기계를 작동하지 마십시오.
- 어떠한 구멍에도 물건을 떨어뜨리거나 넣지 마십시오.
- 옥외에서는 사용하지 마십시오.
- 에어로졸(스프레이) 제품을 사용하거나 산소를 공급하는 곳에서는 작동하지 마십시오.
- 움직이는 모든 부품에서 손가락을 멀리하십시오. 재봉틀 바늘 주변에는 특별한주의가 필요합니다.
- 항상 적절한 바늘판을 사용하십시오. 잘못된 판은 바늘이 부러지는 원인이 될 수 있습니다.
- 구부러진 바늘을 사용하지 마십시오.
- 바느질하는 동안 천을 잡아당기거나 밀지 마십시오. 바늘이 휘어져 부러질 수 있습니다.
- 바늘에 실을 끼우거나, 바늘을 바꾸거나, 실통에 실을 끼우거나, 압력 발을 바꾸는 등 바늘 부분을 조정할 때는 재봉틀을 끄세요.
- Always unplug the machine when removing the light bulb.
- 코드를 잡아당겨서 플러그를 뽑지 마십시오. 플러그를 뽑으려면 코드가 아닌 플러그를 잡으십시오.
제품 끝view
주요 특징
- 12가지 스티치 종류: Versatile options for various sewing projects.
- 프리암: Facilitates sewing cuffs, sleeves, and other small, circular items.
- Oscillating Hook: Ensures smooth and consistent stitch formation.
- 바느질 길이와 폭 조절 가능: Provides control over stitch appearance.
- Automatic Four-Step Buttonhole: Simplifies the creation of professional-looking buttonholes.
- Double Presser Foot Lift: Allows for sewing thicker fabrics.
- 사료 급여견 내리기: Useful for darning and free-motion quilting.
- 실 커터: Conveniently trims threads.
- 바늘 끼우기: Assists in quickly threading the needle.
- 소프트커버: Protects the machine from dust and damage.
기계 구성 요소
Familiarize yourself with the main parts of your Janome IT 1028 Glamour sewing machine.

그림 1: 전면 view of the Janome IT 1028 Glamour sewing machine with the soft cover in place. This image shows the overall design and the stitch selection and length dials.

그림 2: 클로즈업 view of the stitch selector dial (left) and stitch length dial (right) on the Janome IT 1028 Glamour. The decorative illustration on the machine body is also visible.
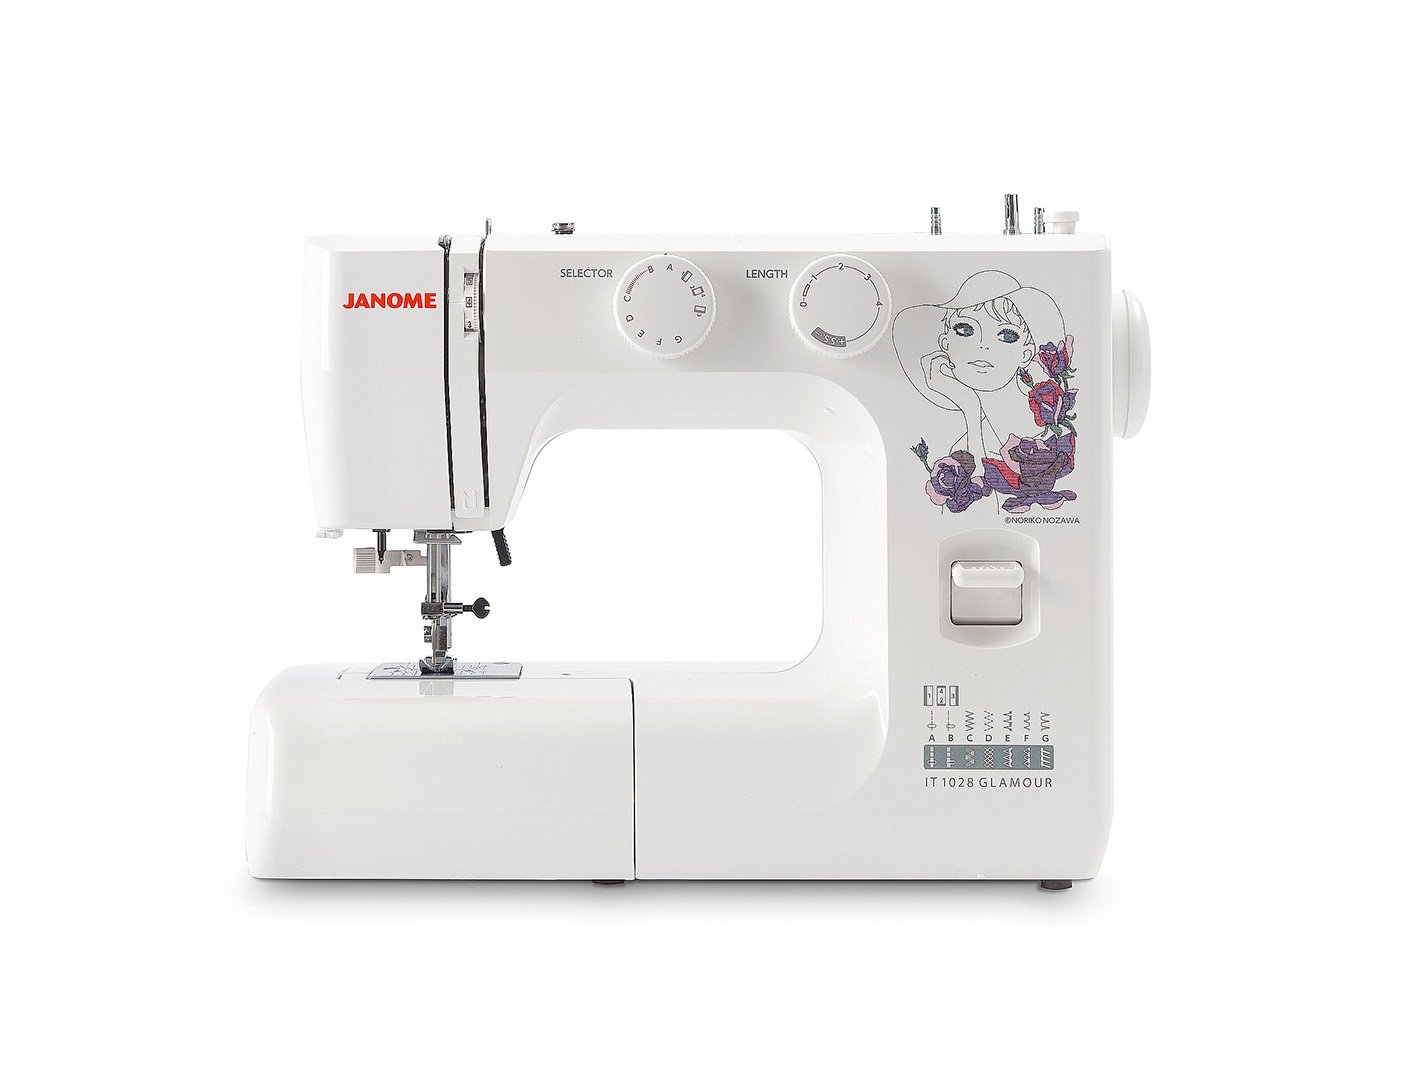
Figure 3: The Janome IT 1028 Glamour sewing machine with the accessory tray removed, revealing the free arm and the bobbin case area. This view is essential for bobbin insertion and cleaning.
설정
1. 풀기 및 배치
- 기계를 포장에서 조심스럽게 꺼내세요.
- 기계를 안정적이고 평평한 표면에 놓으십시오.
- 보호 필름이나 포장재를 모두 제거하십시오.
2. 전원 연결
- 기기의 전원 스위치가 "OFF" 위치에 있는지 확인하십시오.
- Connect the power cord to the machine's power input jack.
- 전원 코드를 적합한 콘센트에 꽂으세요.
3. 보빈 감기
- 실패꽂이에 실패를 놓습니다.
- 윗실 가이드를 통해 실을 넣고, 보빈 감기 장력 디스크 주위로 실을 감습니다.
- Insert the thread through the hole in the bobbin from the inside out.
- Place the bobbin onto the bobbin winder spindle and push the spindle to the right.
- Start the machine. The bobbin will wind automatically. Stop when the bobbin is full.
- Cut the thread and push the bobbin winder spindle to the left. Remove the bobbin.
4. 북실 넣기
- 기계를 끄세요.
- Open the bobbin cover plate located on the free arm.
- Insert the bobbin into the bobbin case with the thread running in the direction indicated by the arrows.
- 실을 장력 스프링을 통해 당겨서 가이드 슬롯에 넣으세요.
- 보빈 커버 플레이트를 닫습니다.
5. 윗실 끼우기
- 노루발 리프터를 올립니다.
- 실패꽂이에 실패를 놓습니다.
- 실을 위쪽 실 가이드에 통과시키세요.
- 실을 오른쪽 채널 아래로 내린 다음 왼쪽 채널 위로 올려 오른쪽에서 왼쪽으로 감는 레버를 통과시키세요.
- Continue guiding the thread down to the needle bar thread guide.
- 내장된 바늘 실꿰기 장치를 사용하거나 앞에서 뒤로 바늘에 실을 꿰십시오.
- 바늘귀에 실을 약 6cm 정도 통과시키세요.
6. 북실 끌어올리기
- 왼손으로 윗실을 가볍게 잡으세요.
- Turn the handwheel towards you to lower the needle into the needle plate and then raise it.
- 윗실이 밑실을 걸어 고리를 형성합니다.
- 고리를 당겨 북실을 바늘판 구멍을 통해 위로 빼냅니다.
- 윗실과 밑실 두 가닥을 모두 노루발 아래로 당겨 재봉틀 뒤쪽으로 향하게 하세요.
작동 지침
1. 스티치 선택
켜다 스티치 선택 다이얼 (refer to Figure 2) to choose your desired stitch pattern. The available stitches are indicated by letters or symbols on the dial.
2. 바느질 길이 및 폭 조절
- 스티치 길이: 사용하세요 땀길이 다이얼 (refer to Figure 2) to adjust the length of your stitches. Higher numbers indicate longer stitches.
- 스티치 폭: For stitches that allow width adjustment, use the corresponding dial or setting. (Note: The Janome IT 1028 Glamour has adjustable stitch width, typically integrated with the stitch selector or a separate dial. Consult the machine's markings for specific controls.)
3. 기초 바느질
- 노루발 아래에 천을 놓습니다.
- 노루발 리프터를 내립니다.
- 기계를 켜세요.
- 발판 조절기를 살짝 눌러 재봉을 시작하세요. 세게 누를수록 재봉 속도가 빨라집니다.
- Guide the fabric gently with your hands, but do not pull or push forcefully.
- 바느질의 시작과 끝 부분을 단단히 고정하려면 역방향 레버를 사용하여 몇 땀을 뒤로 박음질하십시오.
- 작업이 끝나면 바늘을 가장 높은 위치로 올리고 노루발을 들어 올린 다음 원단을 재봉틀에서 당겨 빼냅니다.
- Use the built-in thread cutter or scissors to trim the threads.
4. 프리암 사용
To use the free arm, simply slide off the accessory tray (refer to Figure 3). This exposes the narrow free arm, ideal for sewing small, tubular items like sleeves, pant hems, and cuffs.
5. Automatic Four-Step Buttonholes
The Janome IT 1028 Glamour features an automatic four-step buttonhole function. Refer to the stitch selector dial for the buttonhole settings (usually marked with a buttonhole symbol and steps 1-4).
- 단추 구멍 풋을 부착합니다.
- 원단에 단추구멍 위치를 표시하세요.
- Set the stitch selector to the first buttonhole step.
- Sew the first side of the buttonhole.
- Change the stitch selector to the next step and sew the bar tack.
- Continue through all four steps, following the machine's markings for each segment of the buttonhole.
- Carefully cut open the buttonhole using a seam ripper, ensuring not to cut the stitches.
유지
1. 기계 청소
정기적인 청소는 기기의 성능을 유지하는 데 도움이 됩니다. 청소하기 전에는 항상 기기의 전원을 뽑으십시오.
- 보빈 영역: Remove the needle plate and bobbin case. Use a small brush to remove lint and dust from the bobbin area and feed dogs.
- 외부: 외부 표면은 부드럽고 마른 천으로 닦으세요. 강한 화학 물질이나 연마성 세제는 사용하지 마세요.
2. 바늘 교체
Replace the needle regularly (after 8-10 hours of sewing) or if it becomes bent, dull, or damaged. A damaged needle can cause skipped stitches or fabric damage.
- 기계를 끄고 플러그를 뽑으세요.
- 바늘 cl 풀기amp 나사.
- 오래된 바늘을 제거하세요.
- 기계 뒤쪽을 향하게 하여 새로운 바늘을 꽂고, 바늘이 들어갈 수 있는 곳까지 위로 밀어 올립니다.
- 바늘을 조여주세요amp 나사를 단단히 조입니다.
문제 해결
이 섹션에서는 발생할 수 있는 일반적인 문제를 다룹니다. 여기에 나열되지 않은 문제는 고객 지원팀에 문의하세요.
| 문제 | 가능한 원인 | 해결책 |
|---|---|---|
| 건너뛴 스티치 | 바늘이 잘못되었거나, 바늘이 휘었거나, 실을 잘못 끼웠거나, 원단에 맞지 않는 바늘 크기일 수 있습니다. | 바늘을 교체하고, 재봉틀에 실을 다시 끼우고, 바늘 종류/크기가 올바른지 확인하십시오. |
| 나사산 파손(상단) | 실 끼우기가 잘못되었거나, 장력이 너무 세거나, 실의 질이 좋지 않거나, 바늘이 휘었거나, 바늘판에 거스러미가 있는 경우. | Re-thread machine, adjust upper tension, use quality thread, replace needle, check needle plate for damage. |
| 실 끊김 (실타래) | 북실이 제대로 감기지 않았거나, 북실이 잘못 삽입되었거나, 북실통에 먼지가 끼었거나, 장력이 너무 세게 당겨져 있을 수 있습니다. | Re-wind bobbin, re-insert bobbin correctly, clean bobbin case, adjust bobbin tension (if adjustable). |
| 고르지 못한 스티치 | Incorrect tension settings, pulling/pushing fabric, wrong presser foot. | Adjust tension, guide fabric gently, use appropriate presser foot. |
| 기계가 시작되지 않음 | 전원 플러그가 꽂혀 있지 않고, 전원 스위치가 꺼져 있으며, 풋 컨트롤러가 연결되어 있지 않습니다. | 전원 연결을 확인하고 스위치가 켜져 있는지 확인한 후 풋 컨트롤러를 연결하십시오. |
명세서
- 모델 번호: 8100000017663 (IT 1028 Glamour)
- 상표: 야놈
- 재료: 플라스틱
- 무게: 8 킬로그램
- 크기 (가로 x 세로 x 높이): 10 cm x 35 cm x 25 cm (Depth x Width x Height)
- 전원: 전기 케이블
- 스티치 종류: 12
- 후크 유형: 진동
- 단추구멍 유형: Automatic Four-Step
보증 및 지원
For warranty information, service, or technical support, please refer to the warranty card included with your product or contact your authorized Janome dealer or customer service center. Keep your purchase receipt as proof of purchase.


