
소개
The LiftMaster 377LM Wireless Keypad provides secure and convenient access to your garage. It features Security+ rolling code technology for enhanced security and offers a temporary password option for guest access. This keypad operates wirelessly and is powered by a 9-volt battery. This manual provides instructions for setup, operation, maintenance, and troubleshooting.
설정 및 설치
1. 배터리 설치
The LiftMaster 377LM Wireless Keypad requires one 9-volt battery for operation. The battery is typically included with the keypad.
- Open the battery compartment cover located at the bottom of the keypad.
- Insert the 9-volt battery, ensuring correct polarity.
- 배터리 덮개를 단단히 닫으세요.
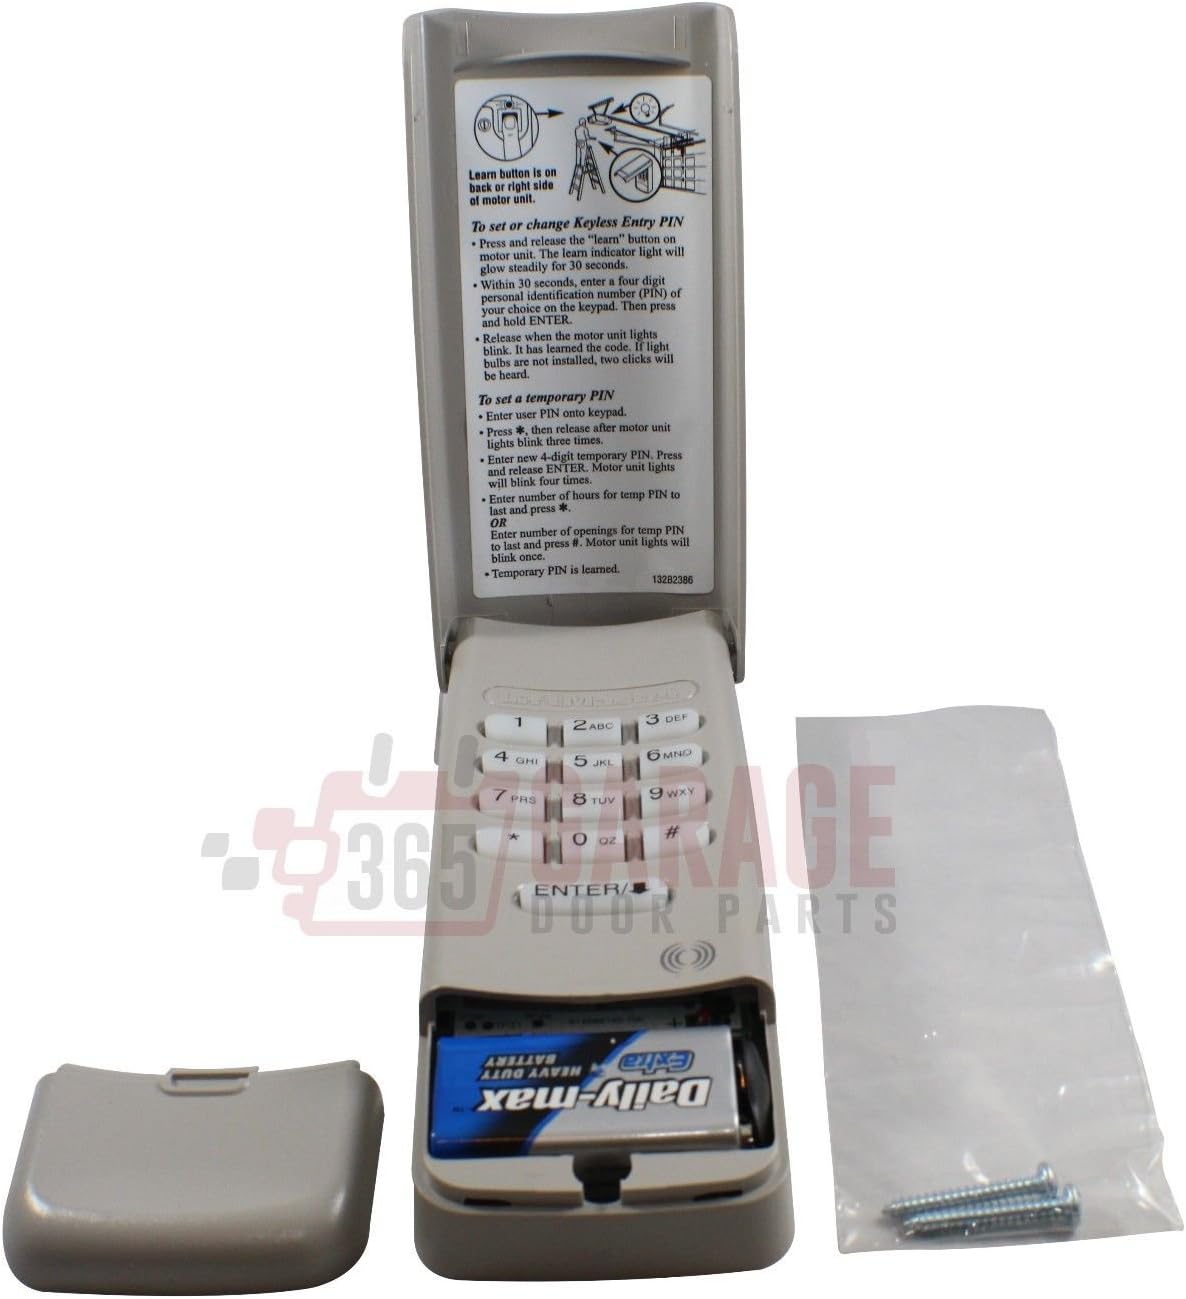
This image shows the LiftMaster 377LM Wireless Keypad with its battery compartment open, revealing a 9-volt battery. The keypad's flip-up cover is also open, displaying programming instructions.
2. 키패드 장착
The keypad is designed for outdoor use and can be mounted near your garage door. It features a keyhole slot on the back for easy installation.
- Choose a suitable location on a wall or door frame, ensuring it is within range of your garage door opener.
- Mark the position for the mounting screw.
- Install a screw into the marked position, leaving a small portion exposed.
- Align the keyhole slot on the back of the keypad with the screw head and slide the keypad down to secure it.

The back of the LiftMaster 377LM Wireless Keypad, displaying the model number, FCC ID, and a keyhole for mounting.
3. 키패드 프로그래밍
The 377LM keypad is compatible with garage door openers that operate on a 315 MHz frequency and have a purple learn button on the motor head.

A close-up of the LiftMaster 377LM Wireless Keypad with its protective cover flipped up, clearly showing the programming instructions printed on the inside for setting or changing the keyless entry PIN.
To Set or Change Keyless Entry PIN:
- 위치 배우다 button on your garage door opener's motor head unit. Press and release the 배우다 button. The learn indicator light will glow steadily for 30 seconds.
- Within 30 seconds, enter a four-digit 핀 of your choice on the keypad. Then, press and hold 입력하다.
- 릴리스하다 입력하다 button when the motor unit lights blink. If light bulbs are not installed, two clicks will be heard. This indicates the PIN has been learned.
To Set a Temporary PIN:
- Enter your primary user 핀 onto the keypad.
- 눌러서 놓으세요 * button. The motor unit lights will blink three times.
- Enter the desired temporary 핀. 눌렀다 떼기 입력하다. The motor unit lights will blink once.
- To set the validity period for the temporary PIN, choose one of the following options:
- To limit by number of openings: Enter the desired number of openings (e.g., '5' for 5 uses), then press *. The motor unit lights will blink once.
- To limit by number of hours: Enter the desired number of hours (e.g., '24' for 24 hours), then press #. The motor unit lights will blink once.
- The temporary PIN is now programmed.

This image presents the LiftMaster 377LM Wireless Keypad from the front, with the protective cover open to reveal the numeric keypad and the printed instructions for programming.
작동 지침
차고 문 열기/닫기
- Enter your programmed 4-digit PIN on the keypad.
- 를 누르세요 입력하다 단추.
- 차고 문이 작동(열림 또는 닫힘)합니다.
The keypad features a backlit display, making the numbers easy to see even in low-light conditions.
Using a Temporary PIN
If a temporary PIN has been set, guests or service personnel can use it to access the garage. The temporary PIN will function according to the programmed number of openings or hours.
- Enter the temporary 4-digit PIN on the keypad.
- 를 누르세요 입력하다 단추.
- The garage door will activate.
One-Button Locking Feature
The keypad includes a one-button locking feature for added security. Consult your garage door opener's manual for specific instructions on enabling and using this feature, as its functionality may vary.
유지
배터리 교체
The keypad is powered by a 9-volt battery. When the battery is low, the keypad's performance may degrade, or it may stop functioning. Replace the battery as described in the 'Battery Installation' section.
청소
키패드 표면을 부드러운 천으로 닦으세요.amp cloth. Avoid using abrasive cleaners or solvents, as these can damage the finish or electronic components. The keypad features a weatherproof flip-up protective cover to shield it from elements.
문제 해결
- 키패드가 응답하지 않음:
- Check the 9-volt battery. Replace if necessary.
- Ensure the keypad is within range of the garage door opener.
- Verify that the keypad is correctly programmed to your garage door opener. Refer to the 'Programming the Keypad' section.
- Garage Door Not Opening/Closing:
- Confirm that the correct PIN is being entered.
- Check for any obstructions in the path of the garage door.
- Ensure the garage door opener itself is functioning correctly (e.g., check power supply, safety sensors).
- Keypad Buttons Feel Stiff or Unresponsive:
- Over time, buttons may wear out. If cleaning does not resolve the issue, the keypad may need replacement.
- Temporary PIN Not Working:
- Verify the temporary PIN was programmed correctly.
- Check if the temporary PIN has exceeded its programmed number of uses or hours.
명세서
| 특징 | 사양 |
|---|---|
| 상표 | 리프트마스터 |
| 모델 | 377LM |
| 전원 | 9볼트 배터리 1개 (포함) |
| 빈도 | 315MHz |
| 호환 장치 | Garage door openers with 315 MHz frequency and purple learn buttons on motor head |
| 치수(길이 x 너비 x 높이) | 6 x 2.5 x 1 인치 |
| 품목 무게 | 0.18 킬로그램 |
보증 정보
Specific warranty details for the LiftMaster 377LM Wireless Keypad are not provided in this document. For warranty coverage, terms, and conditions, please refer to the documentation included with your purchase or contact LiftMaster customer support directly.
지원하다
For further assistance, technical support, or to purchase replacement parts, please visit the official LiftMaster web사이트 또는 고객 서비스 부서에 문의하십시오.
자세한 내용은 다음에서 확인할 수 있습니다. 리프트마스터 매장.