
1. 서론
Thank you for choosing the Petlibro Automatic Pet Feeder. This device is designed to provide consistent and timely meals for your pet, ensuring they are fed according to a set schedule, even when you are away. Please read this manual thoroughly before use to ensure proper operation and maintenance of your feeder.
2. 중요한 안전 정보
부상이나 제품 손상을 방지하기 위해 다음 안전 예방 조치를 준수하세요.
- Read all instructions carefully before operating the feeder.
- 사용하지 않을 때나 조립할 때는 피더를 어린이와 애완동물이 접근할 수 없는 곳에 보관하세요.
- 본체를 물이나 기타 액체에 담그지 마십시오.
- Use only dry pet food with a diameter between 5-15mm. Do not use wet, canned, or moist food.
- 사료통은 안정적이고 평평한 곳에 놓아야 합니다.
- Unplug the feeder before cleaning or performing any maintenance.
- Do not attempt to repair or modify the feeder yourself. Contact customer support for assistance.
- 현지 규정에 따라 배터리를 책임감 있게 폐기하세요.
3. 패키지 내용
모든 품목이 들어 있는지 확인하려면 패키지 내용물을 확인하세요.
- Petlibro Automatic Pet Feeder Main Unit
- 음식 그릇
- USB-C Power Adapter and Cable
- 제습제 백 (사전 설치 또는 별도 구매)
- 사용자 설명서
4. 제품 오버view
Familiarize yourself with the different parts of your Petlibro Automatic Pet Feeder:
- 식량 탱크: Stores dry pet food.
- 뚜껑: Covers the food tank to keep food fresh.
- 제어판: Buttons and display for setting schedules and manual feeding.
- 푸드 아울렛: Where food dispenses into the bowl.
- 음식 그릇: Detachable bowl for your pet to eat from.
- 전원 포트(USB-C): 전원 어댑터에 연결합니다.
- 배터리 칸: Holds backup batteries (not included).
5. 설정
Follow these steps to set up your Petlibro Automatic Pet Feeder:
5.1 조립
- 풀다: 포장에서 모든 구성 요소를 조심스럽게 제거합니다.
- 푸드볼 설치하기: Place the food bowl securely at the base of the feeder.
- 식량 탱크를 설치하세요: Align the food tank with the base and twist to lock it into place.
- 제습제 백을 삽입하세요: If not pre-installed, open the desiccant compartment (usually under the lid) and insert the desiccant bag to keep food fresh. Replace every 15-30 days.

Image: Step-by-step assembly guide for the Petlibro Automatic Pet Feeder. It shows how to twist open the lid, take out the food bowl, put the desiccant bag into its compartment, install the food tank, put the lid back on, and finally install the food bowl.
5.2 전원 공급
The feeder can be powered by a USB-C adapter or backup batteries.
- 1차 전력: Connect the USB-C power adapter to the feeder's power port and plug it into a wall outlet.
- 배터리 백업(선택 사항): 전원을 위해tages, install 3 D-cell batteries (not included) into the battery compartment at the bottom of the feeder. This ensures continuous operation.
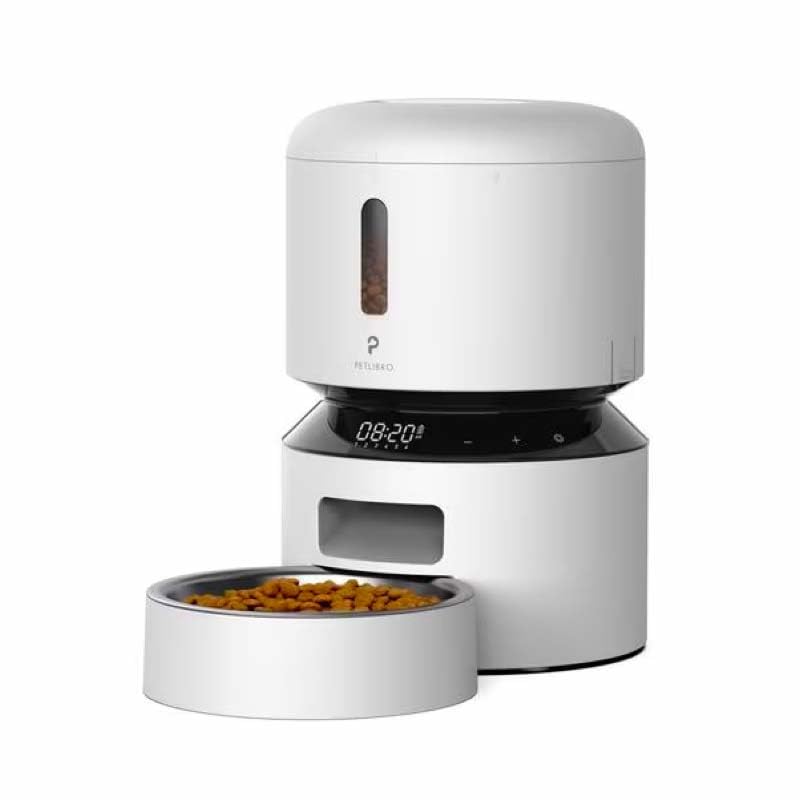
Image: Diagram illustrating the dual power supply system of the Petlibro Automatic Pet Feeder. It shows the USB-C adapter connected for primary power and the battery compartment for backup power. A note indicates that batteries are not included.
6. 사용 설명서
Once assembled and powered, you can begin programming your feeder.
6.1 식량 탱크 채우기
- 음식 탱크의 뚜껑을 엽니다.
- Pour dry pet food into the tank. Ensure the food is within the recommended size (5-15mm diameter).
- 신선도를 유지하려면 뚜껑을 꼭 닫으세요.
6.2 Setting Meal Schedules and Portions
The feeder allows you to schedule up to 6 meals per day, with 1 to 50 portions per meal.

Image: A cat eating from the Petlibro Automatic Pet Feeder, illustrating the feeder's function. Text overlays indicate "Portion: 1-50" and "Meals: 1-6", highlighting the customizable feeding schedule.
- 현재 시간 설정: Use the control panel buttons (e.g., "SET", "UP", "DOWN") to set the current time.
- 프로그램 식사 시간: Press the "MEAL" button to enter meal programming mode. Select the desired meal number (e.g., Meal 1) and set the feeding time.
- 정해진 분량: For each programmed meal, set the number of portions (1-50) using the "PORTION" or "UP/DOWN" buttons.
- Repeat for all meals: Program up to 6 meals as needed.
- 설정 저장: Ensure all settings are saved according to the feeder's specific interface (usually by pressing "SET" or waiting for auto-save).
6.3 수동 급지
To dispense food instantly, press the manual feed button (often labeled "FEED" or a paw icon) on the control panel. Each press typically dispenses one portion.
7. 유지관리 및 청소
정기적인 청소는 위생을 유지하고 사료 급식기의 수명을 연장시켜 줍니다.
- 플러그를 뽑다: 청소하기 전에는 항상 급식기의 전원 플러그를 콘센트에서 뽑으세요.
- 분해: Remove the food bowl and food tank.
- 깨끗한 구성 요소: Wash the food bowl and food tank with mild soap and water. Rinse thoroughly and dry completely before reassembling.
- 본체 닦기: 부드러운 천으로 본체를 닦으세요.amp 옷감. 본체를 물에 담그지 마십시오.
- 제습제를 교체하세요: Replace the desiccant bag every 15-30 days to maintain food freshness.
- 재조립: 급식기를 재조립하기 전에 모든 부품이 완전히 건조되었는지 확인하십시오.
8. 문제 해결
사료 급이기 사용 중 문제가 발생하면 다음의 일반적인 문제 및 해결 방법을 참조하십시오.
| 문제 | 가능한 원인 | 해결책 |
|---|---|---|
| 급전 장치가 전원이 켜지지 않습니다. | No power connection; batteries depleted or incorrectly installed. | Check power adapter connection; replace batteries or ensure correct polarity. |
| 음식이 제공되지 않습니다. | Food tank empty; food jammed; dispenser blocked; incorrect schedule settings. | Refill food tank; clear any food jams; check dispenser for blockages; verify meal schedule and portion settings. |
| 음식이 너무 많이/너무 적게 나옵니다. | 잘못된 분량 설정. | Adjust portion settings for each meal. |
| 디스플레이가 작동하지 않습니다. | 전원 문제, 디스플레이 고장. | 전원 공급 장치를 확인하십시오. 문제가 지속되면 고객 지원 센터에 문의하십시오. |
9. 사양
| 특징 | 세부 사항 |
|---|---|
| 제품 이름 | Petlibro Automatic Pet Feeder |
| 모델 | 3L 자동 펫 피더 |
| 용량 | 3리터 |
| 재료 | Food-grade ABS plastic |
| 전원 공급 장치 | USB-C adapter (5V/1A); 3 x D-cell batteries (backup, not included) |
| 하루 식사량 | 최대 6끼 식사 |
| 식사당 부분 | 1-50 portions (approx. 5-10g per portion, depending on food density) |
| 권장 식품 크기 | 5-15mm dry kibble |
| 색상 | 하얀색 |
10. 보증 및 지원
Your Petlibro Automatic Pet Feeder comes with a standard manufacturer's warranty. For detailed warranty information, please refer to the warranty card included in your package or visit the official Petlibro web대지.
If you have any questions, require technical support, or need assistance with your product, please contact Petlibro customer service. Contact details can typically be found on the product packaging, the official website, or by searching for "Petlibro customer support" online.