
1. 서론
This manual provides instructions for the proper setup, operation, and maintenance of your Sonew eecoo14 WiFi USB Digital Microscope Camera. This device is designed for detailed observation and analysis, offering magnification from 50x to 1000x. It can be used for various applications, including inspecting hair follicles, skin conditions, and other microscopic details. The microscope supports connectivity via both WiFi and USB, allowing it to be used with Android, iOS, Windows, and Mac operating systems.

Image 1.1: The Sonew eecoo14 Digital Microscope Camera. This image displays the main unit of the digital microscope, highlighting its compact and ergonomic design.
2. 패키지 내용
아래 나열된 모든 품목이 패키지에 들어 있는지 확인하세요.
- 1 x Sonew eecoo14 Digital Microscope Camera
- 1 x USB 케이블
- 소프트웨어 설치 CD 1장
- 1 x Software Flash Disk (USB Drive)
- 1 x 전원 어댑터(미국 플러그)
- 1 x Aluminum Lift Stand
- 1 x 사용자 매뉴얼(이 문서)
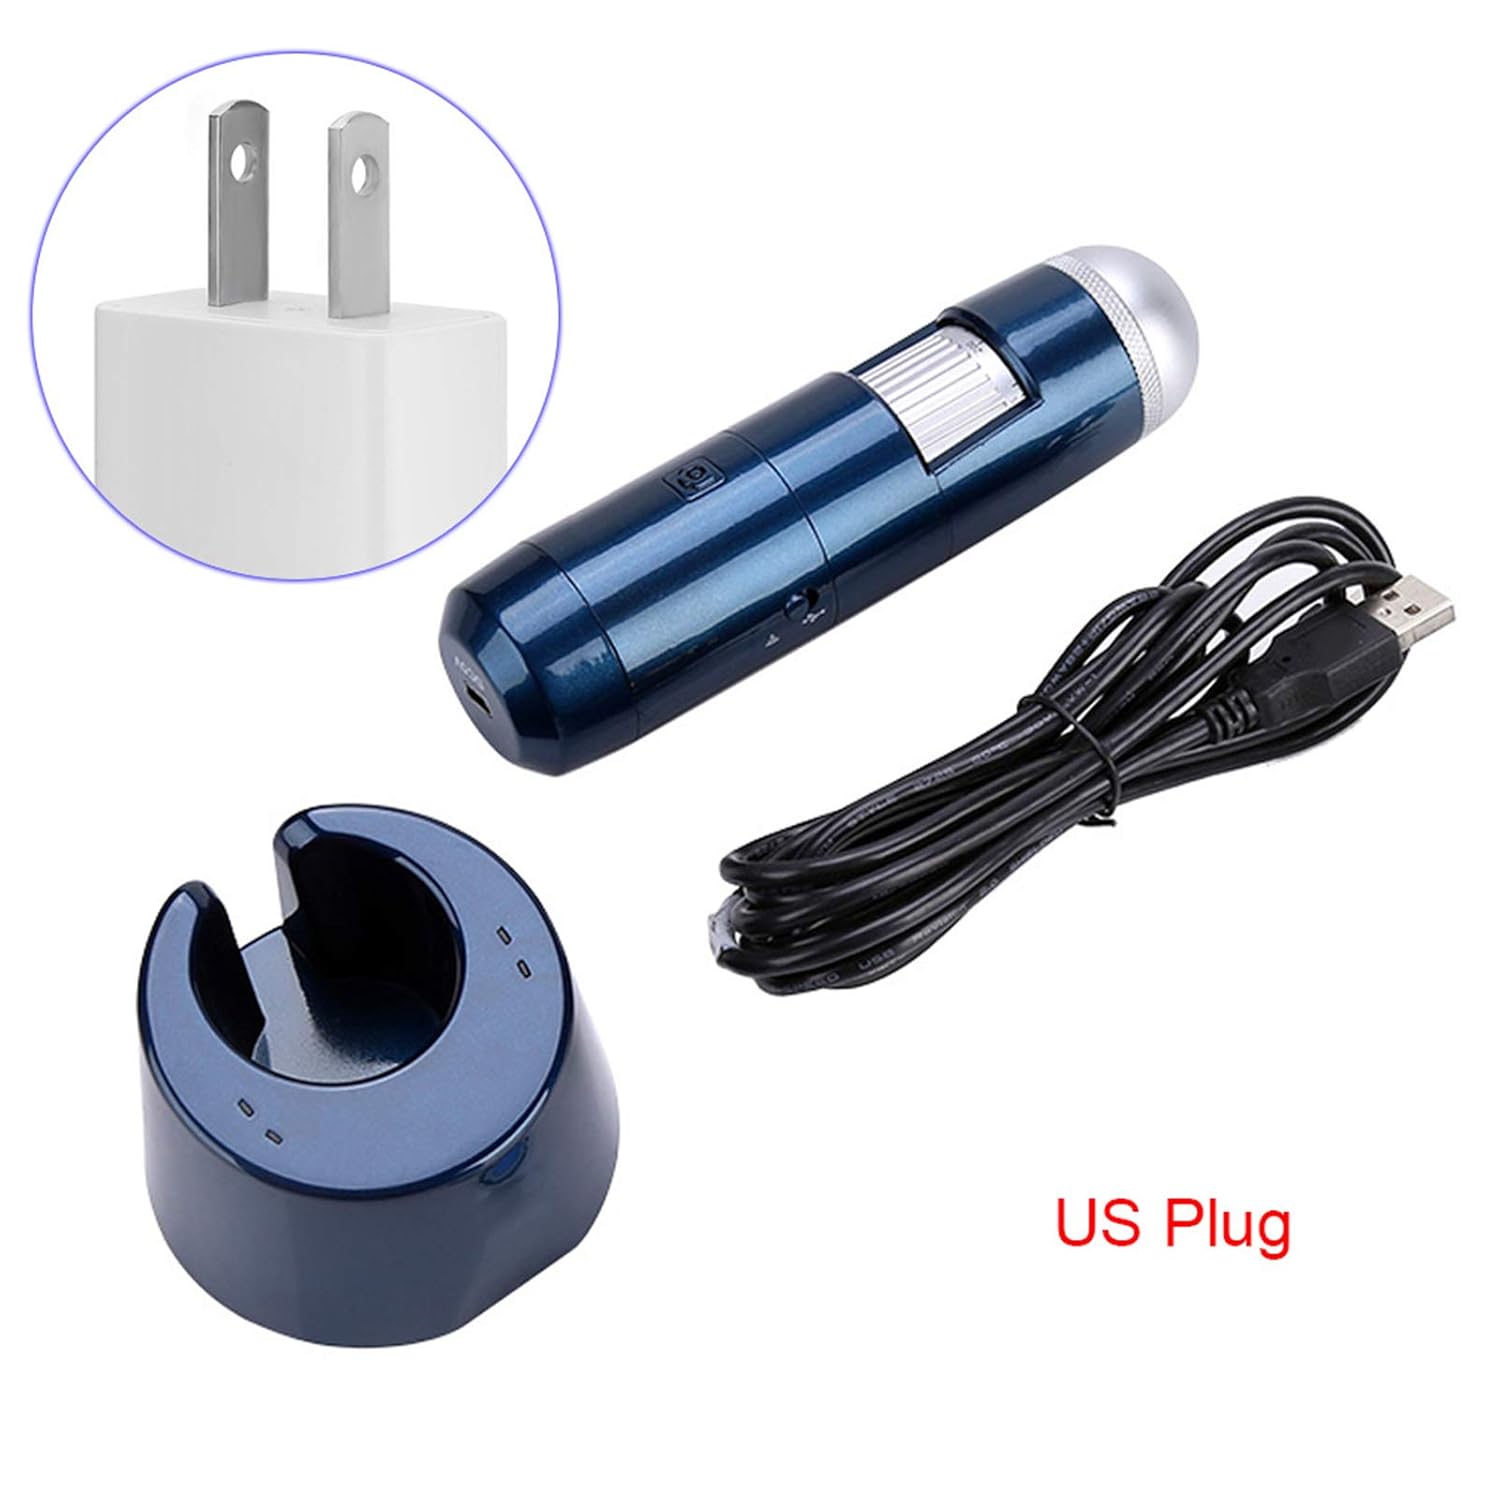
Image 2.1: Included accessories. This image shows the digital microscope, USB cable, power adapter (US plug), and the aluminum lift stand, illustrating the complete set of components.
3. 제품 오버view
디지털 현미경의 구성 요소를 숙지하십시오.
- 초점 휠: 선명한 이미지를 위해 초점을 조정합니다.
- 배율 조정: Allows changing the magnification level.
- LED 조명: Built-in 8-LED light source for illuminating specimens.
- 전원 버튼: 장치를 켜거나 끕니다.
- 캡처버튼: 사진을 촬영하거나 비디오 녹화를 시작/중지합니다.
- USB Port (DC5V): 충전 및 유선 컴퓨터 연결용입니다.
- 와이파이 모듈: Enables wireless connection to mobile devices.

Image 3.1: Microscope features. This image provides a close-up view of the digital microscope, highlighting its various parts such as the focus wheel, power button, capture button, and USB port.
4. 설정
4.1 장치 충전
- Connect the provided USB cable to the microscope's DC5V port.
- USB 케이블의 반대쪽 끝을 전원 어댑터에 연결합니다.
- 전원 어댑터를 표준 전기 콘센트에 꽂습니다.
- Allow the device to charge fully before first use. The charging indicator light will change when charging is complete.
4.2 소프트웨어 설치
에게 view images and control the microscope, you need to install the appropriate software or application.
For Windows/Mac PC:
- Insert the Software Installation CD or the Software Flash Disk into your computer.
- 화면의 지시에 따라 설치하세요. view소프트웨어를 사용하고 있습니다.
- Alternatively, you may download the latest software from the manufacturer's website (refer to the included documentation for the URL).
For Android/iOS Smartphones/Tablets:
- 검색 the recommended application (e.g., "WiFi View" or similar, check included documentation) in your device's app store (Google Play Store for Android, Apple App Store for iOS).
- 응용 프로그램을 다운로드하여 설치하십시오.
4.3 Connecting to a PC (USB Connection)
- 확인하십시오 viewing software is installed on your PC.
- Connect the microscope to your PC using the provided USB cable.
- 전원 버튼을 사용하여 현미경을 켭니다.
- Launch the installed viewing software. The microscope feed should appear automatically.
4.4 Connecting to a Mobile Device (WiFi Connection)
- Ensure the dedicated application is installed on your mobile device.
- 전원 버튼을 사용하여 현미경을 켭니다.
- On your mobile device, go to WiFi settings.
- Locate and connect to the microscope's WiFi network (e.g., "WiFi_Cam_XXXX"). The default password, if any, will be in the included documentation.
- Open the installed application. The microscope feed should appear.

Image 4.1: Wireless and USB connectivity. This image illustrates the flexibility of the microscope, showing it connected wirelessly to a smartphone and via USB to a computer monitor, demonstrating its dual connection capabilities.
5. 사용 설명서
5.1 전원 켜기/끄기
- 전원을 켜려면: 표시등이 켜질 때까지 전원 버튼을 길게 누릅니다.
- 전원을 끄려면: 표시등이 꺼질 때까지 전원 버튼을 길게 누르세요.
5.2 확대 및 초점 조절
- 관찰하고자 하는 물체 위에 현미경을 놓으십시오.
- Rotate the magnification adjustment ring to select the desired magnification level (50x to 1000x).
- Slowly turn the focus wheel until the image on your screen is clear and sharp.
5.3 Using the LED Illumination
The microscope features 8 built-in LEDs to provide optimal lighting for your observations. The brightness can typically be adjusted via a control on the microscope body or within the view소프트웨어/앱.
5.4 이미지 및 비디오 캡처
Once the image is focused, you can capture still images or record videos:
- 캡처 버튼 사용 방법: Press the physical Capture button on the microscope to take a photo. Press and hold to start/stop video recording (functionality may vary by software).
- Using Software/App Controls: 최대 viewing applications provide on-screen buttons for capturing images and recording videos. Refer to your software's help section for specific instructions.
5.5 Specific Applications: Scalp and Skin Analysis
The Sonew eecoo14 is particularly useful for detailed analysis of scalp and skin conditions:
- Ensure the microscope is fully charged and connected to your view장치를 사용하고 있습니다.
- Gently place the microscope lens directly onto the area of the scalp or skin you wish to examine.
- Adjust the focus and magnification to achieve a clear view of hair follicles, skin texture, or other details.
- Use the capture function to document observations for analysis or record changes over time.
- The software allows for storage and printing of analysis data, aiding in professional assessments.

Image 5.1: Scalp analysis on a monitor. This image shows the digital microscope being used to examine a person's scalp, with the magnified view displayed on a computer monitor, demonstrating its application as a skin and hair scalp detector.

Image 5.2: Hair follicle view on a smartphone. This image illustrates the microscope connected wirelessly to a smartphone, displaying a magnified view of hair follicles, highlighting its utility for detailed hair analysis.

Image 5.3: Skin texture view on a smartphone. This image shows the digital microscope connected wirelessly to a smartphone, displaying a magnified view of skin texture, demonstrating its capability for detailed skin examination.
6. 유지관리
6.1 청소
- 청소하기 전에 기기의 전원이 꺼져 있고 모든 전원 공급 장치에서 분리되어 있는지 확인하십시오.
- Use a soft, dry cloth to wipe the body of the microscope.
- 렌즈의 경우, 긁힘 방지를 위해 특수 렌즈 세척용 천과 용액을 사용하세요. 연마성 세척제나 용제는 사용하지 마세요.
6.2 보관
- 현미경은 직사광선과 극한의 온도를 피해 서늘하고 건조한 곳에 보관하세요.
- Keep it in its original packaging or a protective case to prevent dust accumulation and physical damage.
- 장기간 보관할 경우 배터리 수명을 연장하려면 배터리를 부분적으로(약 50%) 충전해 두세요.
7. 문제 해결
If you encounter issues with your microscope, refer to the following common problems and solutions:
| 문제 | 가능한 원인 | 해결책 |
|---|---|---|
| 화면에 이미지가 없습니다. | Device not powered on; Low battery; Incorrect connection; Software not running or installed. | Ensure device is on; Charge battery; Reconnect USB/WiFi; Launch or reinstall software/app. |
| 이미지가 흐릿함 | Out of focus; Incorrect working distance. | Adjust the focus wheel; Ensure the microscope is at an appropriate distance from the object. |
| WiFi 연결 실패 | Incorrect WiFi password; Device too far from microscope; Interference. | Verify WiFi password; Move device closer; Try connecting in a different location. |
| LED가 작동하지 않습니다 | LED가 꺼졌습니다. 배터리가 부족합니다. | Check LED control in software/app or on device; Charge battery. |
이러한 해결 방법을 시도한 후에도 문제가 지속되면 고객 지원팀에 문의하세요.
8. 사양
| 특징 | 사양 |
|---|---|
| 모델 번호 | eecoo14 |
| 해결 | 640 x 840 / 1280 x 1024 |
| 확대 | 50배에서 1000배까지 |
| 인터페이스 | WiFi Wireless + USB 2.0 |
| 광원 | 8-LED (0-30000 MLUX) |
| 전원 공급 장치 | Built-in Lithium Battery, USB (5V DC) |
| 지원 시스템 | iOS (iPad/iPhone), Android (phone/tablet with OTG), Windows XP/Vista/7/8/10, Mac |
| 품목 무게 | 491g |
| 길이 | 약 14.2cm(5.6인치) |

Image 8.1: Microscope dimensions. This image provides a visual representation of the microscope's length, indicating it is approximately 14.2 cm.
9. 보증 및 지원
This product comes with a standard manufacturer's warranty. For specific warranty terms and conditions, please refer to the documentation included with your purchase or contact the retailer. For technical support, troubleshooting assistance beyond this manual, or service inquiries, please contact Sonew customer service through their official web사이트 또는 제품 포장에 제공된 연락처 정보를 참조하세요.