
1. 서론
Thank you for choosing the SUPER DEAL 5-in-1 Heat Press Machine. This versatile digital heat transfer machine is designed for professional-quality heat pressing on various materials, including T-shirts, caps, ceramic plates, mugs, and more. This manual provides essential information for safe and efficient operation, setup, maintenance, and troubleshooting.

Figure 1.1: The SUPER DEAL 5-in-1 Heat Press Machine with the 12"x15" platen press.
2. 안전 지침
부상이나 손상을 방지하기 위해 기계를 작동하기 전에 모든 안전 지침을 주의 깊게 읽으십시오.
- 항상 안정적이고 내열성이 있는 표면에서 열 프레스를 작동하세요.
- Keep hands and body clear of the heating element during operation. The platen reaches high temperatures and can cause severe burns.
- Ensure proper ventilation in your workspace to dissipate any fumes from materials.
- 기기가 작동 중이거나 가열 중일 때는 자리를 비우지 마십시오.
- 사용하지 않을 때나 청소 및 유지 보수를 하기 전에는 기기의 전원 플러그를 콘센트에서 뽑으십시오.
- 어린이와 애완동물을 기계 가까이에 두지 마십시오.
- 기계나 전기 부품을 물이나 다른 액체에 담그지 마십시오.
- Use only the accessories and attachments provided or approved by SUPER DEAL.
- If you notice any unusual smells, smoke, or malfunctions, immediately unplug the machine and contact support.
3. 구성품 및 액세서리
The SUPER DEAL 5-in-1 Heat Press Machine includes the following:
- 1x Fully-assembled machine with 12"x15" Platen Press (Teflon Coated)
- 1x Hat press attachment
- 1x Mug press attachment
- 2x Plate press attachments (various sizes)
- 1x 12mm Silicone composite pad
- 1x Cotton pad
- 1x 전원 코드
- 1x 사용자 설명서
- Basic tools for assembly (e.g., wrench, screwdriver)
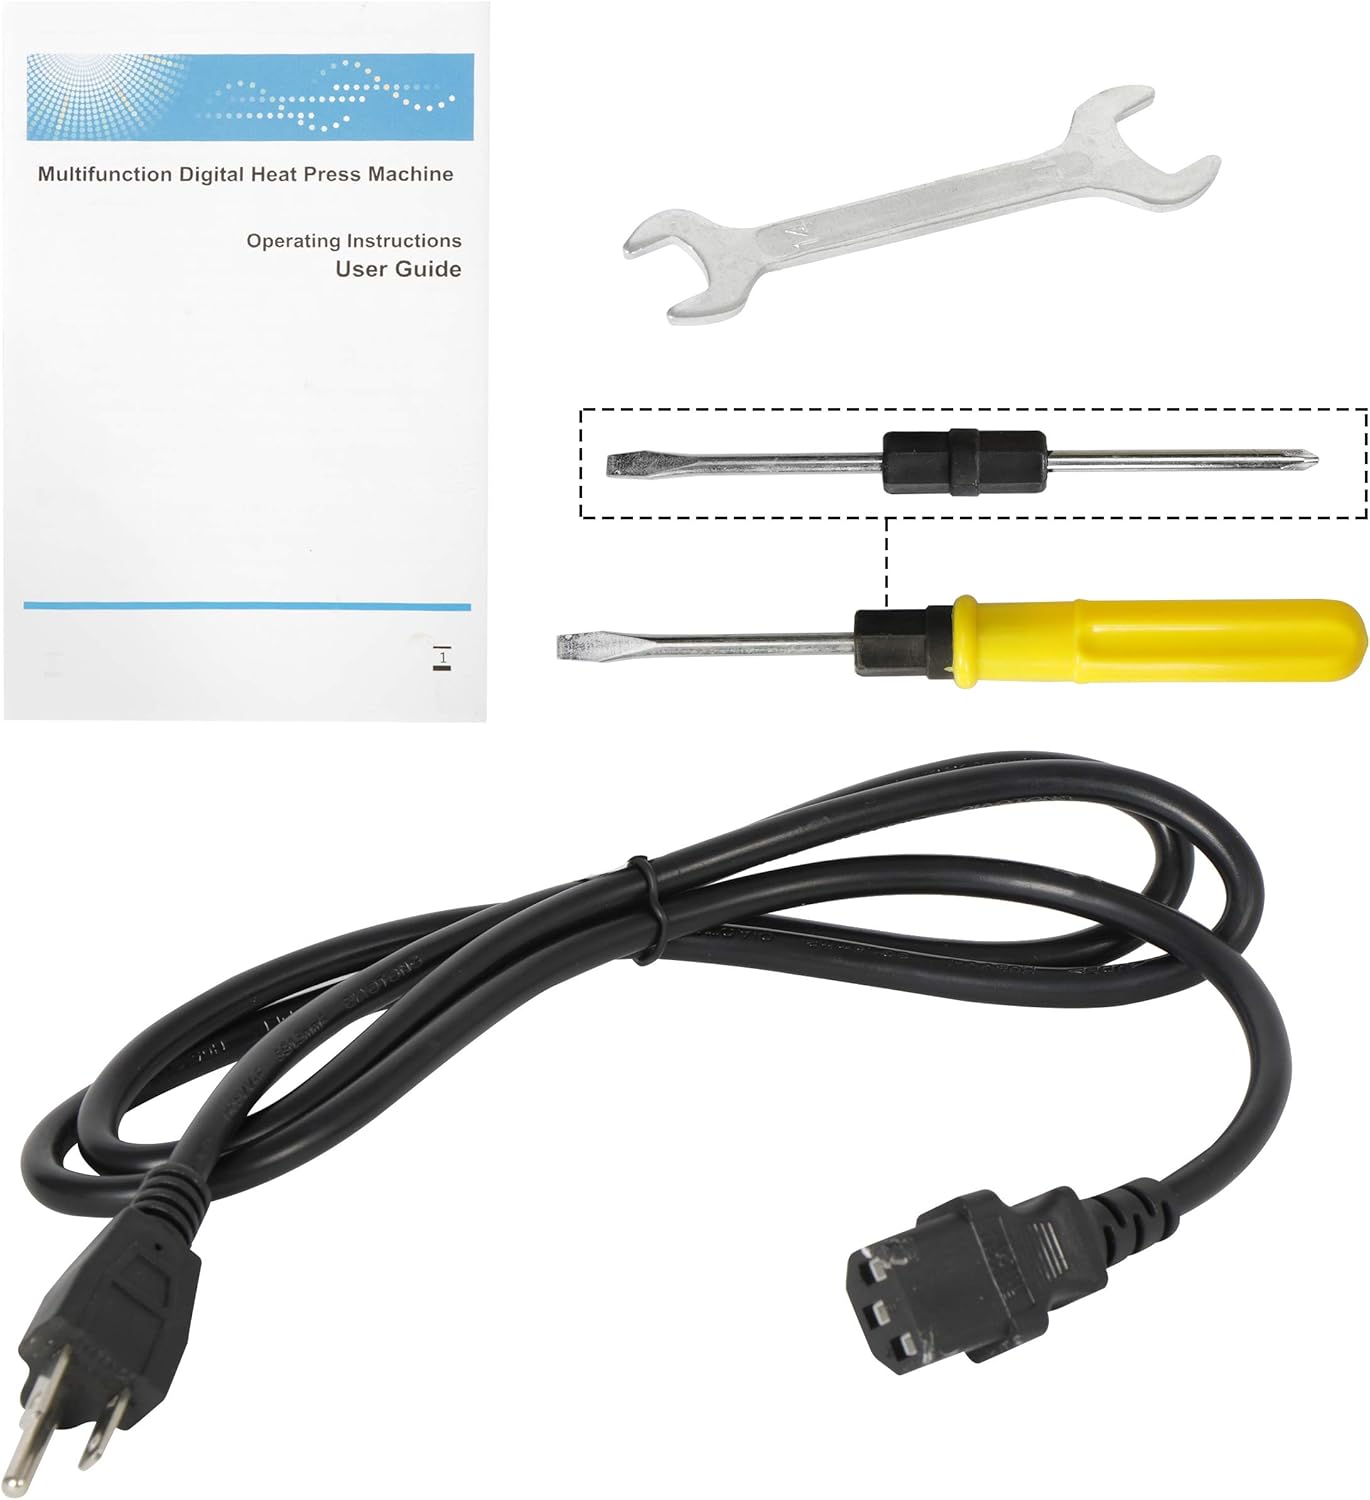
그림 3.1: 이상view of the main unit, various attachments, and included tools.

Figure 3.2: Visual representation of the different attachments and their applications.
4. 설정 및 초기 사용
4.1 포장 풀기 및 조립
- 포장에서 모든 구성 요소를 조심스럽게 제거합니다.
- Place the main heat press unit on a sturdy, flat, and heat-resistant surface.
- Ensure all connections are secure. The machine comes largely pre-assembled.
4.2 Attaching Different Platens/Elements
The machine features a 360-degree rotation design for easy access and interchangeability of heating elements.

Figure 4.1: The 360-degree swing-away design allows for easy placement of items and attachment changes.
- To change an attachment (e.g., from platen press to mug press), first ensure the machine is unplugged and cool.
- Loosen the screws securing the current attachment.
- Carefully remove the attachment.
- Align the desired attachment with the mounting points and secure it with the screws. Ensure it is firmly attached before use.
4.3 압력 조절
The pressure can be adjusted to suit different material thicknesses. This is crucial for achieving optimal transfer results.

Figure 4.2: The pressure adjustment knob is located on top of the heating element arm.
- Turn the pressure adjustment knob clockwise to increase pressure and counter-clockwise to decrease pressure.
- Test the pressure by closing the platen without material. It should require moderate effort to close and open.
5. 사용 설명서
This section outlines the general steps for operating your heat press. Specific temperature and time settings will vary based on the material and transfer type.
5.1 General Heat Pressing Steps
- 전원 켜기: Plug the machine into a grounded 110V outlet and turn on the power switch.
- 온도 및 시간 설정: Use the digital controller to set the desired temperature and time (refer to Section 6 for details).
- 예열: Allow the machine to reach the set temperature. The 'HEATING-UP' indicator will turn off, and an alarm may sound when ready.
- 항목 준비: Place your item (e.g., T-shirt) on the lower platen. For garments, a pre-press for 5-10 seconds can remove moisture and wrinkles.
- 직위 이동: Place your transfer material onto the item. Use heat-resistant tape if necessary to secure it.
- 누르다: Swing the upper platen over the item and press down the handle firmly until it locks into place. The timer will begin counting down.
- 풀어 주다: Once the timer alarm sounds, lift the handle to release the pressure and swing the upper platen away.
- 전송 제거: Carefully remove the transfer paper according to its specific instructions (hot peel or cold peel).
- 전원 끄기 : When finished, turn off the power switch and unplug the machine.
5.2 응용 예amp레
The 5-in-1 machine allows for various applications:
- T-shirts/Flat Items: Use the 12"x15" platen. Ensure the garment is flat and free of obstructions.
- 머그잔: Attach the mug press. Insert the mug and adjust pressure so it's snug but not overly tight.
- Hats/Caps: Attach the cap press. Position the cap securely on the curved platen.
- 플레이트: Attach the appropriate plate press. Ensure the plate is centered and stable.

Figure 5.1: Demonstrating the heat pressing process for a T-shirt.
Video 5.1: A user demonstrates the basic operation of the heat press, including swiveling the platen, placing a shirt, pressing, and peeling the transfer. This video highlights the ease of use for simple heat transfer projects.
6. Digital Temperature and Time Control
The machine is equipped with a digital controller for precise temperature and time settings.

Figure 6.1: The digital control panel for setting temperature and time.
- 설정 온도: Press the 'SET' button once. The 'TEMP' indicator will flash. Use the up/down arrows to adjust the temperature. Press 'SET' again to confirm.
- 설정 시간: Press the 'SET' button twice. The 'TIME' indicator will flash. Use the up/down arrows to adjust the time in seconds. Press 'SET' again to confirm.
- 온도 단위 : The unit is typically in Fahrenheit.
Note: Always refer to the specific instructions provided with your heat transfer material for recommended temperature and time settings.
7. 유지관리
정기적인 유지관리를 통해 열 프레스의 수명과 최적의 성능을 보장할 수 있습니다.
- 플래튼 청소: 플래튼이 완전히 식을 때까지 기다리세요. 부드러운 천을 사용하세요.amp cloth to wipe down the Teflon-coated heating element. For stubborn residue, use a specialized platen cleaner. Avoid abrasive cleaners or sharp objects that could damage the coating.
- 베이스 청소: Wipe the base and other non-heating surfaces with a damp 옷감.
- 저장: 사용하지 않을 때는 건조하고 먼지가 없는 환경에 기기를 보관하십시오.
- Inspecting Cables: Periodically check the power cord and other cables for any signs of wear or damage. Replace immediately if damaged.
8. 문제 해결
이 섹션에서는 일반적으로 발생할 수 있는 문제에 대해 설명합니다.
| 문제 | 가능한 원인 | 해결책 |
|---|---|---|
| 기계의 전원이 켜지지 않습니다. | Power cord not plugged in; power switch off; faulty outlet. | Ensure power cord is securely plugged in. Turn on the power switch. Test the outlet with another device. Check the fuse if accessible. |
| Temperature not reaching set value or inconsistent. | Incorrect temperature setting; faulty heating element or sensor. | Verify temperature settings. Allow sufficient time for heating. If issues persist, contact customer support. (Note: Some users have reported discrepancies between displayed temperature and actual platen temperature; an external thermometer can verify.) |
| Timer does not start when pressed down. | Sensor issue; mechanical fault in the pressing mechanism. | Ensure the handle is fully pressed down and locked. Check for any obstructions. If the timer mechanism is not engaging, contact customer support. (Some users have reported this issue, indicating a potential internal sensor problem.) |
| Poor transfer quality (e.g., peeling, incomplete transfer). | Incorrect temperature/time/pressure; wrong transfer material type; material not pre-pressed. | Adjust temperature, time, and pressure according to transfer material instructions. Ensure even pressure distribution. Pre-press garments to remove moisture. |
| Attachments (e.g., hat press) do not fit or work correctly. | Incorrect assembly; incompatible material size. | Review assembly instructions for the specific attachment. Ensure the item being pressed fits the attachment size. (Some users have noted difficulty with hat press accommodation.) |
Video 8.1: A user demonstrates a potential issue where the heat press displays 300 degrees, but an external thermometer reads 318-322 degrees, indicating a calibration discrepancy. The video also shows the timer not engaging when the press is closed.
9. 사양
| 특징 | 세부 사항 |
|---|---|
| 상표 | 슈퍼딜 |
| 모델 | 5-in-1 Heat Press Machine |
| 재료 | 알루미늄, 실리콘 |
| 색상 | 검은색 |
| 제품 크기(L x W x H) | 16.54인치 x 15.35인치 x 17.99인치 |
| 품목 무게 | 26.8 파운드 |
| 상한 온도 등급 | 화씨 350도 |
| 권tage | 110 볼트 |
| 왓tage | 900 와트 |
| 압반 크기 | 12인치 x 15인치 |
| 회전 | 360-degree Swing-Away |
10. 보증 및 지원
For warranty information, technical support, or to purchase replacement parts, please refer to the official SUPER DEAL web해당 웹사이트를 방문하거나 고객 서비스 센터에 직접 문의하십시오. 자세한 내용은 일반적으로 구매 서류에 나와 있습니다.
보증 청구를 위해 항상 구매 증빙 서류를 보관하세요.


