
Amazon Basics DLB111-US290
Amazon Basics 싱글 컴퓨터 모니터 스탠드 사용 설명서
Model: DLB111-US290 | Brand: Amazon Basics
소개
This user manual provides comprehensive instructions for the assembly, operation, and maintenance of your Amazon Basics Single Computer Monitor Stand. This desk-mounted arm is designed to enhance your workspace ergonomics and free up valuable desk space by securely holding a single computer monitor.
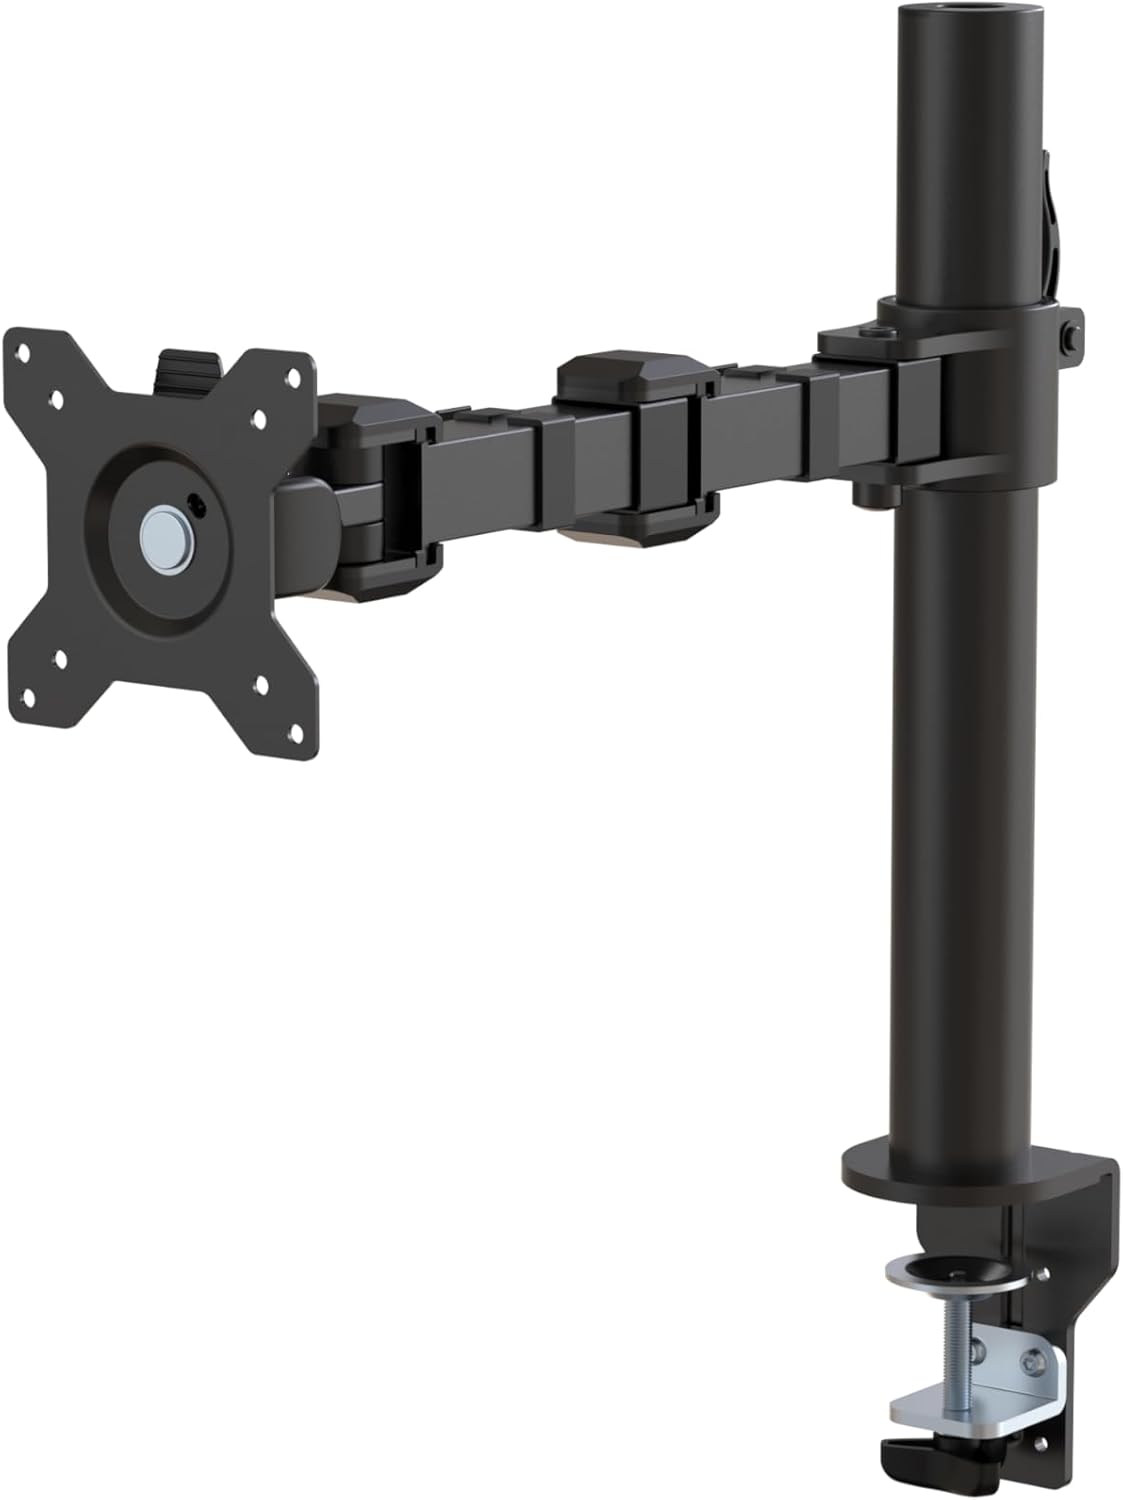
그림 1: 이상view of the Amazon Basics Single Computer Monitor Stand.
중요한 안전 정보
- 조립 및 사용 전에 모든 지침을 주의 깊게 읽으십시오.
- 최대 중량 용량인 22파운드(10kg)를 초과하지 마십시오.
- Ensure your desk surface is stable and can support the combined weight of the monitor arm and your monitor.
- Verify that the desk thickness is between 0.8 to 3.9 inches (2 cm to 10 cm) for proper clamp 설치.
- 제공된 하드웨어만 사용하십시오. 부품이 누락되었거나 손상된 경우 고객 지원팀에 문의하십시오.
- 조립하는 동안 어린이와 애완 동물을 가까이 두지 마십시오.
- 모든 나사와 연결부를 주기적으로 점검하여 단단히 고정되어 있는지 확인하세요.
패키지 내용
조립을 시작하기 전에 모든 구성 요소가 있는지 확인하세요.
- Monitor Arm Assembly (Pre-assembled arm and VESA plate)
- 데스크 Clamp 베이스
- 장착 극
- Hardware Kit (Screws for VESA mounting, Allen keys)
- 케이블 관리 클립
- 사용자 설명서
설치 지침
1단계: 책상 선반 부착amp 베이스
책상 배치 clamp base on your desk edge. Ensure the desk thickness is compatible (0.8 to 3.9 inches). Tighten the clamp screw securely until the base is firmly attached to the desk. Do not overtighten.

Figure 2: Securely attaching the desk clamp base to your desk.
Step 2: Install Mounting Pole
Insert the mounting pole into the hole on the desk clamp base. Secure it by tightening the set screw on the side of the clamp 제공된 육각 렌치를 사용하여 베이스를 분리하십시오.
Step 3: Attach Monitor Arm to Pole
Slide the monitor arm assembly onto the mounting pole. Adjust the height to your desired position and tighten the height adjustment screw on the arm collar to secure it.
4단계: VESA 플레이트를 모니터에 부착합니다.
The monitor arm features a detachable VESA plate. Remove the VESA plate from the arm by lifting it up. Align the VESA plate with the mounting holes on the back of your monitor (compatible with 100x100mm and 75x75mm VESA patterns). Use the appropriate screws from the hardware kit to secure the plate to your monitor. Ensure the screws are tightened firmly but do not overtighten.

Figure 3: The detachable VESA plate for easy monitor attachment.
5단계: 모니터를 암에 장착합니다.
Carefully slide the monitor (with the attached VESA plate) onto the monitor arm. Ensure it clicks securely into place. You may need to adjust the tension screws on the arm joints to support the monitor's weight and allow for smooth movement.

Figure 4: Monitor securely mounted on the arm, view앞에서부터.

Figure 5: Top-down perspective of the monitor mounted, showcasing desk space optimization.
6단계: 케이블 관리
Utilize the integrated cable management system to route your monitor cables (power, video, etc.) along the arm and down the pole. This helps maintain a tidy workspace and prevents cable clutter.
작동 지침
The monitor arm offers a full range of motion to customize your view경험:
- 높이 조정: The horizontal arm can be adjusted from 7.9 to 14.2 inches high along the pole. Loosen the height adjustment screw on the arm collar, slide the arm to the desired height, and re-tighten.
- 경사: Adjust the screen tilt from -15 to +85 degrees to reduce glare and optimize view각도를 나타냅니다.
- 받침: Swivel the monitor left or right up to 180 degrees at various joints for collaborative viewing or screen sharing.
- 회전: Rotate the monitor 360 degrees to switch between landscape and portrait modes without removing the monitor.

Figure 6: Visual representation of the flexible screen adjustment capabilities: Tilt (-85/+15 degrees), Swivel (±180 degrees), and Rotation (360 degrees).
인체공학적 위치
Proper monitor positioning is crucial for ergonomic comfort and reducing strain. Adjust the monitor arm so that the top of your monitor screen is at or slightly below eye level when you are sitting upright. Your eyes should be approximately an arm's length away from the screen. Ensure your wrists are straight and your forearms are parallel to the floor when typing.

Figure 7: Comparison of correct and incorrect sitting postures, highlighting the importance of proper monitor height.
유지
- 청소: 모니터 암을 부드러운 천으로 닦으세요.amp 천으로 닦으세요. 마감재를 손상시킬 수 있는 연마성 세제나 용제는 사용하지 마세요.
- 견고성 확인: Periodically check all screws and connections, especially the desk clamp and VESA plate screws, to ensure they are tight and secure. Re-tighten if necessary.
- 매끄럽게 하기: 움직이는 부품에는 윤활유가 필요하지 않습니다.
문제 해결
| 문제 | 가능한 원인 | 해결책 |
|---|---|---|
| 모니터 암이 처지거나 위치를 유지하지 못합니다. | Tension screws are too loose. | Tighten the tension screws on the arm joints using the provided Allen key until the arm holds the monitor's weight. |
| 모니터가 팔걸이에서 흔들립니다. | VESA 플레이트 나사가 헐거워졌거나 책상에 걸려 있습니다.amp is not secure. | Ensure the VESA plate screws attaching the monitor are tight. Re-tighten the desk clamp 나사. |
| Cannot adjust monitor height. | Height adjustment screw is too tight. | Loosen the height adjustment screw on the arm collar, adjust height, then re-tighten. |
명세서
| 특징 | 세부 사항 |
|---|---|
| 모델 번호 | DLB111-US290 |
| 제품 치수 | 20 x 18.13 x 4.5 인치 |
| 품목 무게 | 5.59파운드 |
| 재료 | 합금강 |
| 색상 | 검은색 |
| 장착 유형 | 테이블탑 Clamp 산 |
| 호환 가능한 화면 크기 | 13 ~ 30 인치 |
| 최대 중량 용량 | 22파운드(10kg) |
| Desk Thickness Compatibility | 0.8 ~ 3.9 인치 |
| VESA 호환성 | 75x75mm, 100x100mm |
| 높이 조절 범위 | 7.9 to 14.2 inches (horizontal arm) |
| 기울기 각도 | -15에서 + 85도까지 |
| 회전 | 360도 |
보증 및 지원
This product is backed by an Amazon Basics limited 1-year warranty.
For detailed warranty information or technical support, please refer to the official documentation or contact Amazon Basics customer service.
- 사용자 매뉴얼(PDF): 사용자 설명서 다운로드
- 보증서(PDF): 보증 정보 다운로드
Ask a question about this manual
Ask about setup, troubleshooting, compatibility, parts, safety, or missing instructions. Manuals+ will review the question and use this page’s manual context to help answer it.