
1. 서론
The ASUS PRIME B360M-A is a micro-ATX motherboard designed for 8th generation Intel Core processors. It offers a robust foundation for building a personal computer, featuring hardware-level safeguards, advanced fan control, and optimized memory stability.
주요 특징:
- Designed exclusively for 8th generation Intel Core processors to maximize connectivity and speed with integrated dual M.2 slots with Intel Optane Memory compatibility and USB 3.1 Gen2.
- 5X Protection III Hardware-level safeguards provide component longevity and reliability.
- FanXpert 2+ delivers advanced fan control for dynamic cooling.
- ASUS OptiMem improves memory stability and performance by improving trace isolation between PCB layers to maintain signal integrity even at higher frequencies.
- On-board 8-Channel HD Audio provides warm, immersive crystal-clear surround sound.
2. 제품 오버view
이 섹션에서는 시각적이고 설명적인 내용을 제공합니다.view of the ASUS PRIME B360M-A motherboard and its components.

Figure 2.1: The ASUS PRIME B360M-A motherboard alongside its retail packaging, highlighting its compact mATX form factor and key features.

그림 2.2: 상향식 view 마더보드의, showcasing the LGA 1151 CPU socket, four DDR4 DIMM slots, M.2 slots, and various headers and connectors.
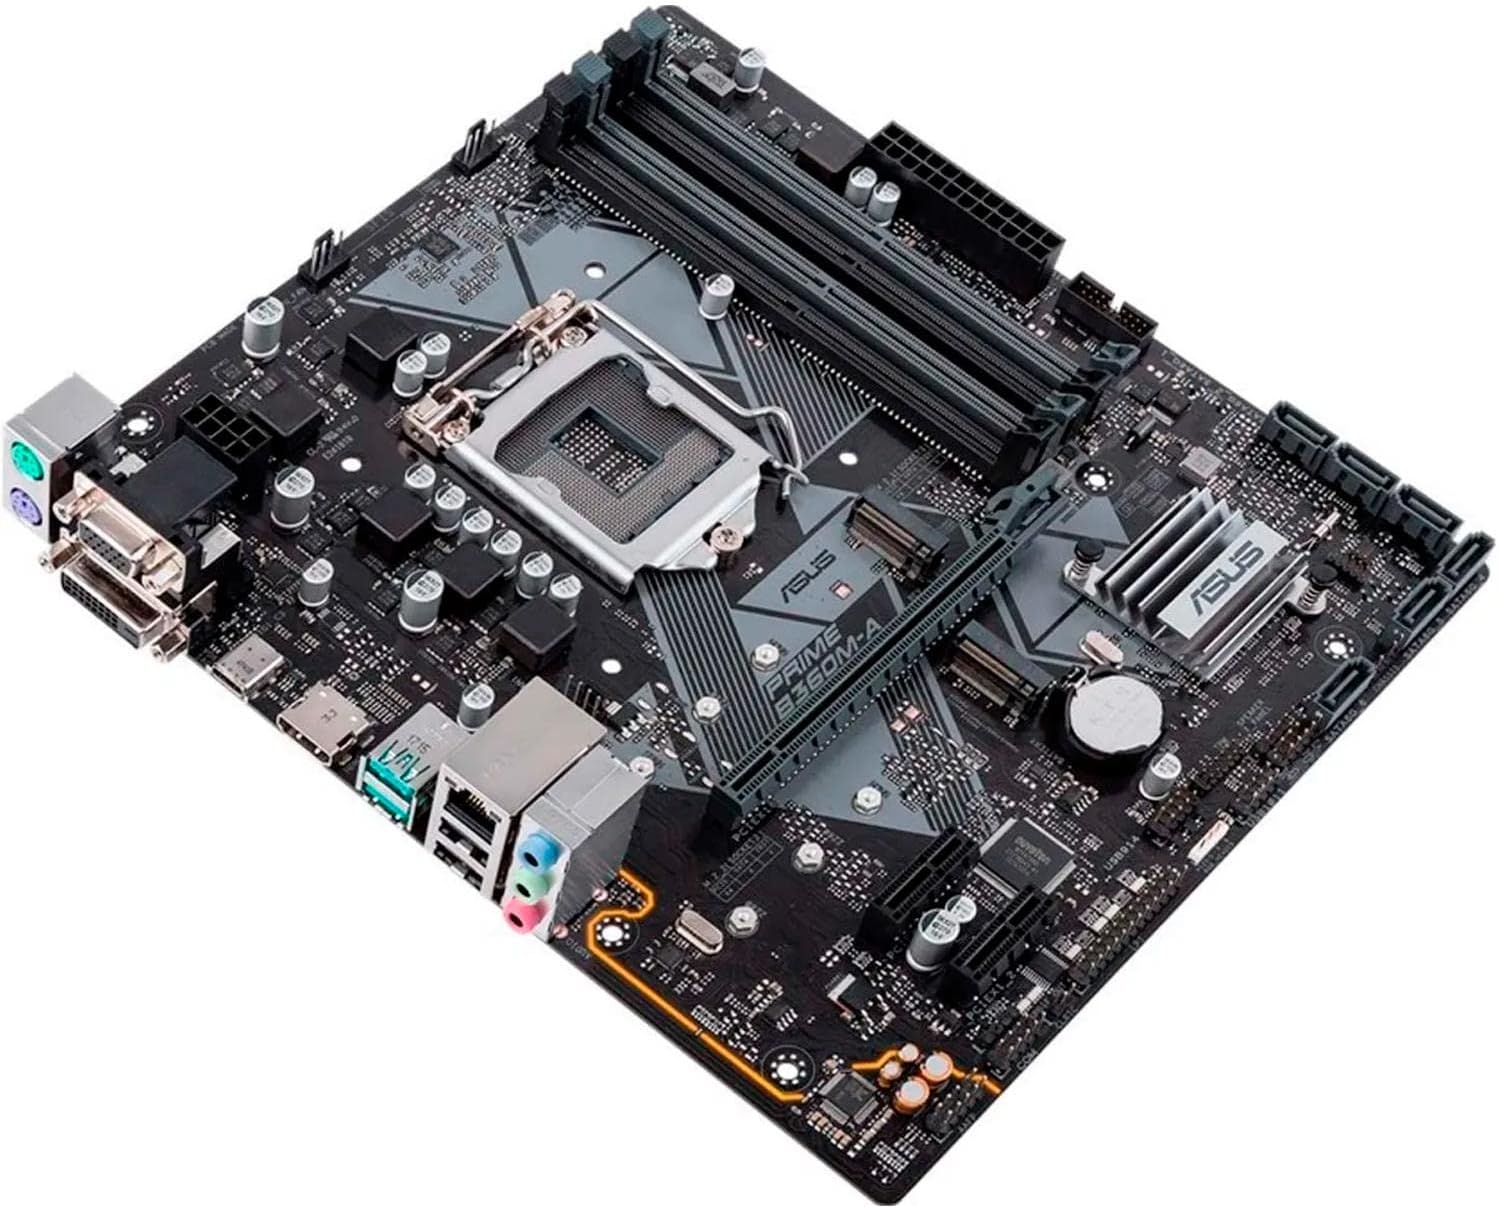
Figure 2.3: An angled perspective of the motherboard, providing a clearer view of the PCIe slots, SATA ports, and the chipset heatsink.

Figure 2.4: Close-up of the rear I/O panel, displaying the various ports including USB, HDMI, DVI, VGA, LAN, and audio jacks.

그림 2.5: 또 다른 view of the motherboard, emphasizing the layout of components and power connectors.
3. 설정 및 설치
시스템의 안정적인 작동을 위해서는 올바른 설치가 필수적입니다. 구성 요소를 다루기 전에 항상 시스템의 전원이 꺼져 있고 플러그가 뽑혀 있는지 확인하십시오.
3.1. 설치 전 체크리스트
- Ensure you have all necessary components: CPU, RAM, storage devices (SSD/HDD), power supply, and a compatible PC case.
- 준비물: 십자 드라이버, 정전기 방지 손목 스트랩(권장).
- Review the detailed user manual for specific installation diagrams and warnings. A PDF version is available 여기.
3.2. 구성 요소 설치 단계
- CPU 설치: Carefully align the CPU with the socket, ensuring the triangle mark on the CPU matches the mark on the socket. Lower the retention arm to secure the CPU.
- CPU 쿨러 설치: Attach the appropriate cooler for your CPU, ensuring proper thermal paste application and secure mounting.
- RAM 모듈 설치: Open the DIMM slot clips, align the RAM modules with the notch, and press down firmly until the clips snap into place. Refer to the motherboard manual for recommended slot population for dual-channel memory.
- 마더보드 장착: I/O 쉴드를 PC 케이스에 설치합니다. 마더보드를 케이스에 조심스럽게 넣고 스탠드오프에 맞춰 정렬합니다. 나사를 사용하여 마더보드를 고정합니다.
- 저장 장치 설치: Connect M.2 SSDs to the M.2 slots and SATA drives to the SATA ports.
- 그래픽 카드 설치(선택 사항): Insert your graphics card into the primary PCIe x16 slot and secure it.
- 전원 케이블 연결: Connect the 24-pin ATX power connector and the 8-pin CPU power connector from your power supply to the motherboard. Connect power to other components as needed.
- 전면 패널 헤더를 연결하세요: Connect the power button, reset button, USB ports, and audio jacks from your case to the corresponding headers on the motherboard. Refer to the motherboard manual for pinout diagrams.
4. 시스템 운영
4.1. 첫 번째 부팅 및 BIOS/UEFI 설정
Upon the first boot, your system will likely enter the BIOS (Basic Input/Output System) or UEFI (Unified Extensible Firmware Interface). The ASUS BIOS is known for its user-friendly interface.
- 를 누르세요 델 부팅 중에 BIOS/UEFI 설정으로 들어가려면 해당 키를 누르십시오.
- 운영 체제를 설치하려면 부팅 순서를 구성하세요.
- Adjust system time and date.
- Enable XMP/DOCP for optimal memory performance if using high-speed RAM.
- Save changes and exit BIOS to proceed with OS installation.
4.2. 운영체제 설치
The ASUS PRIME B360M-A motherboard is compatible with 윈도우 10. Follow the standard installation procedures for your chosen operating system.
4.3. 드라이버 설치
After installing the operating system, install the necessary drivers for the motherboard's components to ensure full functionality and performance. Drivers are typically provided on a support CD or can be downloaded from the ASUS official web대지.
- 칩셋 드라이버
- LAN 드라이버
- 오디오 드라이버
- USB 드라이버
- 그래픽 드라이버(통합 그래픽 또는 개별 GPU용)
5. 유지관리
정기적인 유지관리는 마더보드와 PC 시스템의 수명과 최적의 성능을 보장하는 데 도움이 됩니다.
5.1. 먼지 관리
- Periodically clean dust from inside your PC case, especially from fans and heatsinks, using compressed air or a soft brush.
- Ensure proper airflow within the case to prevent overheating.
5.2. BIOS 업데이트
ASUS regularly releases BIOS updates to improve system stability, compatibility, and performance. Check the ASUS support website for the latest BIOS versions for your PRIME B360M-A motherboard.
- Download the correct BIOS file 당신의 모델을 위해.
- Follow the instructions provided by ASUS for updating the BIOS (e.g., using EZ Flash utility).
- 주의: BIOS 업데이트 프로세스를 중단하지 마십시오. 중단할 경우 마더보드가 작동 불능 상태가 될 수 있습니다.
5.3. 연결 확인
- Occasionally check all internal cable connections (power, SATA, front panel) to ensure they are securely seated.
6. 문제 해결
This section provides solutions to common issues you might encounter with your ASUS PRIME B360M-A motherboard.
6.1. 전원 없음 / POST(전원 켜짐 자가 진단) 없음
- 모든 전원 케이블(24핀 ATX, 8핀 CPU)이 마더보드와 전원 공급 장치에 단단히 연결되어 있는지 확인하세요.
- 전원 스위치가 켜짐 위치에 있는지 확인하십시오.
- Check front panel connections (power button header).
- Try reseating RAM modules, CPU, and graphics card.
- Clear CMOS (Complementary Metal-Oxide-Semiconductor) by removing the CMOS battery for a few minutes or using the clear CMOS jumper (refer to manual).
6.2. System Instability / Random Reboots
- Check CPU and GPU temperatures to ensure they are within safe operating limits. Improve cooling if necessary.
- 메모리 진단 도구를 사용하여 RAM 안정성을 확인하십시오.
- 모든 드라이버가 최신 상태인지 확인하세요.
- BIOS를 최신 버전으로 업데이트하세요.
- 전원 공급 장치를 확인하십시오.tage and ensure it is sufficient for all components.
6.3. 오디오 문제
- 오디오 드라이버가 올바르게 설치되고 업데이트되었는지 확인하십시오.
- Check audio cable connections to the rear I/O panel or front panel audio header.
- 운영 체제의 오디오 출력 설정을 확인하십시오.
6.4. M.2 Slot Interference
Some users have reported potential interference between aftermarket NVMe heatsinks and larger graphics cards due to the lower M.2 slot's position. Ensure adequate clearance during installation.
7. 기술 사양
| 특징 | 사양 |
|---|---|
| 상표 | 아수스 |
| 시리즈 | 프라임 B360M-A |
| 모델명 | 프라임 B360M-A |
| CPU 소켓 | LGA 1151 |
| 호환 프로세서 | Intel Socket 1151 for 8th Generation Core i7/Core i5/Core i3/Pentium/Celeron Processor |
| 칩셋 유형 | 인텔 B360 |
| RAM 메모리 기술 | DDR4 |
| 메모리 클럭 속도 | 2133 MHz (Supports up to 2666MHz with compatible CPUs) |
| 메모리 저장 용량 | 64GB(최대) |
| 제품 크기(LxWxH) | 9.6 x 2.03 x 8.1 인치 |
| 품목 무게 | 1.65파운드 |
| 플랫폼 | 윈도우 10 |
| USB 2.0 포트 | 2(후면 I/O) |
| USB 3.0 포트 | 2(후면 I/O) |
| 제조업체 | ASUS 컴퓨터 국제 직영점 |
| 첫 번째 가능한 날짜 | 3년 2018월 XNUMX일 |
8. 보증 및 지원
8.1. 상자 안에 무엇이 들어있나요?
The retail package for the ASUS PRIME B360M-A motherboard typically includes:
- 마더보드
- 보증 카드
- 사용자 설명서
- Software Drivers CD/DVD
- SATA 케이블
- I / O 실드
8.2. 공식 사용자 설명서
For detailed instructions, diagrams, and advanced configurations, please refer to the official User Manual in PDF format, available 여기.
8.3. 고객 지원
기술 지원, 보증 청구 또는 기타 문의 사항은 ASUS 공식 지원 페이지를 방문하십시오. web사이트를 방문하거나 고객 서비스에 문의하세요. 또한 Amazon의 ASUS 스토어 더 많은 제품 정보를 보려면.