
1. 서론
This manual provides essential instructions for the proper setup, operation, and maintenance of your AmScope ME580T-PZ-2L Trinocular Dual-Light Polarized Metallurgical Microscope. This advanced metallurgical microscopy system features both incident (reflected) and transmitted illumination, along with polarized lighting capabilities for structural analysis. It is designed to deliver sharp, flat-field images with excellent color correction across various magnification settings.
Please read this manual thoroughly before using the microscope to ensure safe and effective operation and to maximize the lifespan of your instrument.

Figure 1: AmScope ME580T-PZ-2L Trinocular Dual-Light Polarized Metallurgical Microscope. This image shows the complete microscope assembly, including the trinocular head, objective turret, mechanical stage, and illumination unit.
2. 설정
Carefully unpack all components and verify that all parts are present according to the packing list. Handle all optical components with care to avoid scratches or damage.
2.1 구성 요소 조립
- 베이스 및 스탠드: Place the microscope base on a stable, level surface.
- Trinocular Head: Carefully mount the trinocular head onto the top of the microscope body. Secure it with the set screw, ensuring it is oriented correctly for comfortable view주고받음.
- 접안렌즈: Insert the 10X plan eyepieces into the two ocular tubes of the trinocular head.
- 목표: Screw the objective lenses (4X, 10X, 40X achromat and 5X, 10X, 50X long-working-distance metallurgy plan achromat) into the revolving nosepiece. Start with the lowest magnification objective.
- Stage: Ensure the double-layer mechanical stage is securely attached to the microscope body.
- Illumination Unit: Attach the incident illumination unit, which includes the polarizer and analyzer, to its designated port on the microscope body.

Figure 2: Close-up of the microscope stage, objective turret, and control knobs. This view highlights the mechanical stage, the objectives mounted on the revolving nosepiece, and the coarse/fine focus knobs.
2.2 전원 연결
Connect the power cord to the microscope's power input and then to a suitable electrical outlet (240 Volts). Ensure the power switch is in the 'OFF' position before connecting.
3. 사용 설명서
3.1 Powering On and Illumination Adjustment
- Flip the main power switch to 'ON'.
- Adjust the brightness of the transmitted (bottom) and incident (top) halogen light sources using their respective intensity control knobs.
- For polarized light observation, engage the polarizer and analyzer components within the incident illumination path. Rotate the analyzer to observe polarization effects.
- Utilize the adjustable field and aperture diaphragms on the episcopic illuminator to optimize contrast and resolution for incident light.
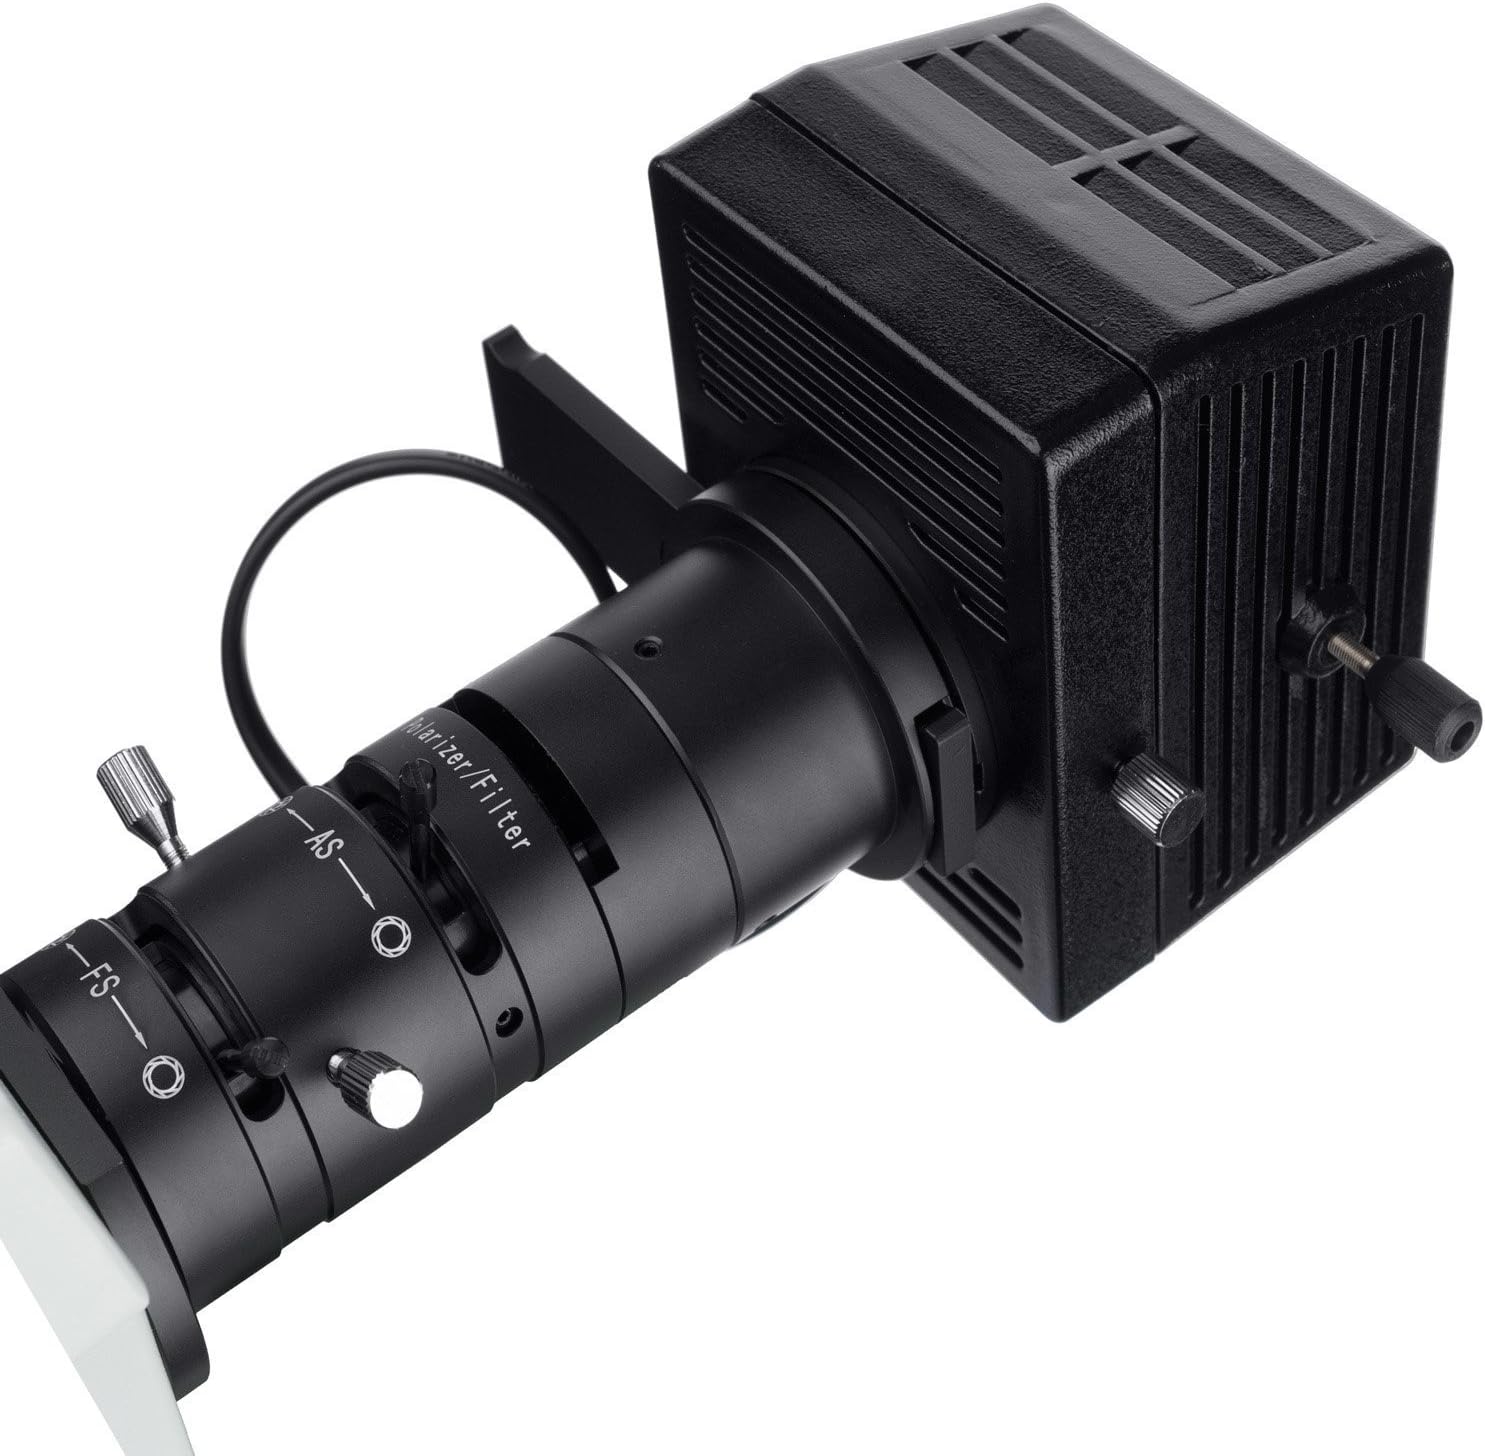
Figure 3: Close-up of the polarizer and filter unit. This image details the components for polarized light observation, including the polarizer and filter adjustment mechanisms.
3.2 Specimen Placement and Focusing
- Place your specimen on the mechanical stage. s를 사용하세요tag필요한 경우 고정용 클립이 있습니다.
- Rotate the revolving nosepiece to select the desired objective lens. Start with a lower magnification (e.g., 4X or 5X) for initial view주고받음.
- 조동 초점 조절 손잡이를 사용하여 피사체의 초점을 대략적으로 맞추십시오.
- Refine the focus using the fine focus knob until the image is sharp. The coaxial coarse and fine focusing system allows for precise adjustments.
- Adjust the focusing tension control mechanism as needed for smooth operation.
3.3 Magnification and View조정
- 배율 변경: Rotate the nosepiece to switch between objectives. The microscope offers metallurgical magnifications of 50X, 100X, 500X and bright-field magnifications of 40X, 100X, 400X.
- 동공간 거리: Adjust the distance between the two ocular tubes to match your eye spacing for comfortable binocular view주고받음.
- 디옵터 조정: Use the adjustable diopters on both eye tubes to compensate for differences in vision between your eyes, ensuring a sharp image for both.
- Photo Port: The dedicated photo port allows for simultaneous viewing and imaging. Attach a compatible camera (not included) to this port for capturing images or video.

Figure 4: Close-up of the trinocular head and eyepieces. This image shows the adjustable eyepieces and the top port for camera attachment.
4. 유지관리
4.1 청소
- 광학 부품: Use a soft, lint-free cloth and a specialized lens cleaning solution to clean objective lenses and eyepieces. Avoid touching optical surfaces with bare hands.
- 몸: 현미경 본체를 부드러운 천으로 닦으십시오.amp 옷감. 강한 화학 물질이나 연마성 세제를 사용하지 마십시오.
4.2 보관
When not in use, cover the microscope with a dust cover to protect it from dust and debris. Store in a dry, cool environment away from direct sunlight and extreme temperatures.
4.3 전구 교체
The microscope uses halogen bulbs for illumination. If a bulb burns out, ensure the microscope is unplugged and cooled down before carefully replacing the bulb according to the instructions provided with the replacement bulb. Avoid touching the new bulb directly with your fingers.
5. 문제 해결
- 조명 없음: Check the power cord connection, ensure the power switch is on, and verify that the intensity control is not set to minimum. Check if the halogen bulb needs replacement.
- 흐릿한 이미지: Adjust the coarse and fine focus knobs. Ensure the diopter settings are correct for your eyes. Clean objective and eyepiece lenses if smudges are present. Verify the specimen is correctly placed on the stage.
- 고르지 못한 조명: Adjust the field and aperture diaphragms. Ensure the light source is properly centered.
- Difficulty with Assembly/Optical Path: Ensure all components are securely and correctly attached as per the setup instructions. If persistent issues with optical alignment occur, contact AmScope support.
여기에 명시되지 않은 문제에 대해서는 보증 및 지원 섹션을 참조하여 연락처 정보를 확인하십시오.
6. 사양
| 특징 | 세부 사항 |
|---|---|
| 모델명 | ME580T-PZ-2L |
| 상표 | 암스코프 |
| 광원 유형 | 할로겐 |
| 재료 | 금속 |
| 배율 최대 | 500.00X |
| 품목 무게 | 69 파운드 |
| 권tage | 240 볼트 |
| 대물렌즈 설명 | 무채색 |
| 실제 각도 View | 30도 |
| 전원 | 코드식 전기 |
| 인클로저 재료 | 금속 |
| 한국어: | 840979104237 |
7. 보증 및 지원
7.1 보증 정보
This AmScope ME580T-PZ-2L microscope comes with an excellent five (5) year factory warranty. Please retain your proof of purchase for warranty claims.
7.2 고객 지원
For technical assistance, warranty service, or inquiries regarding replacement parts, please contact AmScope customer support. Refer to the official AmScope web최신 연락처 정보는 사이트에서 확인하세요.