1. 서론
This manual provides detailed instructions for the installation, operation, and maintenance of your AMTIFO 720P 7 Inch Wireless Backup Camera Kit. Please read this manual thoroughly before using the product to ensure proper function and safety. This system is designed to assist drivers by providing a clear view of the area behind the vehicle, enhancing safety during reversing maneuvers.
2. 패키지 내용
Before installation, please verify that all components listed below are present in your package.

그림 2.1: All components included in the AMTIFO Wireless Backup Camera Kit. This image displays the 7-inch monitor, the rear view camera, two antennas, a cigarette lighter power adapter, power cords for the camera, and a dash mount for the monitor.
- 7인치 HD 무선 모니터
- 무선 백업 카메라
- 모니터 안테나
- 카메라 안테나
- 담배 라이터 전원 어댑터
- 카메라 전원 코드
- Dash Mount for Monitor
3. 제품 특징
- 무선 연결 : The system utilizes a stable wireless signal for communication between the camera and monitor, eliminating the need for complex wiring through the vehicle's interior. This design supports reliable operation in various weather conditions.
- High-Definition 7-inch Monitor: Features a 720P HD display with adjustable contrast and brightness for optimal view명료함.
- 광각 카메라: Equipped with a 150-degree viewing angle lens, providing a broad perspective of the rear environment. The camera features a CCD sensor and 6-glass HD lens for sharp, distortion-free images.
- IP69 방수 카메라: The camera is designed with an IP69 waterproof rating, ensuring reliable performance in harsh weather conditions, including extreme temperatures.
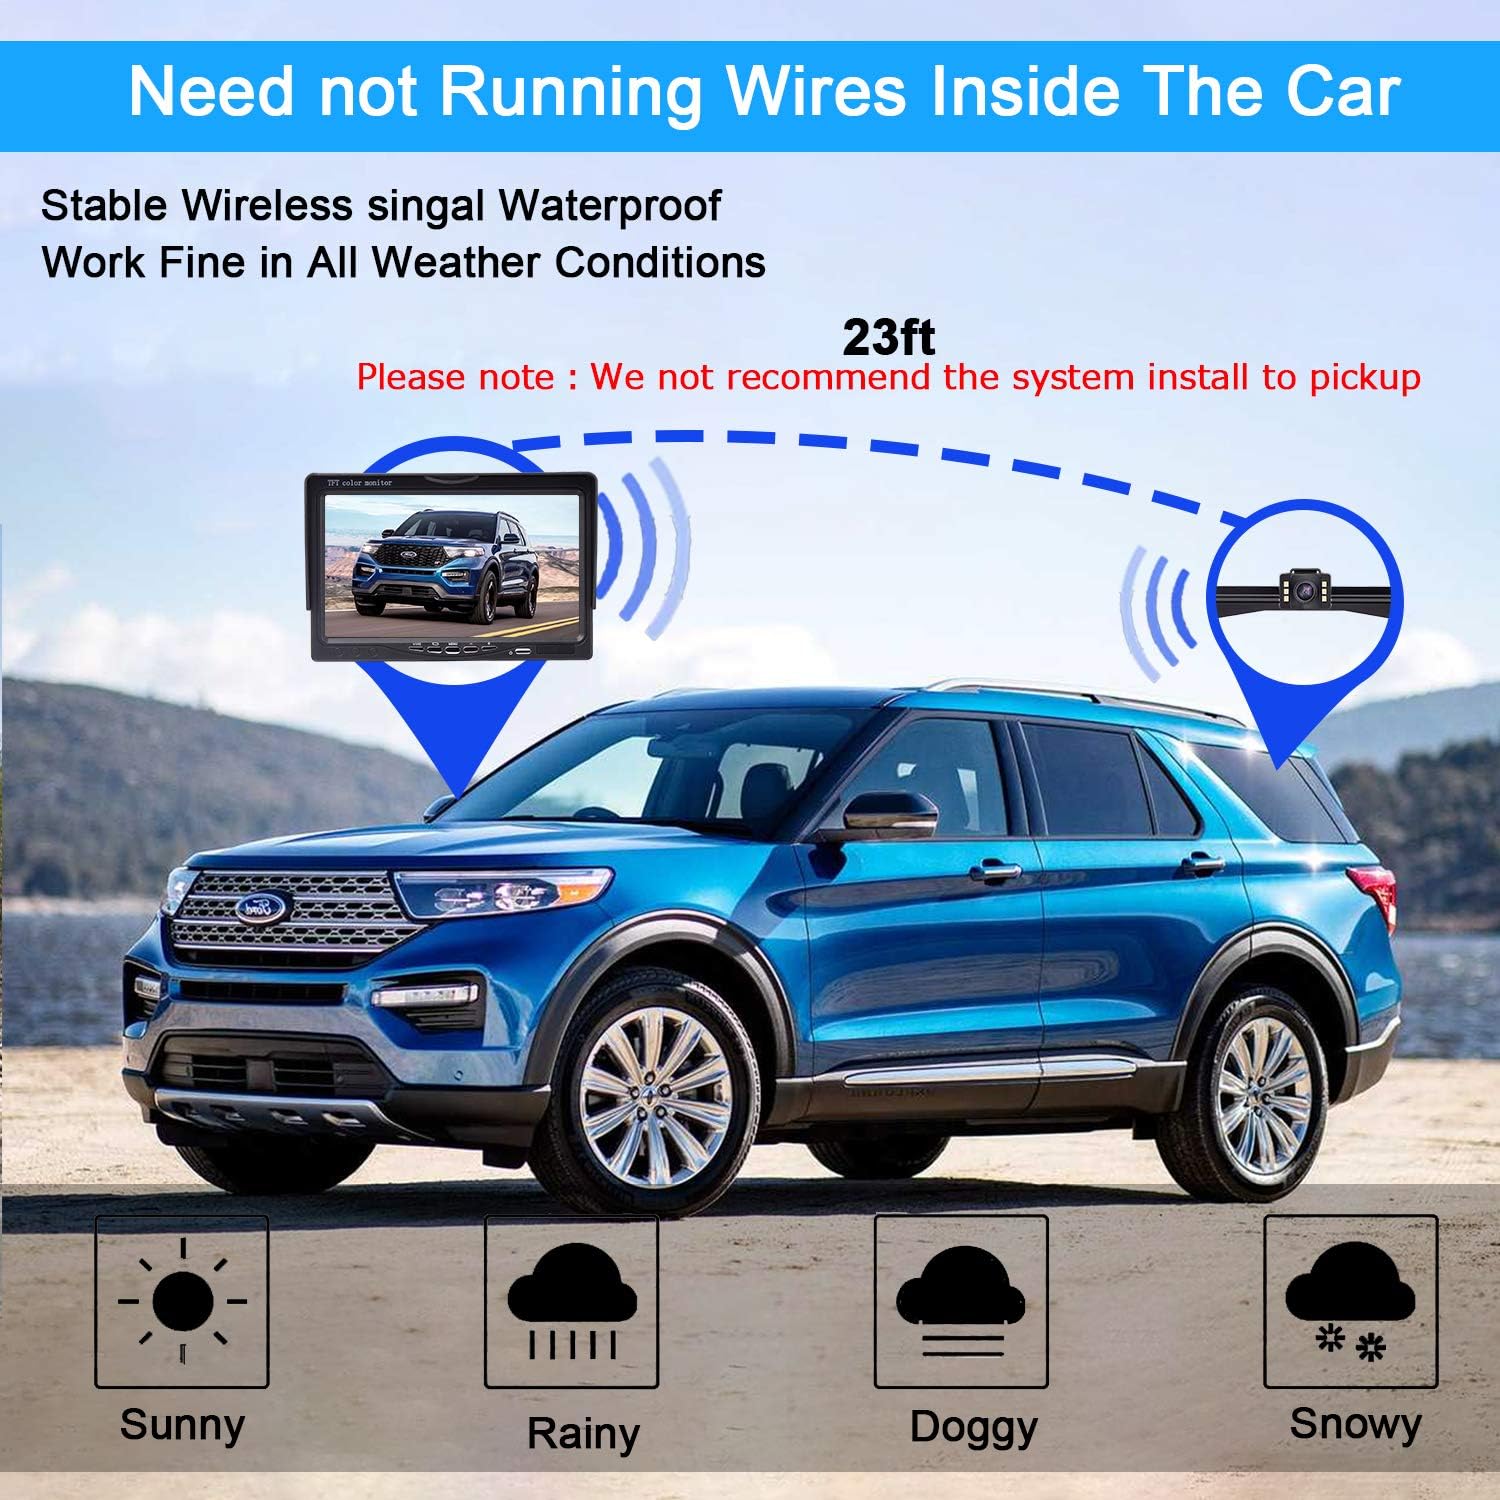
그림 3.1: Wireless signal transmission between the camera and monitor. The diagram shows a car with the monitor inside and the camera mounted at the rear, indicating a wireless connection up to 23 feet. Icons below represent sunny, rainy, foggy, and snowy weather, signifying all-weather performance.
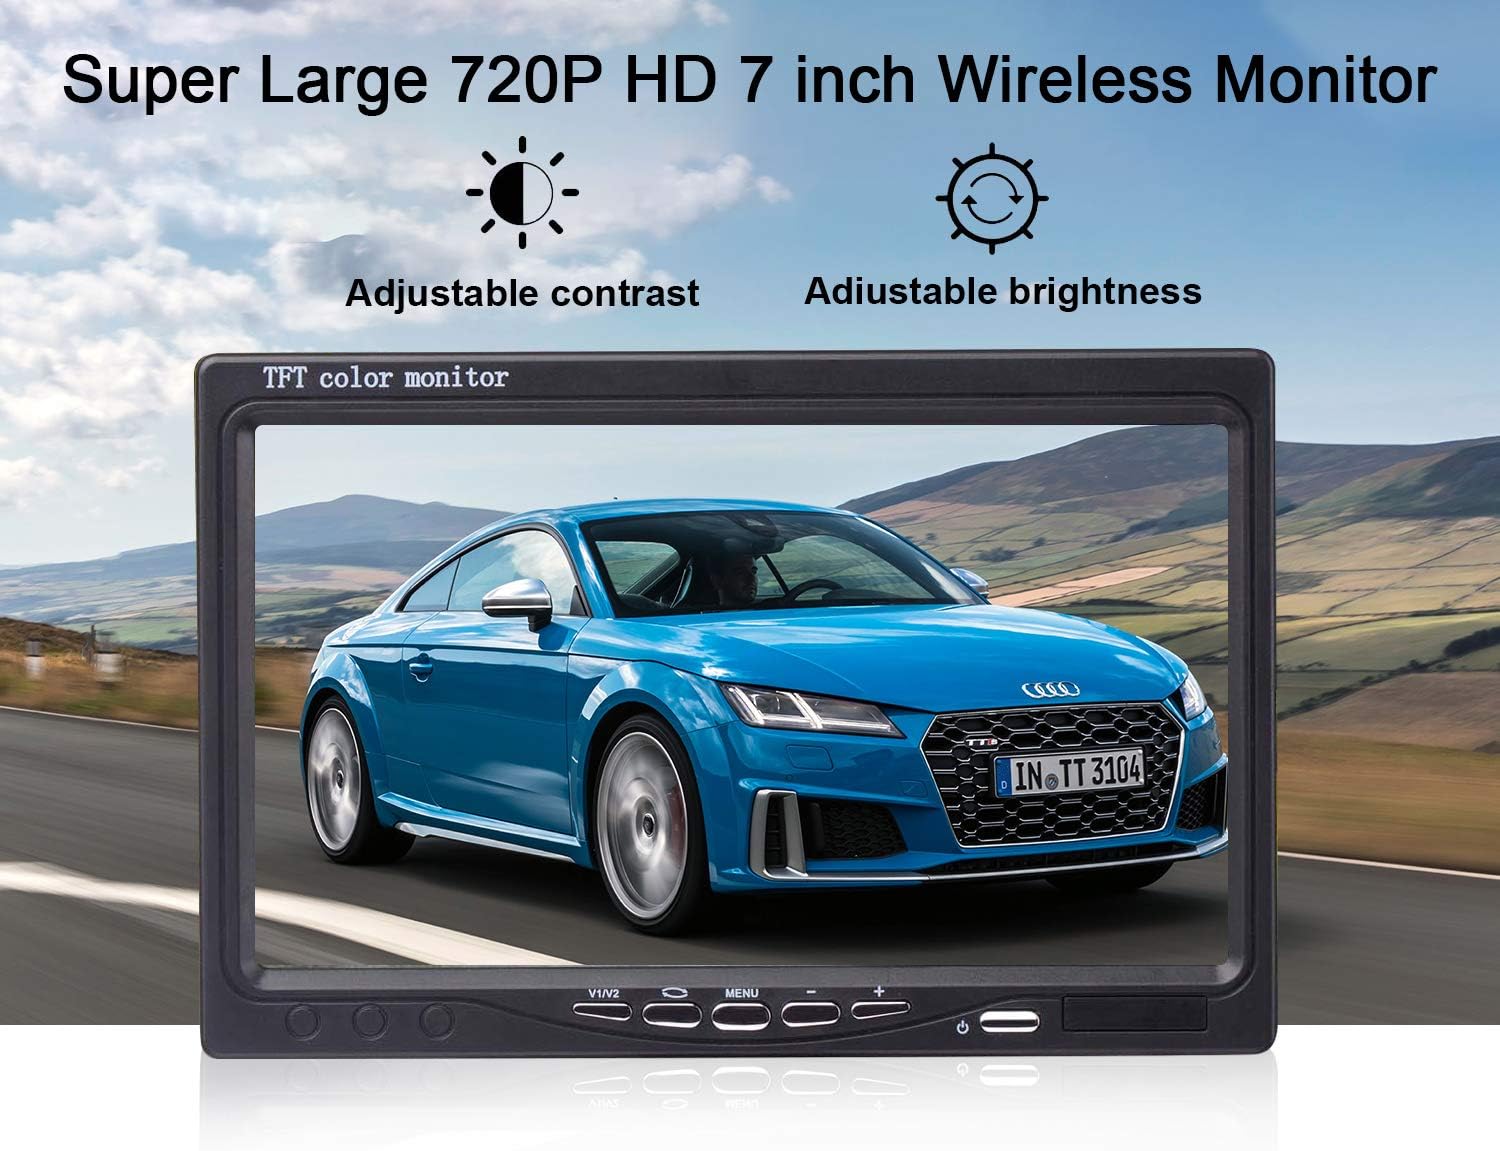
그림 3.2: The 7-inch wireless monitor. The image highlights the monitor's display quality and its adjustable contrast and brightness settings.

그림 3.3: Camera lens and features. This image details the 150-degree wide-angle lens, HD high-quality resolution with anti-blue ray and coated glass lenses, and the IP69 waterproof rating. An exploded view of the lens components is also shown.

그림 3.4: IP69 waterproof camera. The camera is shown submerged in splashing water, with icons indicating its IP69 waterproof rating, resistance to 176°F (80°C) and -22°F (-30°C), and a 6-glass lens construction.
4. 설정 및 설치
Proper installation is crucial for the optimal performance of your backup camera system. Follow these steps carefully.
4.1 모니터 설치
The monitor can be mounted on your vehicle's dashboard or windshield using the provided dash mount.
- Attach the dash mount securely to the desired location on your dashboard or windshield.
- Mount the 7-inch monitor onto the dash mount.
- Connect the monitor's power cable to the cigarette lighter power adapter, then plug it into your vehicle's 12V power outlet.
4.2 카메라 설치
The camera is typically installed near the license plate. It can be mounted either on the front of the license plate bracket or hidden behind it.
- Choose your preferred mounting position for the camera (front or behind the license plate).
- Securely attach the camera to the vehicle using the provided bracket and screws.
- Connect the camera's power cord to a 12V power source, typically the reverse light wiring for automatic activation when reversing. Ensure a stable power connection.
- Attach the camera antenna to the camera unit.

그림 4.1: Display and camera installation options. The top panel shows the monitor mounted on a dashboard. The bottom panel illustrates two camera installation methods: one with the bracket on the front of the license plate and another with the bracket hidden behind the license plate.
5. 사용 설명서
Once installed, the system is designed for straightforward operation.
5.1 전원 켜기/끄기
- The monitor will automatically power on when the vehicle's ignition is turned on and the camera receives power (e.g., when shifting into reverse).
- To manually power off, press and hold the power button on the monitor.
5.2 모니터 조정
Use the buttons on the monitor to access and adjust settings such as contrast and brightness for optimal view조건.
5.3 DIY Guide Lines
The system allows for customization of the parking guide lines displayed on the monitor.
- Guide Line On/Off: Toggle the guide lines visibility.
- Adjustment Width: Modify the width of the guide lines to match your vehicle's dimensions.
- Moving Left or Right: Adjust the horizontal position of the guide lines.
- Moving Up or Down: Adjust the vertical position of the guide lines.

그림 5.1: DIY Guide Lines adjustment options. This image displays four different views of the monitor, illustrating how guide lines can be turned on/off, their width adjusted, and their position moved left/right or up/down.
5.4 이미지 반전 기능
The monitor supports various image orientations to suit different camera mounting positions or user preferences.
- 정상: Standard image orientation.
- 거울: Flips the image horizontally, common for rear-view 응용 프로그램.
- Inverted Front Image: Flips the image vertically and horizontally.
- Inverted Mirror Image: 이미지를 세로로 뒤집습니다.

그림 5.2: Image Flip functionality. This image shows four different display modes: Normal, Mirror, Inverted Front Image, and Inverted Mirror Image, demonstrating how the camera's output can be adjusted.
6. 문제 해결
If you encounter issues with your AMTIFO Wireless Backup Camera Kit, refer to the following common problems and solutions.
- 모니터에 신호 없음:
- Ensure both the monitor and camera are receiving power. Check all power connections.
- Verify that the antennas are securely attached to both the monitor and camera.
- Check for any obstructions between the camera and monitor that might interfere with the wireless signal.
- Ensure the distance between the camera and monitor does not exceed the recommended wireless range (approximately 23 feet).
- 깜빡이거나 왜곡된 이미지:
- Check for strong electromagnetic interference from other devices in the vehicle.
- Ensure power connections are stable and free from fluctuations.
- Adjust the monitor's brightness and contrast settings.
- 후진 시 카메라가 작동하지 않음:
- Verify that the camera's power cord is correctly wired to the vehicle's reverse light circuit.
- Check the fuse for the reverse lights.
7. 사양
| 특징 | 사양 |
|---|---|
| 상표 | 암티포 |
| 화면 크기 | 7 인치 |
| 호환 장치 | 감시 장치 |
| 설치 유형 | Monitor (Dash/Windshield) |
| 권tage | 12 볼트 |
| 실제 각도 View | 150도 |
| 커넥터 유형 | 플러그인 |
| 한국어: | 602191490785 |
| 제조업체 | 암티포 |
8. 유지관리
To ensure the longevity and optimal performance of your backup camera system, follow these maintenance guidelines:
- 모니터 청소: Use a soft, dry cloth to clean the monitor screen. For stubborn smudges, lightly damp천에 물이나 화면에 안전한 세척제를 묻혀 닦아주세요. 연마재나 강한 화학 물질은 사용하지 마세요.
- 카메라 렌즈 청소하기: 카메라 렌즈는 주기적으로 부드러운 천으로 닦아주세요.amp 먼지, 흙 또는 물 얼룩을 제거하기 위한 천으로 막힘을 방지합니다. view. Do not use excessive force or abrasive cleaners.
- 연결 확인 중: Regularly inspect all power and antenna connections to ensure they are secure and free from corrosion.
- 날씨 보호: While the camera is IP69 waterproof, extreme weather conditions (e.g., heavy snow, ice) may temporarily affect performance. Ensure the lens is clear before driving.
9. 보증 및 지원
For warranty information, technical support, or service inquiries, please contact AMTIFO customer service through the retailer where the product was purchased or refer to the official AMTIFO web지원팀에 문의하실 때는 제품 모델명과 구매 정보를 미리 준비해 주세요.