1. 서론
The MISOL Wireless Weather Station HP3001 is designed to monitor temperature and humidity across multiple locations. It supports up to 8 sensors (5 included) and features a color screen display, data logging capabilities, and PC connectivity for advanced analysis. This manual provides instructions for setting up, operating, and maintaining your weather station.
2. 패키지 내용
- 디스플레이 콘솔 1개
- 5x Thermo-hygrometer Transmitters (WH31)
- 1x USB Cable for PC Connection
- 1x Power Adapter (EU plug version, adapter may be required for other regions)
- 1x CD (Software)
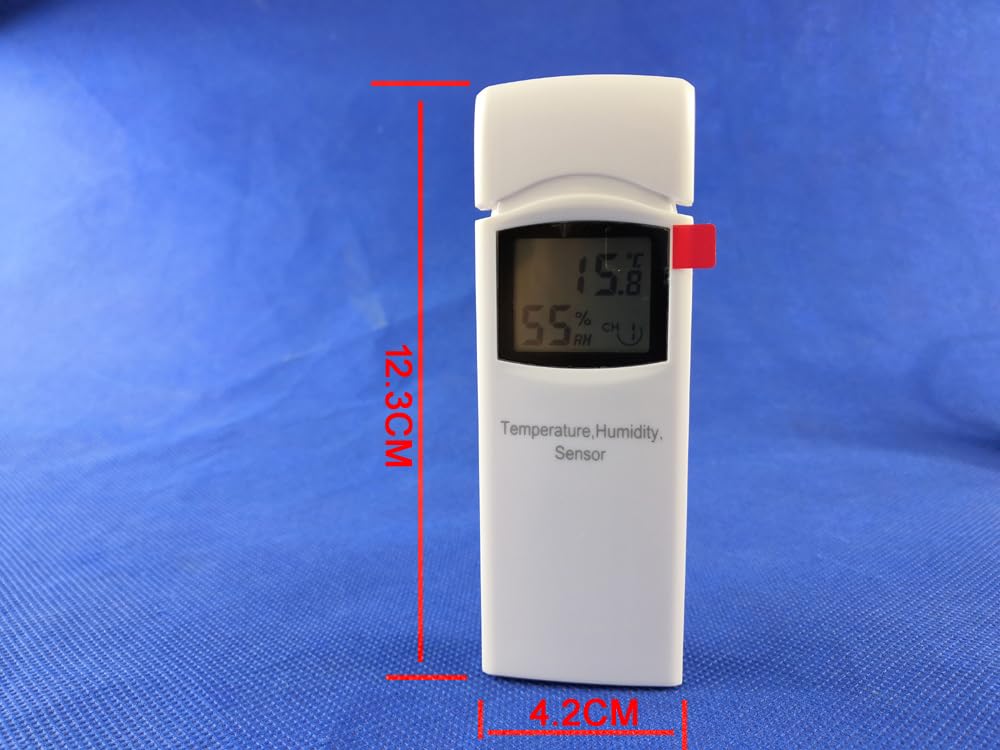
Image: Contents of the MISOL Wireless Weather Station HP3001 package, including the display console, five sensors, USB cable, power adapter, and software CD.
3. 제품 오버view
3.1 디스플레이 콘솔
The main display console features a color LCD screen that shows real-time temperature, humidity, dew point, and heat index data from up to 8 channels. It includes buttons for navigation, graph display, and menu access.
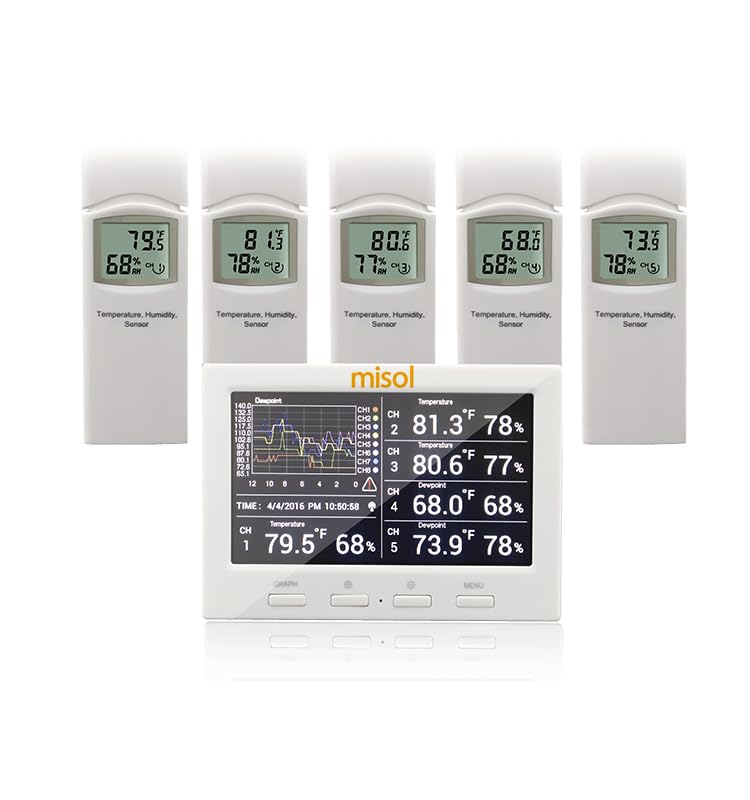
Image: The MISOL Wireless Weather Station HP3001 display console shown with five remote thermo-hygrometer sensors.

Image: Close-up of the display console showing temperature and humidity readings for multiple channels, along with a historical data graph.
3.2 Thermo-hygrometer Sensors (WH31)
Each sensor measures temperature and humidity and transmits data wirelessly to the display console. They are battery-powered and feature DIP switches for channel selection.

Image: A single MISOL WH31 remote thermo-hygrometer sensor, displaying temperature and humidity.
4. 설정
4.1 Sensor Battery Installation and Channel Selection
- Open the battery compartment on the back of each WH31 sensor.
- Insert 2x AA 1.5V alkaline batteries (not included), observing polarity.
- Use the DIP switches inside the battery compartment to select a unique channel (1-8) for each sensor. Ensure no two sensors are set to the same channel. The product includes 5 sensors, so assign channels 1 through 5.
- 배터리 칸을 단단히 닫으세요.

Image: The open battery compartment of a WH31 sensor, showing the slots for two AA batteries and the DIP switches for channel selection.
4.2 Display Console Power-Up
- Connect the provided power adapter to the display console's power input.
- Plug the power adapter into a suitable electrical outlet. The console will power on and begin searching for sensors.
4.3 Pairing Sensors with Console
Once the console is powered on and sensors have batteries installed with unique channels selected, the console will automatically attempt to pair with the sensors. Ensure sensors are within range (up to 100 meters in open field). It may take a few minutes for all sensor data to appear on the display.
5. 운영
5.1 디스플레이 모드 및 정보
- The console displays temperature, humidity, dew point, and heat index.
- It supports both vertical and horizontal display orientations, which can be switched via the menu.
- Min/Max records for temperature and humidity are maintained.
- An LED backlight ensures readability in various lighting conditions.

Image: The display console showing temperature and humidity readings for up to eight channels simultaneously.
5.2 버튼 기능
The console features several buttons for interaction:
- 그래프: Toggles the display to show historical data graphs.
- 메뉴: Accesses the settings menu for configuration options such as time, date, alarms, and unit calibration.
- 탐색 버튼: 메뉴 옵션을 탐색하고 설정을 조정하는 데 사용됩니다.

Image: The display console showing the 'Setup' menu, with options for channel area setup, graph time, time format, date format, date and time, and temperature units.
5.3 PC Connection and Data Logging
The weather station can connect to a PC via the included USB cable for data logging and advanced settings. The provided software (on CD) allows for:
- 라이브 데이터 디스플레이
- 알람 설정
- Calibrating Temperature and Humidity
- Exporting historical data from an optional TF card (not included) in CSV format.
- Synchronizing Date and Time from the computer.
To use data logging, insert a TF card (MicroSD card) into the designated slot on the console. Data will be saved in CSV format.

이미지: 후면 view of the display console, highlighting the USB port for PC connection and the TF card slot for data logging.
6. 유지관리
- 배터리 교체: Replace sensor batteries (2x AA) when the low battery indicator appears on the console for that channel.
- 청소: 디스플레이 콘솔과 센서를 부드러운 천으로 닦으십시오.amp 천으로 닦으세요. 연마성 세제나 용제는 사용하지 마세요.
- 센서 배치: For accurate outdoor readings, place sensors in a shaded area, away from direct sunlight and heat sources, to prevent false readings.
7. 문제 해결
- 센서 데이터가 표시되지 않습니다:
- Ensure sensor batteries are correctly installed and not depleted.
- Verify each sensor has a unique channel selected via its DIP switches.
- Check if sensors are within the wireless transmission range (100m max in open field) and without significant obstacles.
- Restart both the console and the sensors.
- 부정확한 판독:
- Ensure sensors are not exposed to direct sunlight, rain, or extreme heat/cold sources.
- Calibrate temperature and humidity using the PC software if necessary.
- PC 소프트웨어 연결 문제:
- Ensure the USB cable is securely connected to both the console and the PC.
- Install the software from the provided CD.
- Check device manager for proper driver installation.
8. 사양
| 특징 | 사양 |
|---|---|
| Transmission Distance (open field) | 최대 100 미터 |
| 빈도 | 868MHz |
| 온도 측정 범위 | -40 ~ 60°C |
| 온도 분해능 | 0.1도 |
| 온도 정확도 | +/- 1 ° C |
| 습도 측정 범위 | 10%에서 99%까지 |
| 습도 정확도 | +/-5% (20 to 90% under 0-45°C) |
| 알람 지속 시간 | 120초 |
| Waterproof Level (Sensors) | IPX3 |
| Display Console Dimensions (LxHxW) | 11.5 x 8.2 x 4cm |
| Display LCD Dimensions (LxW) | 9.5 x 5.5cm |
| Sensor Dimensions (LxHxW) | 12 x 4.2 x 1.8cm |
| Console Power Consumption | 5V DC 어댑터(포함) |
| 원격 센서 전원 | 2x AA 1.5V alkaline batteries (not included) |
9. 보증 및 지원
For warranty information and technical support, please refer to the documentation included with your product or contact MISOL customer service. Keep your purchase receipt for warranty claims.
For further assistance, visit the official MISOL web사이트를 방문하거나 판매점에 문의하세요.