
1. 서론
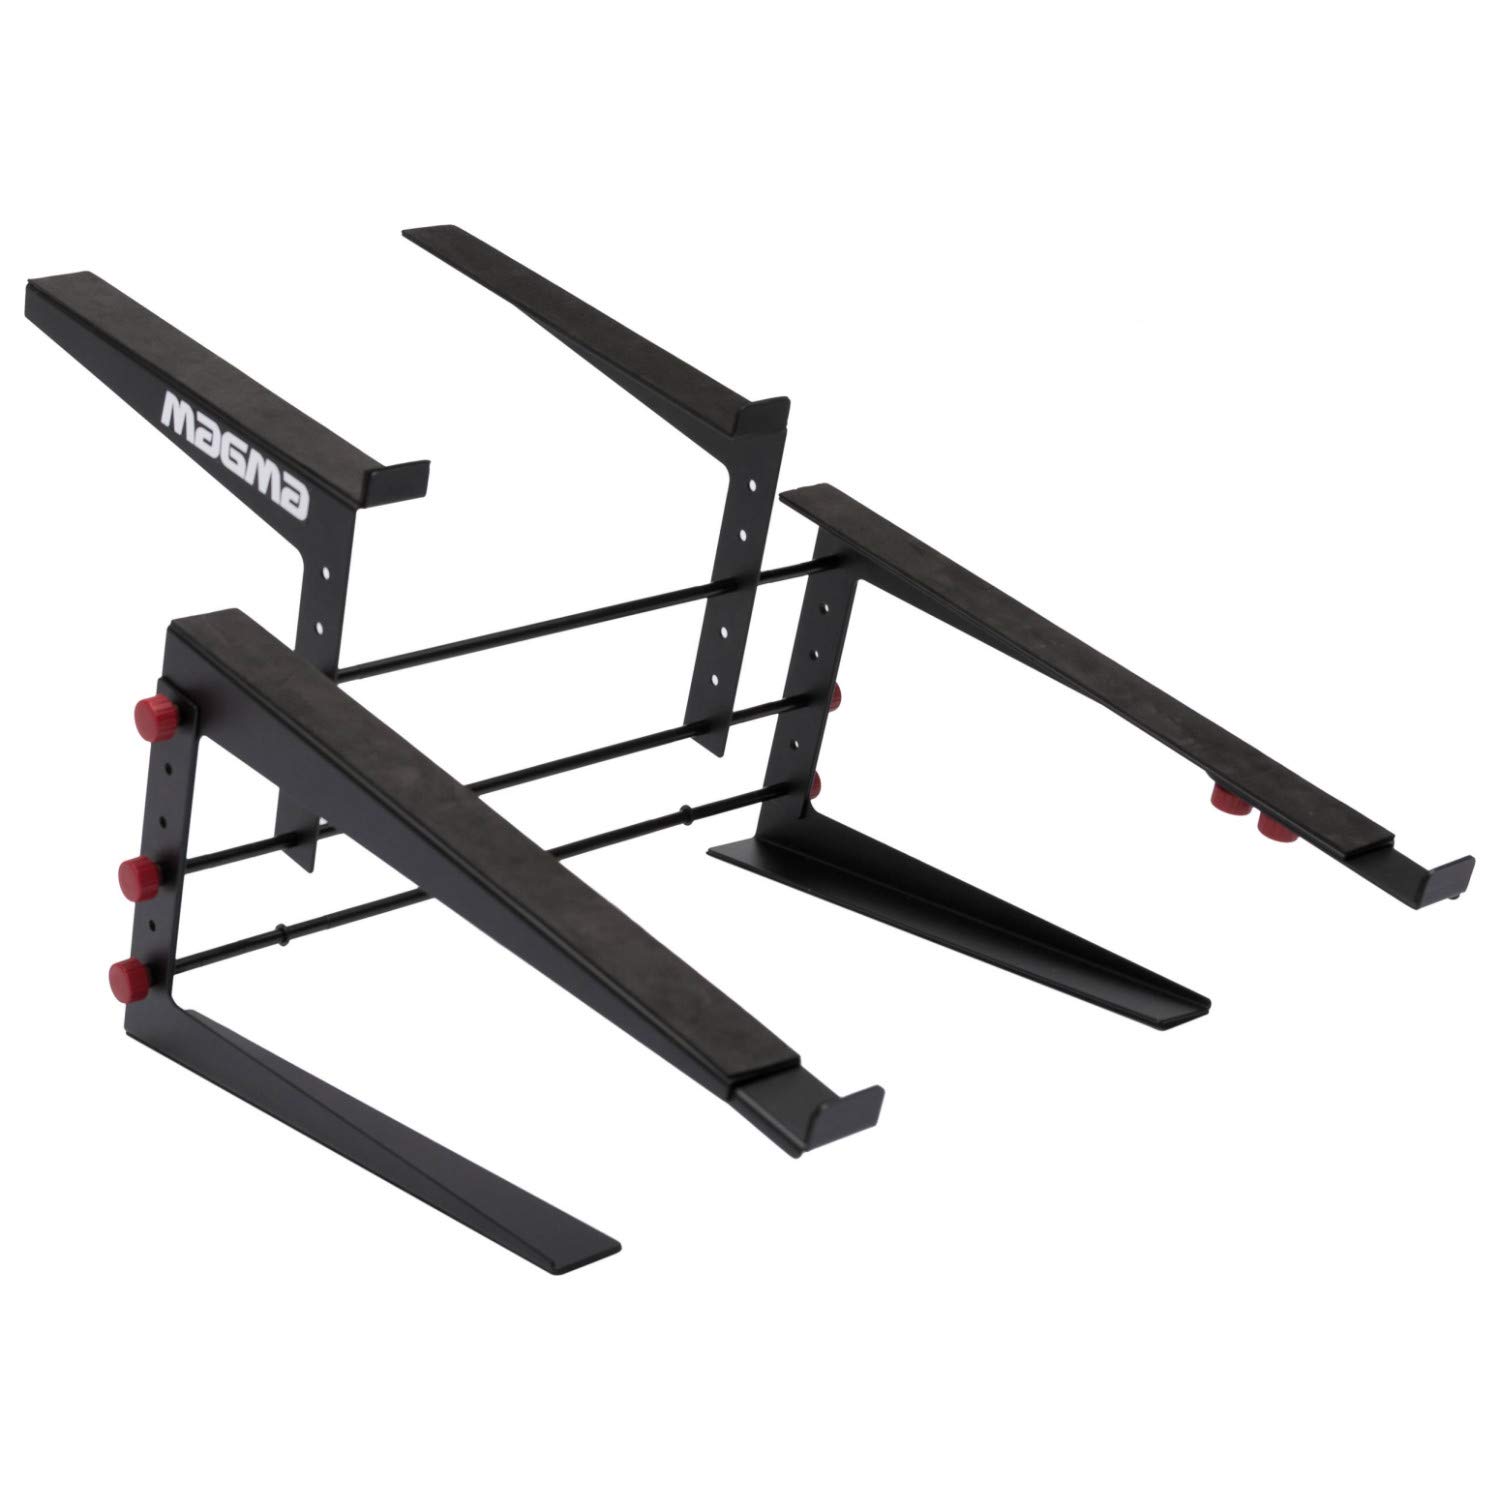
The Magma Control Stand II is a robust and versatile platform designed to elevate your laptop and DJ controller, optimizing space and ergonomics in studio, club, or home environments. Its adjustable design allows for customized height and width settings for both the laptop and controller platforms, accommodating a wide range of equipment. This manual provides detailed instructions for assembly, operation, maintenance, and troubleshooting to ensure safe and effective use of your stand.
2. 안전 정보
- Always ensure all adjustment knobs and fasteners are securely tightened before placing any equipment on the stand. Loose connections can lead to instability and potential damage to your devices.
- Do not exceed the recommended weight capacity of the stand. While robust, overloading can compromise stability.
- 넘어지지 않도록 안정적이고 평평한 표면에 거치대를 놓으십시오.
- Keep the stand away from liquids to prevent damage to the stand and any electronic equipment placed on it.
- Exercise caution during assembly and adjustment to avoid pinching fingers or other body parts.
- Regularly inspect the stand for any signs of wear, damage, or loose components. Discontinue use if damage is found until repairs are made.
3. 패키지 내용
조립을 시작하기 전에 모든 구성 요소가 있는지 확인하세요.
- 1x 베이스 프레임
- 2x Vertical Support Rods
- 1x Laptop Platform (with adjustable arms)
- 1x Controller Platform (with adjustable arms)
- 6x Red Adjustment Knobs (for height and width adjustments)
- 4x Small Red Knobs (for platform arm extension)
- Non-slip rubber pads (pre-applied or separate for application)
- 조립 하드웨어(나사, 와셔 등)
4. 설치 및 조립
Follow these steps to assemble your Magma Control Stand II. It is recommended to have a flat, clear workspace.
- Attach Vertical Support Rods to Base: Insert the two vertical support rods into the designated holes on the base frame. Secure them from underneath using the provided screws and washers. Ensure they are firmly tightened.
- Install Controller Platform: Slide the controller platform onto the vertical support rods. Position it at your desired initial height. Secure it in place using two of the large red adjustment knobs, screwing them into the threaded holes on the platform arms and tightening against the rods.
- Install Laptop Platform: Similarly, slide the laptop platform onto the vertical support rods above the controller platform. Adjust its height and secure it with two more large red adjustment knobs.
- Adjust Platform Width (Controller): The controller platform arms can be extended. Loosen the small red knobs on the underside of the controller platform arms. Slide the arms outwards or inwards to achieve the desired width for your controller. Retighten the small red knobs securely.
- Adjust Platform Width (Laptop): Repeat the width adjustment process for the laptop platform using its small red knobs.
- 최종 조임: After all components are in place and adjusted to your preferred settings, double-check and securely tighten 모두 red adjustment knobs and any other fasteners. This is crucial for the stand's stability.

5. 사용 설명서
Once assembled, the Magma Control Stand II offers flexible positioning for your equipment.
- 높이 조절: To change the height of either the laptop or controller platform, loosen the two large red adjustment knobs on the respective platform's arms. Slide the platform up or down the vertical support rods to the desired position. Retighten the knobs firmly to secure the platform.
- 폭 조정: To change the width of either platform, loosen the small red knobs located on the underside of the platform arms. Extend or retract the arms to fit your specific device. Ensure the device rests securely on the non-slip rubber surface. Retighten the small red knobs firmly.
- 장비 배치: Carefully place your laptop on the upper platform and your DJ controller on the lower platform. Ensure they are centered and stable on the non-slip surfaces. The stand is designed to accommodate a DJ controller and a laptop simultaneously.
6. 유지관리
- 청소: Wipe the stand with a soft, dry cloth to remove dust. For stubborn dirt, a slightly damp 천을 사용하여 세척 후 바로 말리세요. 연마성 세척제나 용제는 사용하지 마세요.
- 점검: Periodically check all screws, bolts, and adjustment knobs for tightness. Over time, vibrations or movement can cause fasteners to loosen. Retighten as necessary to maintain stability.
- 고무 패드: Ensure the non-slip rubber pads on the platforms and feet are intact and clean to provide maximum grip and prevent scratches.
7. 문제 해결
If you encounter issues with your Magma Control Stand II, refer to the following common problems and solutions:
- Issue: Stand feels wobbly or unstable.
해결책: This is the most common issue reported. Ensure 모두 adjustment knobs (both large and small red ones) are tightened as firmly as possible. Check the screws securing the vertical support rods to the base. If the issue persists, disassemble and reassemble, paying close attention to fully tightening each connection point. Some users have found that using pliers to tighten the initial assembly pegs can help, but be careful not to strip threads or scratch the finish.
- Issue: Difficulty in assembling or tightening knobs.
해결책: Some components, particularly the initial pegs or threaded parts, may require extra effort or a tool like a wrench/pliers for initial tightening. Apply firm, steady pressure. If threads appear stripped, contact customer support.
- Issue: Equipment slides on the platform.
해결책: Ensure the non-slip rubber pads are clean and free of dust or oils. If pads are missing or damaged, contact customer support for replacements.
8. 사양
| 특징 | 세부 사항 |
|---|---|
| 모델 번호 | MGA75541 |
| 품목 무게 | 3.08파운드(1.4kg) |
| 제품 크기(L x W x H) | 16.5 x 18.5 x 13.77인치(41.9 x 47 x 35cm) |
| Laptop Platform Dimensions (H/W/D) | 23-35 x 23-33 x 30 cm / 9-13.77 x 9-12.99 x 11.8 inch |
| Controller Platform Dimensions (H/W/D) | 23-28 x 23-47 x 37-42 cm / 9-11 x 9-18.5 x 14.5-16.5 inch |
| 재료 유형 | Rubber (for non-slip surfaces) |
| 호환 장치 | Laptops, DJ Controllers (e.g., Pioneer DDJ-SZ/RZ/SX/RX/SR/RR/SB2/RB, Roland DJ-808, Denon MCX-8000/MC-7000, Numark NS-6, Native Instruments Traktor Kontrol S8/S5/S4/S2) |
9. 보증 및 지원
Magma products are manufactured with quality and durability in mind. For specific warranty information, please refer to the documentation included with your purchase or visit the official Magma website. If you require technical assistance, have questions about assembly, or need replacement parts, please contact Magma customer support through their official channels.
자세한 내용은 다음을 방문하세요. Magma Store on Amazon.