
소개
This manual provides instructions for the assembly, operation, and maintenance of your BONTEC MTR-B2 2-Tier Wood Monitor Stand Riser. This product is designed to elevate your monitor to an ergonomic height, reduce neck and back strain, and organize your workspace with its integrated storage and cable management features.
제품 특징
- 프리미엄 품질의 재료: Constructed from eco-friendly MDF wood with a smooth finish for durability and stability.
- 인체공학적 디자인: Elevates your screen by 5.6 inches to eye level, promoting healthier posture and reducing strain.
- Spacious 2-Tier Storage: 제공합니다 ample space (21.3 inches wide) for laptops, keyboards, and other desk essentials.
- 통합 케이블 관리: Features a built-in system and cellphone holder to keep your workspace organized and clutter-free.
- 쉬운 조립: Designed for quick and straightforward assembly.
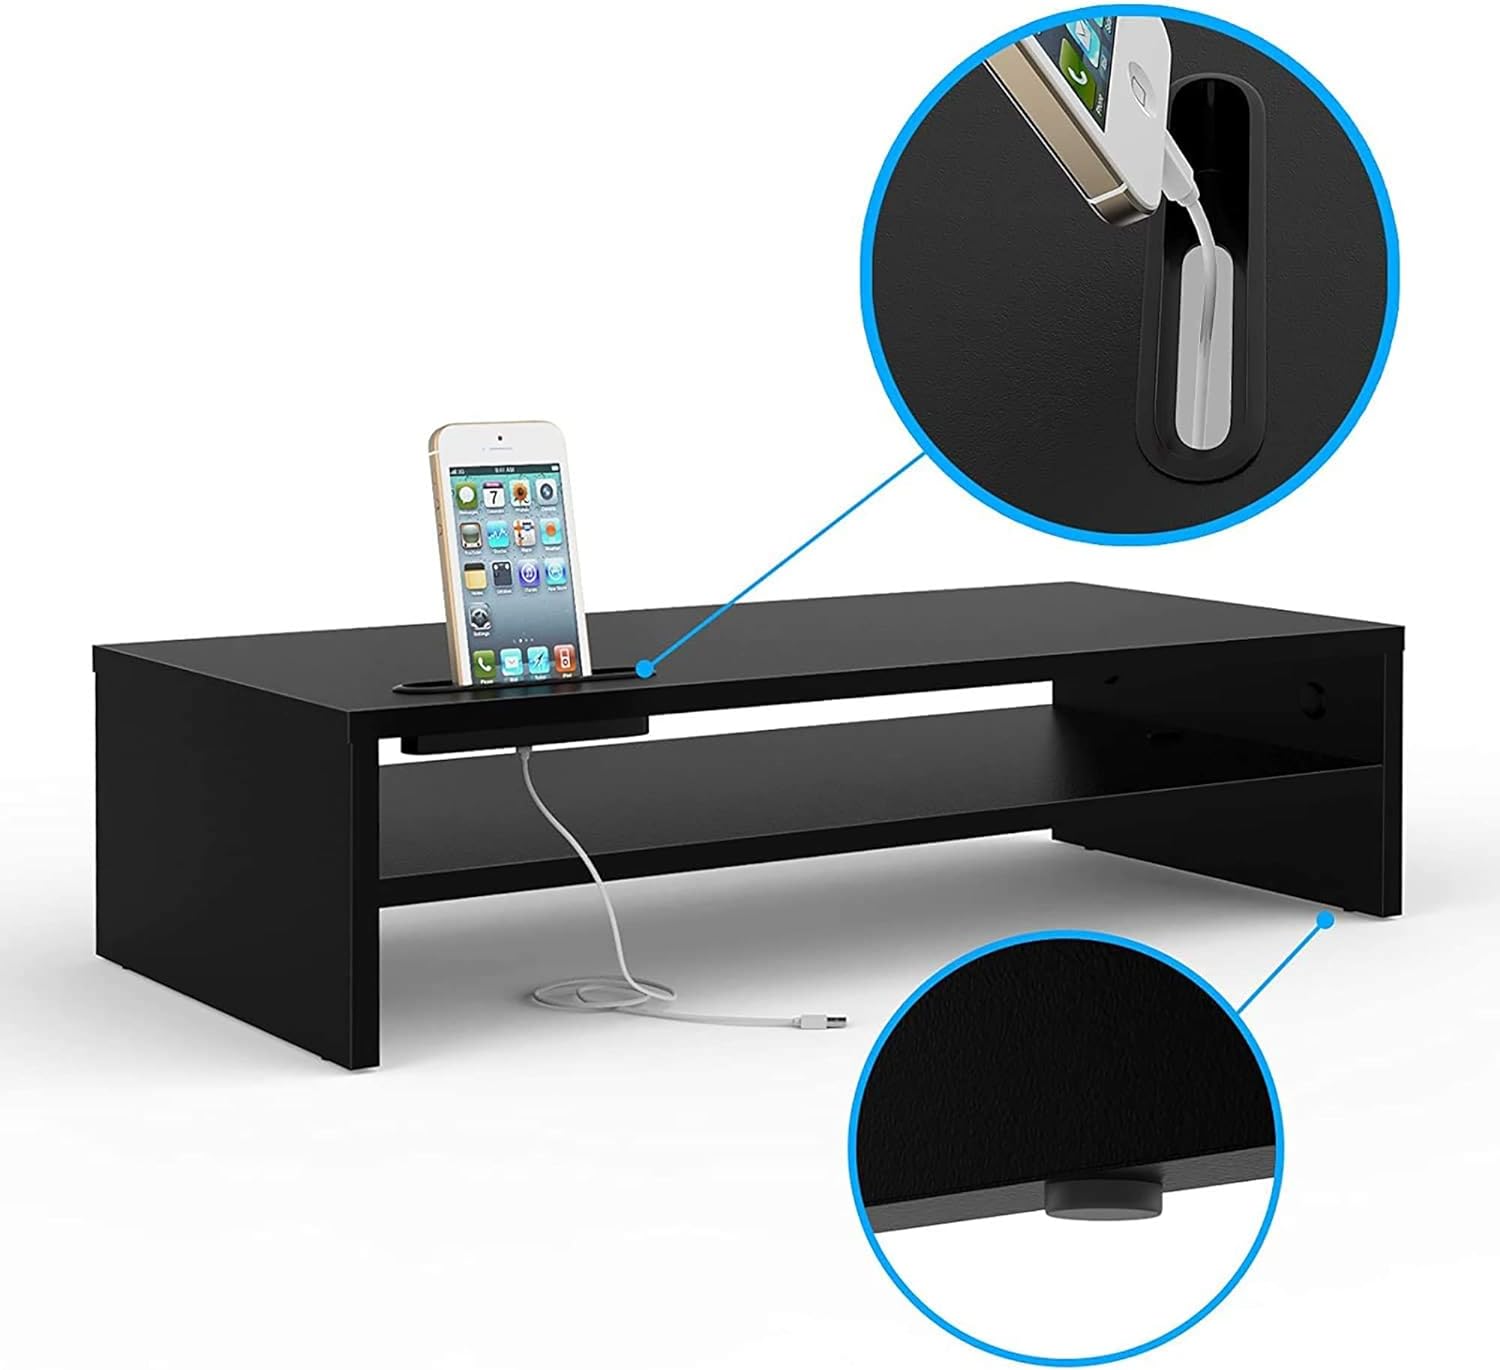
- 안정적인 디자인: Includes soft rubber feet to ensure stability and protect your desk surface.

패키지 내용
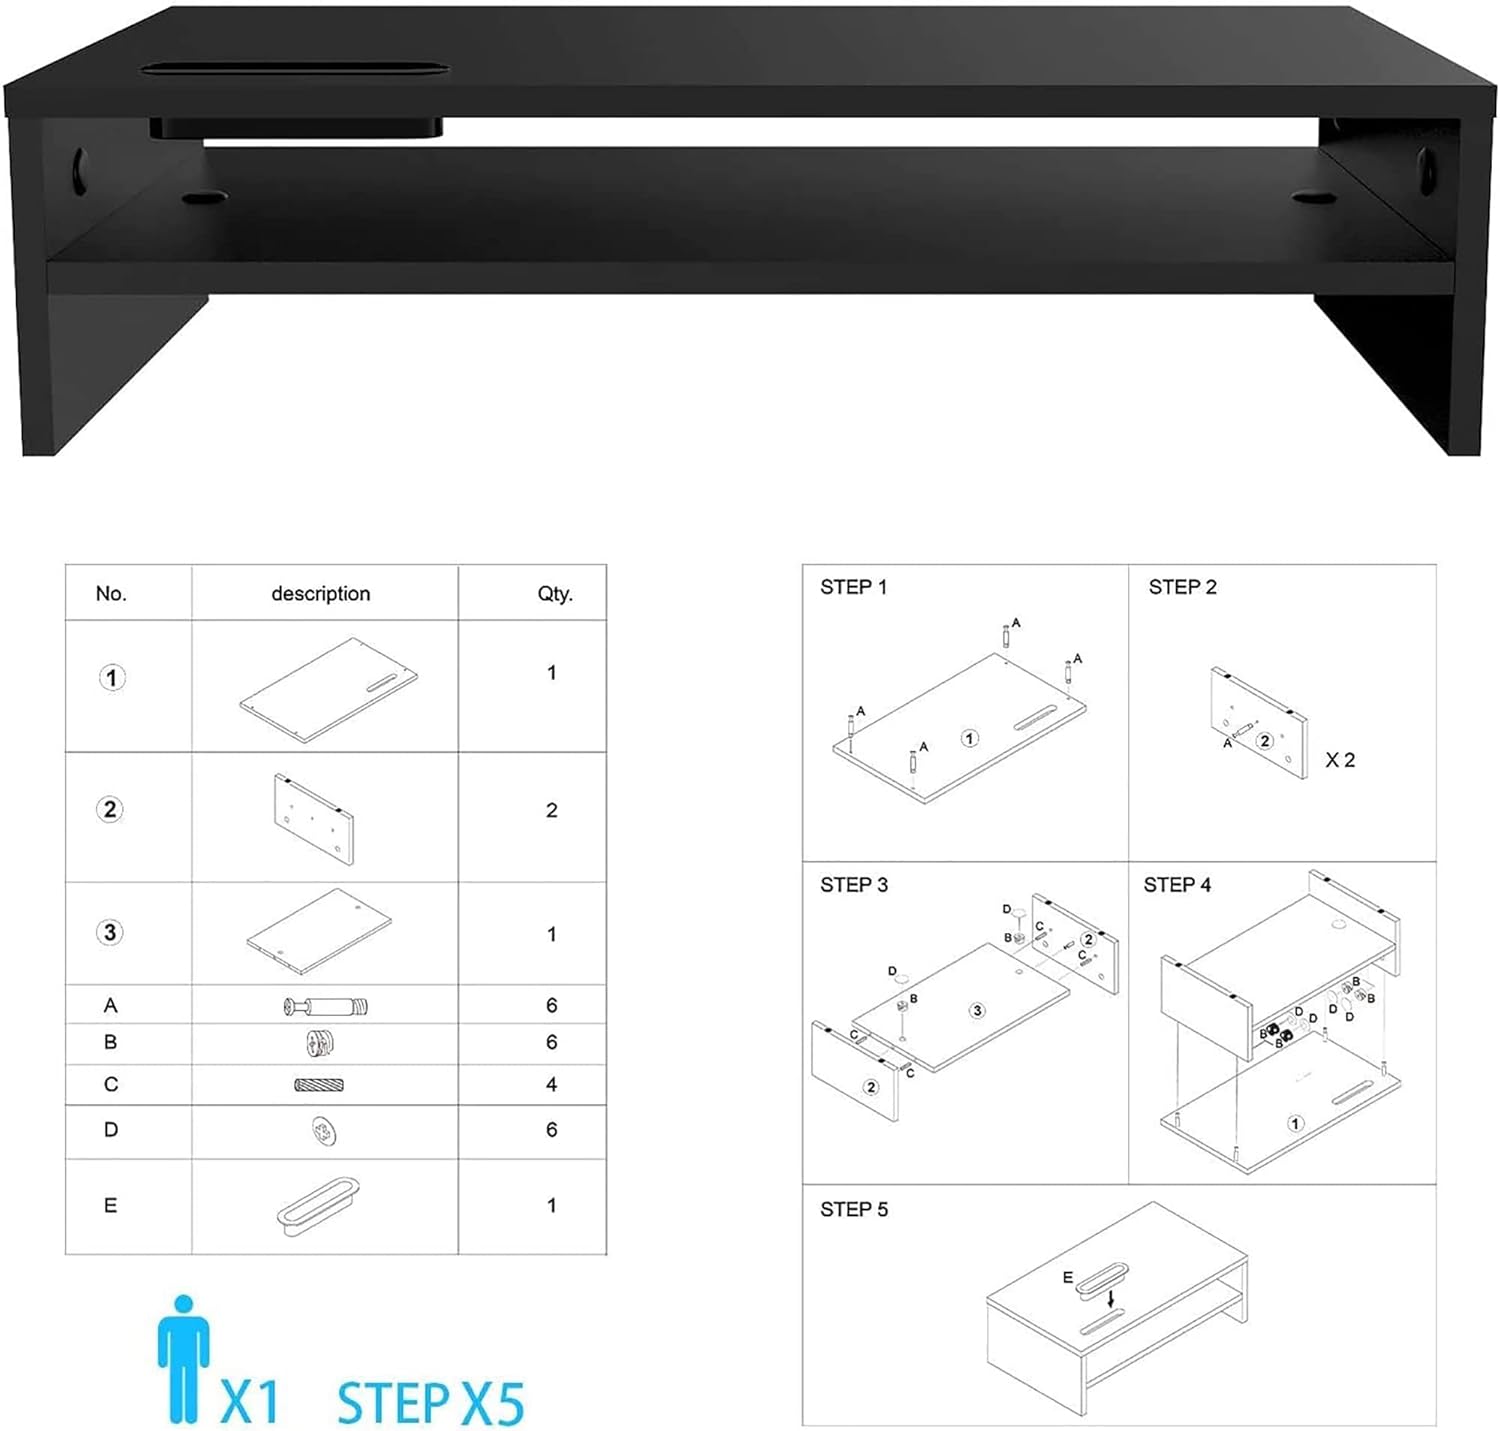
Please verify that all components are present before beginning assembly. Refer to the assembly diagram for visual identification.
- Top Shelf Board (x1)
- Side Support Boards (x2)
- 중간 선반 보드(x1)
- Connecting Screws (Type A, x6)
- Cam Locks (Type B, x6)
- Wooden Dowels (Type C, x4)
- Rubber Feet (Type D, x6)
- Cable Management Clip (Type E, x1)
조립 설명서
Follow these steps to assemble your BONTEC MTR-B2 Monitor Stand Riser. A screwdriver is required (not included).
- Step 1: Attach Connecting Screws to Top Shelf. Insert 4 connecting screws (Type A) into the pre-drilled holes on the underside of the top shelf board. Ensure they are securely fastened.
- Step 2: Attach Wooden Dowels to Side Supports. Insert 2 wooden dowels (Type C) into the corresponding holes on the inner side of each side support board.
- Step 3: Connect Side Supports to Middle Shelf. Align the middle shelf board with the wooden dowels on the side support boards. Secure the middle shelf to the side supports using 2 cam locks (Type B) on each side. Turn the cam locks clockwise until tight.
- Step 4: Attach Top Shelf to Assembled Base. Align the top shelf (with connecting screws from Step 1) with the holes on the top edges of the assembled side and middle shelves. Secure the top shelf using the remaining 2 cam locks (Type B) on each side. Turn clockwise until tight.
- Step 5: Apply Rubber Feet. Attach the 6 rubber feet (Type D) to the bottom corners and center of the stand to prevent scratching and ensure stability.
- Step 6: Install Cable Management Clip. Attach the cable management clip (Type E) to the desired side of the stand for organizing cables.
Note: Do not overtighten screws to avoid damaging the wood.
작동 지침
Your BONTEC MTR-B2 Monitor Stand Riser is designed for versatile use to enhance your workspace.
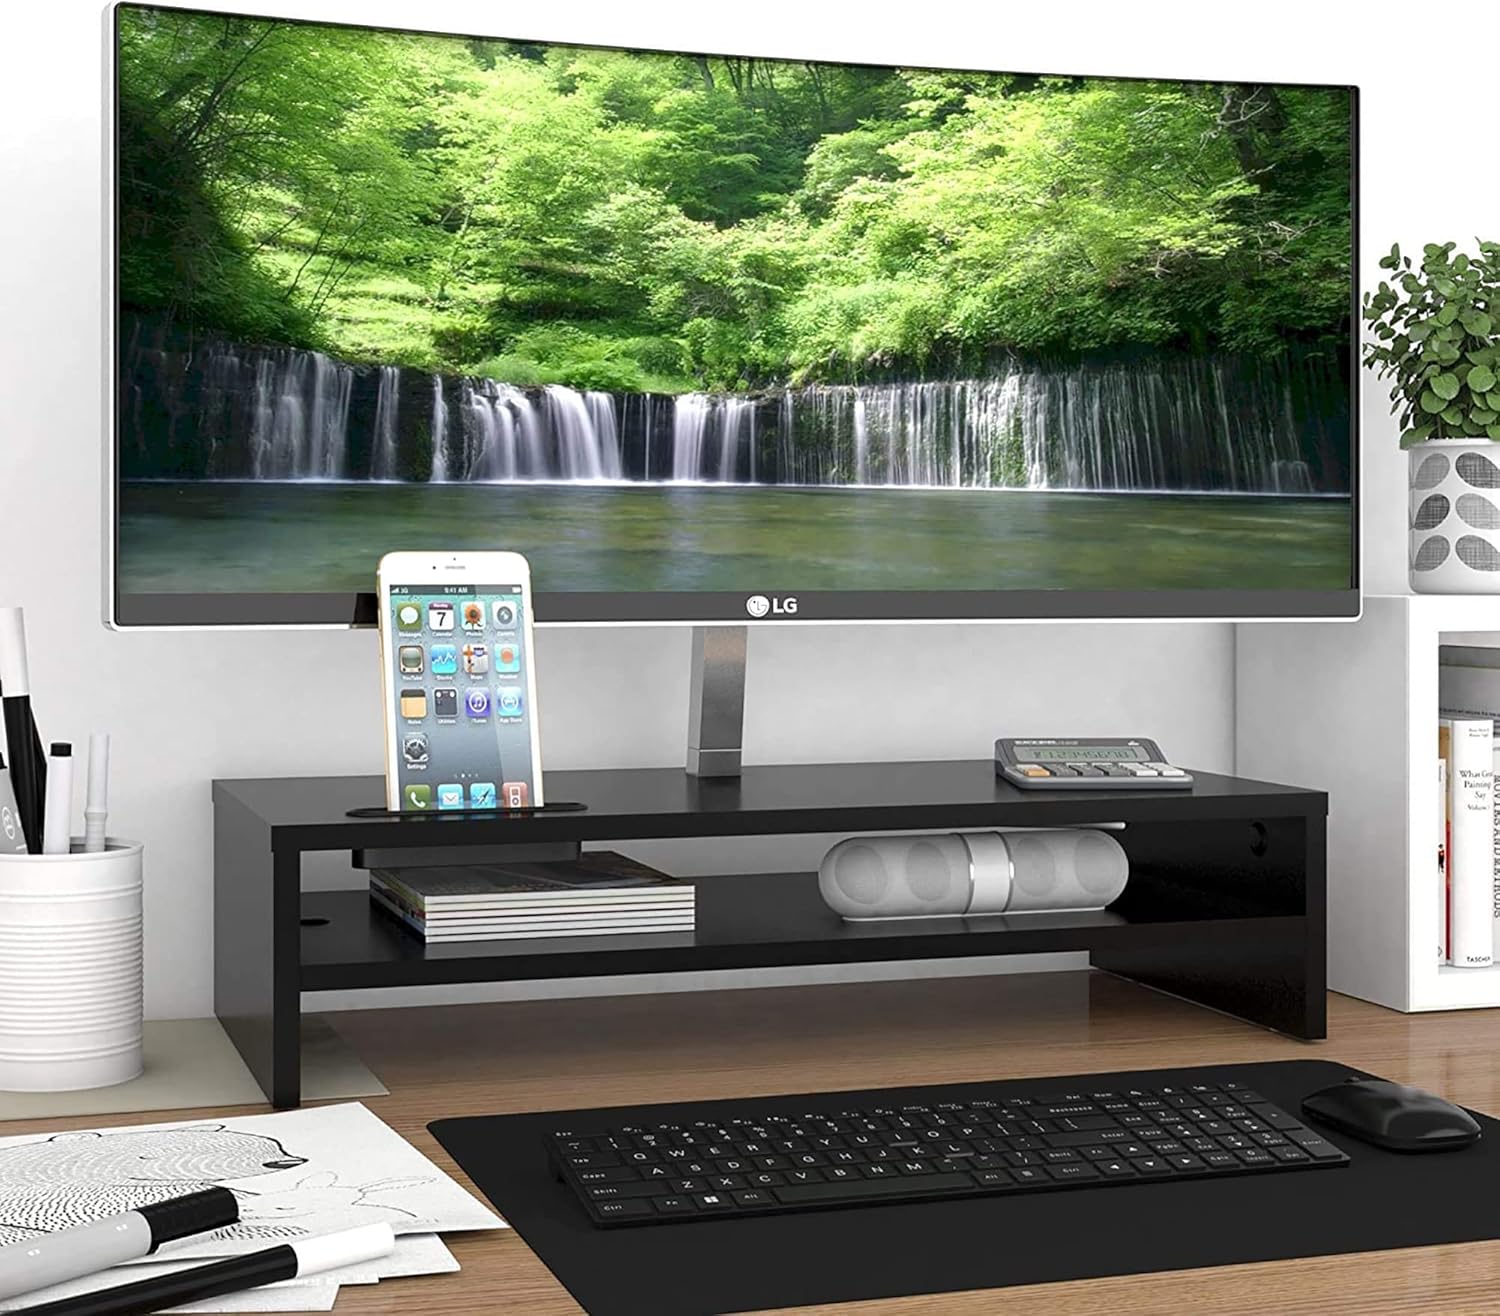
- 모니터 배치: Place your monitor securely on the top surface of the stand. Ensure the monitor's base fits within the dimensions of the stand.
- 키보드 보관: Utilize the space beneath the middle shelf to store your full-size keyboard when not in use, freeing up desk space.
- 액세서리 보관: The middle shelf and side compartments are ideal for organizing notebooks, pens, external hard drives, or other small office supplies.
- Cellphone Holder: Use the integrated slot on the top surface to hold your cellphone upright. The slot is designed to allow charging cables to pass through for convenience.
- 케이블 관리 : Route power cords and data lines through the attached cable management clip to keep them tidy and prevent tangles.


유지
To ensure the longevity and appearance of your monitor stand, follow these simple maintenance guidelines:
- 청소: 부드러운 d로 표면을 닦으십시오.amp 천으로 닦으세요. 강한 화학 물질이나 연마성 세제는 마감재를 손상시킬 수 있으므로 사용하지 마세요.
- 가루 살포: 먼지가 쌓이는 것을 방지하기 위해 스탠드를 정기적으로 닦아주세요.
- 안정성 확인: 모든 나사와 연결부가 단단히 조여져 있는지 정기적으로 점검하세요. 필요하면 다시 조이세요.
- 과도한 체중을 피하세요: Do not exceed the maximum load capacity of 66 pounds (30 kg) to prevent damage or instability.
- 습기로부터 보호: Keep the stand away from excessive moisture or direct sunlight to prevent warping or discoloration of the wood.
문제 해결
If you encounter any issues with your BONTEC MTR-B2 Monitor Stand Riser, refer to the following common solutions:
| 문제 | 가능한 원인 | 해결책 |
|---|---|---|
| 스탠드가 흔들리거나 불안정합니다. | Screws are loose; uneven surface; missing rubber feet. | Ensure all connecting screws and cam locks are tightened. Place the stand on a flat, stable surface. Verify all rubber feet are attached. |
| 조립 시 어려움이 있습니다. | 부품 방향이 잘못되었거나, 하드웨어가 누락되었습니다. | Review the assembly instructions and diagrams carefully. Ensure parts are oriented correctly. Check package contents against the list. Do not force parts together. |
| Monitor does not fit on the stand. | Monitor base is too large for the stand's top surface. | Verify your monitor's base dimensions against the stand's top surface dimensions (21.26 x 10.04 inches). |
명세서
| 기인하다 | 세부 사항 |
|---|---|
| 모델 번호 | MTR-B2 |
| 상표 | 본텍 |
| 재료 | 엔지니어드 우드(MDF) |
| 색상 | 검은색 |
| 제품 크기(L x W x H) | 21.26 x 10.04 x 5.59인치(540 x 255 x 142mm) |
| 품목 무게 | 7파운드(3.17kg) |
| 하중 용량 | 66파운드(30kg) |
| 조립이 필요합니다 | 예 |
| 특징 | Lightweight, 2-Tier Storage, Cable Management, Cellphone Holder |

제품 비디오
BONTEC 2-Tier Wood Monitor Stand Riser Overview
Video 1: Product Features and Installation Steps. 이 비디오는 포괄적인 내용을 제공합니다.view of the BONTEC 2-Tier Wood Monitor Stand Riser, highlighting its key features, dimensions, and a visual guide for assembly. It demonstrates how the stand helps organize your desktop and supports a full-size keyboard.
BONTEC Extra Long 21.3 Inch 2 Tiers Wood Monitor Stand
Video 2: Detailed Product View. This video offers a closer look at the extra-long 21.3-inch BONTEC monitor stand, emphasizing its two-tier design and how it accommodates various desk setups for improved organization and ergonomics.
보증 및 고객 지원
BONTEC is committed to providing high-quality products and exceptional customer service. If you encounter any issues with your monitor stand, please do not hesitate to contact our dedicated support team.
Our customer support is available to address any concerns you may have and ensure your experience is satisfactory. Please refer to your purchase documentation or the BONTEC web구체적인 보증 세부 사항과 연락처 정보는 해당 사이트를 참조하세요.