
RAYSON PD-1501
User Manual: Rayson PD-1501 Coil Binding Machine
Model: PD-1501 | Brand: RAYSON
1. 서론
The Rayson PD-1501 is a robust coil binding machine designed for professional document binding. It features a manual punch operation combined with an electric coil inserter, making it suitable for frequent use in small to medium office environments. This machine is compatible with 4:1 pitch spiral binding coils and can punch 46 round holes, accommodating letter size, A4, or A5 papers. Its durable metal construction ensures long-lasting performance.

Image: The Rayson PD-1501 Coil Binding Machine, shown with included pliers and a selection of binding coils.
2. 안전 지침
- 기계를 작동하기 전에 모든 지침을 읽으십시오.
- Keep hands and loose clothing away from moving parts, especially the punching mechanism and electric coil inserter.
- 기계를 안정적이고 평평한 표면에 놓으세요.
- Do not overload the punch capacity (maximum 15 sheets of 80gsm/20lb paper). Overloading can damage the machine.
- 청소나 유지관리 작업을 하기 전에는 반드시 전원 콘센트에서 기계의 플러그를 뽑으세요.
- 어린이의 손이 닿지 않는 곳에 보관하세요.
- 지정된 전원 어댑터(DC 12V)만 사용하십시오.
3. 패키지 내용
다음 품목이 패키지에 포함되어 있는지 확인하세요.
- Rayson PD-1501 Coil Binding Machine
- 전원 어댑터(DC 12V)
- Pliers (for coil crimping)
- Sample Binding Coils (quantity may vary)
- 사용 설명서 (본 문서)
4. 설정
- 기계 포장 풀기: Carefully remove the binding machine and all accessories from the packaging. Retain packaging for future storage or transport.
- 놓기: Place the machine on a sturdy, level desk or table. Ensure there is enough space around the machine for operation and for the paper to pass through.
- 전원 연결: Locate the DC 12V power input port on the machine and connect the provided power adapter. Plug the adapter into a suitable electrical outlet.
- 초기 확인: Ensure the waste tray is properly inserted and empty before first use.

Image: The Rayson PD-1501 binding machine, showing the power adapter and pliers, essential for setup and operation.
5. 사용 설명서
5.1 문서 펀칭
- Adjust Margin: The machine features an adjustable margin control. Pull and push the margin adjustment lever to select the desired margin depth (0.12 inch / 3mm, 0.19 inch / 5mm, or 0.27 inch / 7mm). The color indicator on the lever does not directly correspond to the margin distance, so refer to the markings on the machine or test punches.
- Set Paper Stopper: Adjust the paper stopper to align your documents for consistent punching. The machine supports A4, A5, and A6 paper sizes, clearly marked on the machine's surface.
- 용지 삽입: Insert up to 15 sheets of 80gsm (20lb) paper into the punching slot. Ensure the paper is flush against the paper stopper.
- 펀치: Pull the punching handle down firmly and completely to punch the holes. Release the handle to return it to its original position.
- 반복하다: 문서의 모든 페이지에 대해 펀칭 과정을 반복합니다.

Image: Close-up details of the Rayson PD-1501, highlighting clearly marked paper sizes, the electric spiral inserter, and the adjustable margin control with its waste tray.
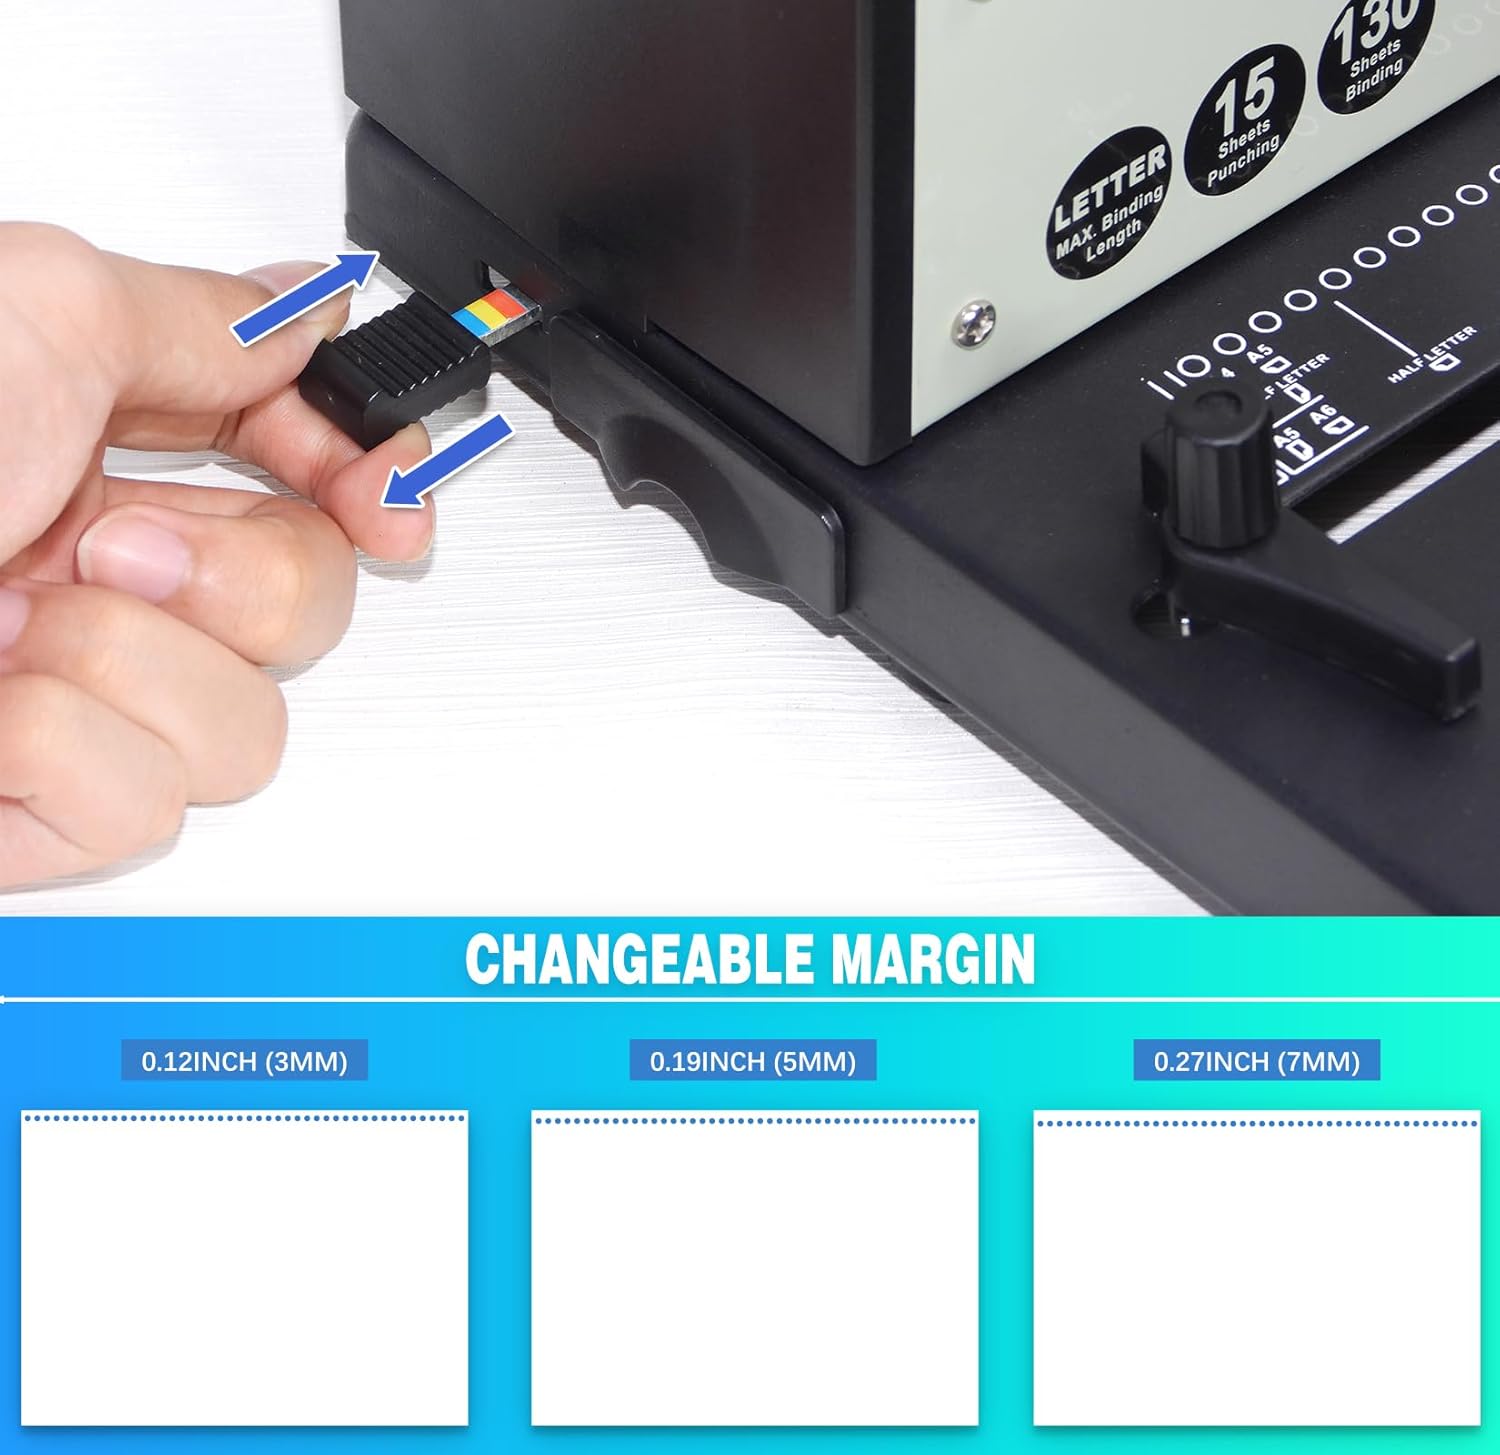
Image: A hand demonstrating the adjustment of the changeable margin on the Rayson PD-1501, showing options for 0.12 inch (3mm), 0.19 inch (5mm), and 0.27 inch (7mm) margins.
Video: Adjusting Margin Distance
Video: This video demonstrates how to adjust the margin distance on the Rayson PD-1501 binding machine, showing the different settings and their effects on the punched holes.
5.2 Binding Documents with Electric Coil Inserter
- 코일을 선택하세요: Choose a spiral binding coil appropriate for the thickness of your document. The machine is compatible with 4:1 pitch coils.
- Align Pages: Gather your punched pages and align them.
- Start Coil Insertion: Place the first few holes of your document onto the electric coil inserter roller. Turn on the electric inserter switch.
- Roll Coil: Gently roll the document against the electric coil inserter. The coil will automatically feed through the punched holes. Guide the coil as it progresses.
- Secure Coil Ends: Once the coil is fully inserted, use the provided pliers to crimp the ends of the coil. This prevents the coil from unraveling and secures your document.

Image: A hand demonstrating the process of inserting a spiral coil into a document using the electric coil inserter feature of the Rayson PD-1501.

이미지: 클로즈업 view showing a black spiral coil being threaded through the precisely punched holes of a document, illustrating the binding process.
6. 유지관리
- 쓰레기통을 비우세요: Regularly empty the waste tray located at the bottom of the machine. A full waste tray can cause paper jams or damage the punching mechanism.
- 깨끗한 블레이드: Periodically clean the punching blades with a soft, dry cloth to remove any paper dust or debris. Do not use abrasive cleaners or solvents.
- 일반 청소: 기계 외부를 광고로 닦으세요.amp cloth. Ensure the machine is unplugged before cleaning.
Image: The waste tray, part of the adjustable margin control, is visible on the Rayson PD-1501, indicating where punched paper scraps collect.
7. 문제 해결
| 문제 | 가능한 원인 | 해결책 |
|---|---|---|
| Paper not punching cleanly. | Overloaded punch capacity; dull blades; paper not inserted correctly. | Reduce the number of sheets per punch. Ensure paper is fully inserted and aligned. If blades are dull, contact customer support. |
| 종이 걸림. | Overloaded punch; waste tray is full. | Do not force the handle. Carefully remove jammed paper. Empty the waste tray. |
| Electric coil inserter not working. | Machine not plugged in; power switch off; motor malfunction. | Check power connection. Ensure the electric inserter switch is ON. If problem persists, contact customer support. |
| Coil not feeding smoothly. | Incorrect coil size; misaligned holes; coil ends not properly started. | Ensure coil size matches document thickness. Verify holes are punched cleanly and aligned. Guide the coil carefully onto the roller. |
8. 사양
| 특징 | 세부 사항 |
|---|---|
| 모델 | PD-1501 |
| Punching Method | 수동 |
| 바인딩 방법 | Electric Coil Inserter |
| 펀치 용량 | 15 sheets (80gsm / 20lb paper) |
| 바인딩 용량 | Unlimited (Max. spiral binding ring size: Unlimited) |
| 정점 | 4시 1분 |
| 구멍 수량 | 46 Round Holes |
| 구멍 크기 | Φ 0.14" (3.5mm) |
| 지원되는 용지 크기 | Letter, A4, A5 (open-throat design for larger paper) |
| 조정 가능한 마진 | 0.12 inch (3mm), 0.19 inch (5mm), 0.27 inch (7mm) |
| 재료 | 금속 구조 |
| 제품 치수 | 18.31 x 10.24 x 14.17 인치 |
| 품목 무게 | 15.2파운드 |

Image: A diagram illustrating the technical specifications of the punching pattern, including 4:1 pitch, 46 holes, and a hole size of 0.14 inches (3.5mm).
9. 보증 및 지원
For warranty information and technical support, please refer to the documentation included with your purchase or contact RAYSON customer service directly. Details regarding specific warranty periods and service procedures are typically provided by the manufacturer or authorized seller at the time of purchase.
You may also visit the official RAYSON store on Amazon for additional product information and support resources: RAYSON Store
Ask a question about this manual
Ask about setup, troubleshooting, compatibility, parts, safety, or missing instructions. Manuals+ will review the question and use this page’s manual context to help answer it.