
1. 서론
This manual provides detailed instructions for the setup, operation, and maintenance of your ELECROW 7 Inch 1024x600 IPS Capacitive Touchscreen Monitor. This display is designed for broad compatibility with devices such as Raspberry Pi (5/4/3B+/3B/2B+), BB Black, Banana Pi, Jetson Nano, and Windows 11/10/8/7 systems.
주요 특징:
- HD 비주얼: 7-inch IPS screen with 1024x600 resolution and 170° wide viewing angle for consistent colors and clear view주고받음.
- 정전식 터치: Supports up to 5-point touch functionality without requiring driver installation for most compatible systems.
- 플러그 앤 플레이: Simple connectivity via HD (HDMI) and Micro USB ports for immediate use.
- 다양한 응용 프로그램: Suitable for use as a Raspberry Pi display, mini PC monitor, gaming console screen, or a computer temperature monitor.
2. 상자 안에 무엇이 들어있나요?
설치를 진행하기 전에 모든 구성 요소가 있는지 확인하세요.
- 7 Inch Capacitive Display x 1
- HD 케이블 1개
- USB 케이블 x 1
- Micro HD Adapter x 1
- Copper Screws Pack (4pcs) x 1
- DVD x 1 (Contains drivers and documentation)
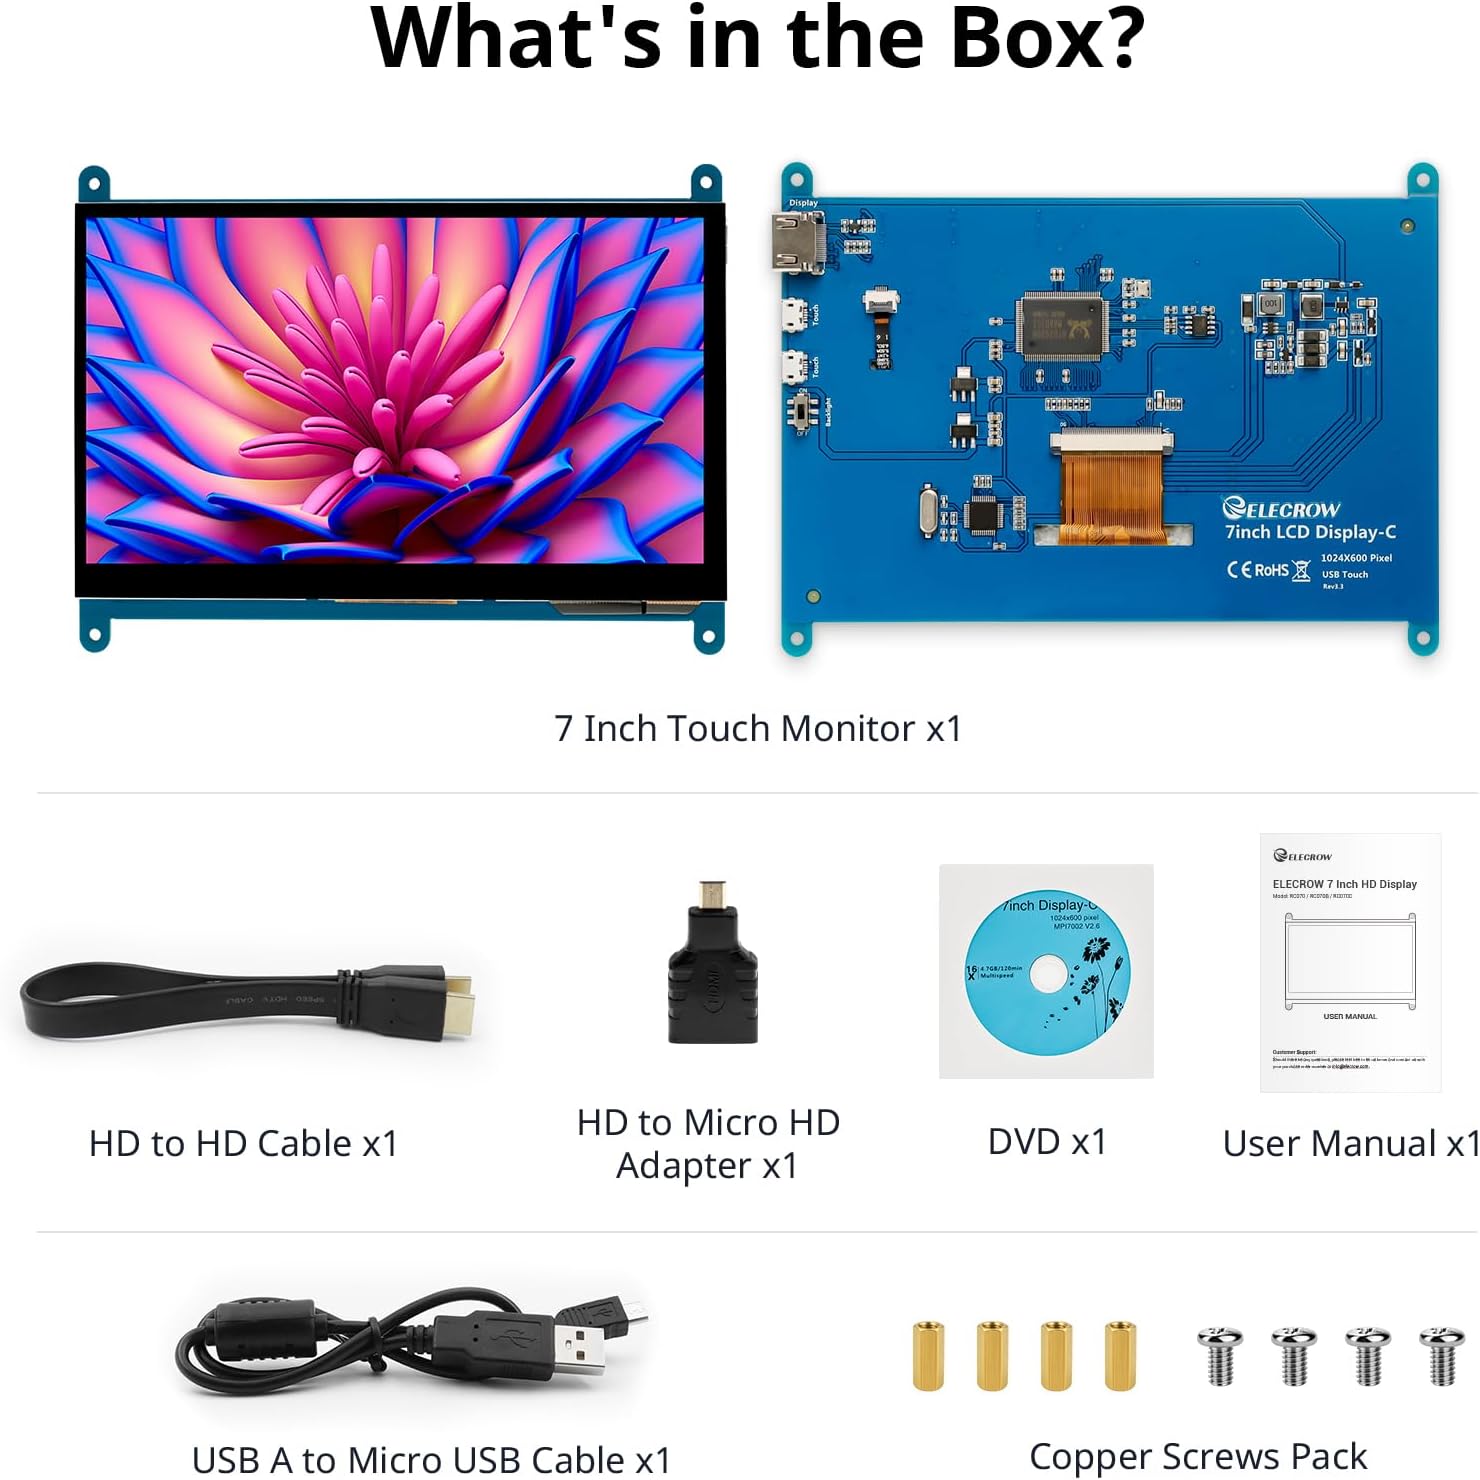
이미지: 제품 포장에 포함된 모든 구성품.
3. 설정 및 연결
Follow these steps to connect your ELECROW 7 Inch Touchscreen Monitor to your device.
3.1 하드웨어 오버view

이미지: 후면 view of the monitor highlighting the Standard HD Port, Micro USB Port for touch and power, and Backlight switch.
- Standard HD Port: For video data transfer.
- 마이크로 USB 포트: 터치 기능 및 전원 공급을 위해.
- 백라이트 스위치: To turn the display backlight on or off.
3.2 라즈베리 파이에 연결하기
To connect the monitor to a Raspberry Pi, you will need both the HD cable for video and the USB cable for touch and power.
- Connect one end of the HD cable to the Standard HD Port on the monitor and the other end to the HDMI port on your Raspberry Pi. Use the Micro HD adapter if necessary for your Raspberry Pi model.
- Connect the Micro USB cable to the Micro USB Port on the monitor. Connect the other end of the USB cable to a USB port on your Raspberry Pi for power and touch data.
- Ensure the backlight switch on the monitor is in the 'On' position.
- Power on your Raspberry Pi. The display should automatically detect and show the output.
For touch functionality with Raspberry Pi, power can be supplied via the Raspberry Pi's USB port. If using an external power source for the Raspberry Pi, ensure it is sufficient. For optimal performance, especially with older Raspberry Pi models, an external power supply for the monitor might be beneficial if the Pi cannot provide enough current.
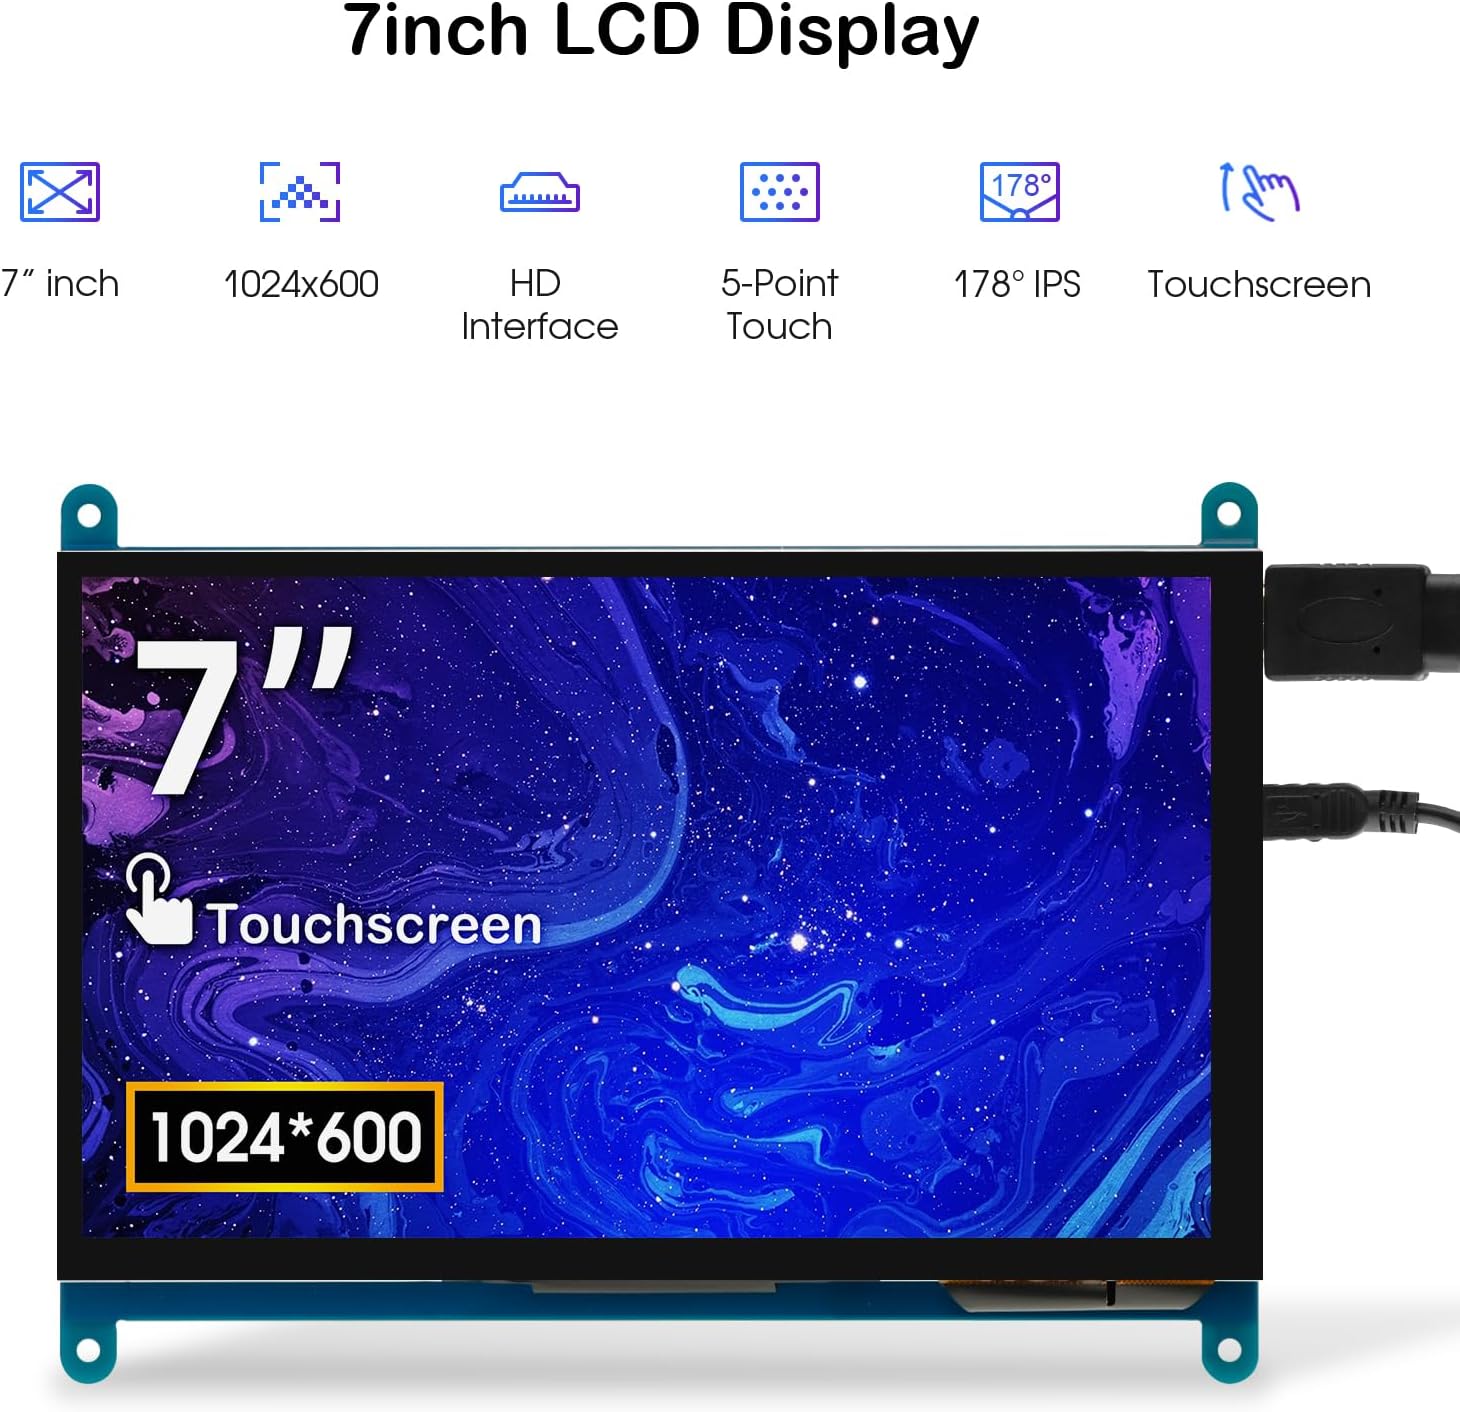
Image: The 7-inch touchscreen connected to a Raspberry Pi board, displaying a graphical user interface.
3.3 Connecting to Windows PC/Laptop
For Windows systems, the monitor functions as a plug-and-play display and touchscreen.
- Connect the HD cable from the monitor's Standard HD Port to an HDMI port on your PC or laptop.
- Connect the Micro USB cable from the monitor's Micro USB Port to a USB-A port on your PC or laptop. This provides power and enables touch functionality.
- Ensure the backlight switch is 'On'.
- Your Windows system should automatically detect the display and touchscreen. No additional drivers are typically required for Windows 7/8/10/11 for basic display and 5-point touch.

Image: The 7-inch touchscreen connected to a laptop, demonstrating seamless connectivity with various operating systems including Windows.
4. 사용 설명서
4.1 터치 기능
The monitor supports 5-point capacitive touch, allowing for various gestures.
- 수도꼭지: Single touch for selection or activation.
- 누르다: Sustained touch for context menus or drag operations.
- 확대/축소: Pinch gestures with two fingers.
- Mouse Click: A single tap typically registers as a left-click.
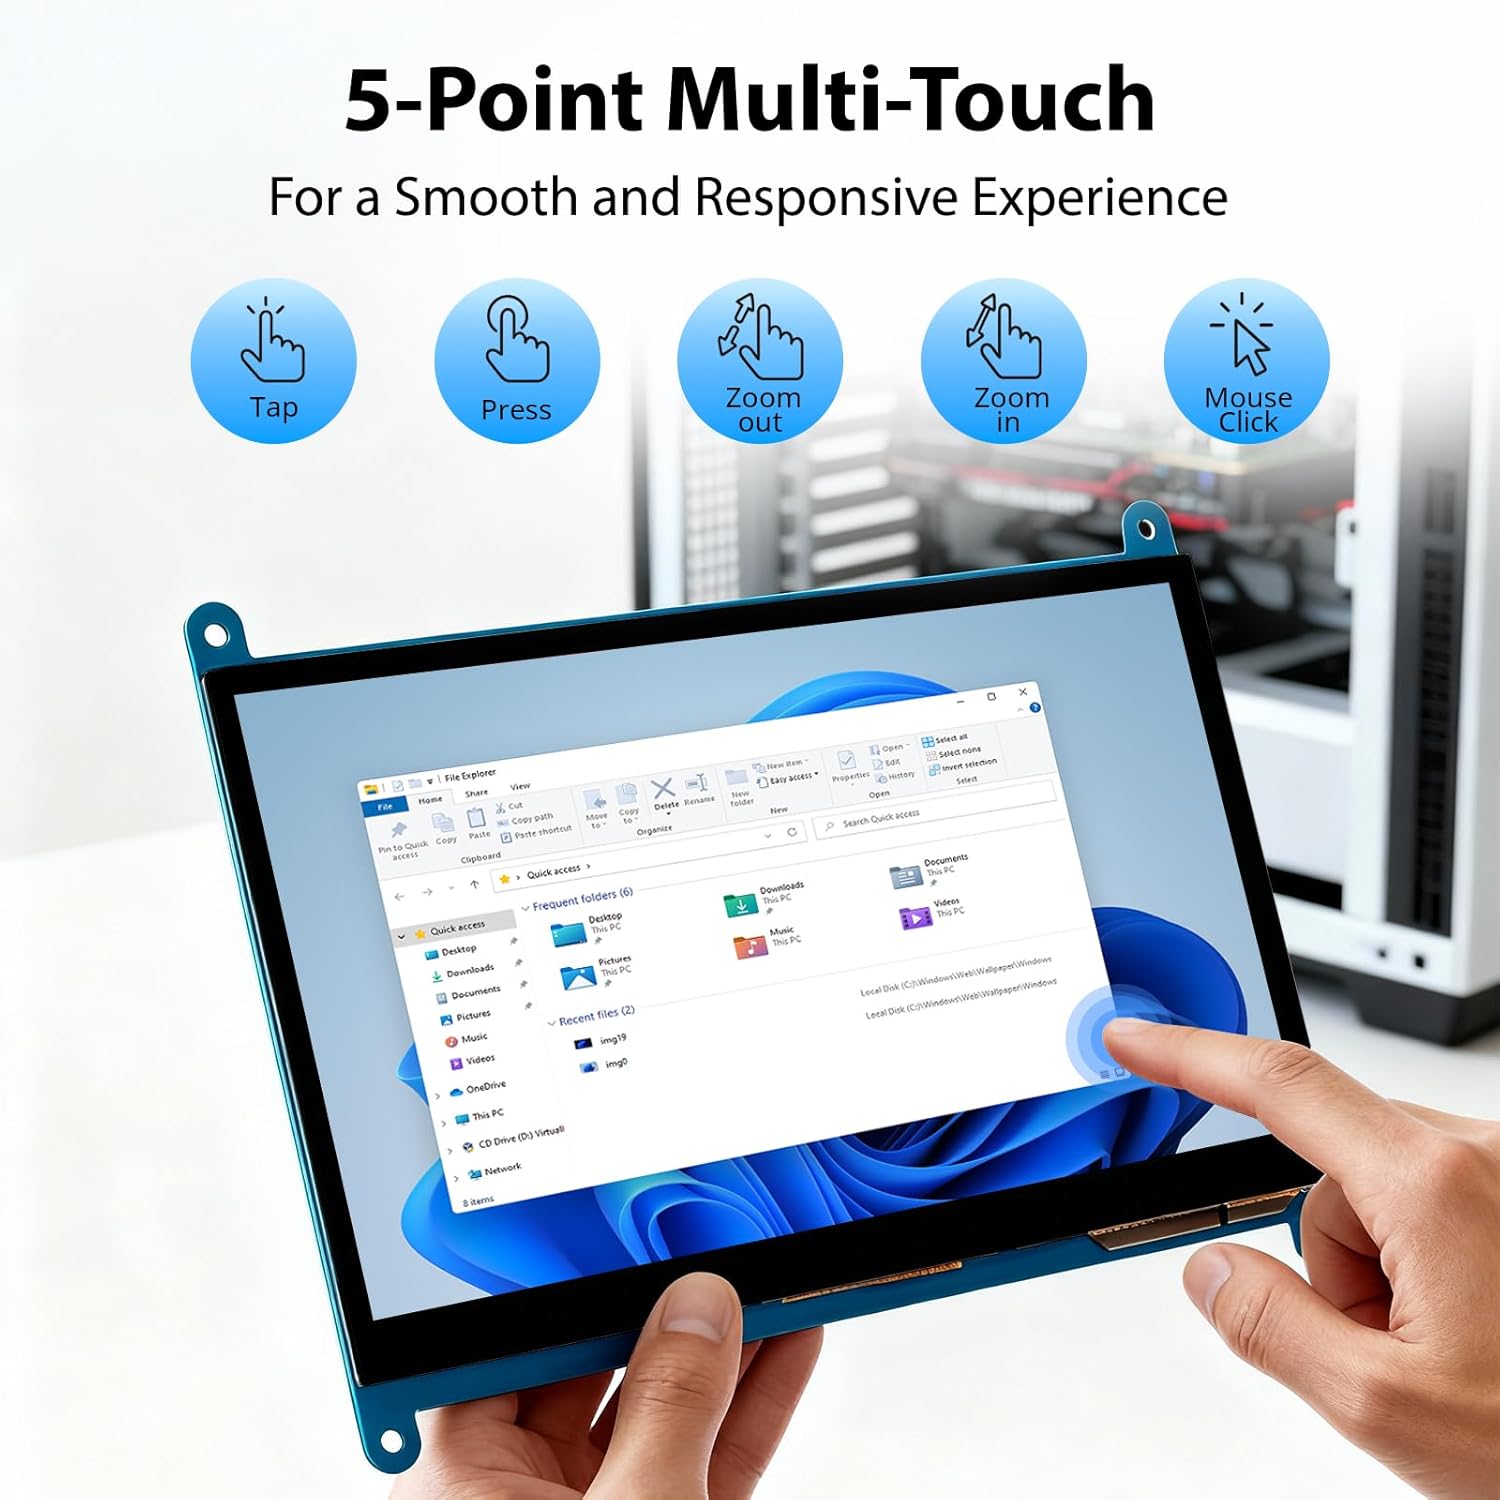
Image: Visual guide to the 5-point multi-touch capabilities of the screen, showing common gestures.
4.2 디스플레이 모드
When connected to a computer, the monitor can operate in several display modes:
- 복제 모드: 이 모니터는 기본 디스플레이의 내용을 그대로 보여줍니다.
- 확장 모드: The monitor acts as an extension of your primary display, providing additional screen space.
- 보조 화면 모드: 기본 디스플레이가 꺼진 상태에서 모니터가 유일한 디스플레이로 작동합니다.
이러한 모드는 일반적으로 운영 체제의 디스플레이 설정을 통해 구성할 수 있습니다.

Image: Illustrations demonstrating the three display modes: Duplicate, Extend, and Second Screen, showing how the monitor can be used with a laptop.
4.3 백라이트 제어
The monitor features a physical switch to control the backlight. This allows you to turn the display illumination on or off without disconnecting power. Note that there is no granular brightness control; it is an on/off function only.
Video: This video demonstrates the backlight control switch on the ELECROW 7 Inch Touchscreen, showing how to turn the display illumination on and off.
5. 유지관리
적절한 유지관리는 모니터의 수명과 최적의 성능을 보장합니다.
- 화면 청소: 부드럽고 털이 없는 천을 살짝 사용하세요.amp물이나 화면 세척액으로 닦으십시오. 화면 표면을 손상시킬 수 있는 강한 화학 물질이나 연마재는 사용하지 마십시오.
- 일반 관리 : Keep the monitor in a clean, dry environment. Avoid exposing it to extreme temperatures, direct sunlight, or high humidity.
- 손질: Handle the monitor by its edges. Avoid applying excessive pressure to the screen.
6. 문제 해결
모니터에 문제가 발생하면 다음의 일반적인 문제와 해결 방법을 참조하세요.
| 문제 | 가능한 원인 | 해결책 |
|---|---|---|
| 디스플레이 없음/검은 화면 |
|
|
| 터치스크린이 응답하지 않음 |
|
|
| Display resolution incorrect |
|
|
| 밝기 조절이 안됨 | The monitor only has an on/off switch for the backlight, not adjustable brightness. | This is expected behavior. The monitor does not support adjustable brightness. |
7. 사양
Detailed technical specifications for the ELECROW 7 Inch Touchscreen Monitor.
| 특징 | 세부 사항 |
|---|---|
| 상표 | 일렉트로크로우 |
| 모델명 | RC070 |
| 화면 크기 | 7 인치 |
| 디스플레이 해상도 최대 | 1024 x 600 |
| 네이티브 해상도 | 1024x600 |
| 디스플레이 유형 | 액정표시장치 |
| 디스플레이 기술 | IPS |
| 종횡비 | 1.71시 1분 |
| 새로 고침 빈도 | 60Hz |
| 응답 시간 | 8밀리초 |
| 대비율 | 800시 1분 |
| 명도 | 300 lm |
| View잉 각도 | 170도 |
| 화면 표면 설명 | 광택있는 |
| 연결 기술 | HDMI |
| 하드웨어 연결 | HDMI, USB |
| HDMI 포트 총 개수 | 1 |
| 총 USB 포트 | 2 (Micro USB for power/touch, USB-A for power/touch) |
| 전력 소비 | 12.5 와트 |
| 권tage | 5 볼트 |
| 품목 치수(D x W x H) | 0.3인치 깊이 x 6.1인치 너비 x 4.8인치 높이 |
| 품목 무게 | 7.36 온스 |
| 호환 장치 | Raspberry Pi, BB Black, Banana Pi, Jetson Nano, Computers, Laptops, Gaming Consoles |
8. 보증 및 지원
Your ELECROW 7 Inch Touchscreen Monitor comes with a manufacturer's warranty.
- 보증 유형: 1년 제조사 보증
- 보증 설명: 1년 제조사
For technical support or warranty claims, please contact ELECROW customer service through their official web제품이 구매된 사이트 또는 플랫폼.