
소개
This manual provides essential information for the safe and effective installation, operation, and maintenance of your NVX XKIT46 True 4 Gauge AWG 100% OFC Complete Amplifier Wiring Kit. Please read all instructions carefully before beginning installation to ensure proper setup and optimal performance of your car audio system. This kit is designed to provide reliable power and signal transfer for car audio systems up to 1500 watts RMS.
제품 특징
- Premium Power Transfer: The kit features 100% Oxygen-Free Copper (OFC) wiring for superior conductivity and efficient power delivery to your amp리퍼.
- 안정적인 보호: Includes a solid brass and satin-chromed ANL/Mini-ANL fuse holder, designed to protect your high-powered audio system from electrical surges and fluctuations.
- 부식 저항성: Power wires feature tinned conductors and a pre-installed black nylon mesh covering, enhancing longevity and durability in automotive environments.
- 간소화된 설치: Equipped with pre-terminated seamless power and ground ring terminals for easy and secure connections.
- Comprehensive Setup: This kit provides all necessary components for a professional amplifier installation, including power and ground wires, RCA interconnect cables, speaker wire, and various terminals.
키트 내용

Image: Diagram illustrating the complete contents of the NVX XKIT46 kit.
The NVX XKIT46 kit includes the following components:
- 17 ft. Frosted Blue 4 gauge power wire with seamless crimp ring terminal
- 3 ft. Frosted Black 4 gauge ground wire with seamless crimp ring terminal
- 17 ft. Clear 18 gauge remote lead wire
- 60 ft. Frosted Black/Blue 16 gauge speaker wire
- One 16.4 ft. 4-channel dual twisted construction RCA interconnect cable (NVX XIV45)
- One 16.4 ft. 2-channel dual twisted construction RCA interconnect cable (NVX XIV25)
- One NVX XMANL04 ANL/Mini-ANL Fuse Holder with 100 amp Mini-ANL fuse
- One Black rubber firewall grommet
- Two 4 Gauge Nickel Plated spade terminals
- Four 18 Gauge Spade terminal
- Two 18 Gauge Red butt connectors
- Four 16 Gauge quick disconnect
- Five 16 Gauge Nickel Plated spade terminals
- Two Heat Shrink tubes with the NVX logo
- Ten 6" Black zip ties
설정 및 설치 지침
Proper installation of an amplifier wiring kit is crucial for safety and optimal audio performance. If you are unsure about any steps, it is recommended to seek professional installation.
안전 예방 조치:
- 전기 작업을 시작하기 전에 항상 차량 배터리의 음극 단자를 분리하십시오.
- 눈 보호 장비를 포함한 적절한 안전 장비를 착용하세요.
- 모든 연결 부분이 안전하고 적절하게 절연되어 단락을 방지하세요.
- Route power cables away from signal cables to minimize noise interference.
- Use grommets when passing wires through metal panels to prevent chafing and shorting.
설치 단계:
- Power Wire Installation: Connect the 4 gauge power wire to the positive terminal of your vehicle's battery. Route the power wire through the firewall into the vehicle's cabin, ensuring it is protected by the included grommet. Connect the other end to the ANL/Mini-ANL fuse holder, then to your amp앰프의 전력 입력.
- Ground Wire Installation: Connect the 4 gauge ground wire from your amplifier to a clean, unpainted metal surface on the vehicle's chassis. Ensure the connection point is free of paint, rust, or debris for optimal conductivity.
- 원격 전원 켜짐 와이어: Connect the 18 gauge remote lead wire from your head unit's remote output to your amplifier's remote input. This wire signals the amp앰프를 헤드 유닛과 함께 켜고 끌 수 있습니다.
- RCA Interconnect Cables: Connect the RCA cables from your head unit's RCA outputs to your amplifier's RCA inputs. Ensure correct channel matching (e.g., front left to front left).
- 스피커 와이어: Route the 16 gauge speaker wire from your amplifier's speaker outputs to your speakers. Maintain correct polarity (+ to + and - to -) for each speaker.
- 퓨즈 설치: 100를 설치하세요 amp Mini-ANL fuse into the fuse holder.
- 최종 연결: Double-check all connections for tightness and proper insulation. Reconnect the vehicle's negative battery terminal.

Image: Close-up of the NVX 4 AWG power wire, highlighting its nylon braided tubing, silver-tinned true-spec 100% oxygen-free copper, and pre-terminated seamless ring terminals. It features 1862 strands.

이미지: 상세 view of the NVX fuse holder, showing its high-temperature polycarbonate base and cover, solid brass and satin-chrome plated contacts, and compatibility with ANL or Mini-ANL fuses for 1/0 or 4 gauge wire.
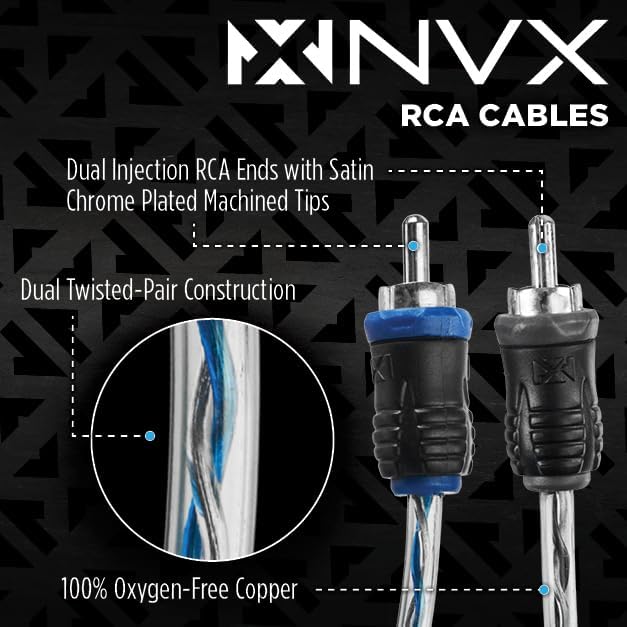
Image: Close-up of NVX RCA cables, featuring dual injection RCA ends with satin chrome plated machined tips, dual twisted-pair construction, and 100% Oxygen-Free Copper conductors.
작동 지침
Once the NVX XKIT46 amplifier wiring kit is correctly installed, the operation of your car audio system will largely depend on your head unit and amp증폭기. 귀하의 amplifier settings (gain, crossover, bass boost) are adjusted according to your amplifier's manual and your specific audio preferences. Always start with low gain settings and gradually increase to avoid distortion or damage to your speakers and amp리퍼.
유지
The NVX XKIT46 wiring kit is designed for durability and minimal maintenance. Periodically inspect all connections for tightness and corrosion. Ensure the fuse holder is clean and the fuse is intact. If any wiring appears damaged, replace it immediately to prevent electrical issues or system failure. Keep the wiring free from excessive heat and sharp objects.
문제 해결
If you experience issues with your car audio system after installing the NVX XKIT46 kit, consider the following common troubleshooting steps:
- No Power to Amp정수기: Check the fuse in the ANL/Mini-ANL fuse holder. Ensure the power and ground connections are secure and free of corrosion. Verify the remote turn-on wire is receiving a signal from the head unit.
- 소리 없음: Confirm all RCA cables are securely connected at both the head unit and amplifier. Check speaker wire connections for correct polarity and secure contact. Ensure amplifier gain and crossover settings are correctly configured.
- 왜곡된 소리: 감소하다 amplifier's gain setting. Check for proper grounding. Ensure speaker wires are not shorting to each other or to the vehicle chassis.
- 엔진 소음/윙윙거리는 소리: Reroute power cables away from signal cables. Ensure the amplifier's ground connection is solid and short. Consider adding a ground loop isolator if the issue persists.
이러한 조치를 취해도 문제가 해결되지 않으면 전문 차량 오디오 기술자에게 문의하십시오.
명세서
| 상표 | 엔비엑스 |
| 모델 | XKIT46 |
| 재료 | 100% Oxygen-Free Copper (OFC) |
| 전력선 게이지 | 4와이어 |
| RCA Channels | 6-Channel (4-channel and 2-channel interconnects included) |
| Fuse Holder Type | ANL/Mini-ANL |
| Max RMS Power Rating | 최대 1500와트 |
| 한국어: | 818060016448 |

Image: Visual comparison of NVX power wire gauges, showing AWG 1/0 (4704 strands), AWG 4 (1862 strands), and AWG 8 (735 strands).
보증 및 지원
For warranty information or technical support regarding your NVX XKIT46 amplifier wiring kit, please refer to the official NVX website or contact NVX customer service directly. Keep your purchase receipt as proof of purchase for any warranty claims.