
소개
This manual provides detailed instructions for the installation, operation, and maintenance of your new Igloo Replacement Spigot. Designed for Igloo 2, 3, 5, and 10 Gallon Beverage Coolers, this spigot features an easy-install design with front access and a button-style mechanism for efficient liquid dispensing. Please read this manual thoroughly before installation and use to ensure proper function and longevity of the product.
안전 정보
Always handle the spigot and cooler with care. Ensure the cooler is empty and clean before attempting to replace the spigot. Do not use excessive force during installation, as this may damage the spigot or the cooler. Keep small parts away from children to prevent choking hazards.
부품 목록
귀하의 패키지에는 다음 품목이 포함되어야 합니다.
- One (1) Igloo Replacement Spigot (White)
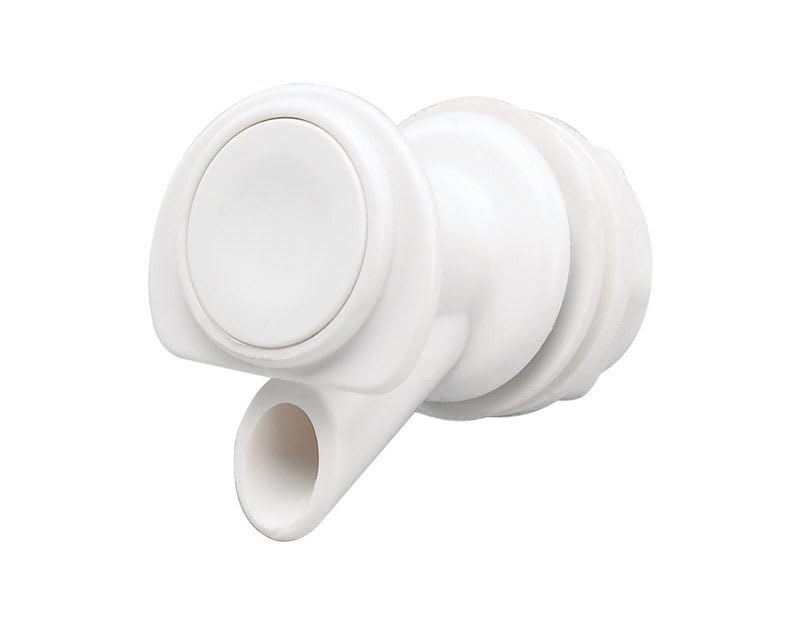
Image: The Igloo Replacement Spigot, white in color, featuring a button-style dispenser and threaded base for installation.
설치 지침
- Prepare the Cooler: Ensure your Igloo beverage cooler is empty and clean. If replacing an old spigot, remove it by unscrewing the nut from the inside of the cooler and pulling the spigot out from the front.
- Insert New Spigot: From the outside of the cooler, insert the new Igloo Replacement Spigot through the spigot hole. Ensure the button mechanism is facing upwards.
- Secure the Spigot: From the inside of the cooler, place the washer (if applicable, typically included with the cooler or old spigot) onto the threaded part of the spigot. Then, screw the retaining nut onto the threaded part of the spigot.
- 죄다: Hand-tighten the retaining nut until the spigot is snug and secure. Do not overtighten, as this may damage the cooler or spigot.
- 누출 테스트: Fill the cooler with water and check for any leaks around the spigot. If leaks occur, tighten the nut slightly more until the leak stops.
작동 지침
To dispense liquid from your cooler using the Igloo Replacement Spigot:
- 위치 컨테이너: Place your cup or container directly under the spigot's nozzle.
- 버튼을 누르시오: Firmly press the button on the front of the spigot. Liquid will begin to flow.
- 릴리스 버튼: Release the button to stop the flow of liquid. The drip-resistant valve is designed to minimize post-dispensing drips.
유지
Regular cleaning of your Igloo Replacement Spigot will ensure hygienic use and prolong its lifespan.
- 매일 청소: After each use, rinse the spigot thoroughly with warm water.
- 딥 클리닝 : Periodically, remove the spigot from the cooler and wash it with mild soap and water. Use a small brush if necessary to clean inside the nozzle and around the button mechanism.
- 건조: Allow the spigot to air dry completely before re-installing or storing.
- 저장: Store the spigot in a clean, dry place when not in use.
문제 해결
| 문제 | 가능한 원인 | 해결책 |
|---|---|---|
| Spigot leaks | Nut not tightened sufficiently; damaged washer; improper installation. | Ensure the retaining nut is hand-tightened securely. Check the washer for damage and replace if necessary. Re-install the spigot following the setup instructions carefully. |
| Liquid flow is slow or blocked | Debris or residue inside the spigot; airlock in cooler. | Remove and thoroughly clean the spigot. Ensure the cooler's vent (if applicable) is open. |
| Button is stiff or stuck | Residue buildup; internal mechanism issue. | Remove and clean the spigot, paying attention to the button area. If the issue persists, the spigot may need replacement. |
명세서
- 모델 번호: 24009
- 색상: 하얀색
- 재료: 플라스틱
- Compatible Cooler Capacity: 2, 3, 5, 10 갤런
- 접근 위치: 앞쪽
- 품목 무게: 1.6 온스
- Product Dimensions (approximate, packaging): 25 x 3.5 x 5.75 인치
보증 및 지원
For information regarding product warranty or if you require further assistance, please contact Igloo customer support directly. Refer to the official Igloo web최신 연락처 정보와 보증 조건은 해당 사이트나 제품 포장에서 확인하세요.