1. 서론
구매해주셔서 감사합니다asing the COBY DTV-700 Digital to Analog TV Converter. This device allows you to receive digital broadcast television signals and convert them for display on older analog televisions. It also functions as a multimedia player, supporting various audio, video, and image formats via its USB port, and offers recording capabilities. Please read this manual thoroughly before operating the device to ensure proper use and to maximize your view경험.
2. 패키지 내용
다음 항목에 대한 상자를 체크해 주세요.
- COBY DTV-700 Digital to Analog TV Converter
- 원격 제어
- AC/DC 전원 어댑터
- AV 케이블(RCA)
- 사용 설명서 (본 문서)
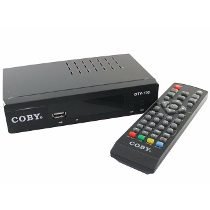
Image 2.1: The COBY DTV-700 Digital to Analog TV Converter. This image shows the compact design of the converter unit, typically black with various ports and indicators.
3. 안전 정보
안전한 작동을 보장하고 손상을 방지하려면 다음 예방 조치를 준수하세요.
- 본 제품을 비, 습기 또는 극한의 온도에 노출시키지 마십시오.
- c를 열지 마세요asing; 모든 서비스는 자격을 갖춘 인력에게 의뢰하세요.
- 과열을 방지하려면 장치 주변에 적절한 환기가 이루어지도록 하십시오.
- 제공된 전원 어댑터만 사용하세요.
- 본 제품을 직사광선, 열원, 강한 자기장으로부터 멀리 두십시오.
- 배터리와 전자 폐기물은 지역 규정에 따라 책임감 있게 처리하십시오.
4. 제품 오버view
4.1 전면 패널
The front panel typically includes:
- 전원 표시기: 장치가 켜지면 불이 들어옵니다.
- 채널 위/아래 버튼: 채널 변경을 위해.
- 메뉴 버튼: 주 메뉴에 액세스합니다.
- USB 포트: For connecting USB storage devices for media playback and recording.
4.2 후면 패널
후면 패널에는 필요한 모든 연결 포트가 제공됩니다.
- 개미: Connects to your antenna for receiving digital signals.
- HDMI 출력 : Connects to an HDMI-compatible TV for high-definition output.
- AV OUT (RCA): Connects to older analog TVs using composite video (yellow) and stereo audio (red/white) cables.
- 동축 출력: Digital audio output (if available).
- DC 입력 : Connects to the provided AC/DC power adapter.
5. 설정
5.1 변환기 연결하기
- 안테나 연결: 디지털 안테나를 연결하세요 개미가 들어와요 port on the rear of the DTV-700.
- TV에 연결:
- For Analog TVs: Use the supplied AV cable. Connect the yellow plug to the video input of your TV, and the red/white plugs to the corresponding audio inputs. Connect the other end to the AV OUT ports on the DTV-700.
- For Digital/HDTVs: Use an HDMI cable (not included). Connect one end to the HDMI 출력 port on the DTV-700 and the other end to an available HDMI input on your TV.
- 전원 연결: Plug the AC/DC power adapter into the 직류전원 port on the DTV-700, then plug the adapter into a wall outlet.
5.2 초기 설정 및 채널 검색
- Turn on your TV and select the correct input source (e.g., AV1, HDMI1) that corresponds to your connection.
- Power on the DTV-700 using the remote control or the power button on the front panel.
- The first time you power on, an initial setup wizard may appear. Follow the on-screen prompts to select your language and country.
- Initiate an automatic channel scan. This will search for all available digital channels in your area. This process may take several minutes. Do not interrupt the scan.
- Once the scan is complete, the converter will tune to the first available channel.
6. 사용 설명서
6.1 리모콘 기능
The remote control provides full functionality for your DTV-700. Ensure two AAA batteries are inserted correctly (batteries not included).
- 힘: 장치를 켜거나 끕니다.
- 채널 +/-: 채널을 위아래로 변경합니다.
- 볼륨 +/-: 볼륨을 조정합니다.
- 메뉴: 주 메뉴에 액세스합니다.
- 출구: 현재 메뉴 또는 기능을 종료합니다.
- 정보: 현재 채널 정보를 표시합니다.
- 확인 / 탐색 버튼: 선택 사항을 확인하고 메뉴를 탐색합니다.
- REC : Starts recording the current program.
- PLAY/PAUSE, STOP, FF, REW: 미디어 재생 제어.
- USB: Switches to USB media playback mode.
6.2 채널 탐색
사용하세요 채널 +/- buttons on the remote or front panel to browse channels. You can also directly enter a channel number using the numeric keypad on the remote.
6.3 메인 메뉴
를 누르세요 메뉴 button to access settings for Program, Picture, Sound, Time, Option, and System. Use the navigation buttons to select options and OK 확인합니다.
7. 미디어 재생
The DTV-700 supports media playback from a USB storage device (e.g., USB flash drive, external hard drive). Insert your USB device into the USB port on the front panel.
7.1 지원되는 형식
- 음악: MP3, WMA
- 사진: JPG, BMP, PNG
- 동영상: MKV, AVI, DIVX, XVID, MOV, VOB, FLV, DAT, MPEG, MP4, TS
7.2 미디어 재생
- USB 저장장치를 USB 포트에 삽입합니다.
- 를 누르세요 USB button on the remote control or navigate to the 'Multimedia' section in the main menu.
- Select the desired media type (Music, Photo, Video) and browse your files.
- 탐색 버튼을 사용하여 선택하세요 file 그리고 누르세요 OK 놀다.
8. 녹화 기능
The DTV-700 allows you to record live TV programs to a connected USB storage device.
8.1 즉시녹화
프로그램을 시청하는 동안 기록 button on the remote control to start recording. Press 멈추다 녹음을 끝내려면.
8.2 Scheduled Recording (PVR)
Access the PVR (Personal Video Recorder) or Schedule menu via the main menu to set up timed recordings. You will need to specify the channel, start time, end time, and date for the recording.
9. 문제 해결
| 문제 | 가능한 원인 / 해결책 |
|---|---|
| 그림이나 소리가 나지 않습니다 |
|
| Poor picture quality / No channels |
|
| 리모컨이 작동하지 않습니다 |
|
| USB 미디어가 재생되지 않습니다 |
|
10. 사양
- 모델: DTV-700
- 상표: 코비
- 입력: Digital TV Antenna (ATSC/DVB-T/T2 compatible, depending on region)
- 산출: HDMI, AV (RCA Composite Video/Audio)
- USB 포트: Yes (for media playback and PVR)
- 지원되는 미디어 형식:
- Music: MP3, WMA
- 사진: JPG, BMP, PNG
- Video: MKV, AVI, DIVX, XVID, MOV, VOB, FLV, DAT, MPEG, MP4, TS
- 힘: AC/DC Adapter (Input: 100-240V ~ 50/60Hz, Output: typically 5V-12V DC)
- 치수: Approximately 20 x 15.6 x 6.2 cm (Package dimensions)
- 무게: Approximately 490 g (Package weight)
- 원격 제어 배터리: AAA 2개(포함되지 않음)
11. 유지관리
To ensure the longevity and optimal performance of your DTV-700 converter:
- 청소: 제품 외부를 닦을 때는 부드럽고 마른 천을 사용하십시오. 액체 세제나 연마성 화학 약품은 사용하지 마십시오.
- 통풍: 과열을 방지하려면 통풍구가 막히지 않도록 주의하세요.
- 저장: 장기간 보관할 경우 전원을 끄고 서늘하고 건조한 곳에 보관하세요.
12. 보증 및 지원
보증 정보 및 기술 지원은 제품에 동봉된 보증 카드를 참조하거나 Coby 공식 웹사이트를 방문하십시오. web사이트. 보증 청구에 대비해 구매 증빙 자료로 구매 영수증을 보관하세요.
Coby is committed to providing quality products and customer satisfaction. If you encounter any issues not covered in this manual, please contact Coby customer service for assistance.


