
1. 서론
This manual provides essential instructions for the safe and efficient operation of your ICOM BC-152 charger. Please read this manual thoroughly before using the charger to ensure proper setup, operation, and maintenance. Keep this manual for future reference.
2. 안전 정보
Always observe the following safety precautions to prevent injury, damage to the charger, or damage to the device being charged.
- Use only with compatible ICOM battery packs. Using incompatible batteries may cause fire, explosion, or injury.
- 충전기를 비, 습기 또는 극한의 온도에 노출시키지 마세요.
- 충전기를 분해하거나 개조하지 마십시오. 모든 정비는 자격을 갖춘 기술자에게 맡기십시오.
- 전원 콘센트의 볼륨을 확인하세요tage는 충전기의 사양과 일치합니다.
- 충전기를 열원이나 직사광선에 닿지 않는 곳에 보관하세요.
- 사용하지 않을 때나 청소하기 전에는 충전기를 전원 콘센트에서 뽑아 두세요.
3. 설정
3.1 풀기
Carefully remove the ICOM BC-152 charger from its packaging. Verify that all components are present:
- ICOM BC-152 Charger Unit
- AC Adapter (if included)
- 사용 설명서(본 문서)
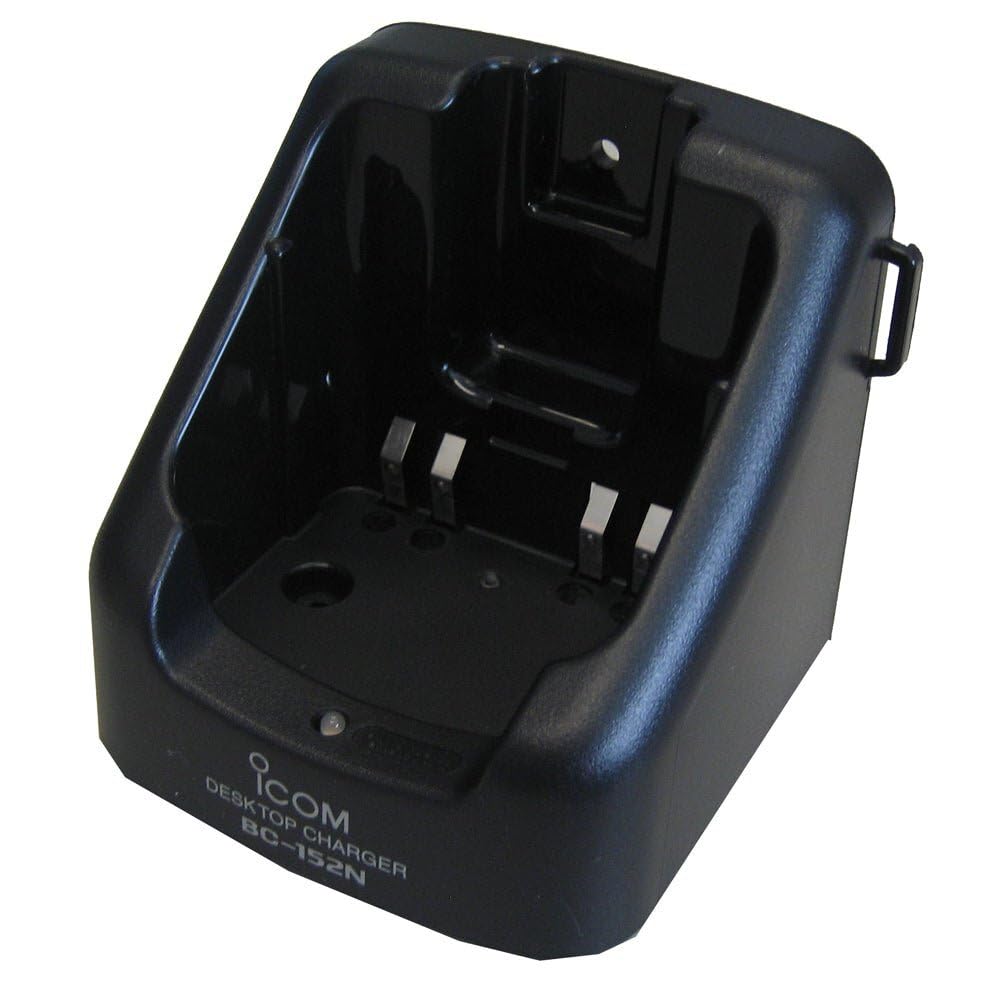
Figure 1: The ICOM BC-152 charger unit. This image shows the compact black charger with a single slot for a battery pack.
3.2 전원 연결
- Connect the AC adapter cable to the DC input jack on the rear of the BC-152 charger unit.
- AC 어댑터를 표준 벽면 콘센트에 꽂습니다.
- 이제 충전기를 사용할 준비가 되었습니다.
4. 사용 설명서
4.1 배터리 팩 충전
Follow these steps to charge a compatible ICOM battery pack:
- 충전기가 3.2절에 설명된 대로 전원에 연결되어 있는지 확인하십시오.
- Carefully insert the battery pack into the charging slot of the BC-152 charger. Ensure it is seated firmly.
- Observe the charging indicator light.
4.2개의 표시등
The BC-152 charger features an LED indicator to show the charging status:
- 빨간색(단색): 배터리가 현재 충전 중입니다.
- 녹색(단색): Charging is complete. The battery pack is fully charged.
- 빨간색으로 깜박임: Charging error or battery fault. Remove the battery and re-insert. If the error persists, consult the troubleshooting section.
- 빛 없음: Charger is not connected to power, or no battery is inserted.
Charging time may vary depending on the battery's capacity and its current charge level. Typically, a fully depleted battery will take approximately 2-4 hours to charge.
5. 유지관리
5.1 청소
최적의 성능과 외관을 유지하려면:
- 청소하기 전에는 항상 충전기를 전원 콘센트에서 뽑아 두세요.
- 부드럽고 마른 천으로 충전기 외부를 닦아주세요.
- 연마성 세척제, 용제 또는 강한 화학 물질을 사용하지 마십시오.
- Ensure no moisture enters the charging slot or power input.
5.2 보관
When not in use for extended periods, store the charger in a cool, dry place, away from direct sunlight and extreme temperatures. Disconnect it from the power supply.
6. 문제 해결
If you encounter issues with your BC-152 charger, refer to the table below for common problems and solutions.
| 문제 | 가능한 원인 | 해결책 |
|---|---|---|
| 충전기 표시등이 꺼져 있습니다. | No power supply or battery not inserted. | Check AC adapter connection. Ensure battery is correctly inserted. |
| Indicator light flashes red. | Battery fault or charging error. | Remove and re-insert the battery. Try a different compatible battery if available. |
| 배터리가 충전되지 않습니다. | Faulty battery, charger, or power supply. | Verify power connection. Test with a known good battery. If problem persists, contact support. |
7. 사양
| 상표 | ICOM |
| 모델 | BC-152 |
| 입력 Voltage | 12-16V DC (via AC adapter) |
| 출력 볼륨tage | 8.4V 직류 |
| 충전 전류 | 대략. 450mA |
| 치수(폭×높이×깊이) | Approx. 80 × 50 × 90 mm (3.1 × 2.0 × 3.5 inches) |
| 무게 | 0.18파운드(약 82g) |
| 색상 | 검은색 |
참고: 사양은 개선을 위해 예고 없이 변경될 수 있습니다.
8. 보증 정보
ICOM products are manufactured with high-quality components and are subject to rigorous quality control. This product is covered by a limited warranty against defects in materials and workmanship. The specific terms and duration of the warranty may vary by region. Please refer to the warranty card included with your purchase or visit the official ICOM web자세한 보증 정보는 사이트를 참조하십시오.
본 보증은 오용, 사고, 무단 개조 또는 부적절한 설치로 인한 손상에는 적용되지 않습니다.
9. 고객 지원
If you have any questions, require technical assistance, or need to report a problem that cannot be resolved using the troubleshooting guide, please contact ICOM customer support.
ICOM America Inc.
Visit ICOM America's Contact Page
Please have your product model (BC-152) and serial number ready when contacting support.